
Building Custom Cabinetry for Our Van

Building our cabinets was one the more complex elements of woodworking in our van. We built and designed the cabinets with the items we would be storing in mind.
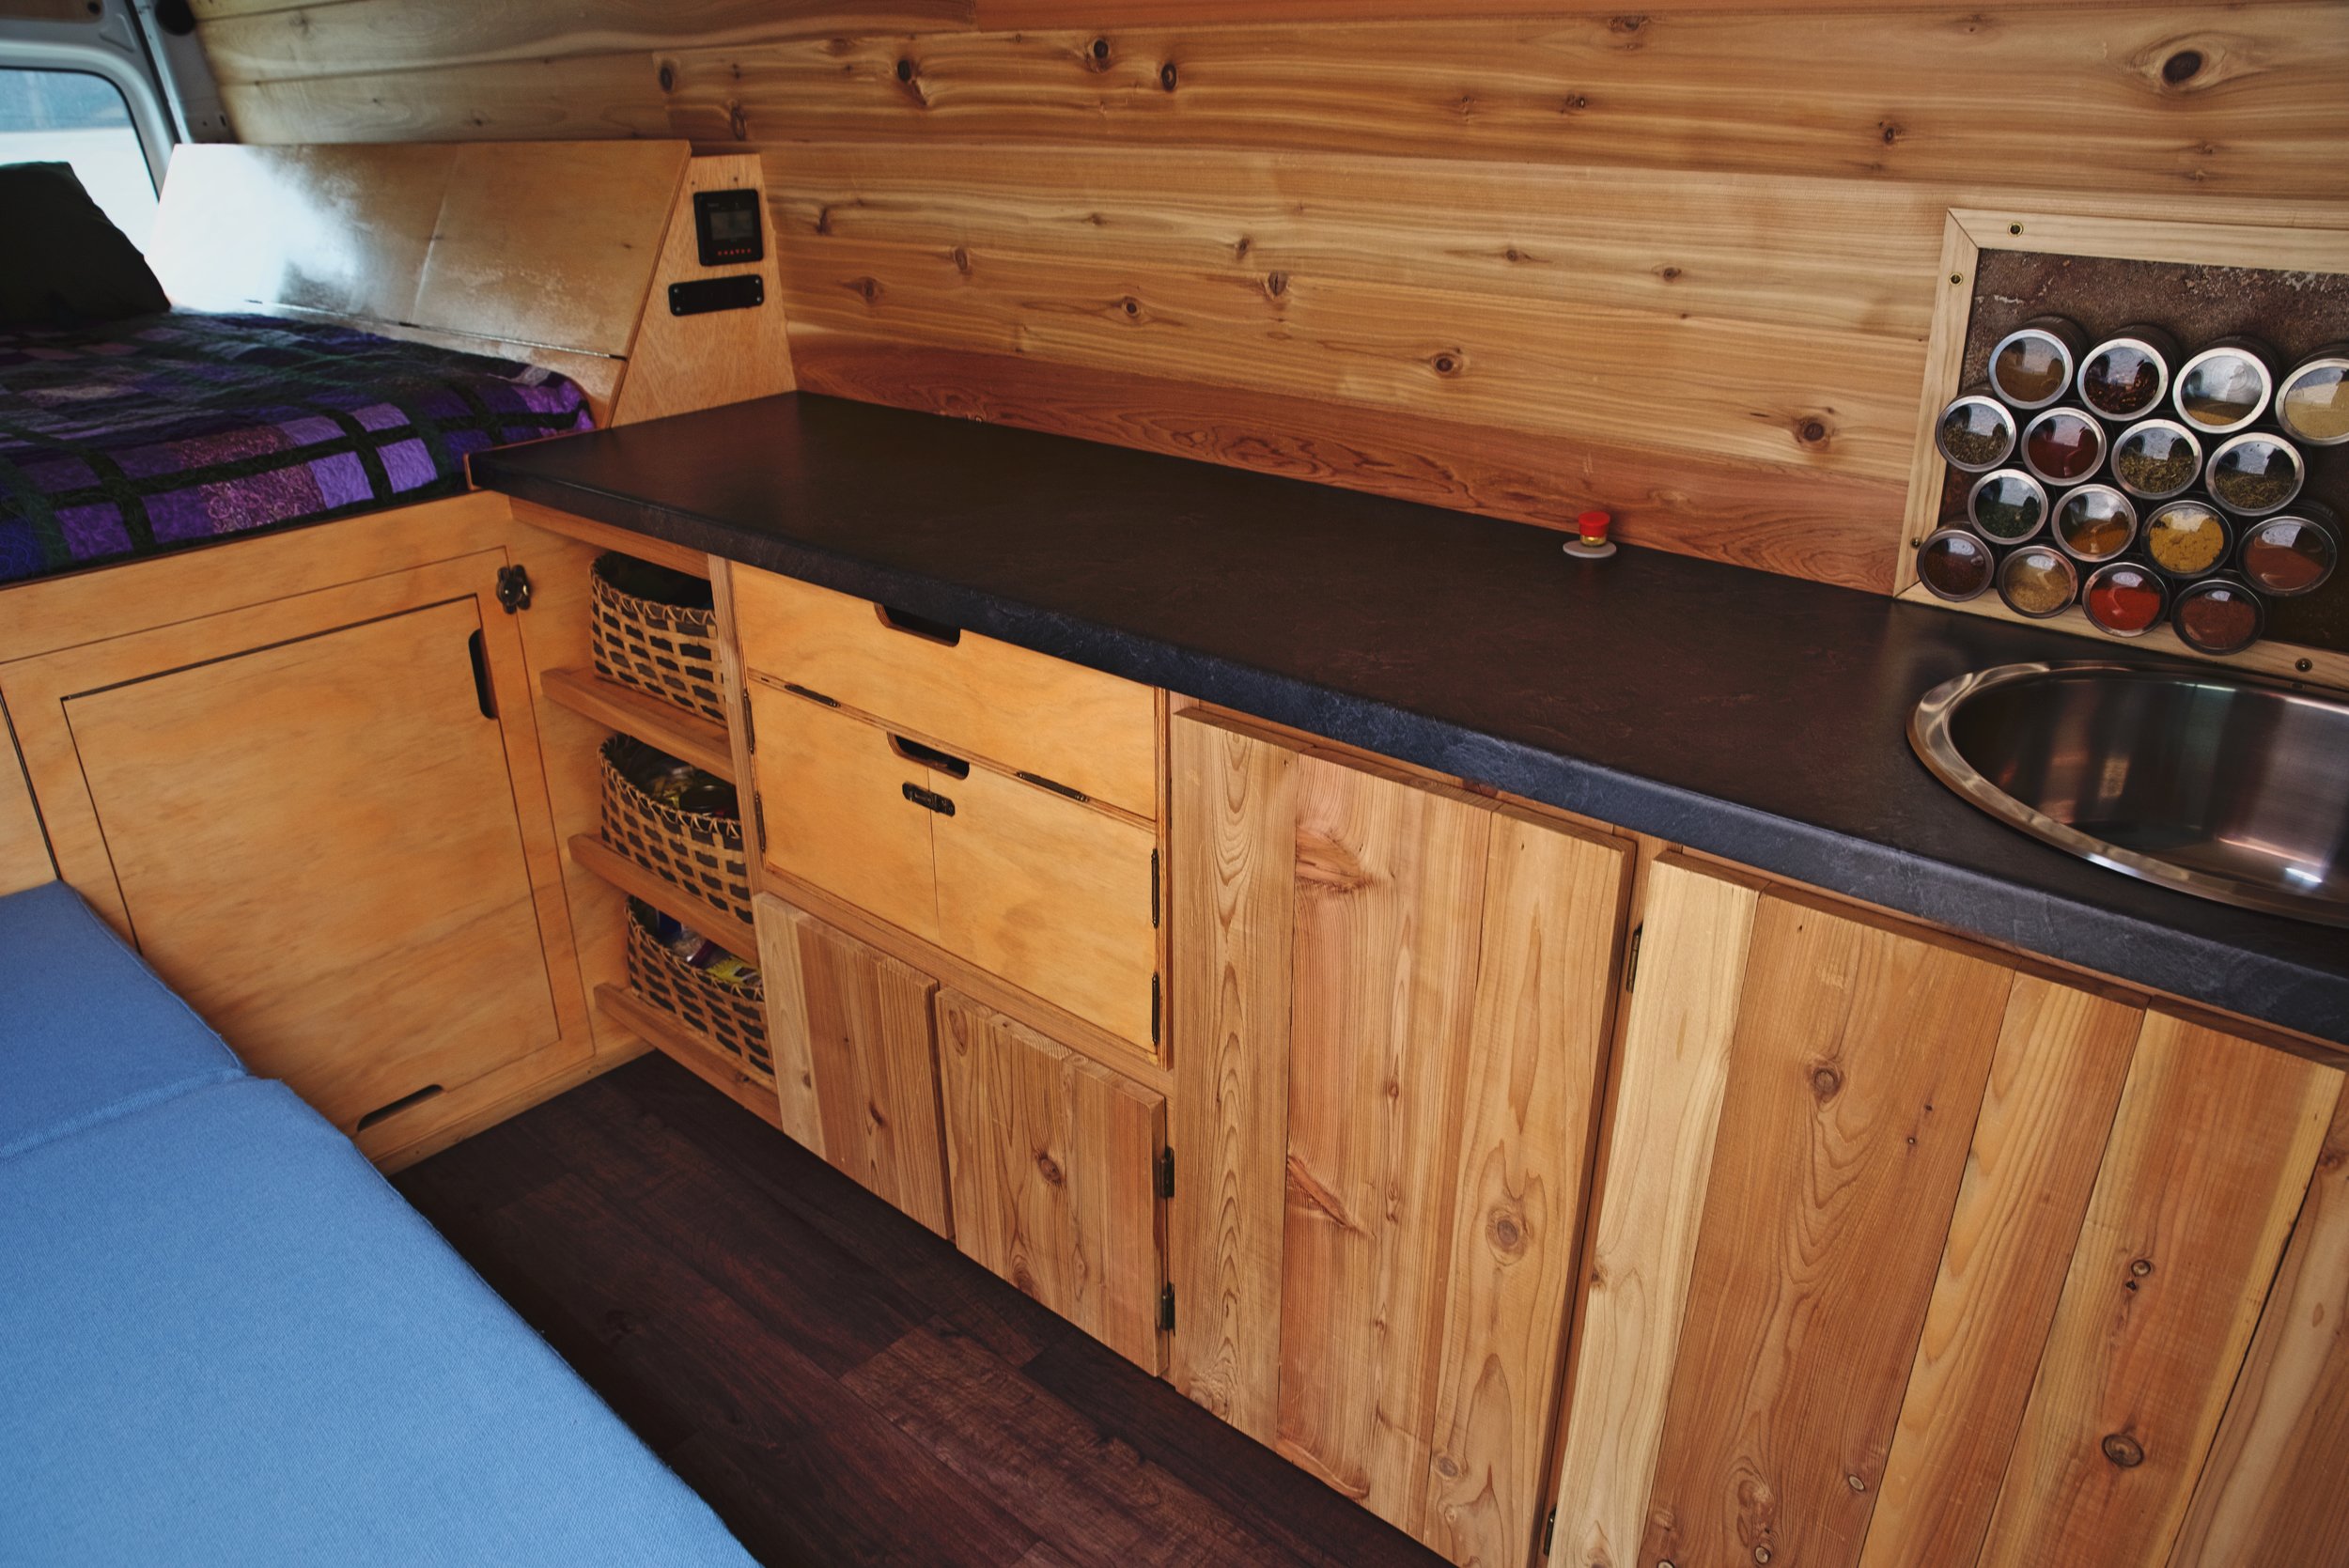
The kitchen is one of the most important spaces in any home. This is no less the case in our DIY Sprinter van build. When planning our camper van conversion, we knew we needed a really great kitchen set up, and that included a large open counter top and custom kitchen cabinets that could house everything for our on-the-road kitchen.
Building cabinets is complex, precise woodworking. Building custom cabinets in our Sprinter van that is full of curved surfaces was really tricky, especially because it was our first time building any type of cabinetry. Don’t worry though, because we figured out how to make attractive, simple, and functional cabinets. The walls and interior of the cabinets are plywood, while the front and the doors are reclaimed cedar planks. Our cabinetry includes a section for our water system, a propane locker, a removable chuck box that we can take out for cooking outside, and bunch of storage space for food and dishes. We built these cabinets without any special tools, such as a router, and they definitely don’t have any dadoes or rabbets!
Tools
Materials
1/2" AB-grade, sanded plywood (about 2-4’x8’ pieces)
1/2” AC-grade, sanded plywood (about 2-4’x8’ pieces)
Varathane One Step water-based stain and polyurethane (Honey Pecan)
1x6" cedar planks
Laminate countertop (Slate pattern, 25”x 96”)
Planning and Designing Cabinets
Having a great kitchen in our van was a really important part of our van build. Allocating enough space to the kitchen and taking the time to design a very functional space not only makes our van more pleasant, it also saves us money because we eat out way less because cooking in the van is pretty similar to cooking in a normal house. We have a good balance of storage space and open space for movement.
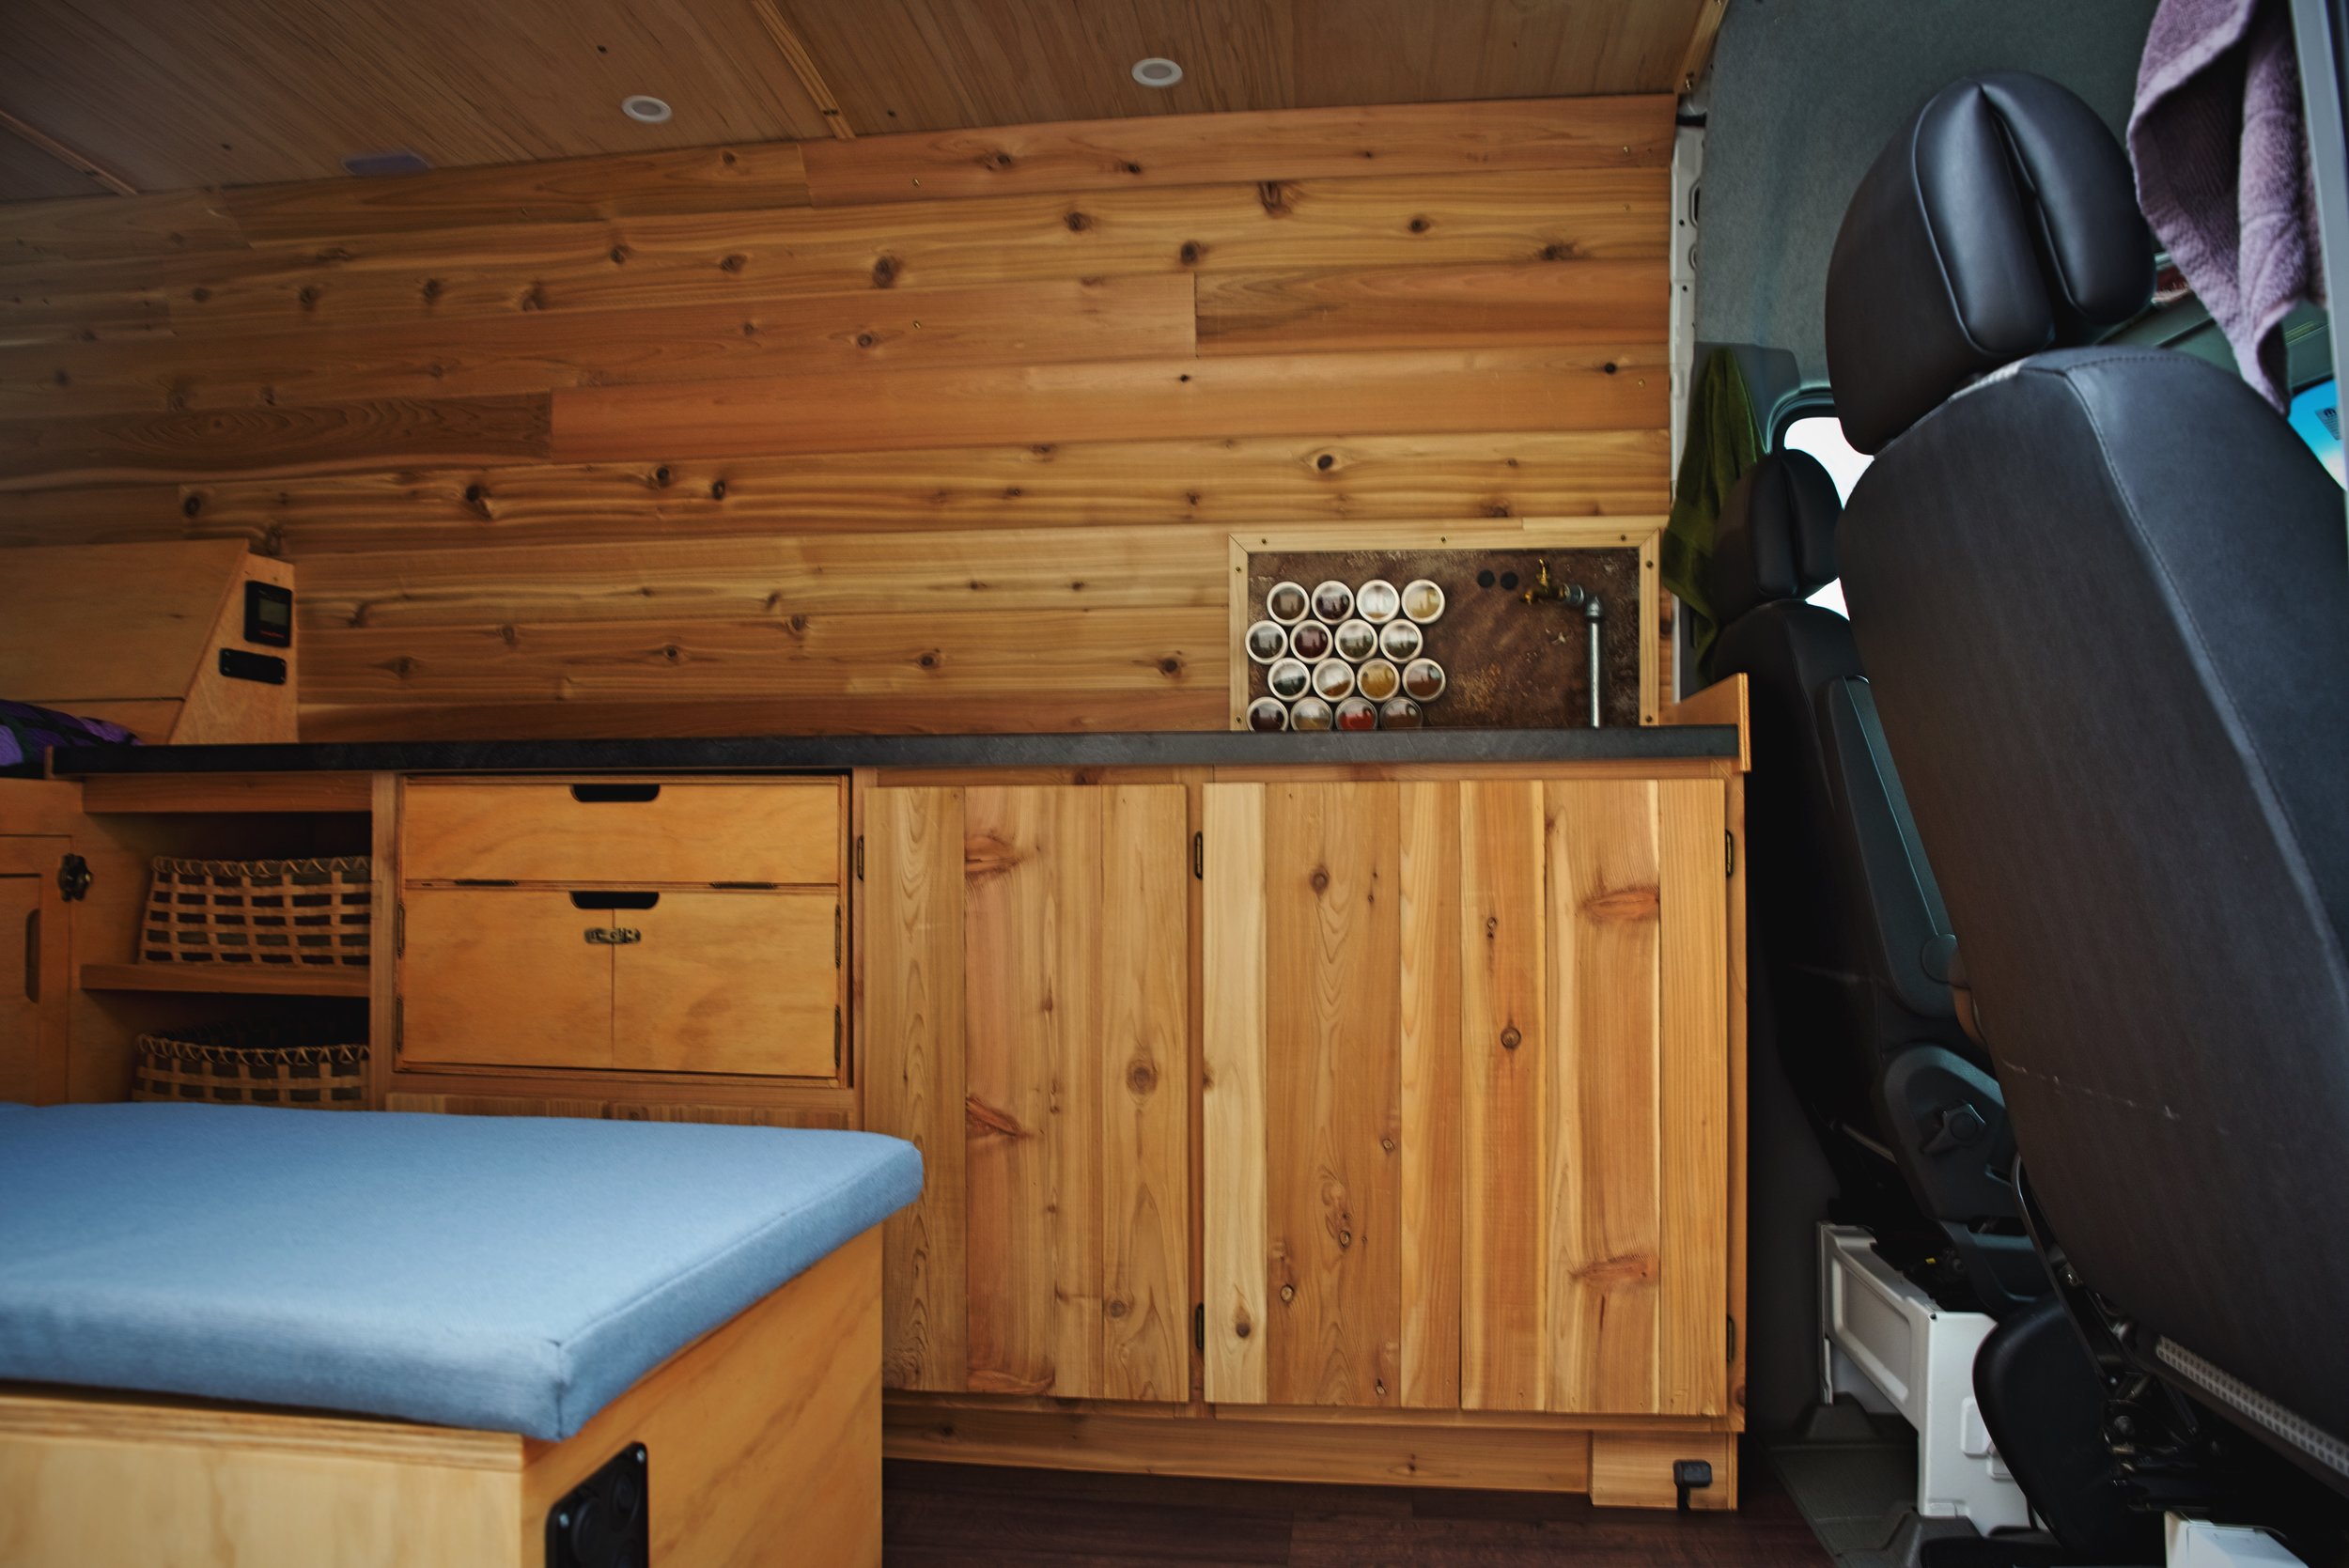
We have a large space for the kitchen in our van, and it is designed well.

We have an entire binder of various designs for the elements of our van. This is the design we landed on for our cabinets.
We looked into modifying used cabinets from a house for our van, but we realized that would likely result in pigeon-holing the things we needed into spaces that they didn’t really fit well, resulting in a lot of unusable or wasted space. The reality is that you need different items when you are living in a van, than what you need in a house. We decided that building custom cabinets for the van would be our best option. Before designing any of the cabinetry, we first figured out what items would need to be stored in our kitchen area. Then we designed our cabinetry around those items. We even measured things like pots and dishes and built our cabinetry to fit!
For the most part our cabinetry is very simple, with a case and frame structure and basic plank and brace doors. We built the cabinets square, rather than trying to work with the curve of the van walls as we did with the cabinetry alongside the bed (see how we built our bed platform and its cabinetry here.) We may have lost a small amount of space behind the bottom of the cabinets, but it wasn’t too much.
We had 90” of space for the length of the cabinetry, and we decide that 20” was as deep as the cabinets could be while still leaving a decent walkway between them and our bench. Going from the front to the back of the van we have four distinct sections of cabinets. The first cabinet houses our water system. The sink is above this cabinet, and it is basically just a large open cabinet that holds jerry cans for freshwater and gray water. It has two doors on the front. (Check out our article about our sink and water system here.)

Our entire water system is contained within this cabinet under the sink. These ten gallons usually last one to two weeks.

This photo shows the water cabinet and the propane locker cabinet.
The second cabinet contains our propane locker, so it is a cabinet within a cabinet. Our propane locker holds our 20lb. propane tank within a fairly airtight, sealed container. A hose runs through the countertop allowing us to connect it to our stove. We have a 12-volt propane and carbon-monoxide detector installed in this cabinet as well, to alert us to any leaks in our propane system. The propane cabinet has one door on the front, and a bit of storage space above the propane locker where we keep our fire extinguisher and things like toilet paper and cleaning supplies.

Here are our designs for the propane locker that fits within the larger cabinet.

Our propane locker keeps our propane tank secure and forces any leaking propane out a hole in the bottom of the van rather than allowing it to leak into our living space.
The third cabinet houses our chuck box. The chuck box holds our stove and pots and pans in a large wooden box that can be totally removed from cabinetry. We can carry this box out to a picnic table if we want to cook outside. Under the chuck box, we have a cupboard with two doors where we store food, dishes, and water bottles. (Read how to build your own vanlife removable chuck box.)

Our cabinetry includes a chuck box that we can remove in order to cook outside the van. It holds our dishes and our stove.
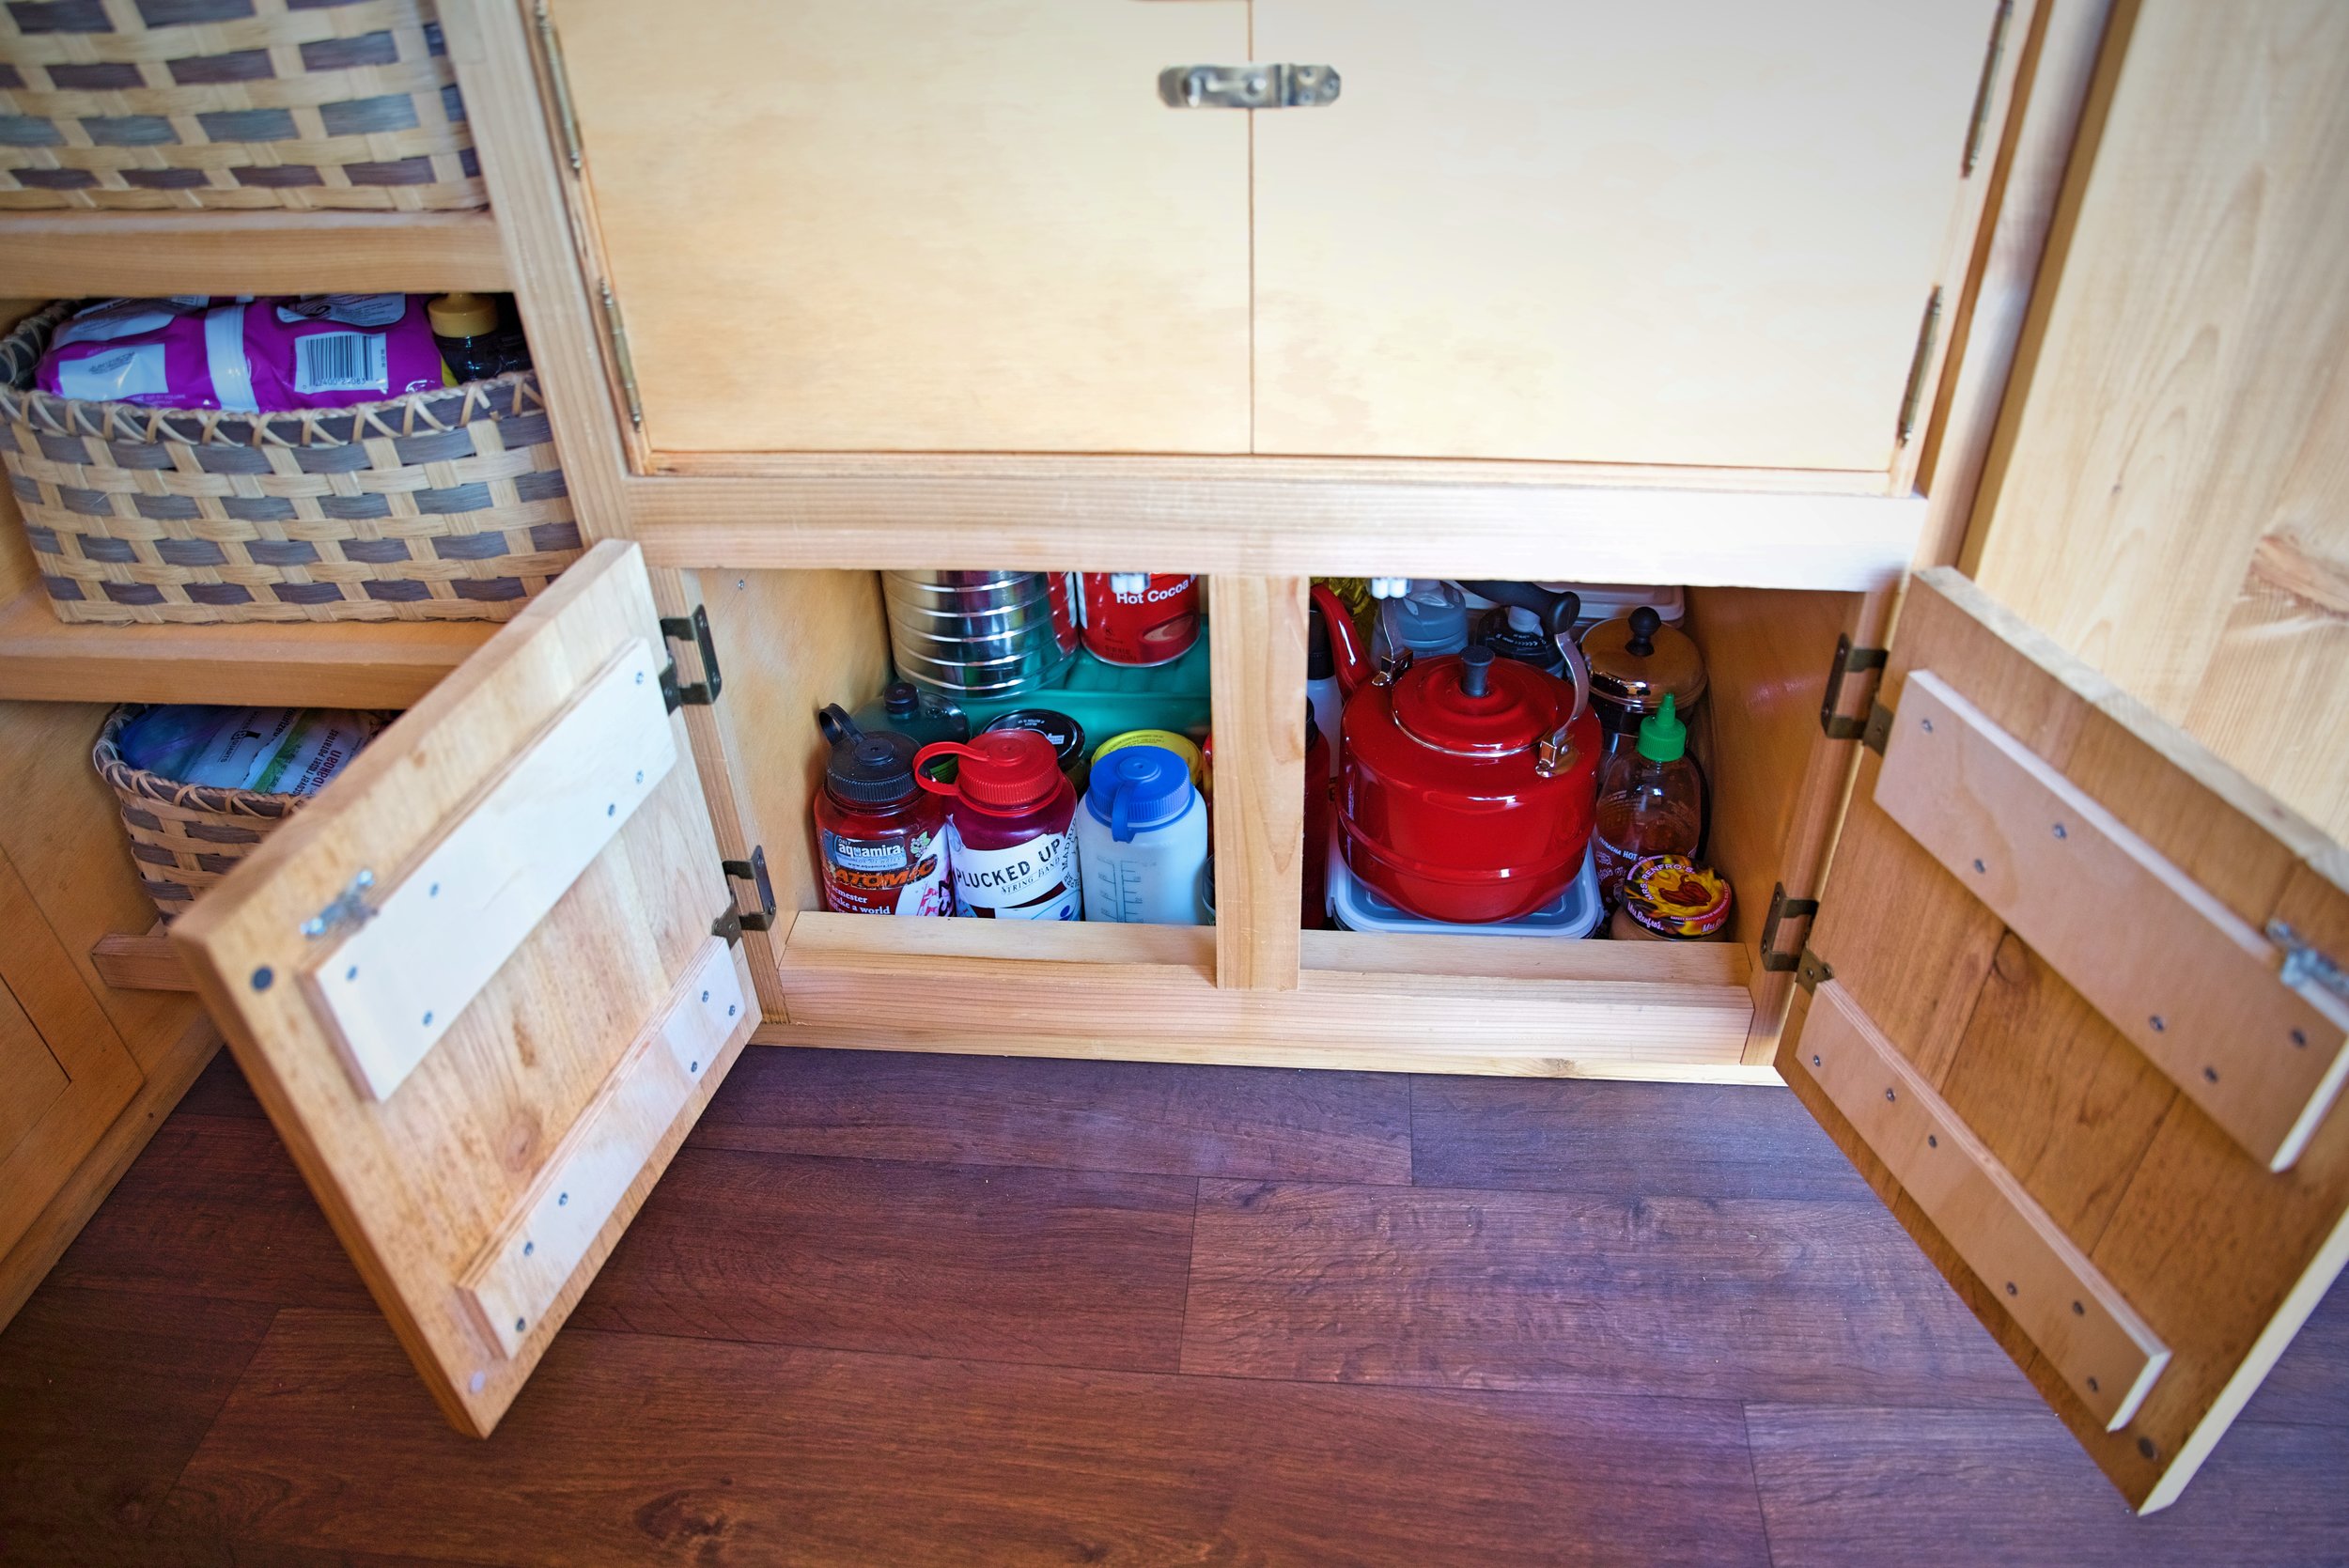
Under the chuck box we have a storage space for water bottles, extra dishes, and food.
The fourth cabinet has an open front. It has three shelves that hold handmade baskets. This open storage space was the length of the cabinet area that was left once we had designed all the other components we wanted in our cabinetry. We wove these custom baskets to fit into the space we had, rather than trying to build a cabinet around store-bought baskets. The three shelves have small lips that hold the baskets in place while we are driving. The frame of this basket area also houses the support for our fold-up table. (Want to see how the table works? Read this article.) The baskets are a really cute way to store our dishes, odds and ends, and dry goods.

I made these baskets to fit this particular space in the van. A small lip on the shelves hold them in place while we drive.
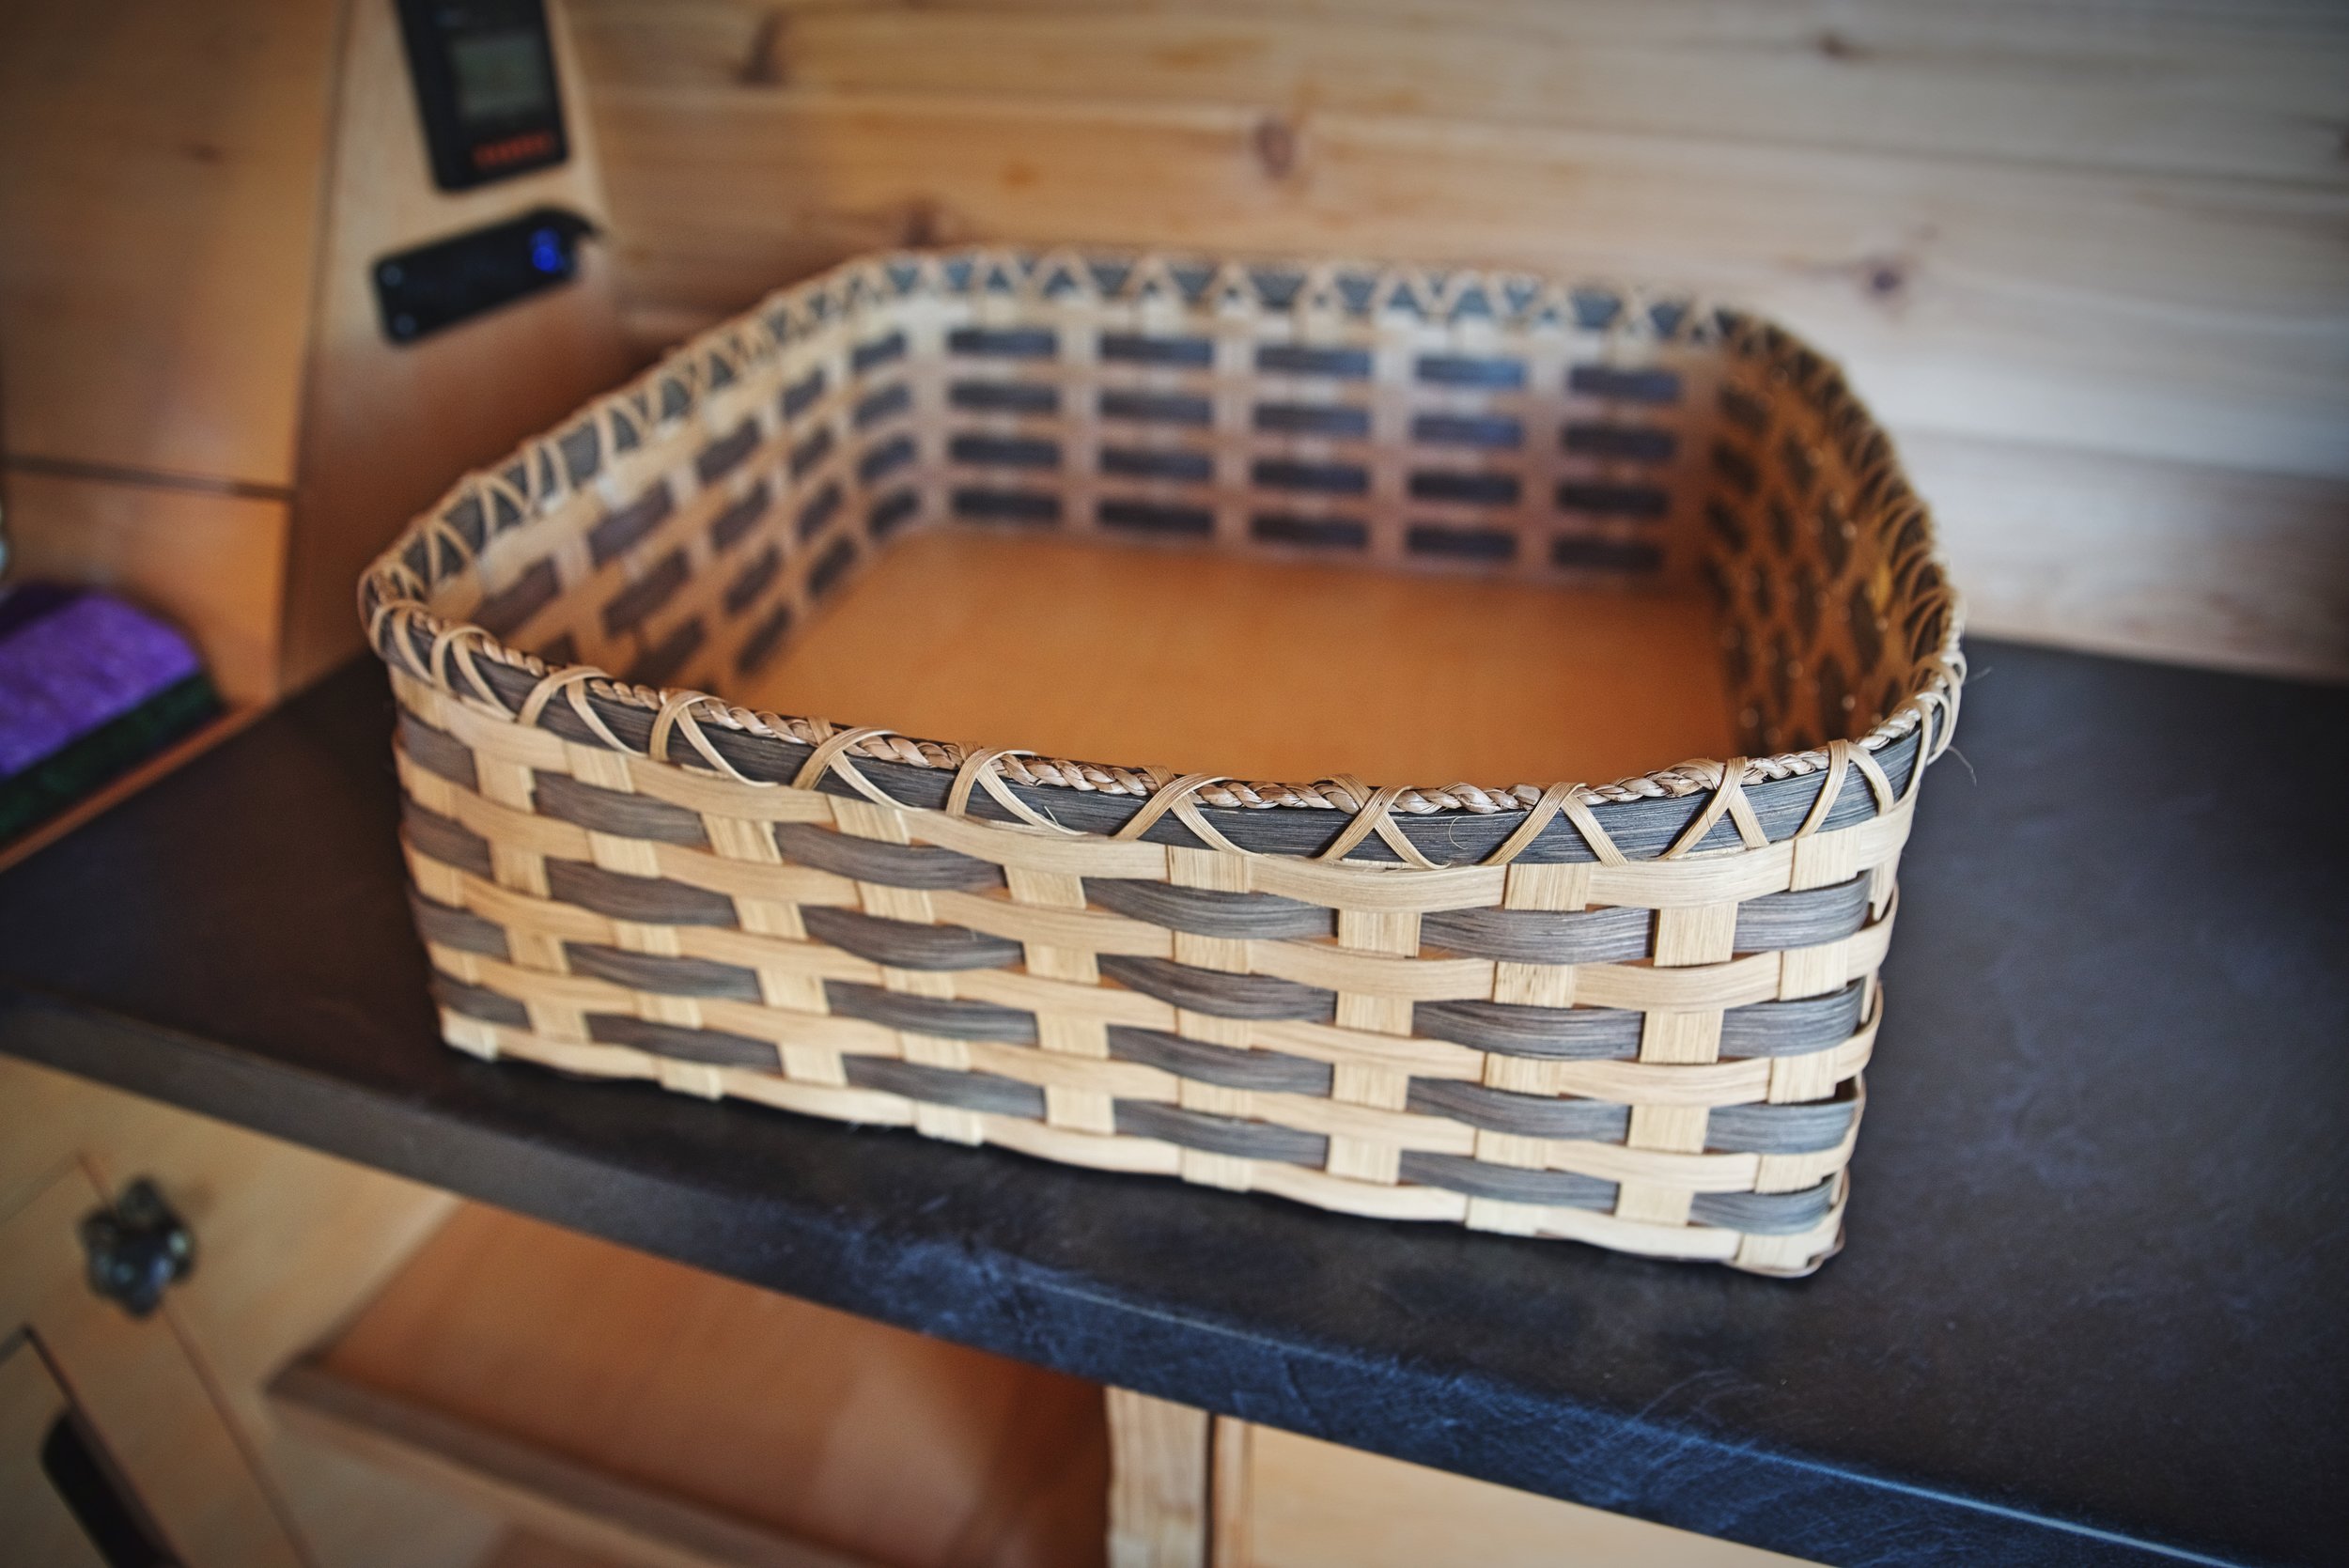
We keep utensils and dry foods in these baskets. The bottom is reinforced with a piece of 1/4-inch plywood.
Another element of planning to consider is getting the most our of your materials. Since our cabinets are largely made out of plywood, this meant carefully planning out all the pieces of the cabinets in advance and finding the best layout for them on a 4’x8’ piece of plywood that would create the least amount of waste.
Building the “Case”
The case of a cabinet is the structure or box of the cabinetry that provides the storage space. Cabinets are frequently made in a “frame-and-panel” constructions, in which a thin piece of paneling rests within a routed frame. We did not opt for that method—that was way too complicated for us. Plus we didn’t want to buy expensive tools like a router.
We went for the simplest type of cabinet construction—just a basic box made of plywood, although we did make some modifications to make our cabinets more useful for our van. The front of these boxes is covered with a solid wood frame. This type of cabinetry is called “case and frame.”
The cases of our cabinetry are made of AB grade, 5-ply, 1/2-inch plywood. We built our cabinetry modularly rather than in one large unit, so that it could easily be moved from the garage into the van.

The basic design for our cabinetry is very similar to that of most under-counter kitchen cabinets in houses.

Here you can see the pieces we needed for the walls of our cabinet cases—basic plywood rectangles with the toe kick cut out.
We first cut the walls and the backs of our cabinets to build the case. We built a toe-kick into the bottom of the cabinets, like you would see in a typical kitchen, so our cabinet walls are rectangles with one of the corners cut out.

The cabinet wall next to the sink rises above the counter, giving this end a nice lip and capping the edge of the countertop.

We sanded the plywood for our cabinet cases thoroughly.
The bed end of the cabinets share a wall with the front of the bed. The cab end of the cabinets have a larger wall that rises above the countertop to create a lip next to the sink so that things don’t fall behind the driver seat. This lip also caps the edge of the countertop that we cut. The back wall of the cabinetry that is against the van wall is 1/2-inch AC ply. We picked a lower grade wood, because it’s cheaper and this back wall is mostly hidden.

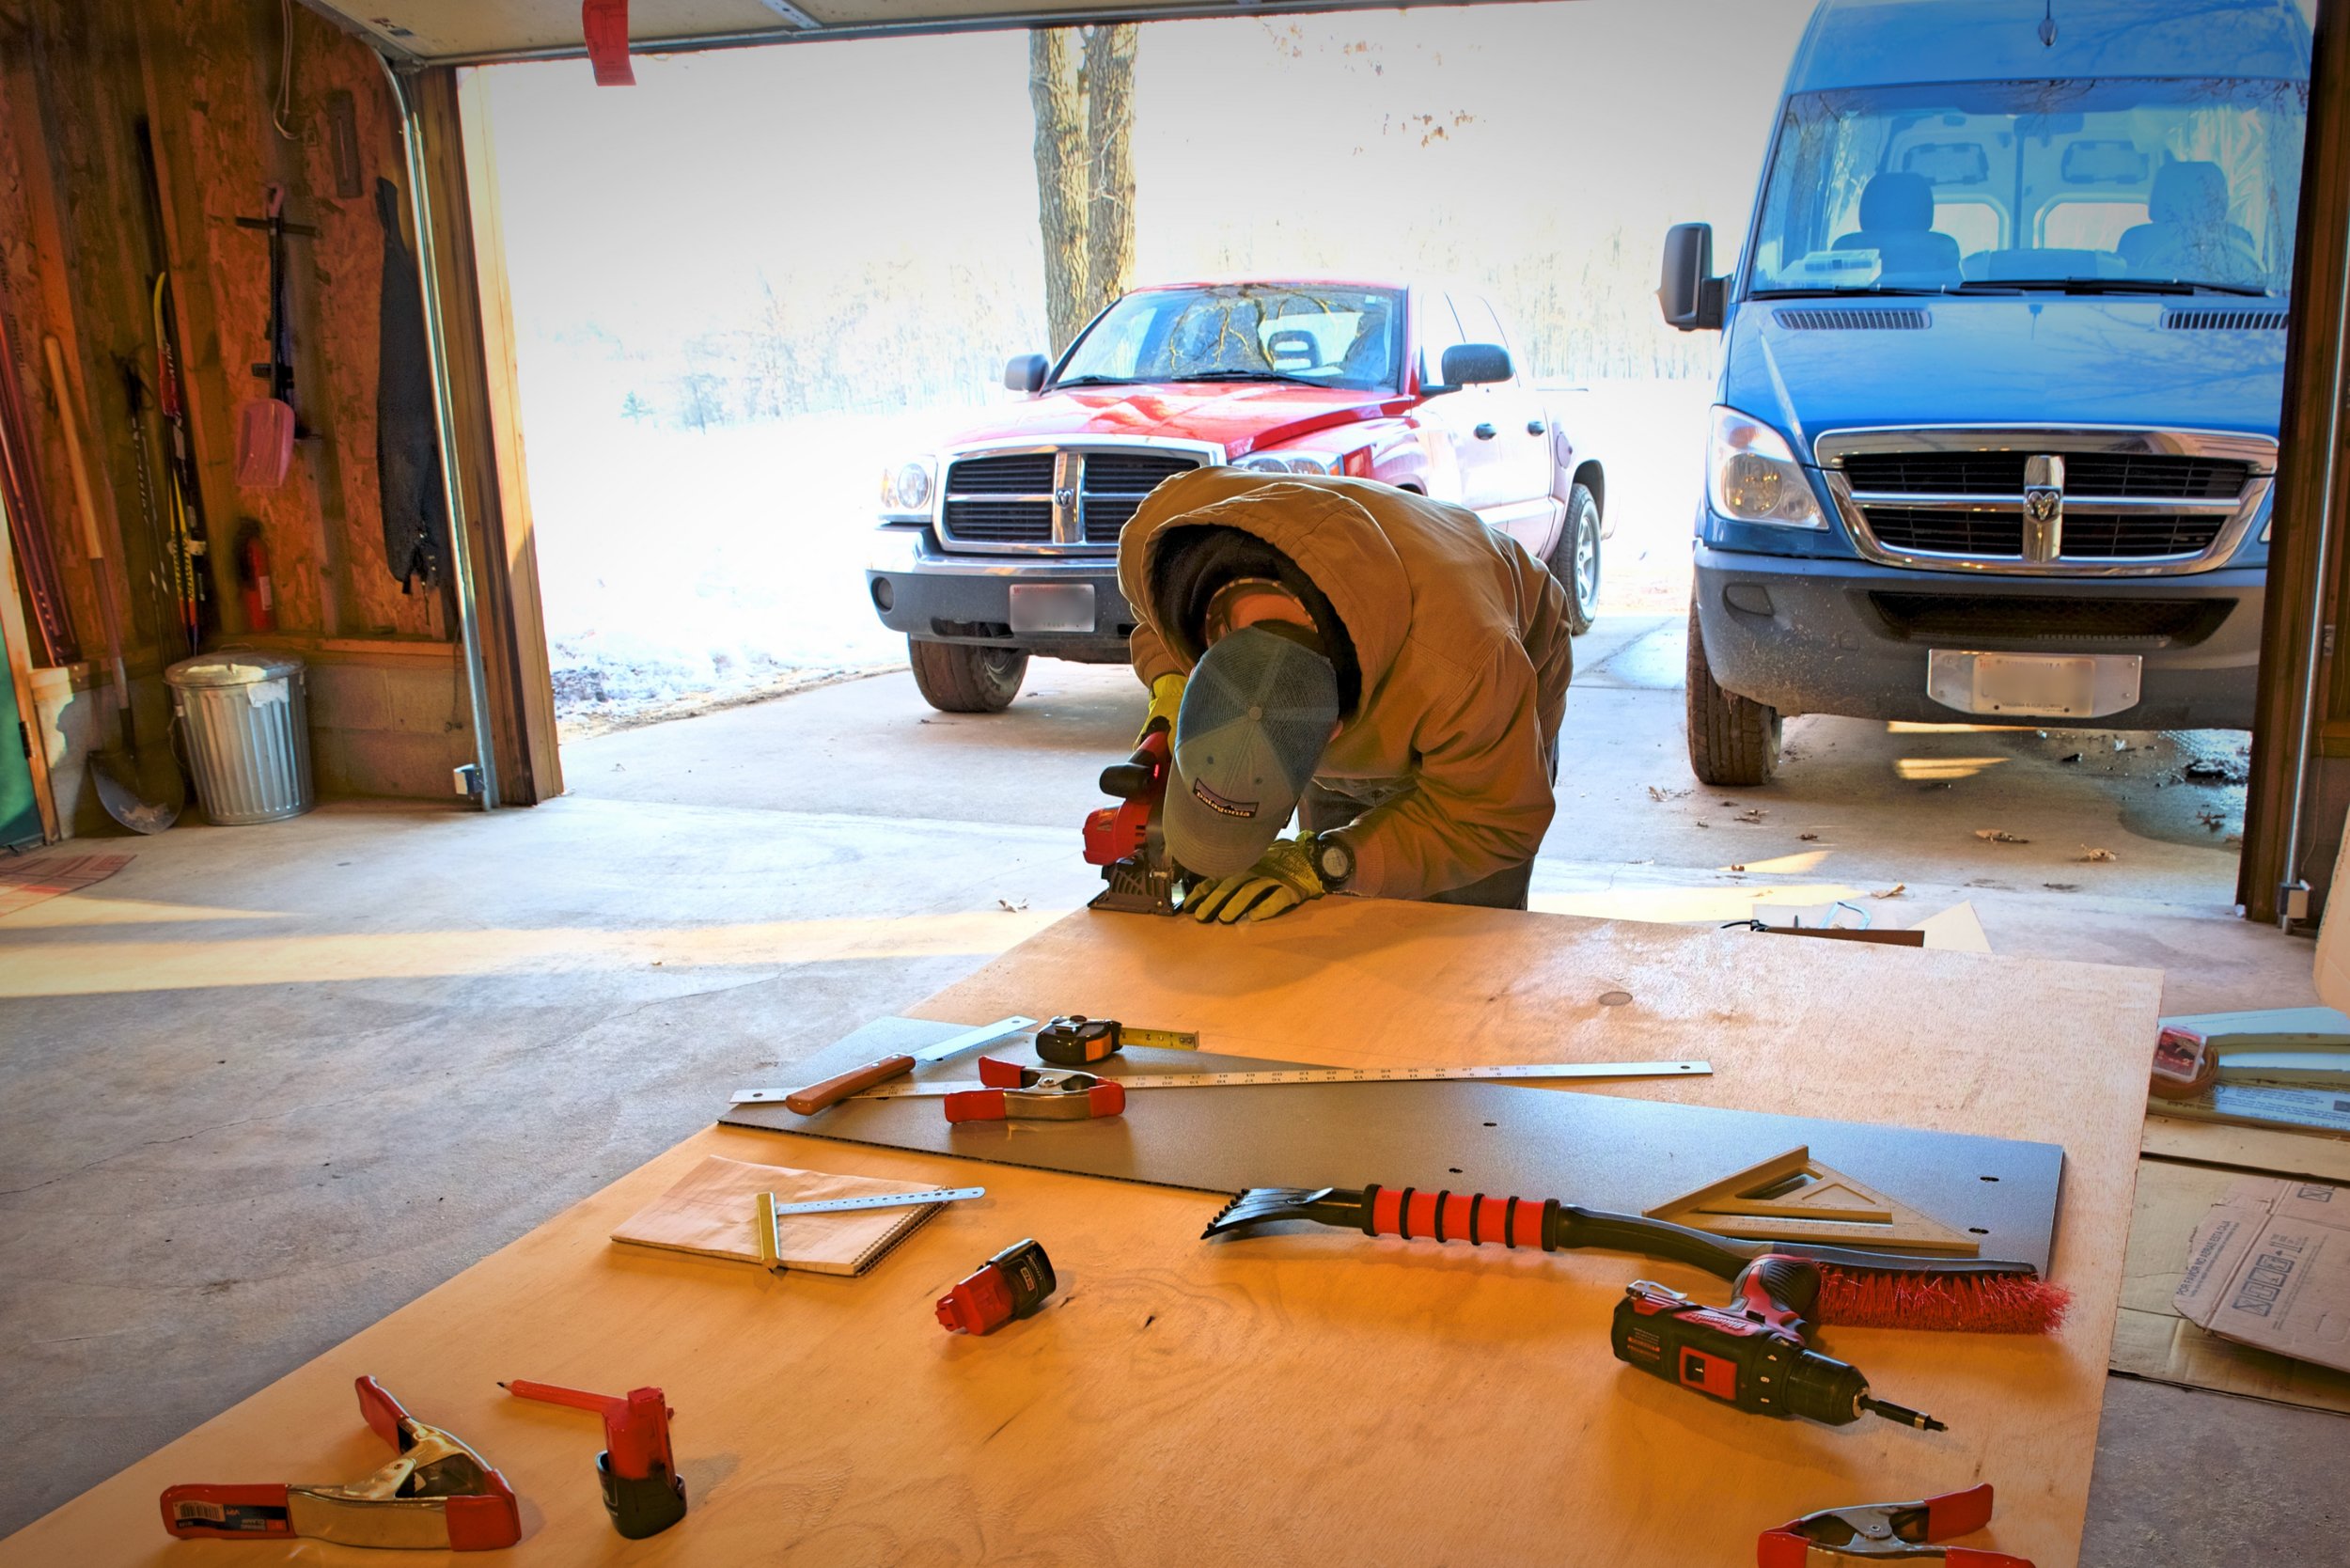
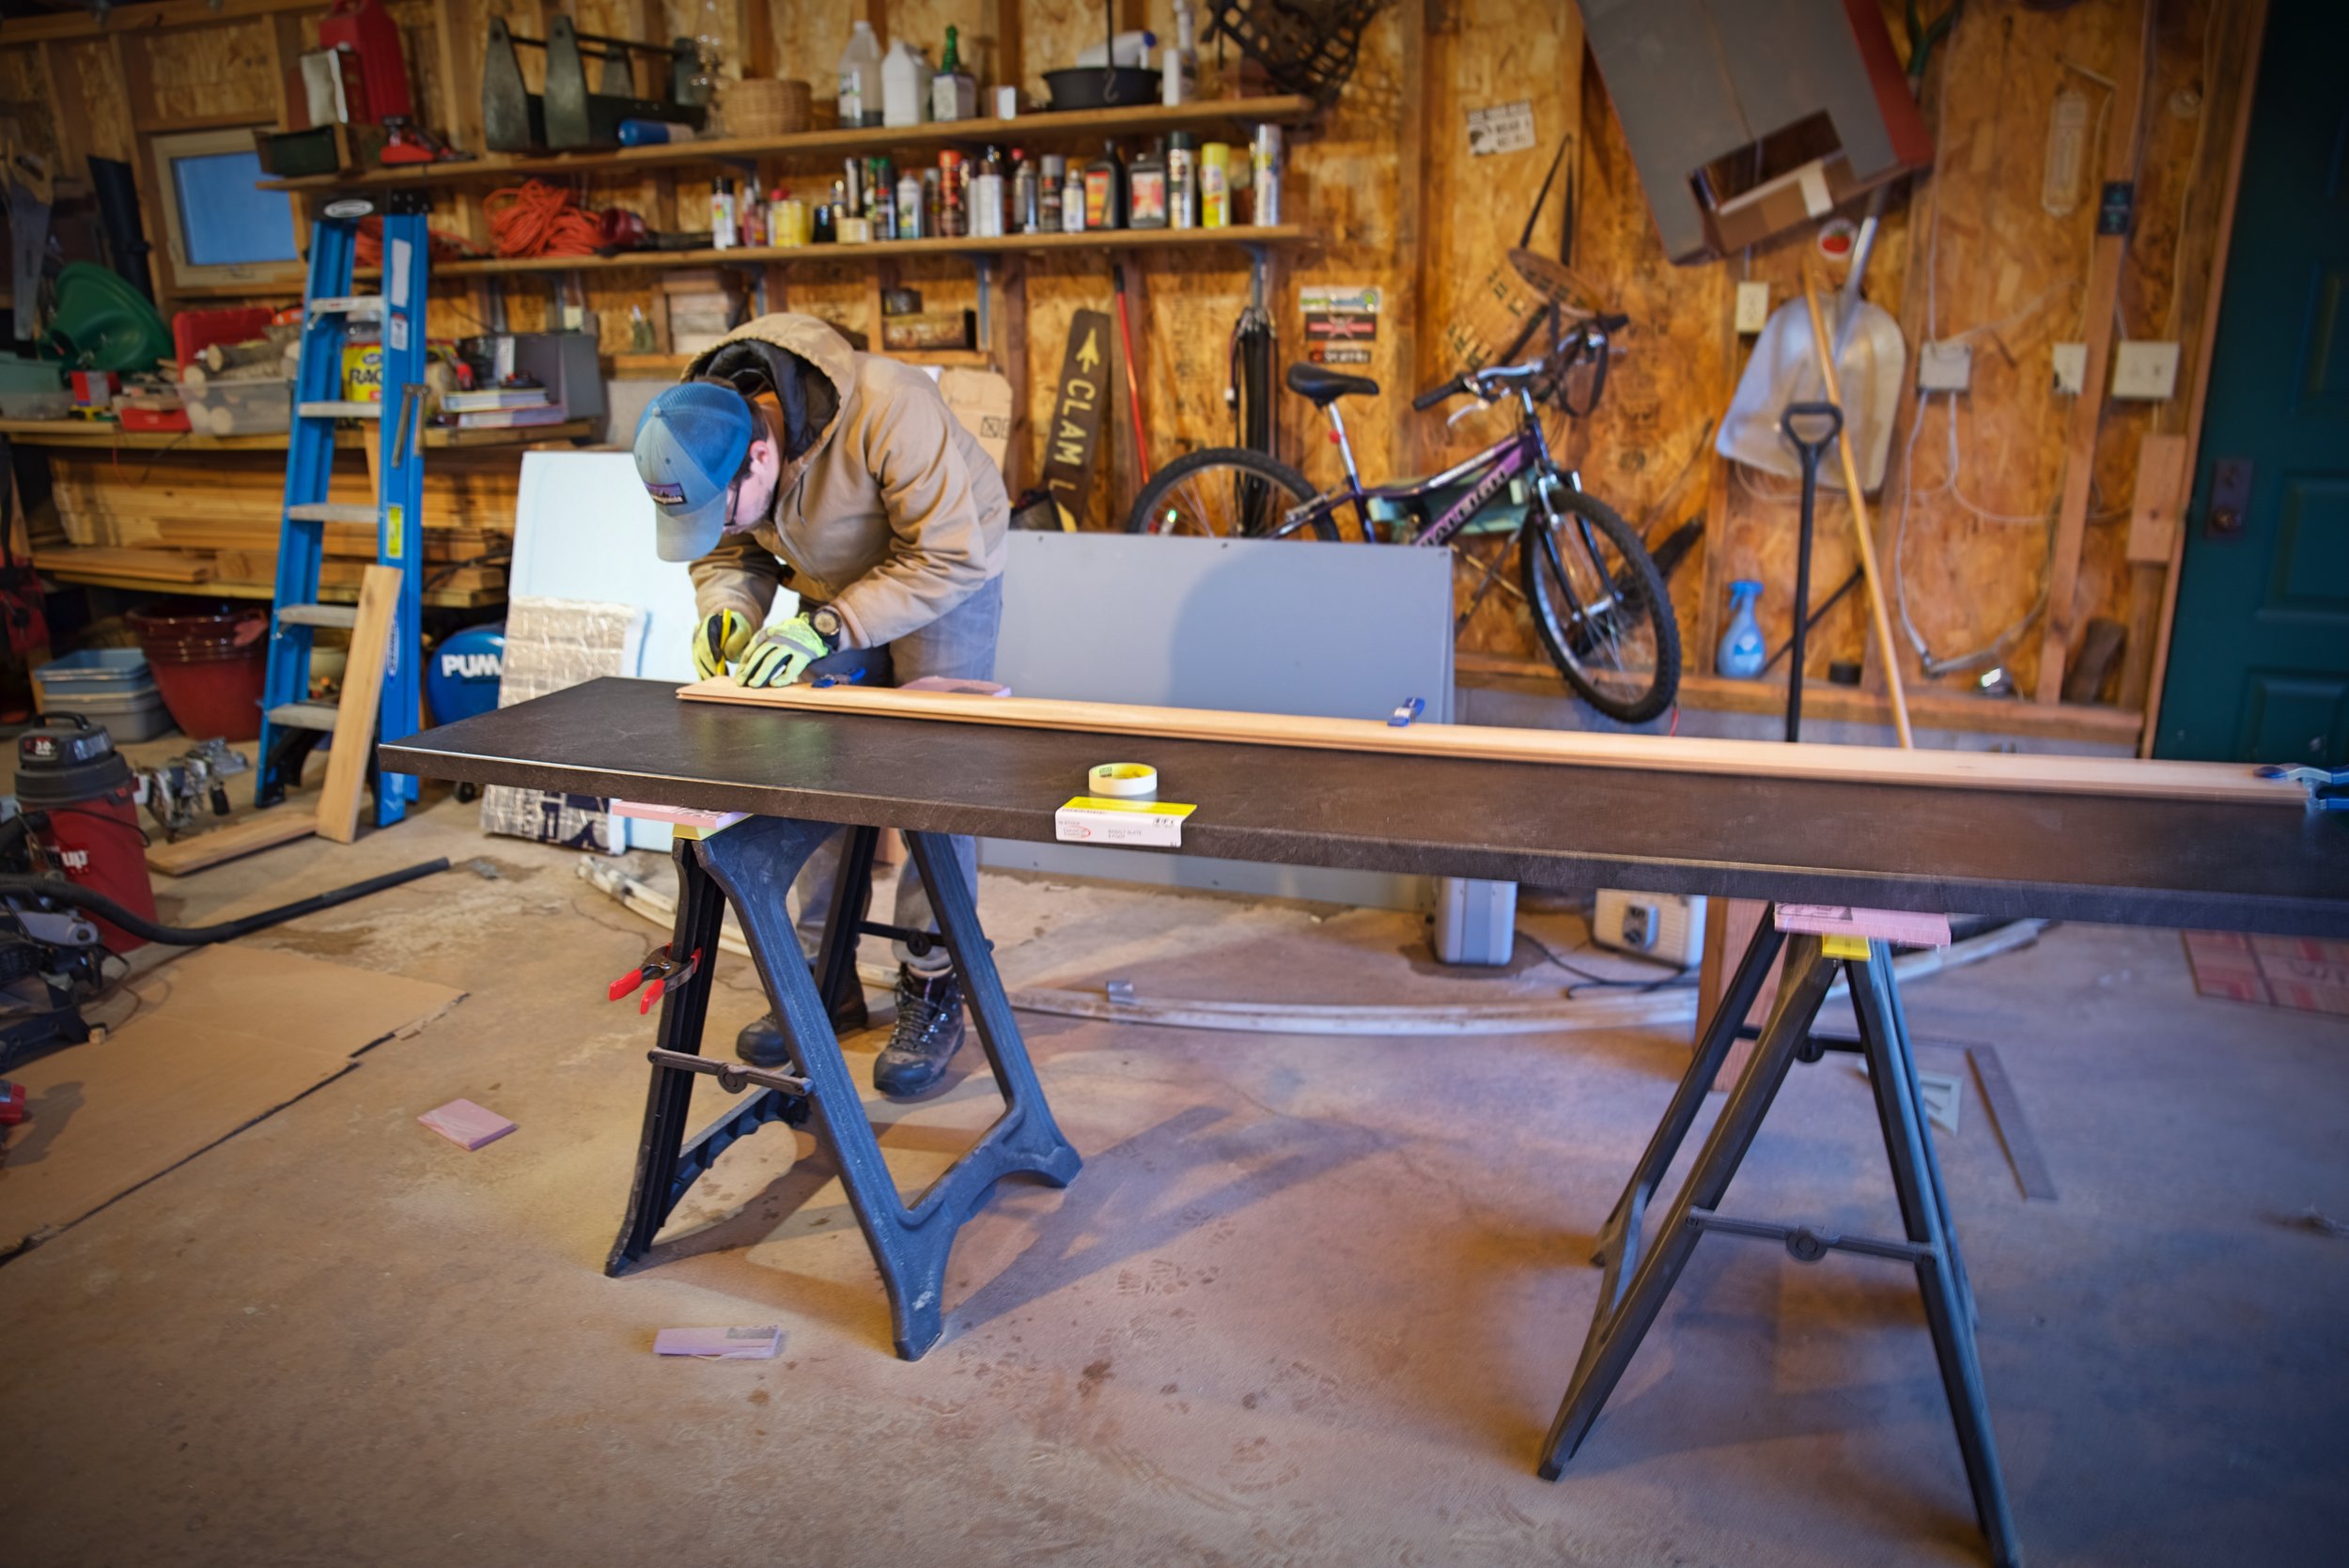
Ian measures the line he’s drawn for the cut at multiple places to make sure that it’s accurate and perfectly straight.

We used this piece of plastic paneling from the van’s original walls to guide many of our cuts because it’s perfectly straight. We clamped it down using a piece of plywood on top if it wasn’t long enough to reach across the plywood.
When you are building cabinets, you have to be pretty precise because there are so many joints. If one case gets a bit wonky, this will just be amplified through the entire row of cabinets. We didn’t have a table saw so to get really straight cut so we used a couple of tricks. We used fence attachment on our circular saw to help with any cuts that were narrow enough. We also used a piece of plastic paneling or the factory edge of a piece of plywood to guide the circular saw as we cut. Finally we would measure multiple times along the line with a ruler or a tape measure to make sure it was in the precisely right place before cutting.
Ian cuts the corner off one of the walls of the case in order to accommodate our toe kick.
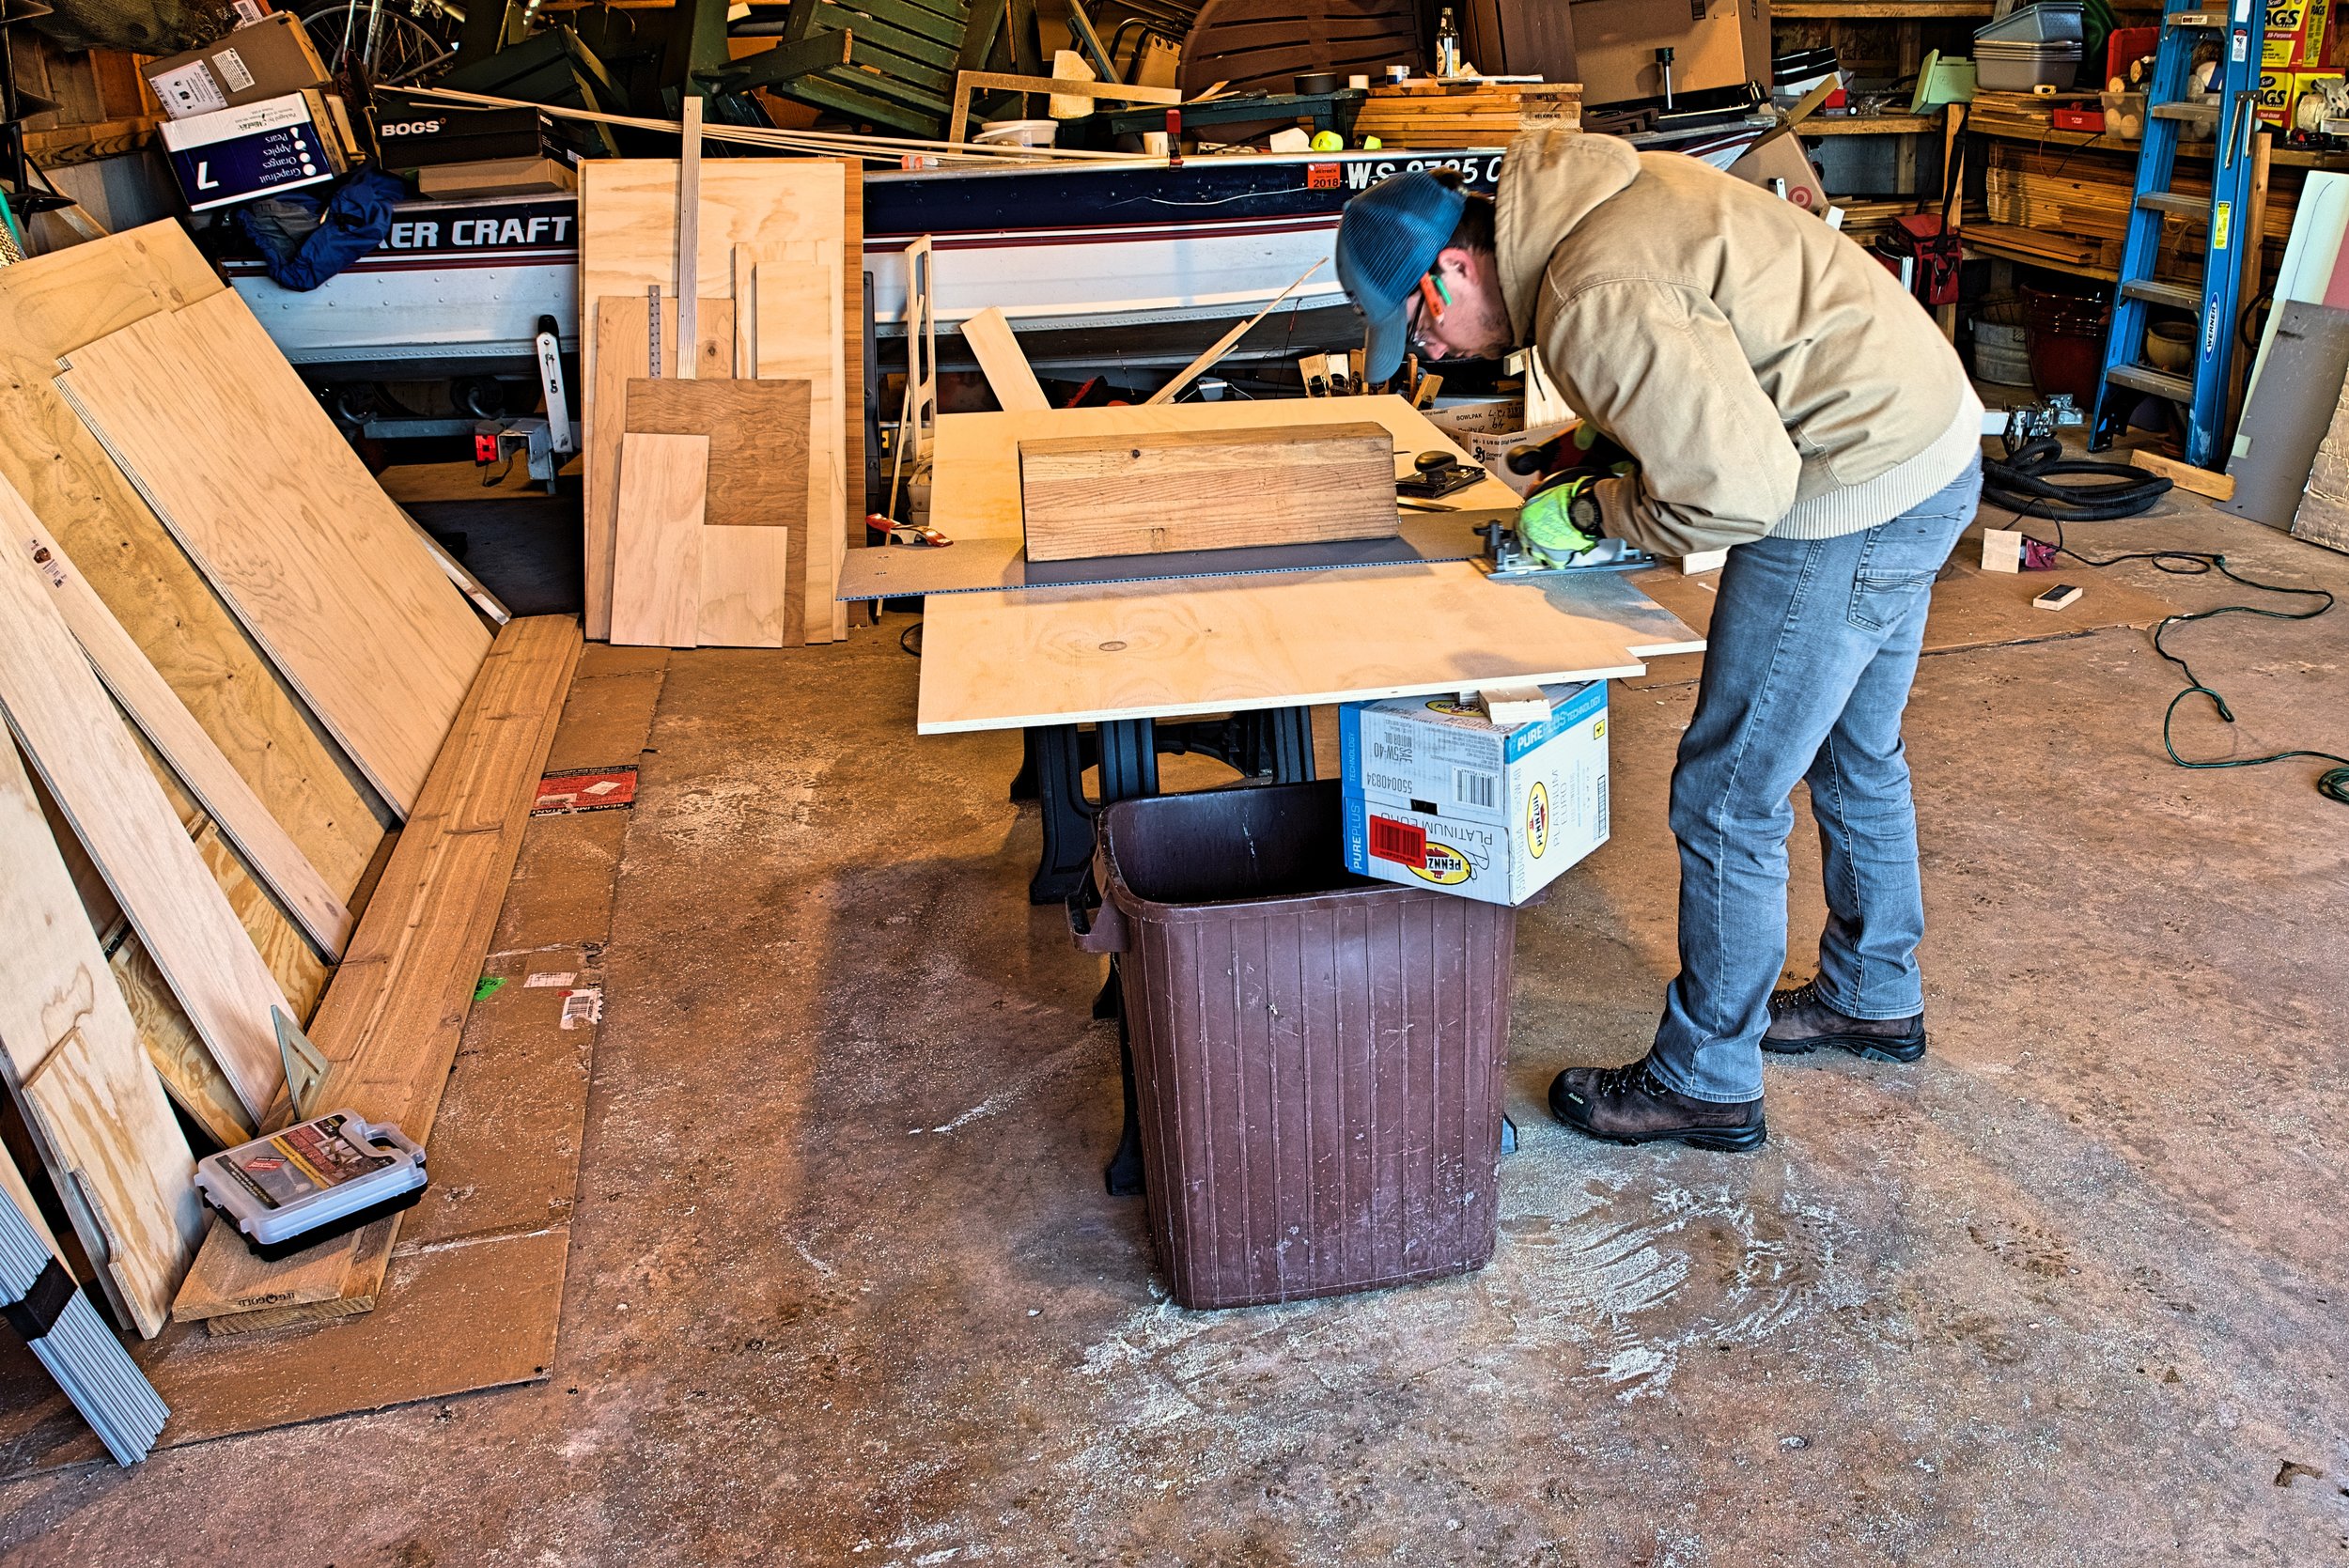
Ian prepares to cut the case of one cabinet. You can support the cut using saw horses if you’re working by yourself.
Once we were ready to cut the plywood walls, one of us would hold the board and possibly also support it on a saw horse or with a garbage can. You need to hold it because if it sags, the cut will be uneven or curved. Also if it’s not supported at the end of the cut, it might break and splinter or the plywood’s layers will de-laminate. Moving the circular saw really slowly also helps you stay on your line and prevent the plywood from splintering.

A table saw would be the ideal tool for cutting large pieces of plywood like this, but the circular saw works fine.

Having a helper to catch the cut is will make building cabinetry a lot easier.
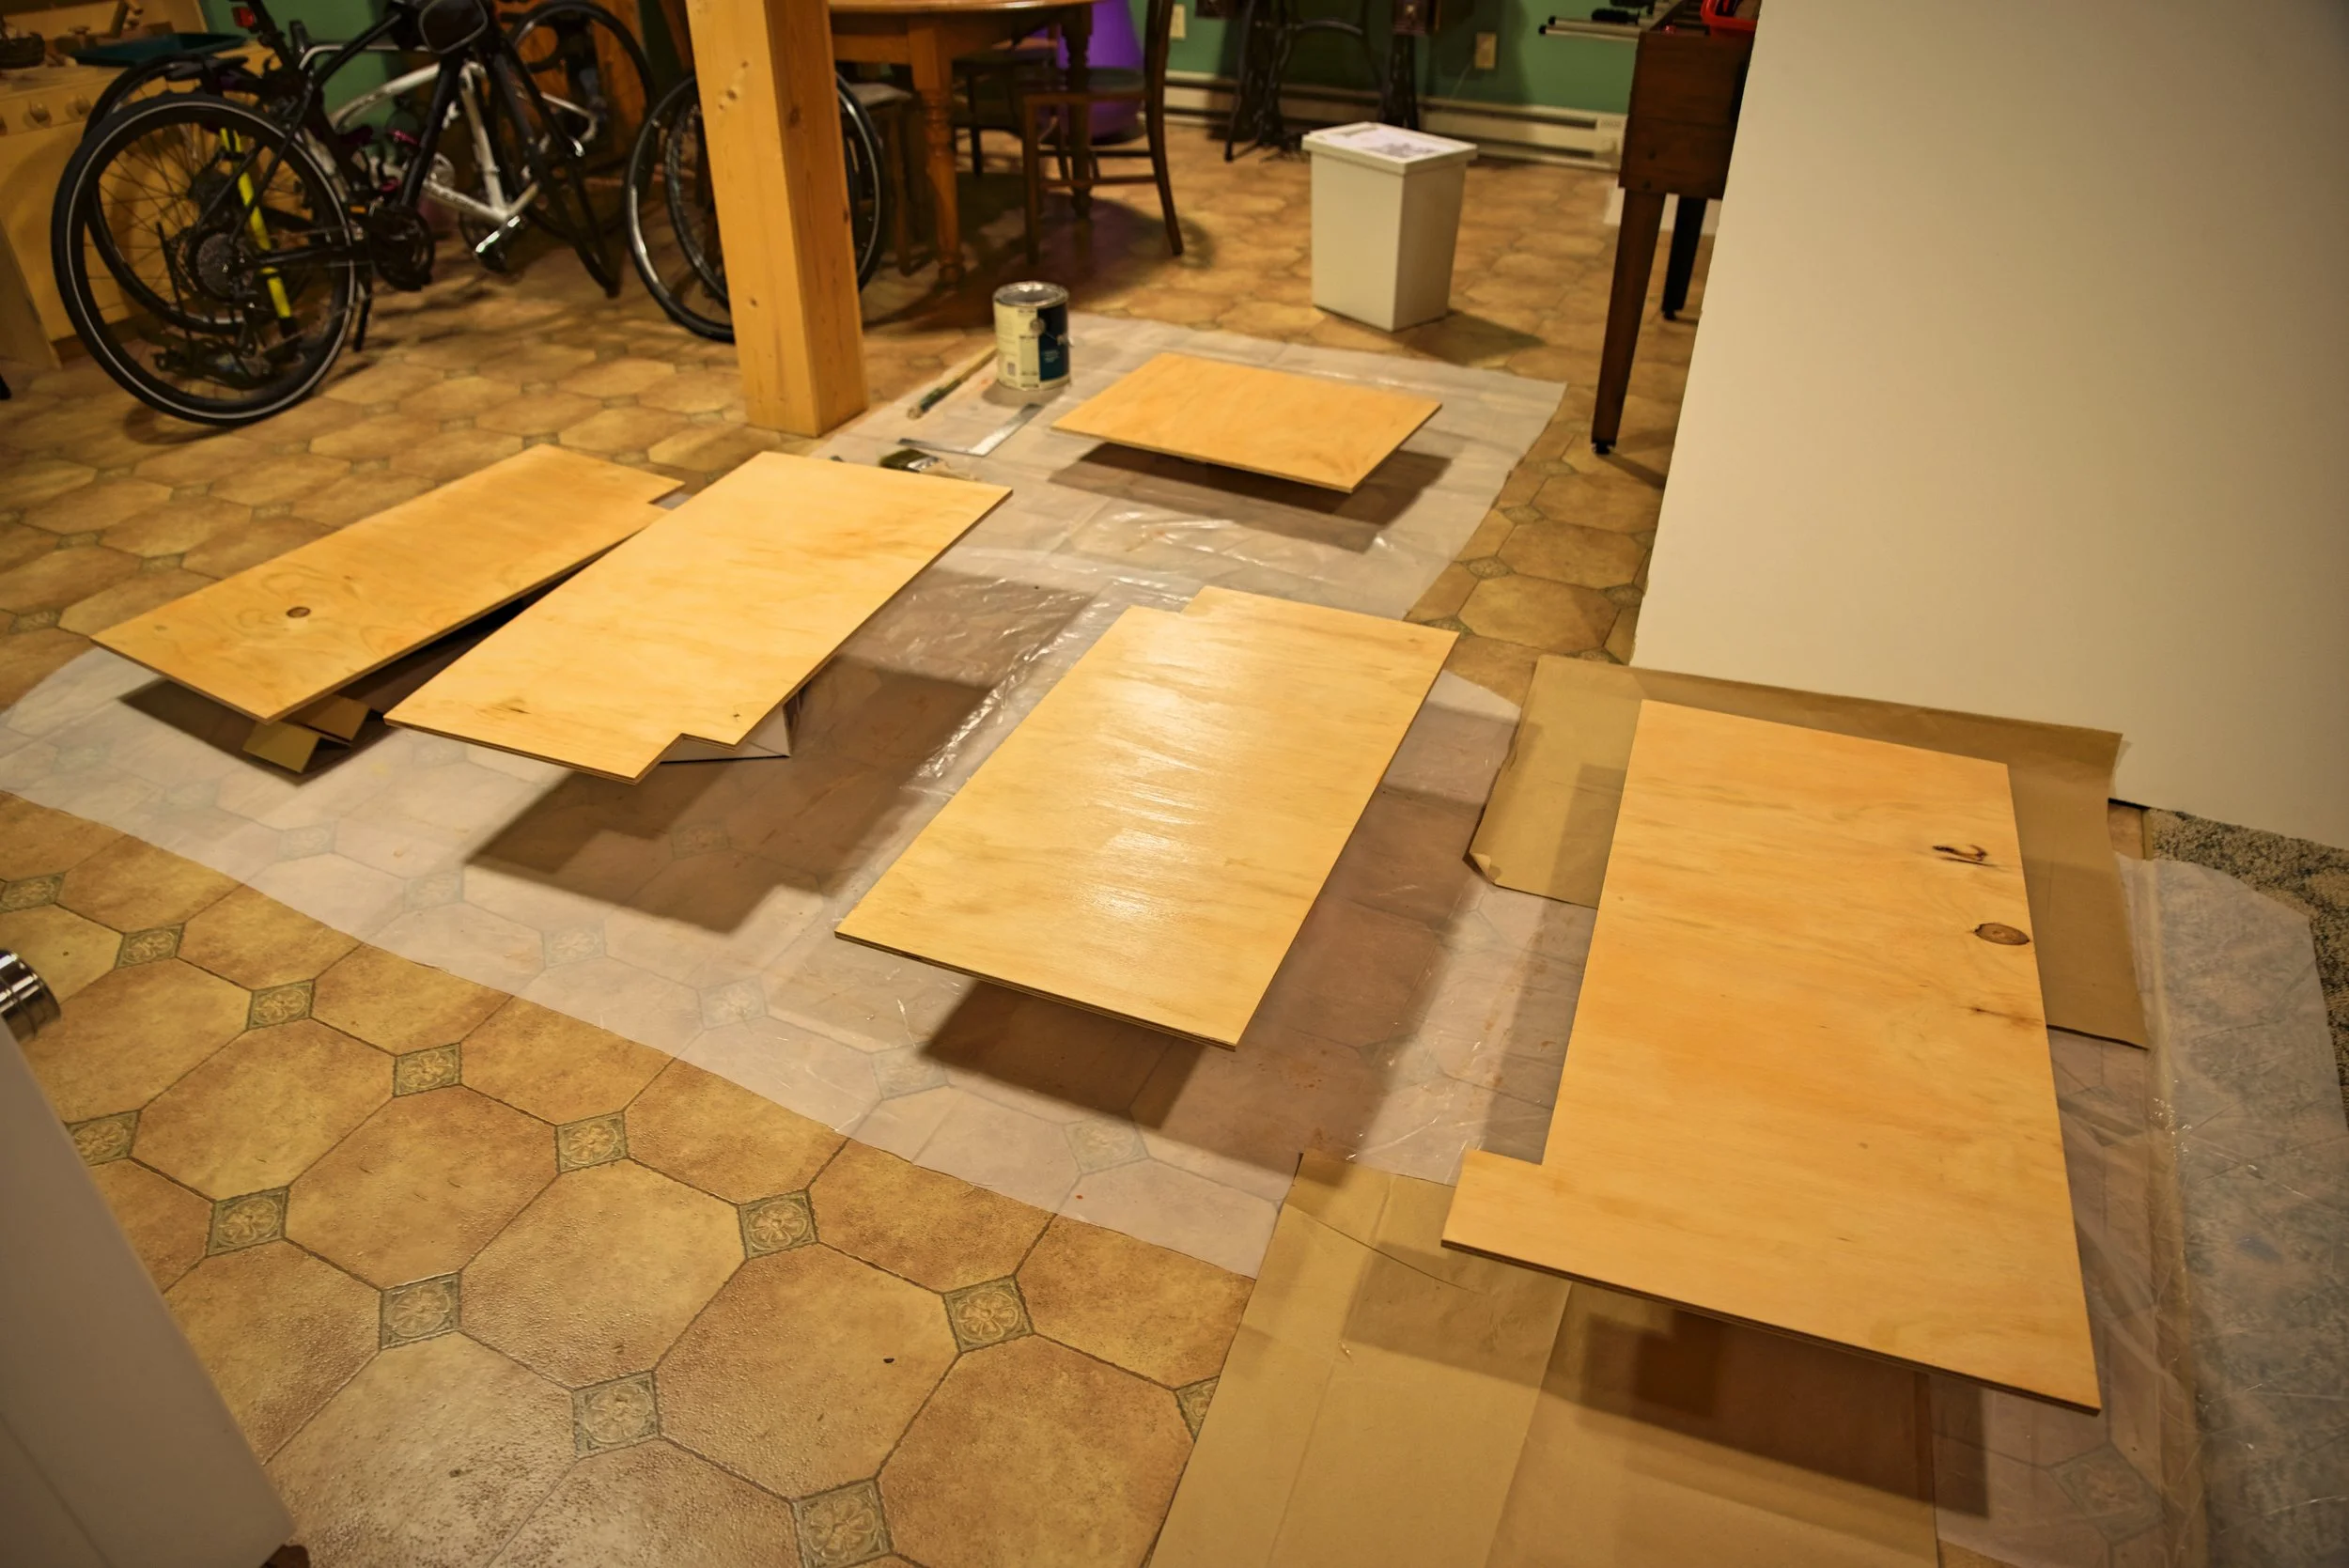
After we had cut the walls and backs, we gave the cabinet walls a thorough sanding, using a handheld sander. We finished all the plywood with a water-based polyurethane. In any places the cabinet walls are visible we used Varathane One Step Water-based Stain and Polyurethane (in Honey Pecan) as the first coat, so our cabinetry matches our bed platform and fridge storage bench. On the insides we just used clear polyurethane finish.
Polyurethane is most easily applied with a nylon-bristle brush. We finished our bed cabinets once they were already constructed, and we decided that it’s a lot easier to finish the cabinetry when it’s still in pieces and not in a confined space like a van.
We applied three layers of stain and/or poly and sanded the stained surface of the cabinet lightly with a medium grit sanding block between layers.

Sanding between layers helps the finish to penetrate and adhere better. Make sure to wipe the dust off though or it will affect the finish.

One of the great things about water-based poly is that it can be applied indoors, because it has very little odor—a huge bonus if you are building a van during the winter in northern Wisconsin.
A note on the best finishes for inside vans: Polyurethane is essentially a liquid plastic that can be applied as a finish to wood surfaces. It comes in oil- and water-based varieties, and it is just about the most durable wood finish around. Oil-based polyurethane penetrates the wood giving a bit richer finish, whereas water-based polyurethane just sits on the wood's surface.
Water-based polyurethane has very little odor in comparison to oil-based, and it provides a nearly as durable a finish. Water-based polyurethane also has fewer VOCs (Volatile Organic Compounds). It's definitely healthier for you and the environment than it's oil-based counter part, especially for a small space like a van where there isn't a great way to avoid inhaling it. Moreover, the water-based polyurethane dries much more quickly. Not only is this more convenient, your VOC exposure is also reduced based on the dry time, since the fewer chemicals are released after it has dried.
There are some more "natural" options such as linseed oil or tung oil. These finishes can take weeks to cure even in well ventilated spaces, and perpetually have a "wet" look to them. These oil finishes or a product like Shellac, which is made from beetle secretions, do not offer the same durability as polyurethane, and they can be easily scratched or stained. Often the modern versions of these age-old finishes are mixed with other high-VOC solvents anyway.
For these reasons, we believe that water-based polyurethane is the safest and best choice for woodwork inside van conversions.
Finishing all the woodwork in our van was one of the simplest but most time consuming tasks involved in the build. Make sure you have other projects you can work on while the finish is drying.

Make sure you don’t go overboard when sanding edges, you could affect the size of the board and throw off the entire cabinet.
Building the Cabinet Cases
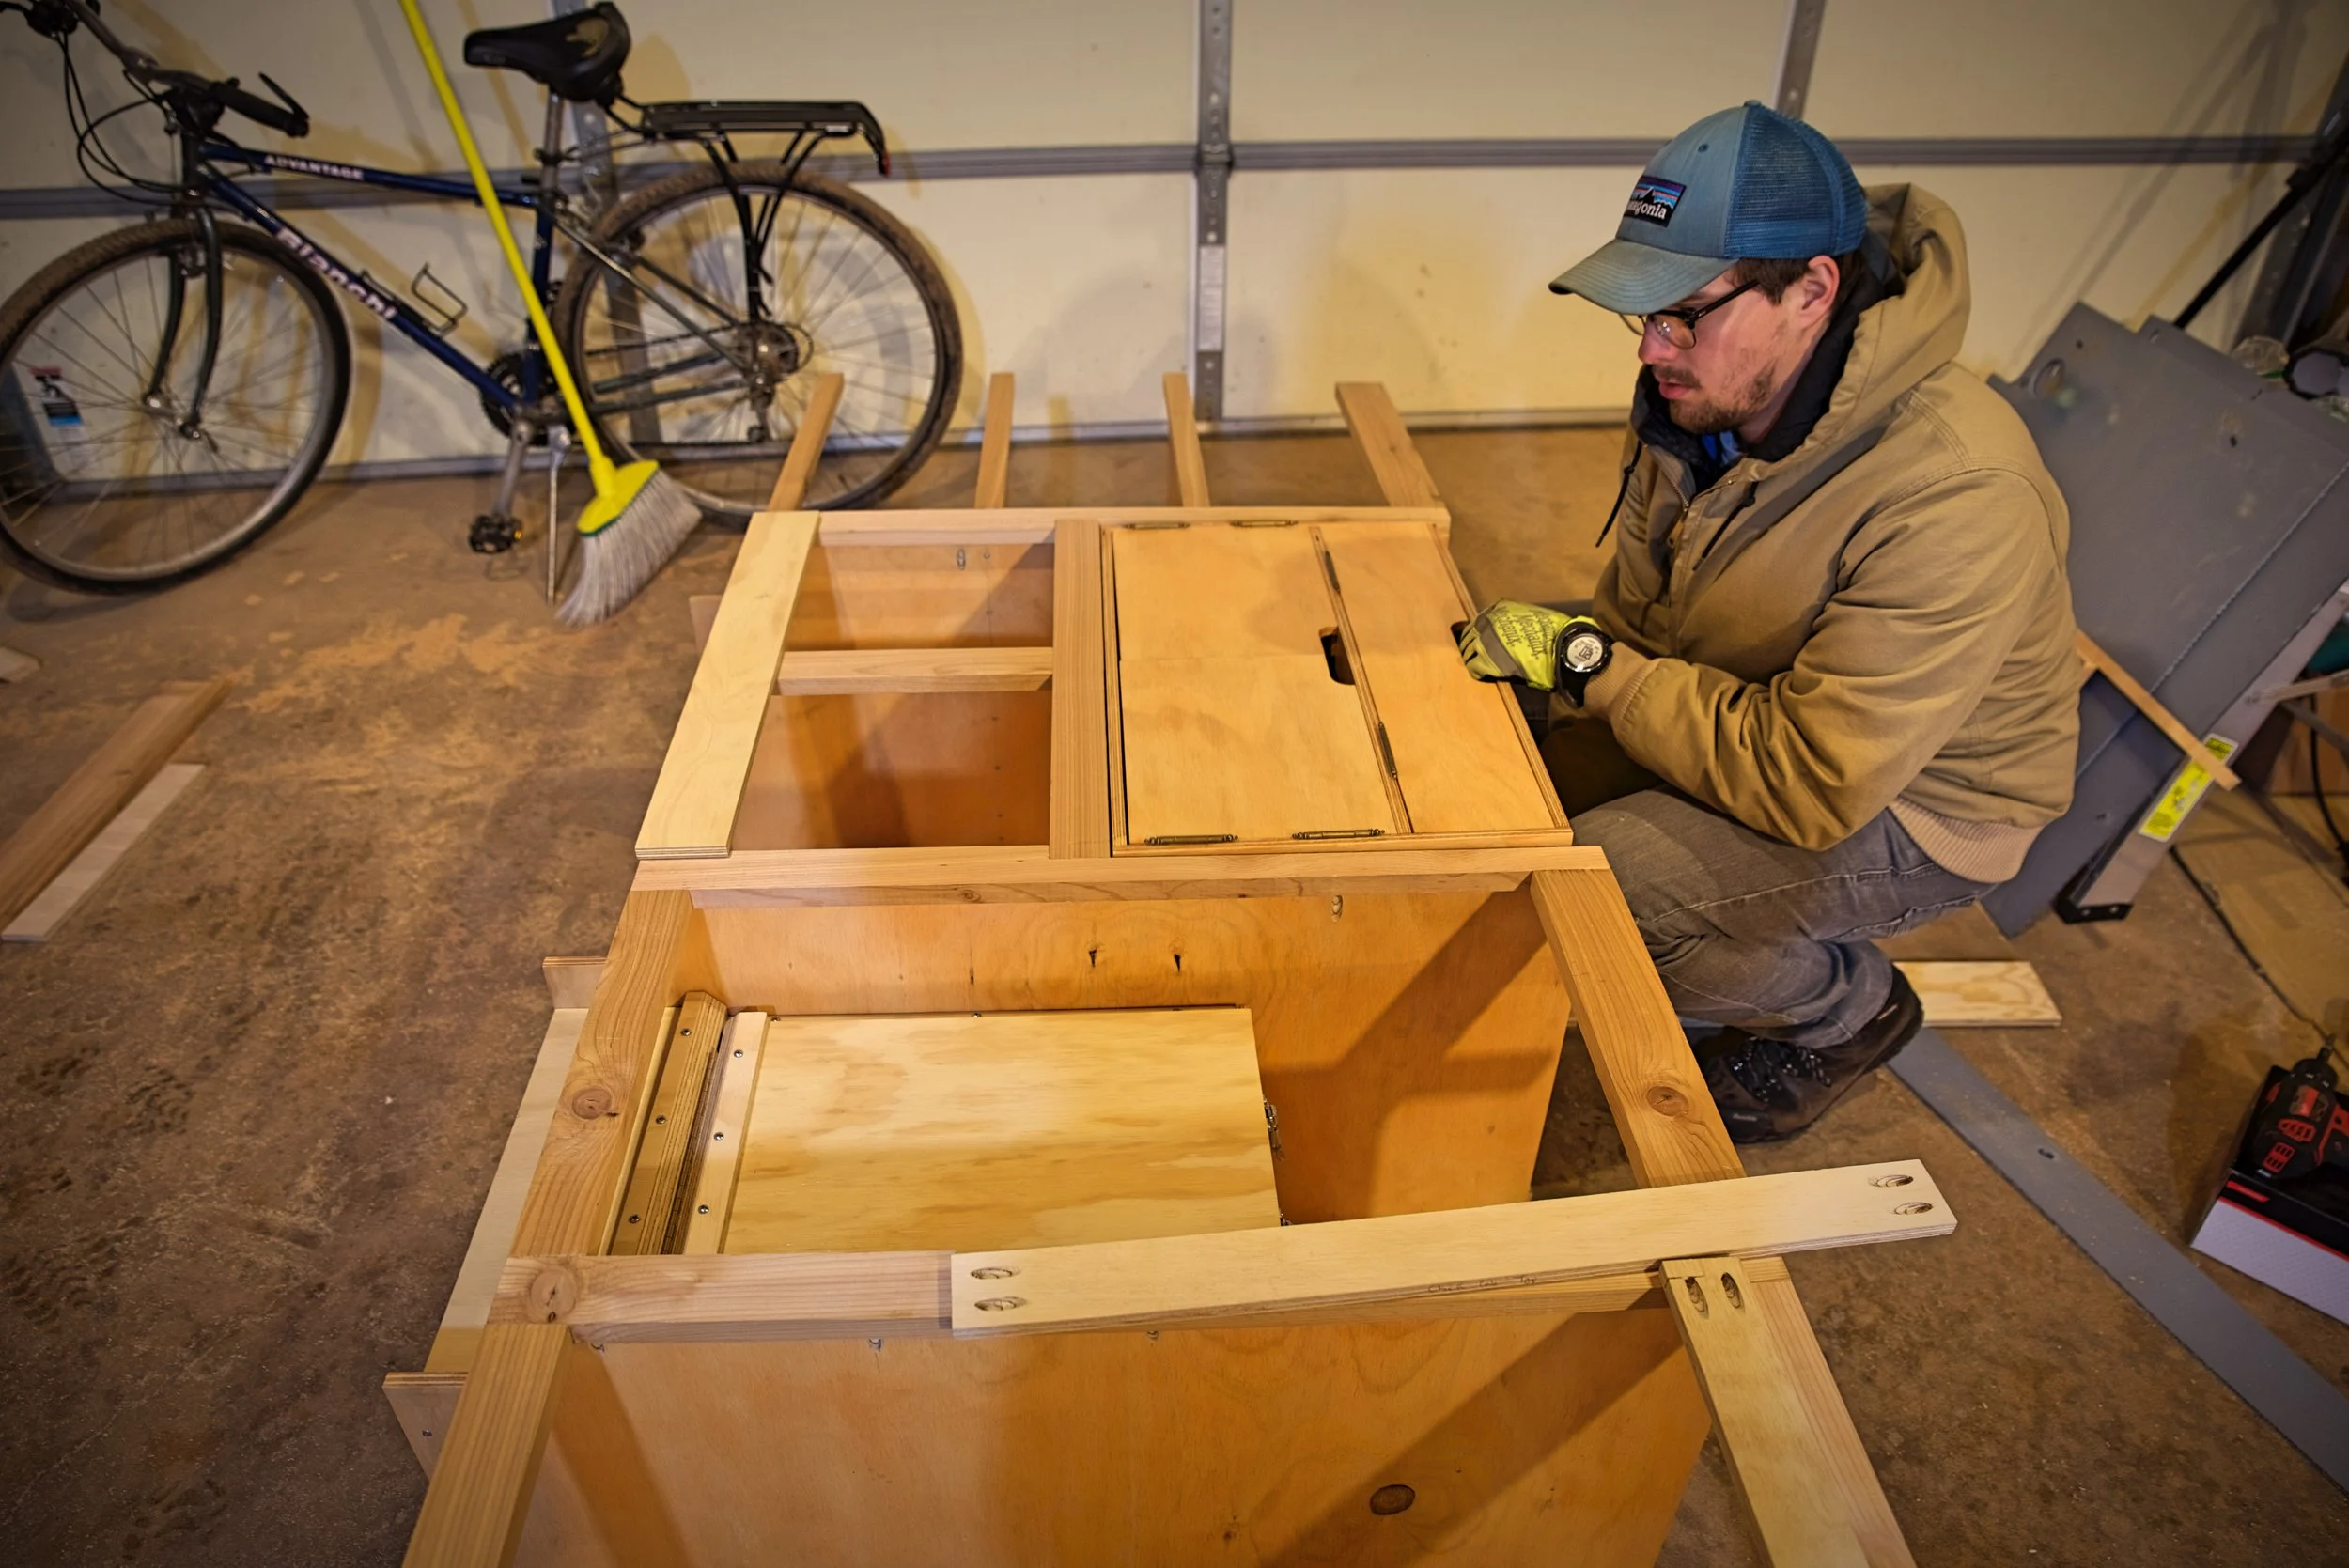
We built three modules of cabinet cases so that we could easily move it into the van. The sink cabinet was one L-shaped case, with one wall and a back. The propane cabinet is another module with two walls and a back. The area that holds the chuck box and the section with three shelves is another module.
To build out cabinets, we screwed the cut and stained pieces together using countersunk screws and a power drill. When screwing plywood together it can get a little tricky, because for one of the pieces you have to screw into the end grain, and it can split easily. If you are screwing into the end grain, it helps to pre-drill a hole for the screw using a countersink drill bit. This will prevent the wood from splitting. In some places we also used some solid scrap wood as a splint to screw into so we didn’t have to screw into end grain.
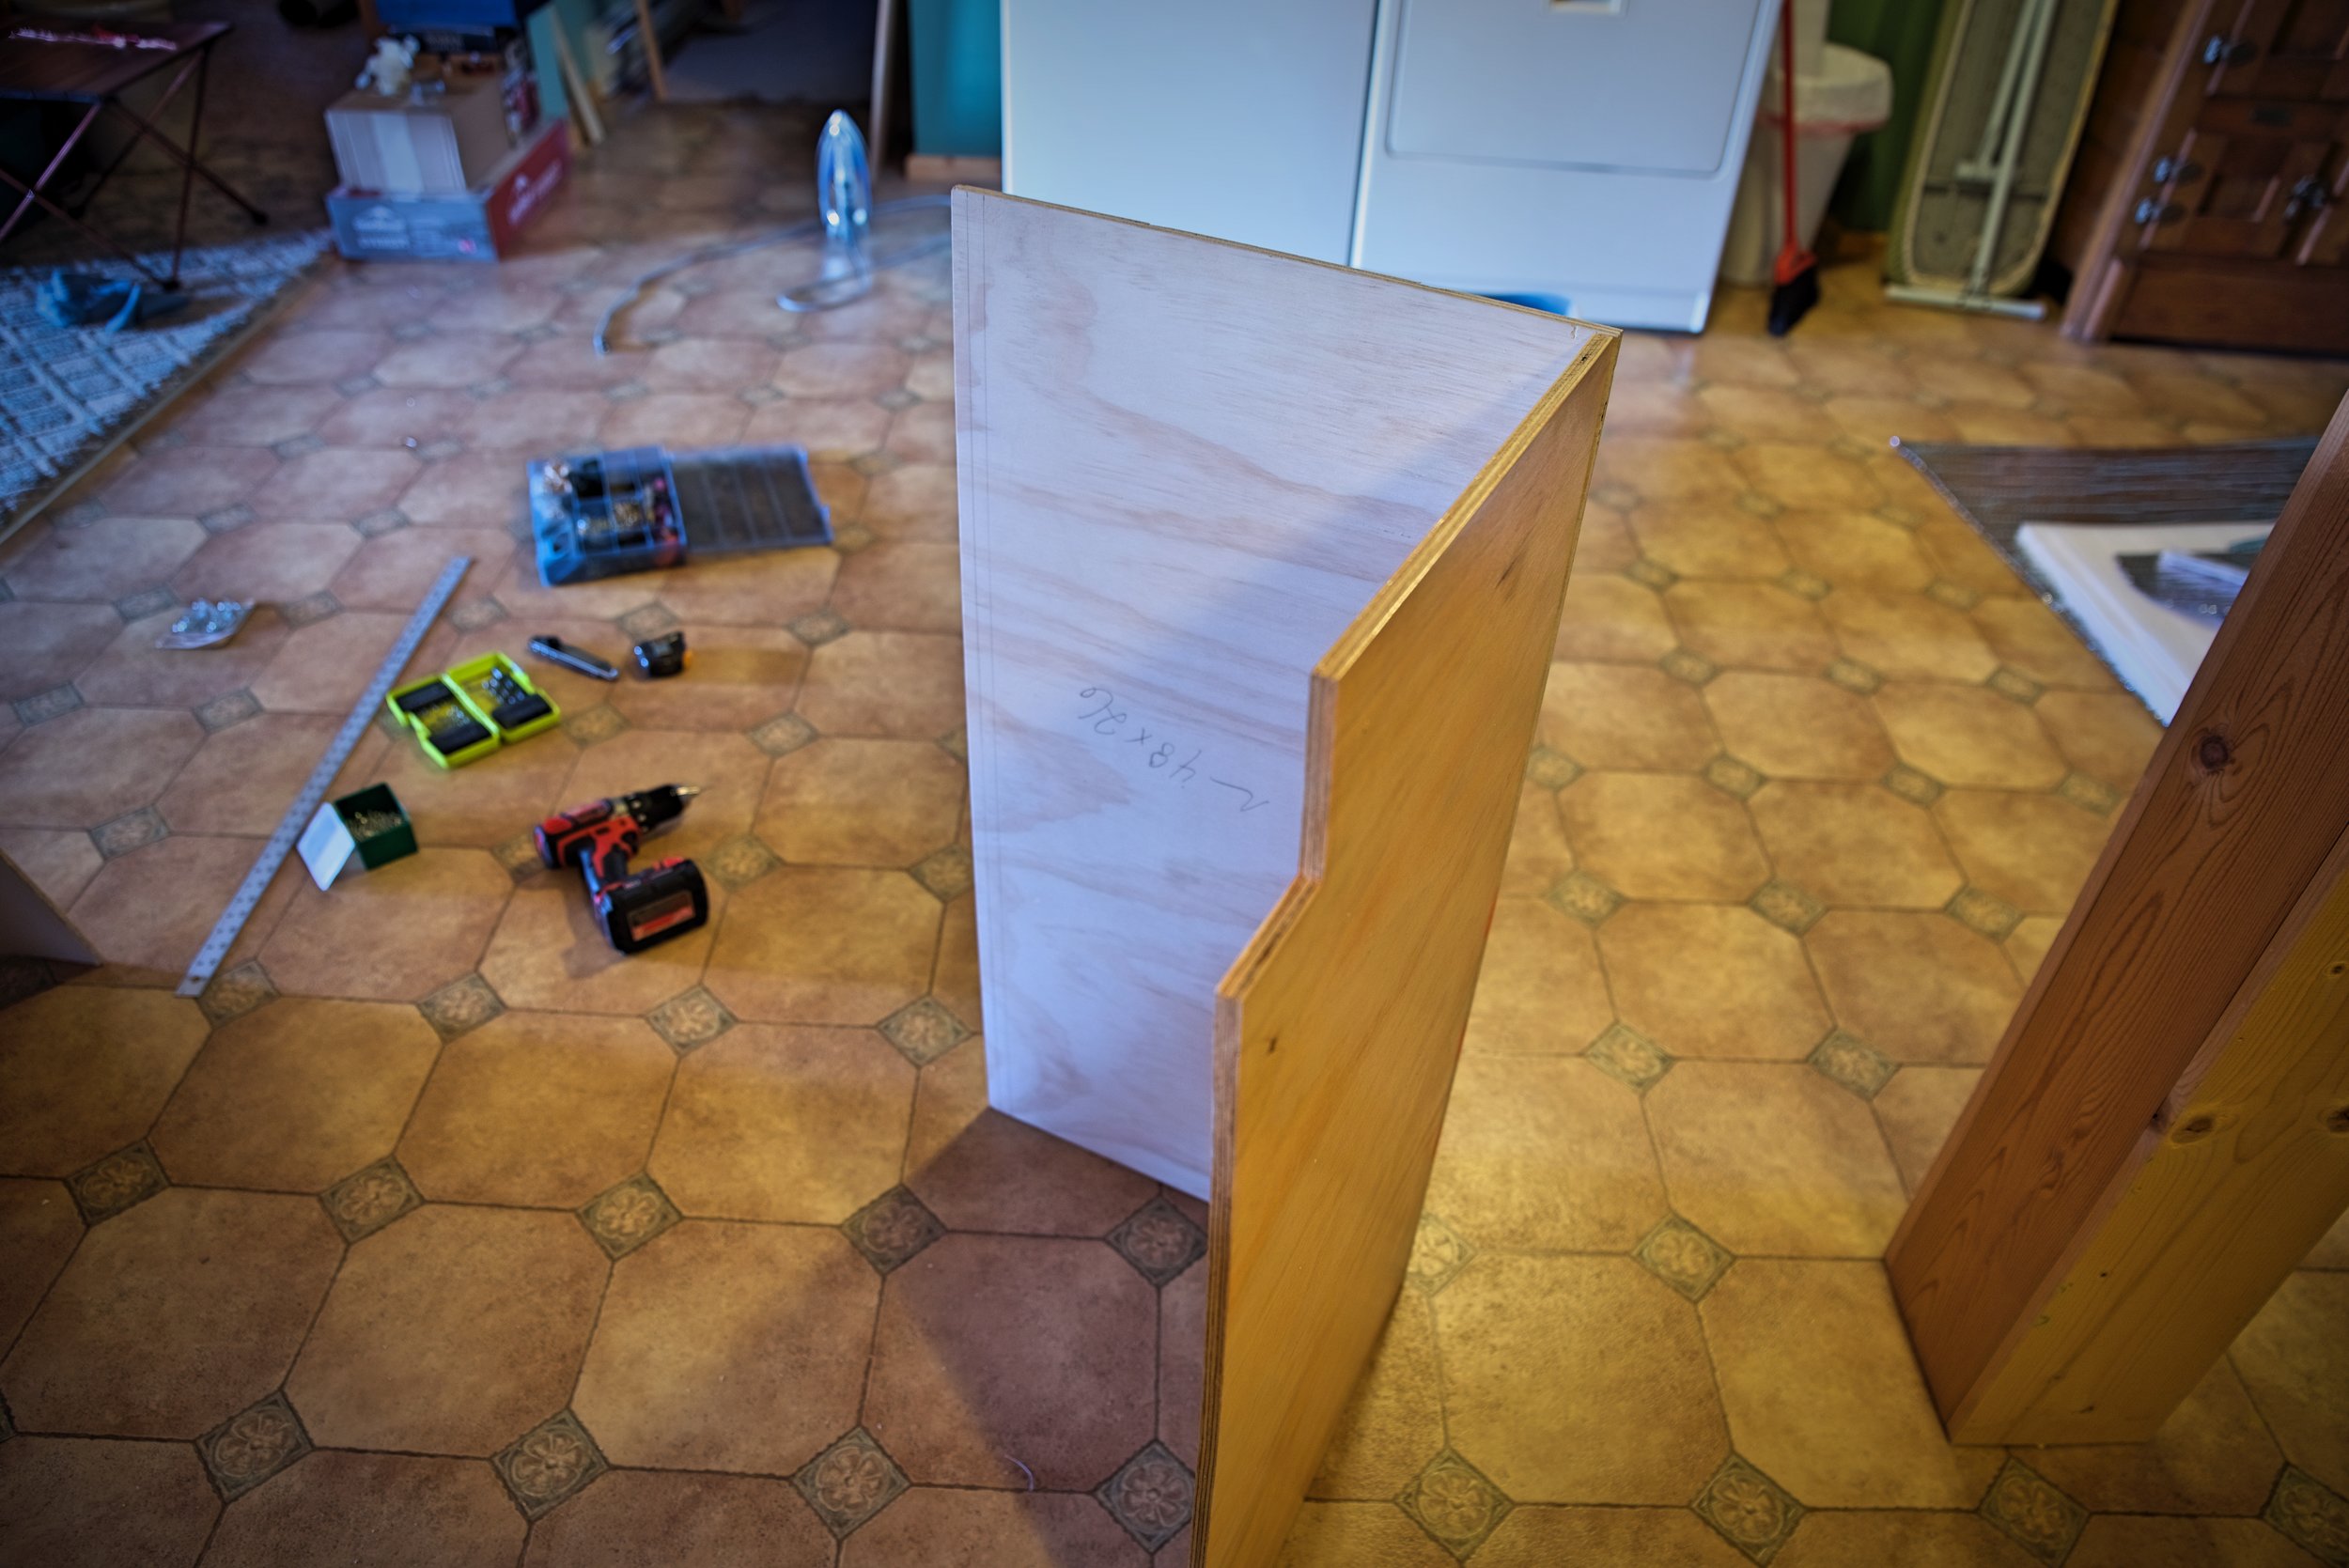
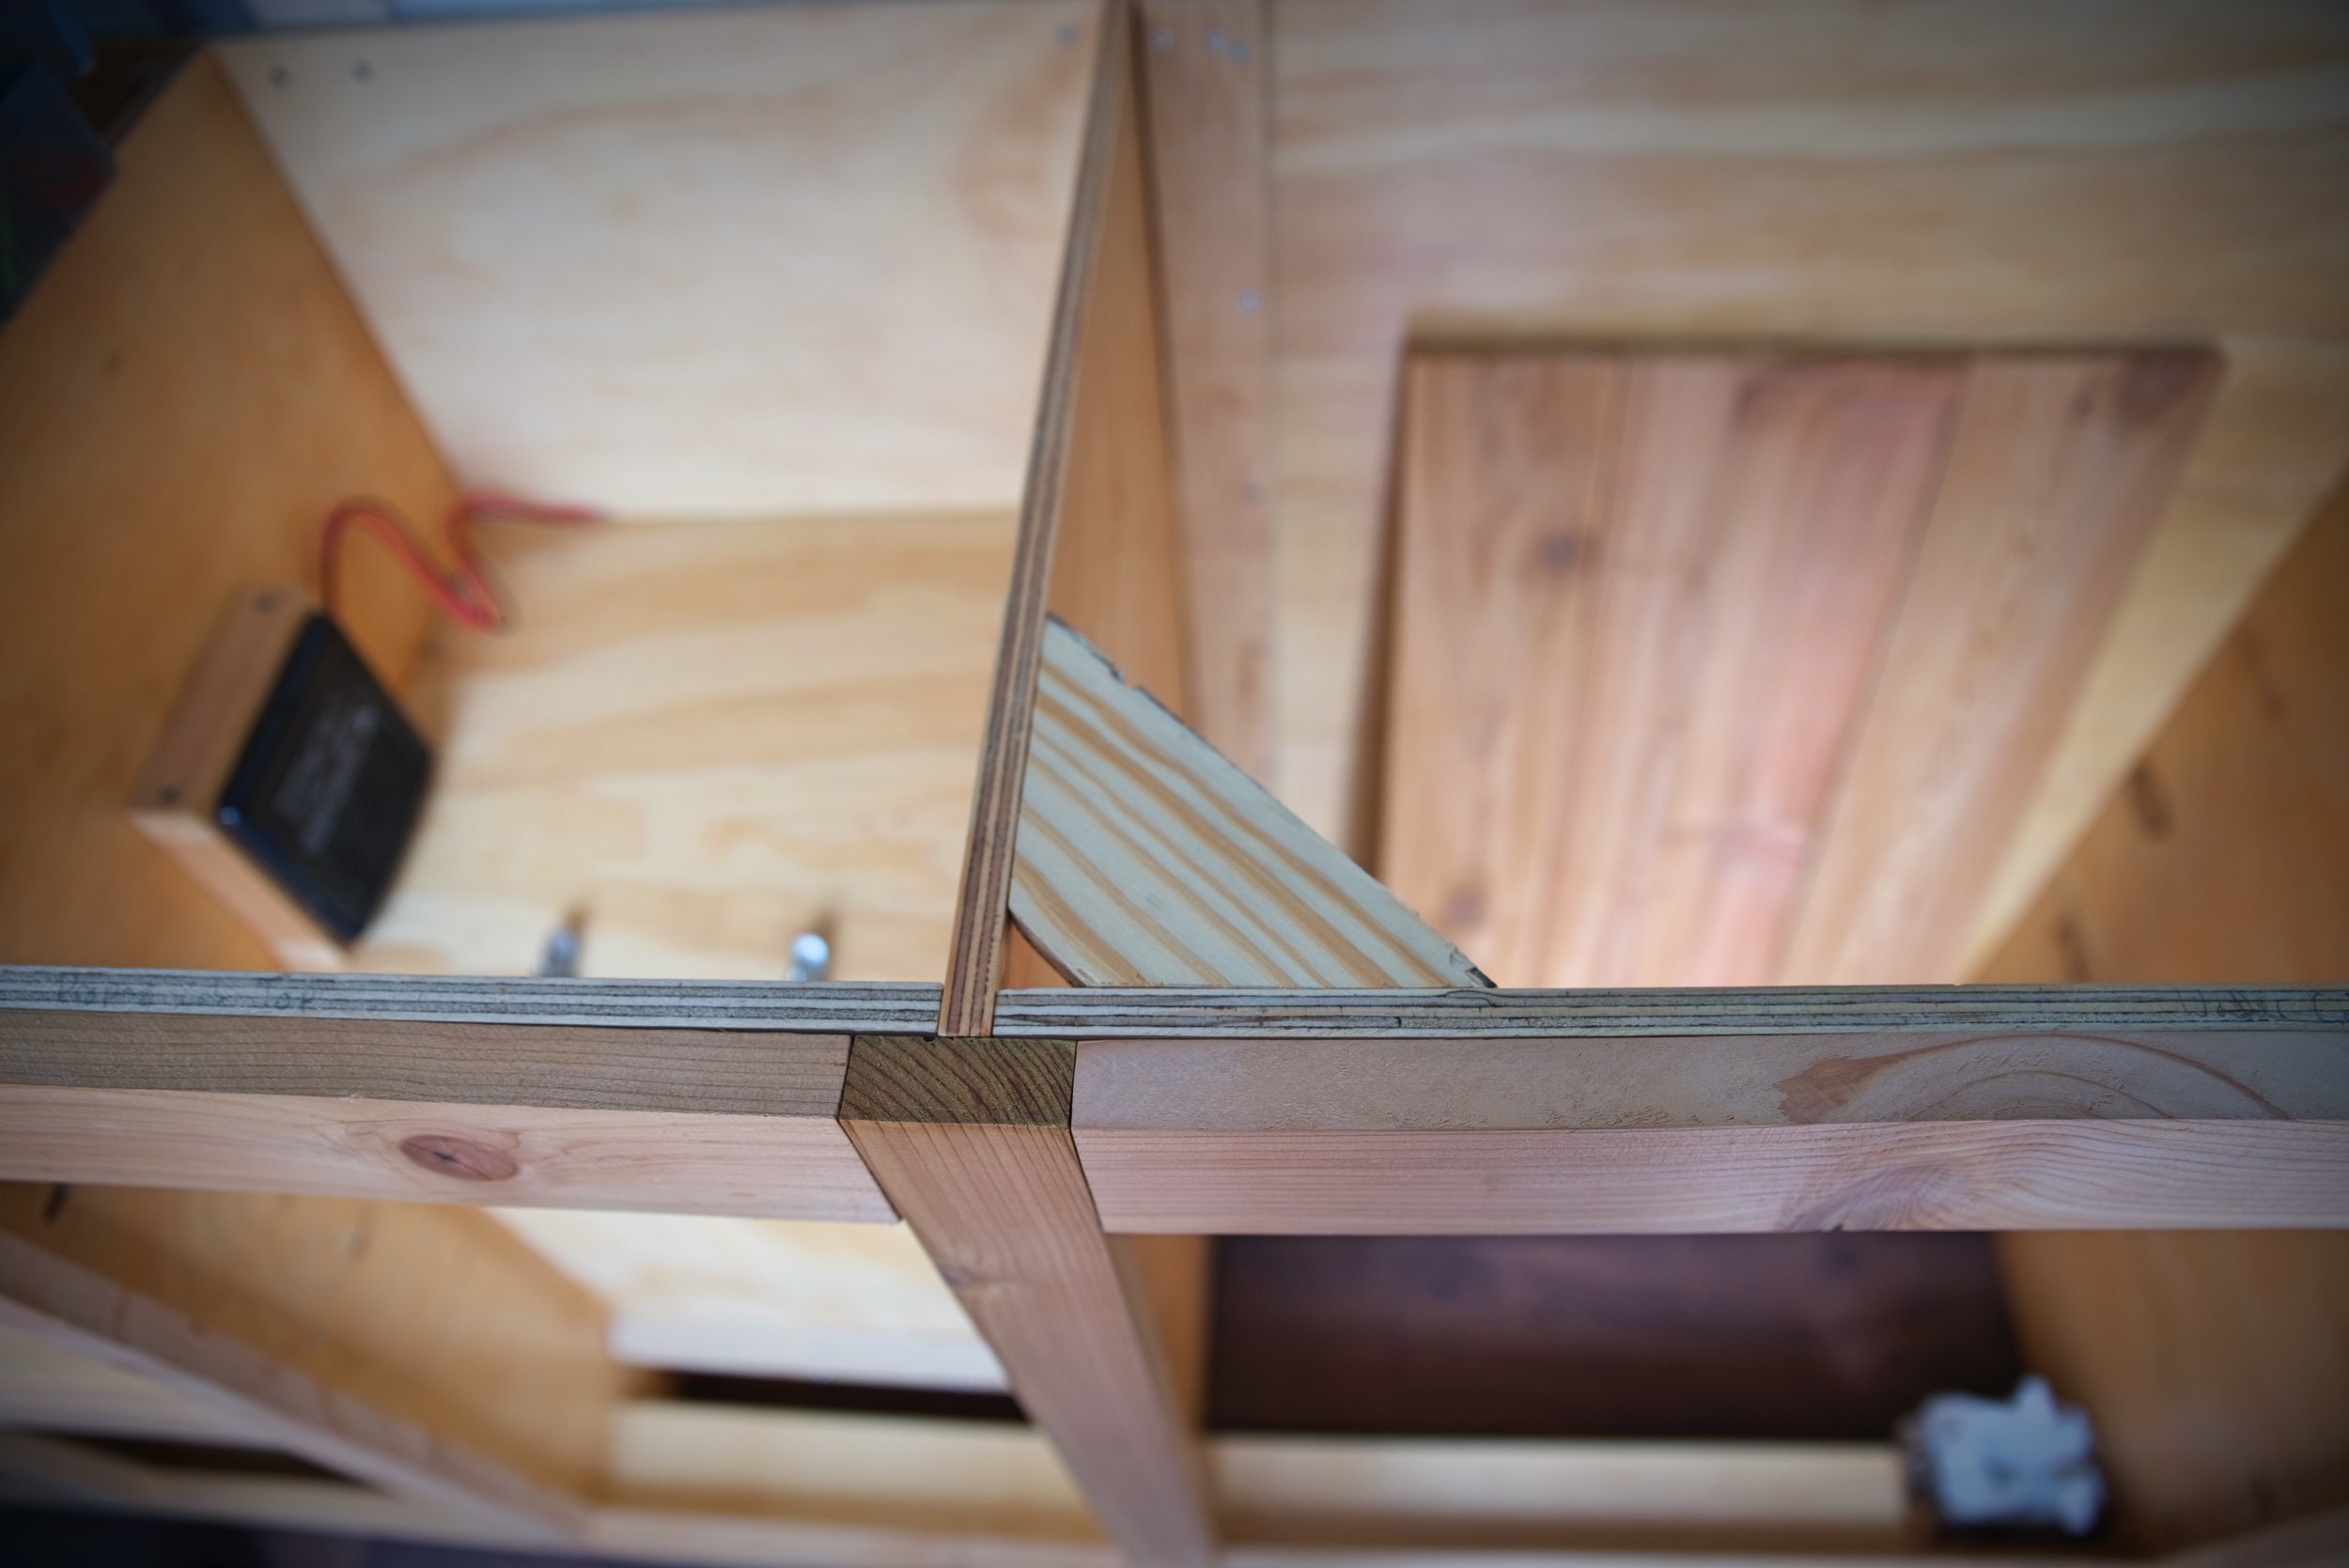
This is the case for the propane cabinet before we installed the propane locker. Pro tip: don’t write giant numbers on the wood so your girlfriend doesn’t have to spend a million hours sanding.

This is a splint of solid wood that we used in the cabinet under the chuck box so that we didn’t have to drill into the end grain.
Our cases are a bit different than the cabinets that you’d find in a house kitchen. Most cabinets would have a bottom and then be built on top of a base. We didn’t want to lose the bottom three inches of space in our cabinets. We have no base, so the finished vinyl floor of our van is the bottom of our cabinets. (See Laying our Flooring for more on our van’s floor.) Because we have no base, we had to build a notch into the cases for our toe kick into our cabinets’ walls.

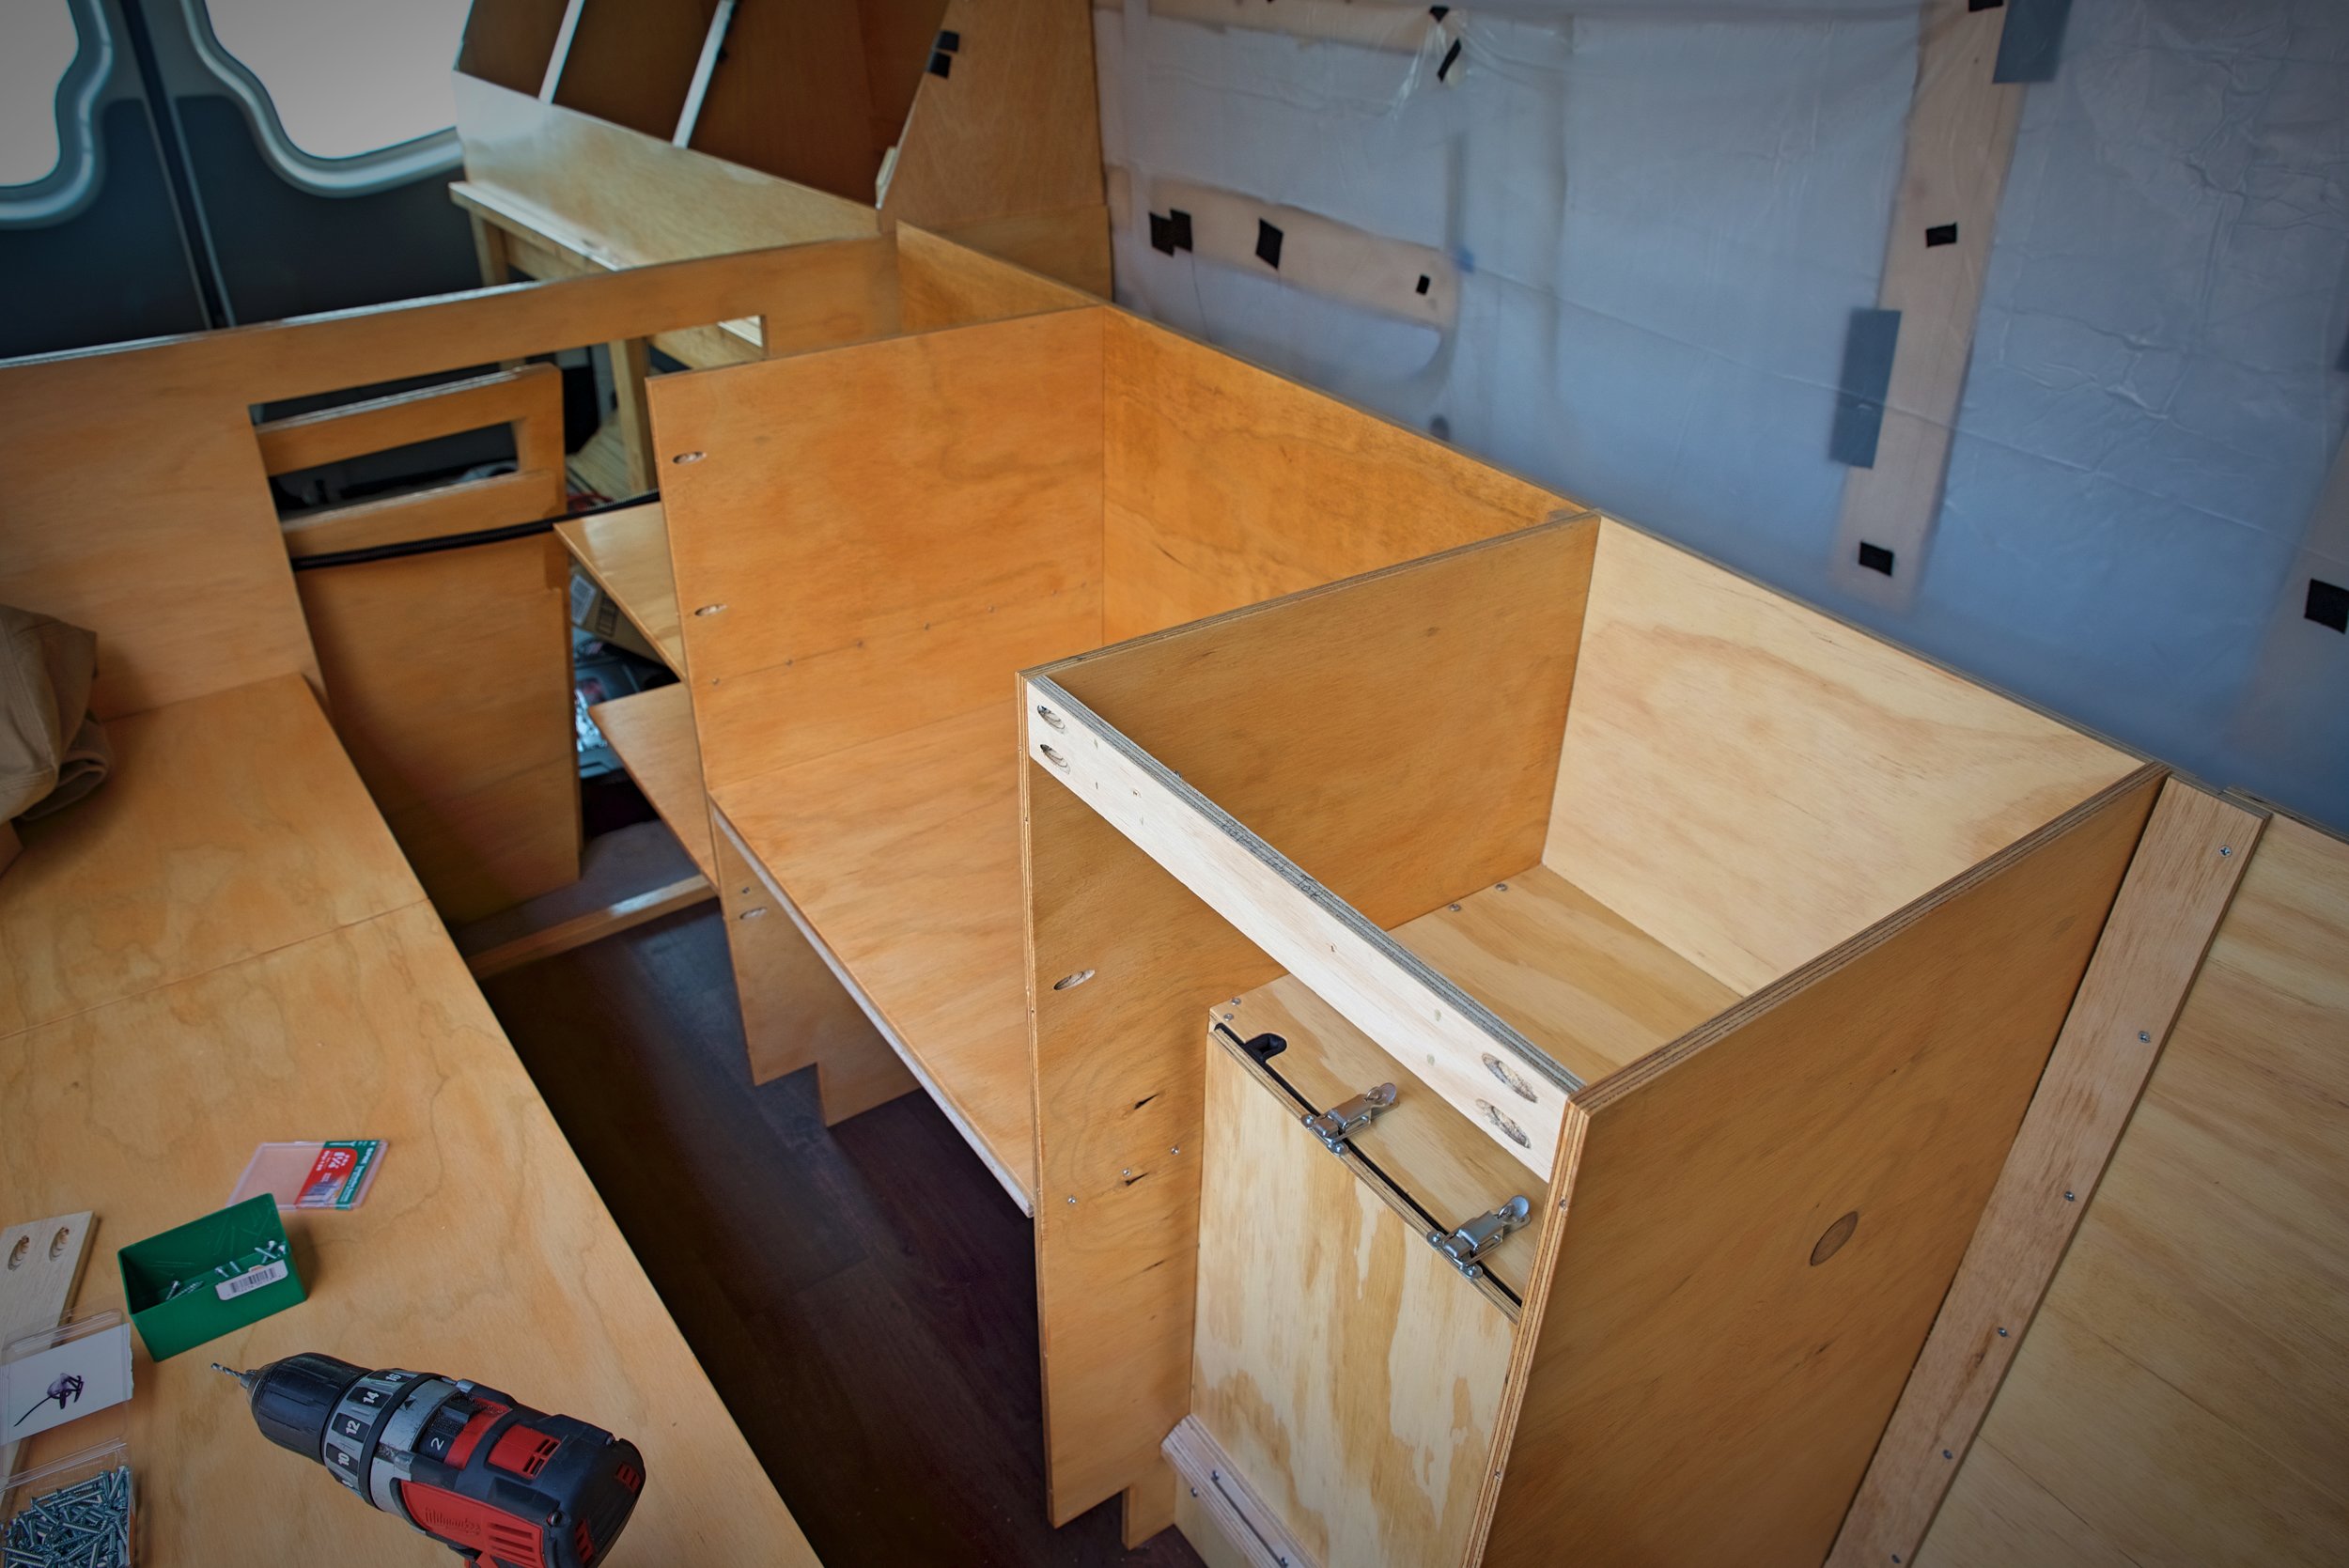
Here are the three separate case modules lined up like they are in the van.
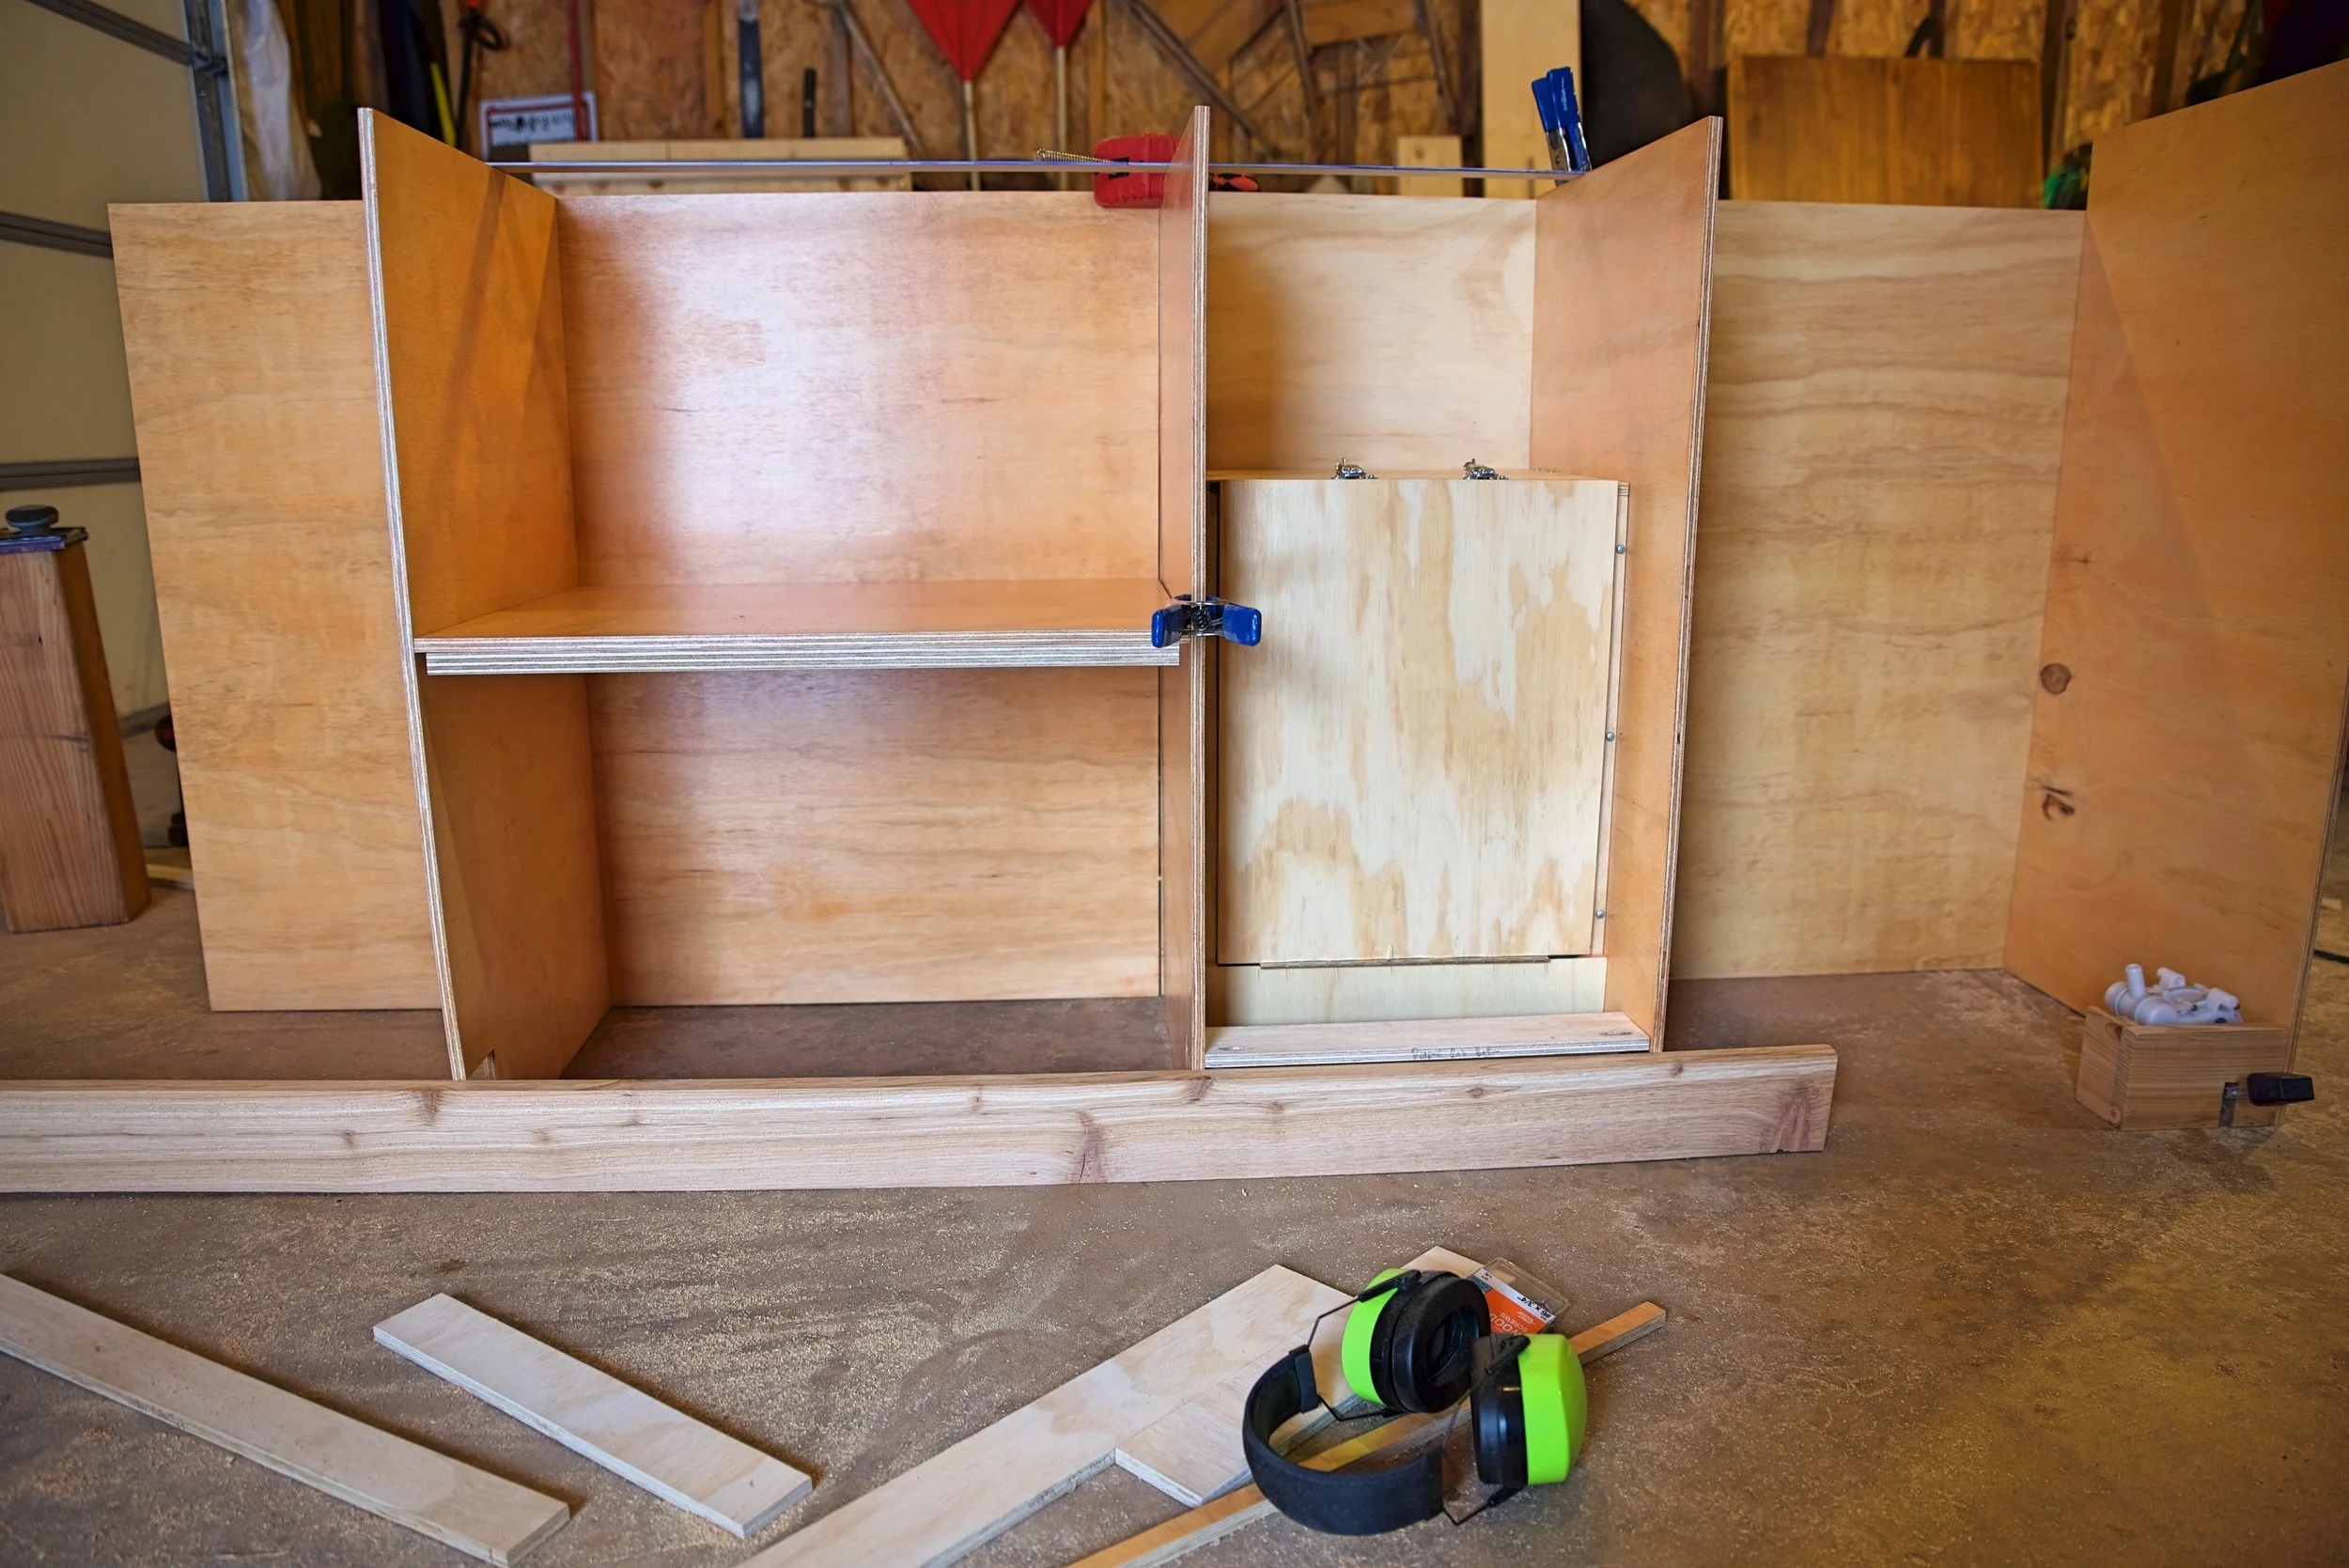
In this photo you can see how the toe kick is built into the cabinets rather than the cabinets sitting atop a hollow base.
When building the cases, corner clamps helped immensely in keeping the cabinets true while we were building them. Some of the pieces of plywood got curved or warped when we finished them with the polyurethane, so the clamps helped us keep them straight while we connected them.

Corner clamps helped us so much when joining 90-degree angles for our cabinetry.

Ian removes a corner clamp after joining the chuck box shelf to the cabinet case.
Building the Face Frame
Our plywood cabinets have an attractive cedar face frame that matches our cedar walls and the cedar cabinet doors. The face frame allows us to mount the cabinet doors and hides and conceals the gaps between and around cabinet doors. The solid frame gives the plywood cabinets a much more finished feel. The face frame also provides a small lip on our shelves so our baskets don’t slide out while driving.

Ian cuts a piece of cedar to the right length for our face frame using his circular saw.

Here is the finished face frame laid out in front of the cabinet cases.
The face frame is 2” wide. Since the plywood is 1/2” wide, the frame sticks out 3/4” on either side of the plywood. The only exception to this is on the basket shelves where the frame is only 1-1/2” wide, because we didn’t want to limit the height of the baskets by losing a lot of space on the openings of the shelves. Around the chuck box the frame is 1-1/4” wide because we couldn’t have a lip on the chuck box area or we wouldn’t be be able to slide the chuck box in and out. We don’t have anything restraining the chuck box in the cabinetry. It’s weight and the friction of the box keeps it in place. Even while driving on some extremely rough roads through Alaska, we never had the chuck box shift more than an inch.
Ian test fits the chuck box to make sure that we had built everything correctly.

Here the face frame is resting on top of the cases for the cabinetry. We installed the face frame inside the van.
Building the face frame involved a lot of ripping cedar planks into 2” strips. Having a fence attachment for our circular saw to rip wood in precise widths was a huge help.
To join the face frame we used a pocket hole jig to make pocket holes. Pocket holes are common for joining cabinetry, because they allow the screw to go into the wood at an angle with the screw head hidden inside a small pocket. Inside the pocket hole we used 3/4” pan head screws.
When screwing the pieces of the face frame together, it helps to either have two people to help hold the pieces in place or to clamp the pieces to the table so they stay flush.

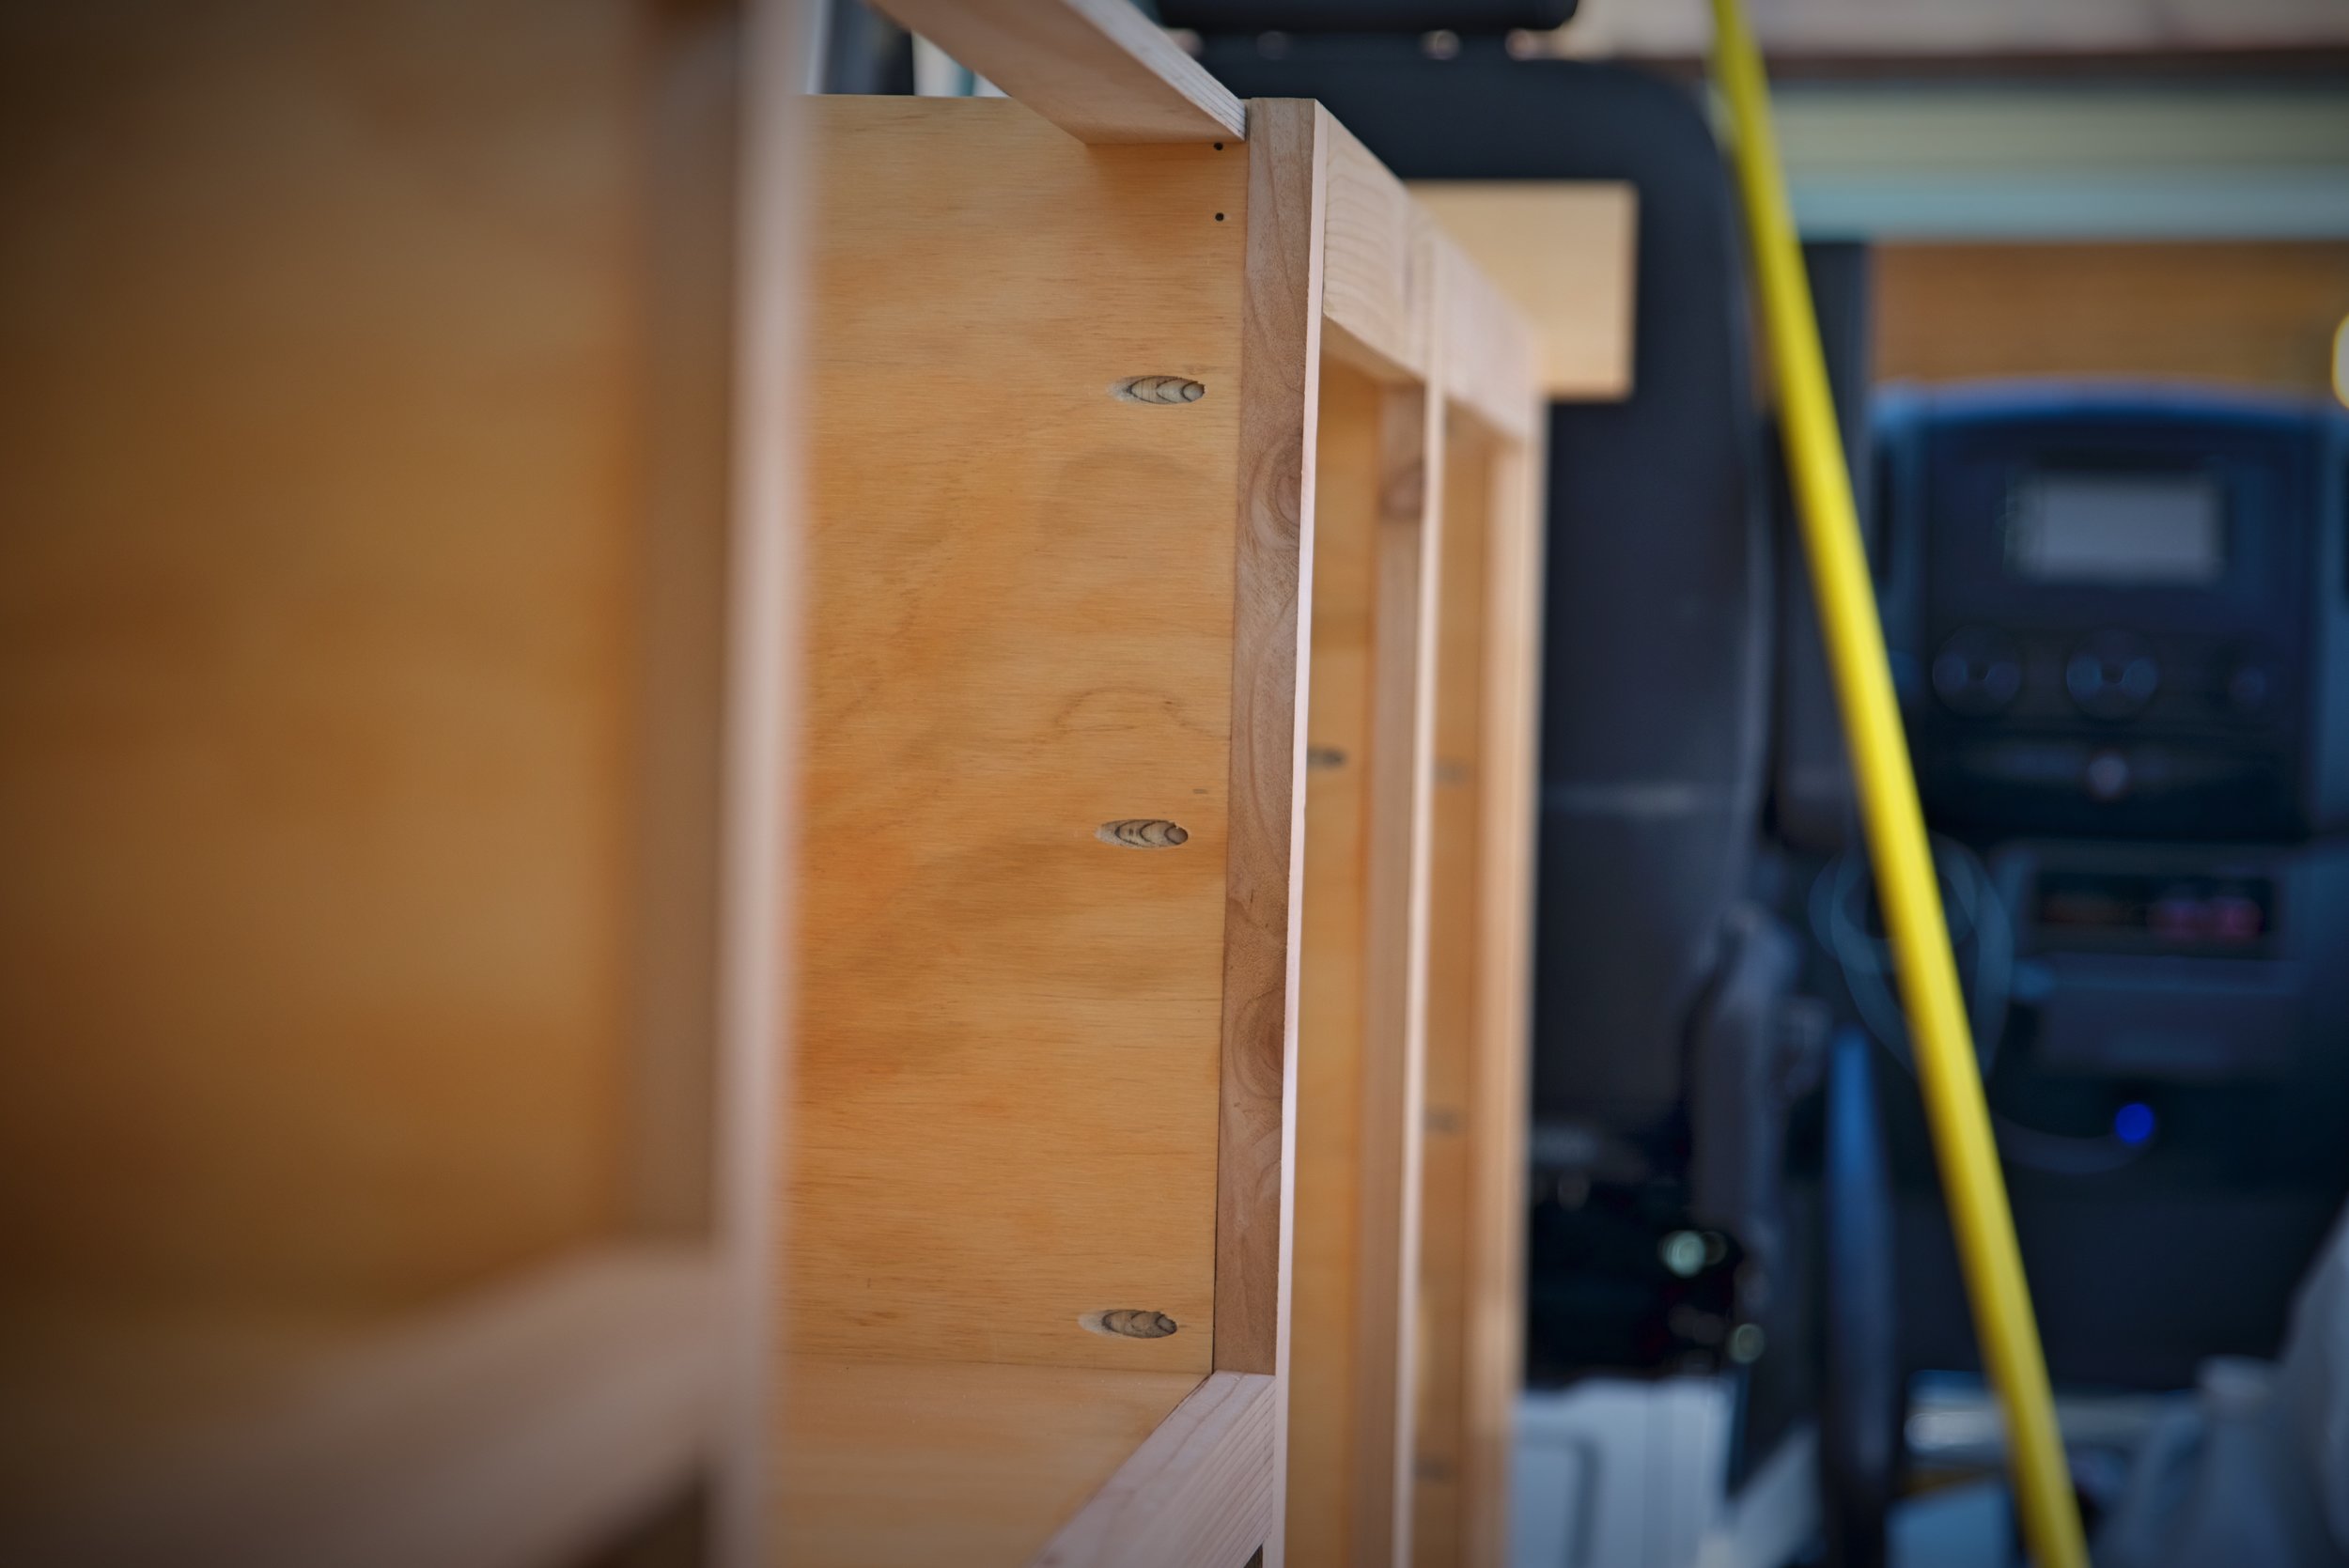
We joined the face frame using these pocket holes on the back rough-cut side of the frame.

Eventually the frame would be joined to the cabinet cases using the pre-drilled pocket holes you can see all over this photo.
Unlike the cases, we built the frame in one piece and then moved it into the van when we weren’t ready to attach it to the cabinets. With the pocket holes, the wood was kind of thin in some places so we had to be very careful when we moved it into the van.
Installing the Cabinets in the Van
When we were ready to install the cabinets in the van, we moved the three cases into the van. We first connected the cases to each other. We used splints and braces to connect the backs of the cabinets to each other so it was all one unit. The braces lay on top of the backs of two cabinets and then we just connected both cabinet backs by screwing through that one piece.
In this photo you can see how the cabinets were connected using a brace that joins the backs of the two cases.

It would have been impossible to move this cabinetry into the van if it were built as one unit.
Once the cabinets were all one module we moved it into place against the wall. Since the wall is angled, we had to use a speed square to make sure the cabinets were square with the floor rather than flush to the wall. The walls of the van curve inward, so the top of the cabinets are against the wall, but there’s a small space between the back of the cabinets and the van wall at the bottom. We secured the cabinets to the wall using studs that we had installed in our van walls prior to insulating. (For more on the studs, see “Framing the Van.” For more on our insulation, check out “Insulating the Van.”)

These braces further connect the cabinets to each other and helps keep them square.

The braces on the tops give us something to attach the face frame too as well.

Ian screws a screw into one of the pocket holes to attach a brace.
After the cabinets were in place we screwed 2” wide braces of plywood in the top front of the cabinets using pocket holes. These braces helped keep the cabinets square and connect them to each other. We mounted the face frame to these braces as well.
Besides these braces, we also have braces on the bottoms of the cabinets. These braces are also the top of the toe kick. We attached these pieces to the frame prior to moving it to the van because it was a lot easier to work in the garage than in the van. We attached the pieces to the frame with pocket holes and we pre-drilled pocket holes to attach them to the cabinet walls. We put all the holes facing toward the floor so they wouldn’t be exposed inside the cupboard.

These bottom braces connect the cabinet cases to each other and this is also the top of the toe kick.

We attached the braces to the frame first so that we wouldn’t have to lay on the floor of the van to attach them. We even screwed the screws that would be screwed into the cabinet walls most of the way in while it was still in the garage.
Attaching the Face Frame
With the top of the toe kick attached to the frame, we moved the face frame into the van. We pre-drilled all the pocket holes in the walls of the cabinets for attaching the face frame. So it was pretty easy to attach the frame once it was in the van.

We had to be fairly careful when we were moving the frame into the van, because it was a bit delicate.

Attaching the frame wasn’t very difficult because we had already drilled all the pocket holes we need to attach it.
We got the frame lined up, and we clamped and held it in place. We attached the top of the toe kick to the walls of the cabinets. We then joined the face frame to the walls by screwing a pan head screw into the pocket holes and by screwing straight through the top brace straight into the frame from inside of the cabinets.
There is no lip on the frame around the space for the chuck box.
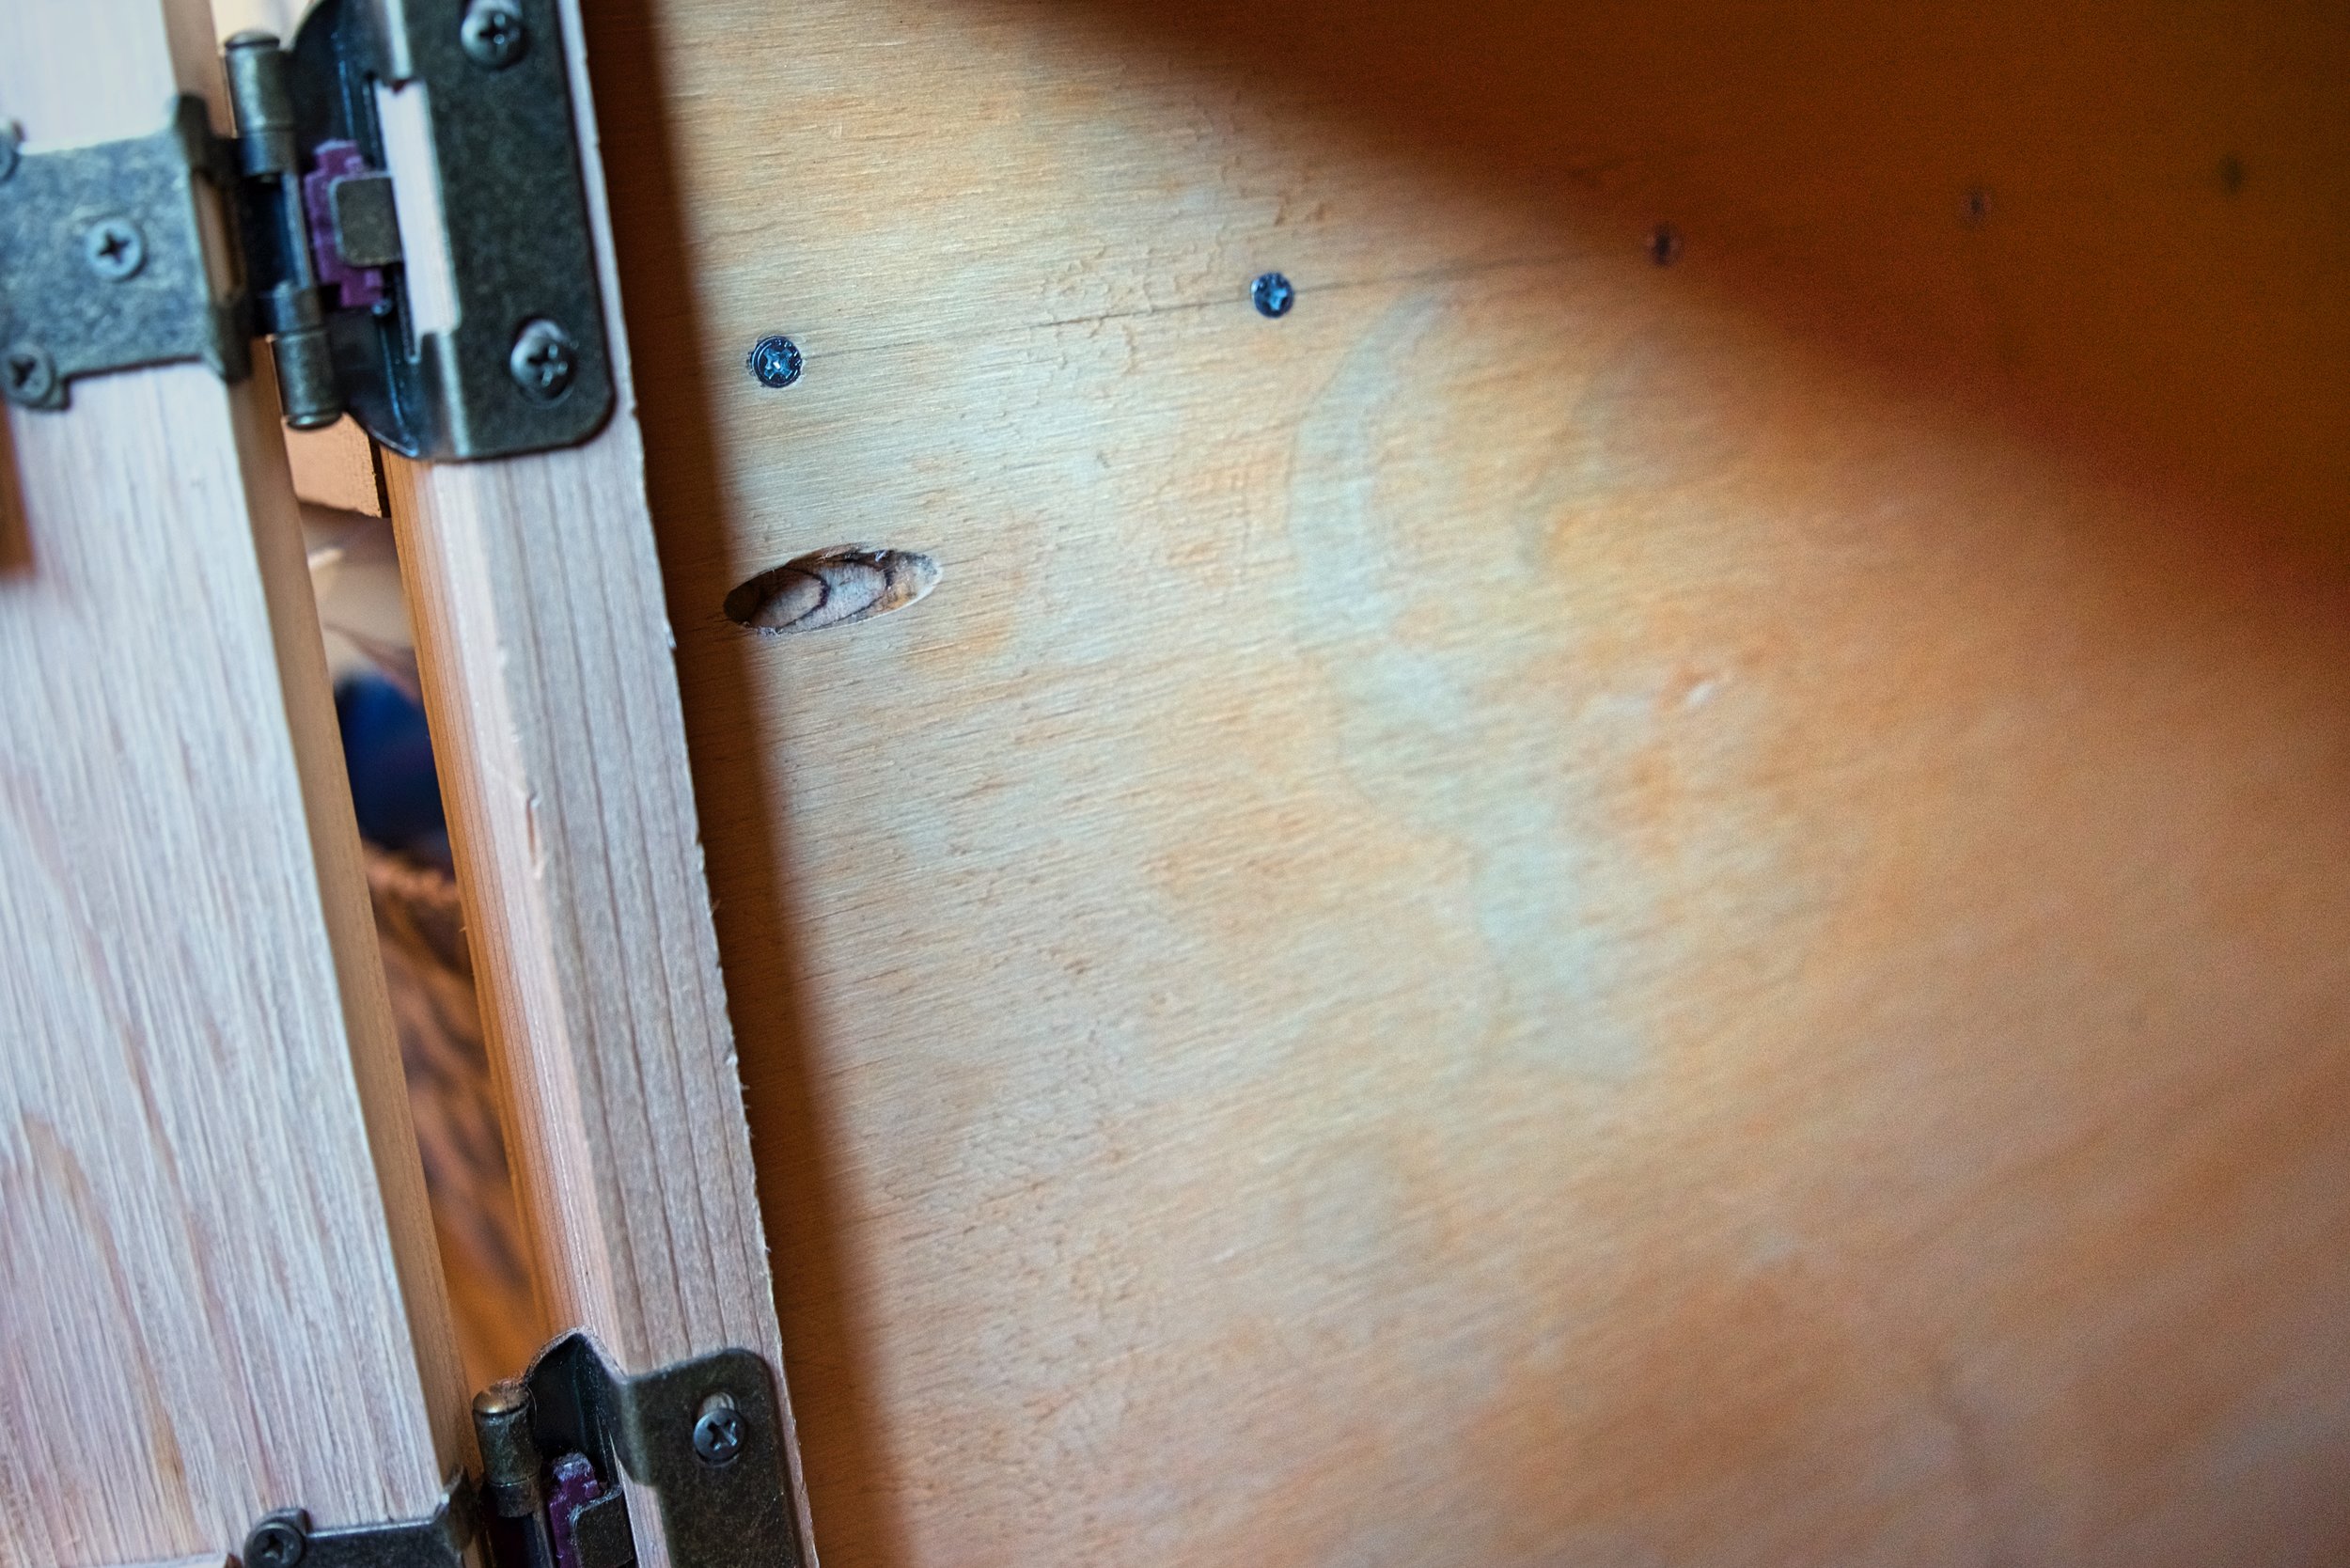
Here is one of the pocket holes that we used extensively throughout this build.

The pocket holes allow you to hide your screws rather than going in through the front of the frame.
Adding the Toe Kick
After attaching the face frame, we added the toe kick. It’s a single long piece of cedar board. Our toe kick is the standard 3-1/2” tall by 3-1/2” deep. We are so happy that we included the toe kick element in our cabinets even though it added quite a bit of extra cutting and joining to the woodworking. It makes the cabinets look a little more like those you’d find in a house and it makes working at the counter much more natural, because as it’s name implies you can stick your toes under the cupboards.

In this photo you can see the toe kick board prior to its installation.

Here is a picture of the removable face plate that hides our galley foot pump for our sink. Also this kind of looks like a Milwaukee advertisement…
To accommodate the foot pump for our water system we had to build a small cover to hide the pump. In order to be able to use the pedal well, we had to place the pump a few inches out from the toe kick. We built a wooden cover plate that’s removable and that can be pulled out from the top. If we ever have to repair or replace our pump we will only have to remove this cover plate rather than the entire toe kick.

The ugly white plastic pump is hidden within the toe kick of our cabinetry.

If we ever need to remove our pump, it will be as easy as taking this little cover plate out, rather than disassembling the cabinetry.
Simple Cabinet Doors
We decided to go with a very simple style of door for our cabinets in our van—plank and brace doors. The doors are made from vertical strips of cedar in varying widths. We intentionally picked random widths and had no particular order for the boards since the cabinet doors needed to be all different sizes. We ripped all the the pieces down using our circular saw and fence.
The water cabinet has two doors that mate up against each other in the middle. We couldn’t have a center bar on the frame for this cabinet, because we wouldn’t be able to get the water jugs in and out with that obstruction. The propane cabinet only has one door. The storage cabinet under our chuck box has two doors with a center frame bar in the middle, so the doors do not mate up with each other in the middle.

Ian cuts a piece of wood for the cedar plank and brace cabinet doors.

Here all the pieces of the cabinet doors ready to be joined together.

We tried to arrange the planks in a way that the varied widths looked somewhat random. The cedar is reclaimed so it has some knicks and some scratches in it.
We connected the different sized cedar planks with scrap pieces of 1/2” plywood on the back for the cross braces. We used a 3/4” countersunk screws to attach the plywood to the cedar. These cabinet doors were really easy to make, and we were pleased with how they look and match our cedar walls.

These plywood braces hold our plank cabinet doors together.

We made sure to attach each plank to each brace using at least two screws.
We chose a nice brushed brass finish for all of our hardware and hinges. There are many different types of cabinet hinges, so you have to pick ones that will work with your cabinetry. This is an excellent article that shows the different types of cabinet hinges. Ours are partial wrap-around, overlay hinges. The doors sit on top of the frame and the hinge mounts to the inside of the frame and the back of the door. They are mostly concealed, except for the knuckle. This type of hinge doesn’t require any mortising, which we did not want to meddle with.
Inlay, or European cabinet doors, where the door sits inside the frame, are very stylish. Overlay cabinet doors are a little bit easier to build though because the woodworking doesn’t need to be quite so precise. With inlay doors if you don’t hang the door perfectly straight, that imperfection will be very visible in the gap between the frame and the door. With overlay cabinet doors minor problems are hidden because the door is on top of the frame. Our doors overlap the cabinet frame by a half inch all the way around.
Hanging the doors was not too difficult. We attached hinges where we wanted them on the doors first. Once the hinges were attached we held the where we wanted to mount them and traced the holes for the screw. From there we pre-drilled a hole using a bit smaller than the screw, which allowed us to drive the screws very straight into the frame. From there, hanging the doors was really easy, although it does help to have two people, one to hold the door, and the other to drill and screw.

This photo shows our roller catches and our antique brass finish hinges.

Since nothing inside our doors are pressing against them while we drive we only needed these very minimal catches to keep them closed.
The other hardware on our cabinetry are our catches. Since our cabinets have to endure a lot more movement and vibration than a house’s cabinets would have to endure, we needed a way to keep ours cabinet doors closed while on the road. Fortunately, the toe kick of our cabinets prevent things from sliding forward into the doors while driving and knocking them open, so we didn’t need anything too strong. We picked a cheap double roller catch that provides just enough hold to keep the cabinet doors closed. On our chuck box where there is no lip to hold the items in place, we used a more solid hook and staple latch.
We intentionally did not add any door pulls or knobs to the cabinet doors. The van is such a tight space compared to a typical kitchen. We didn’t want to be catching our belt loops or our clothing on these knobs while we were walking through the van. It’s easy enough to just use the tips of your fingers to pull the top of the cabinet door open, and we like the simple clean look of the doors without handles or knobs.

The hinges we picked are mostly hidden, so they have a very low, minimal profile on our cabinetry.

Under our chuck box we have a large storage area for things like our tea kettle and water bottles.
Cutting and Installing the Countertop
The final step of our our cabinet build was to add the countertop. Initially we wanted to create our own wood countertop with pieces of solid wood laminated into one large piece, but we soon realized that would be a lot of work and that buying and modifying a premade countertop would be a lot easier and cheaper. Plus finding a food-safe wood finish that is also durable was proving to be more challenging and expensive than expected.
We picked an affordable black, faux slate laminate countertop from Menard’s (the much-better than Home Depot home improvement store of the Midwest). It was only $43. The dark countertop breaks up the cedar in our van so it’s not too monotonous, and the slate pattern hides scratches well.

Cutting the countertop with just one hand! (just kidding, I was only preventing the saw from falling onto the garage floor.) The board clamped to the counter helped guide the cut.
Standard countertops are 25.5” deep, but our cabinetry is only 20” deep, meaning we had to cut the backsplash and about 4” off the entire length of the countertop. We started by cutting the counter to the correct width, because we figured it would be easier to cut the countertop to the right length with the backsplash removed. To cut it, we began by flipping the countertop over, padding the saw horses with foam to prevent scratching the laminate. The top edge of the cut with the circular saw splinters, and we wanted to avoid chipping the laminate surface. We measured the width we needed at six different points along the length of the counter, and then connected these points with a straight edge. Along the cutting line on the laminate top side, we ran a strip of wide masking tape. The tape prevents cracks or chips from forming in the laminate while you are cutting.
To get a precise and straight cut on the counter, we used a very straight board clamped to the counter as a guide. Move the circular saw very slowly while cutting to avoid excess chipping or getting off the line you’ve drawn. Remember to account for the kerf, which is the width of the blade, and always cut on the scrap side of your line. Have someone support the scrap while cutting to avoid ending up with a curved cut and to prevent the laminate from breaking or separating as the weight of the scrap pulls it down.
Ian measures the length needed for the countertop.

This board is the first board in our paneling above the counter, and we used it to make sure we had the right length before cutting our counter.
After cutting the backsplash off the counter, we cut the counter down to the 90” length that we needed. This cut was quite a bit easier than the lengthwise cut. We cut the first piece of paneling that would be right behind the countertop before we cut the countertop. This piece was test fit in the van so we knew we had the length right before we cut the counter to length. In addition to measuring the countertop’s length, we were able to compare this board with the line we had drawn before we made the cut in the countertop, so we knew we had measured correctly. Again we taped the line and cut the countertop with the laminate side down.
The only tricky spot was at the lip on the front edge of the counter. A saw blade depth should ideally be set so that the teeth only extend 1/4” to a 1/2” below the piece being cut. We did most of the cut with the saw blade set at the depth for the countertop. When we got close to the lip, we briefly stopped the cut, pulled the saw out and readjusted the saw’s blade deeper. Then we continued the cut through the lip. We had to hold the saw at an angle to get over the lip, but that worked fine.

Ian using a jig saw to cut the circular hole for our sink.
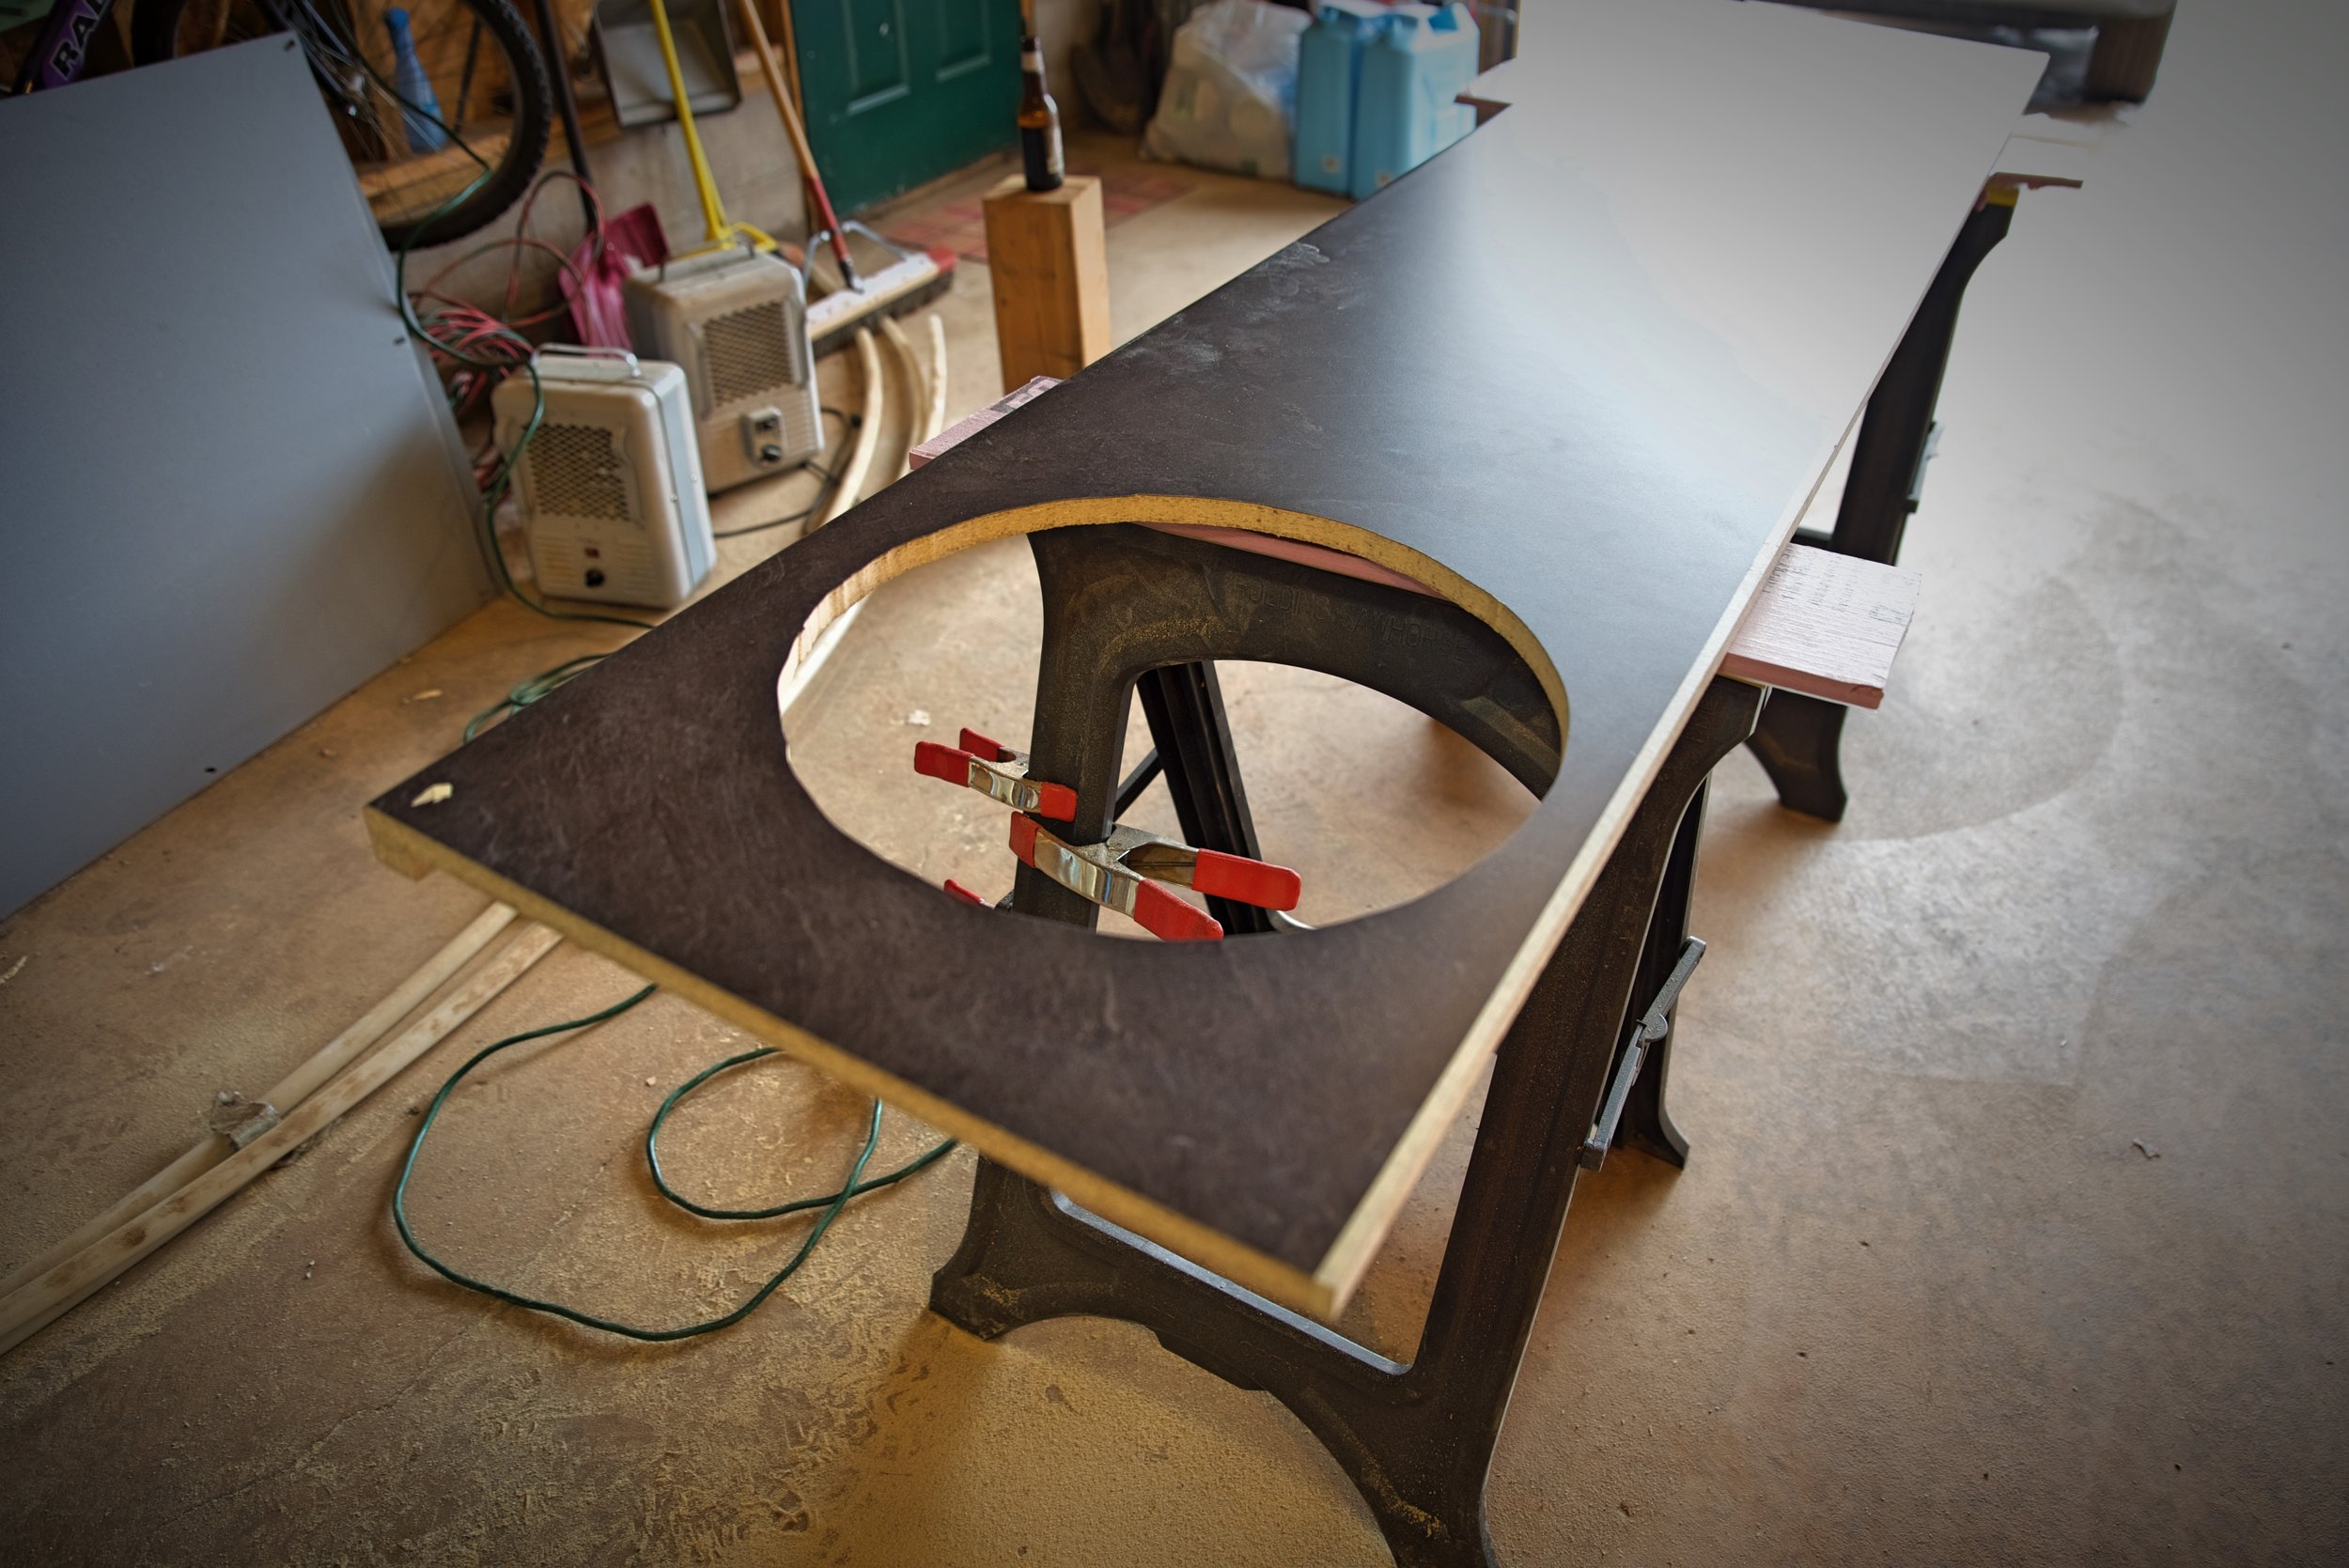
We weren’t too concerned about making this cut smooth, because it would be hidden by the lip of the sink.
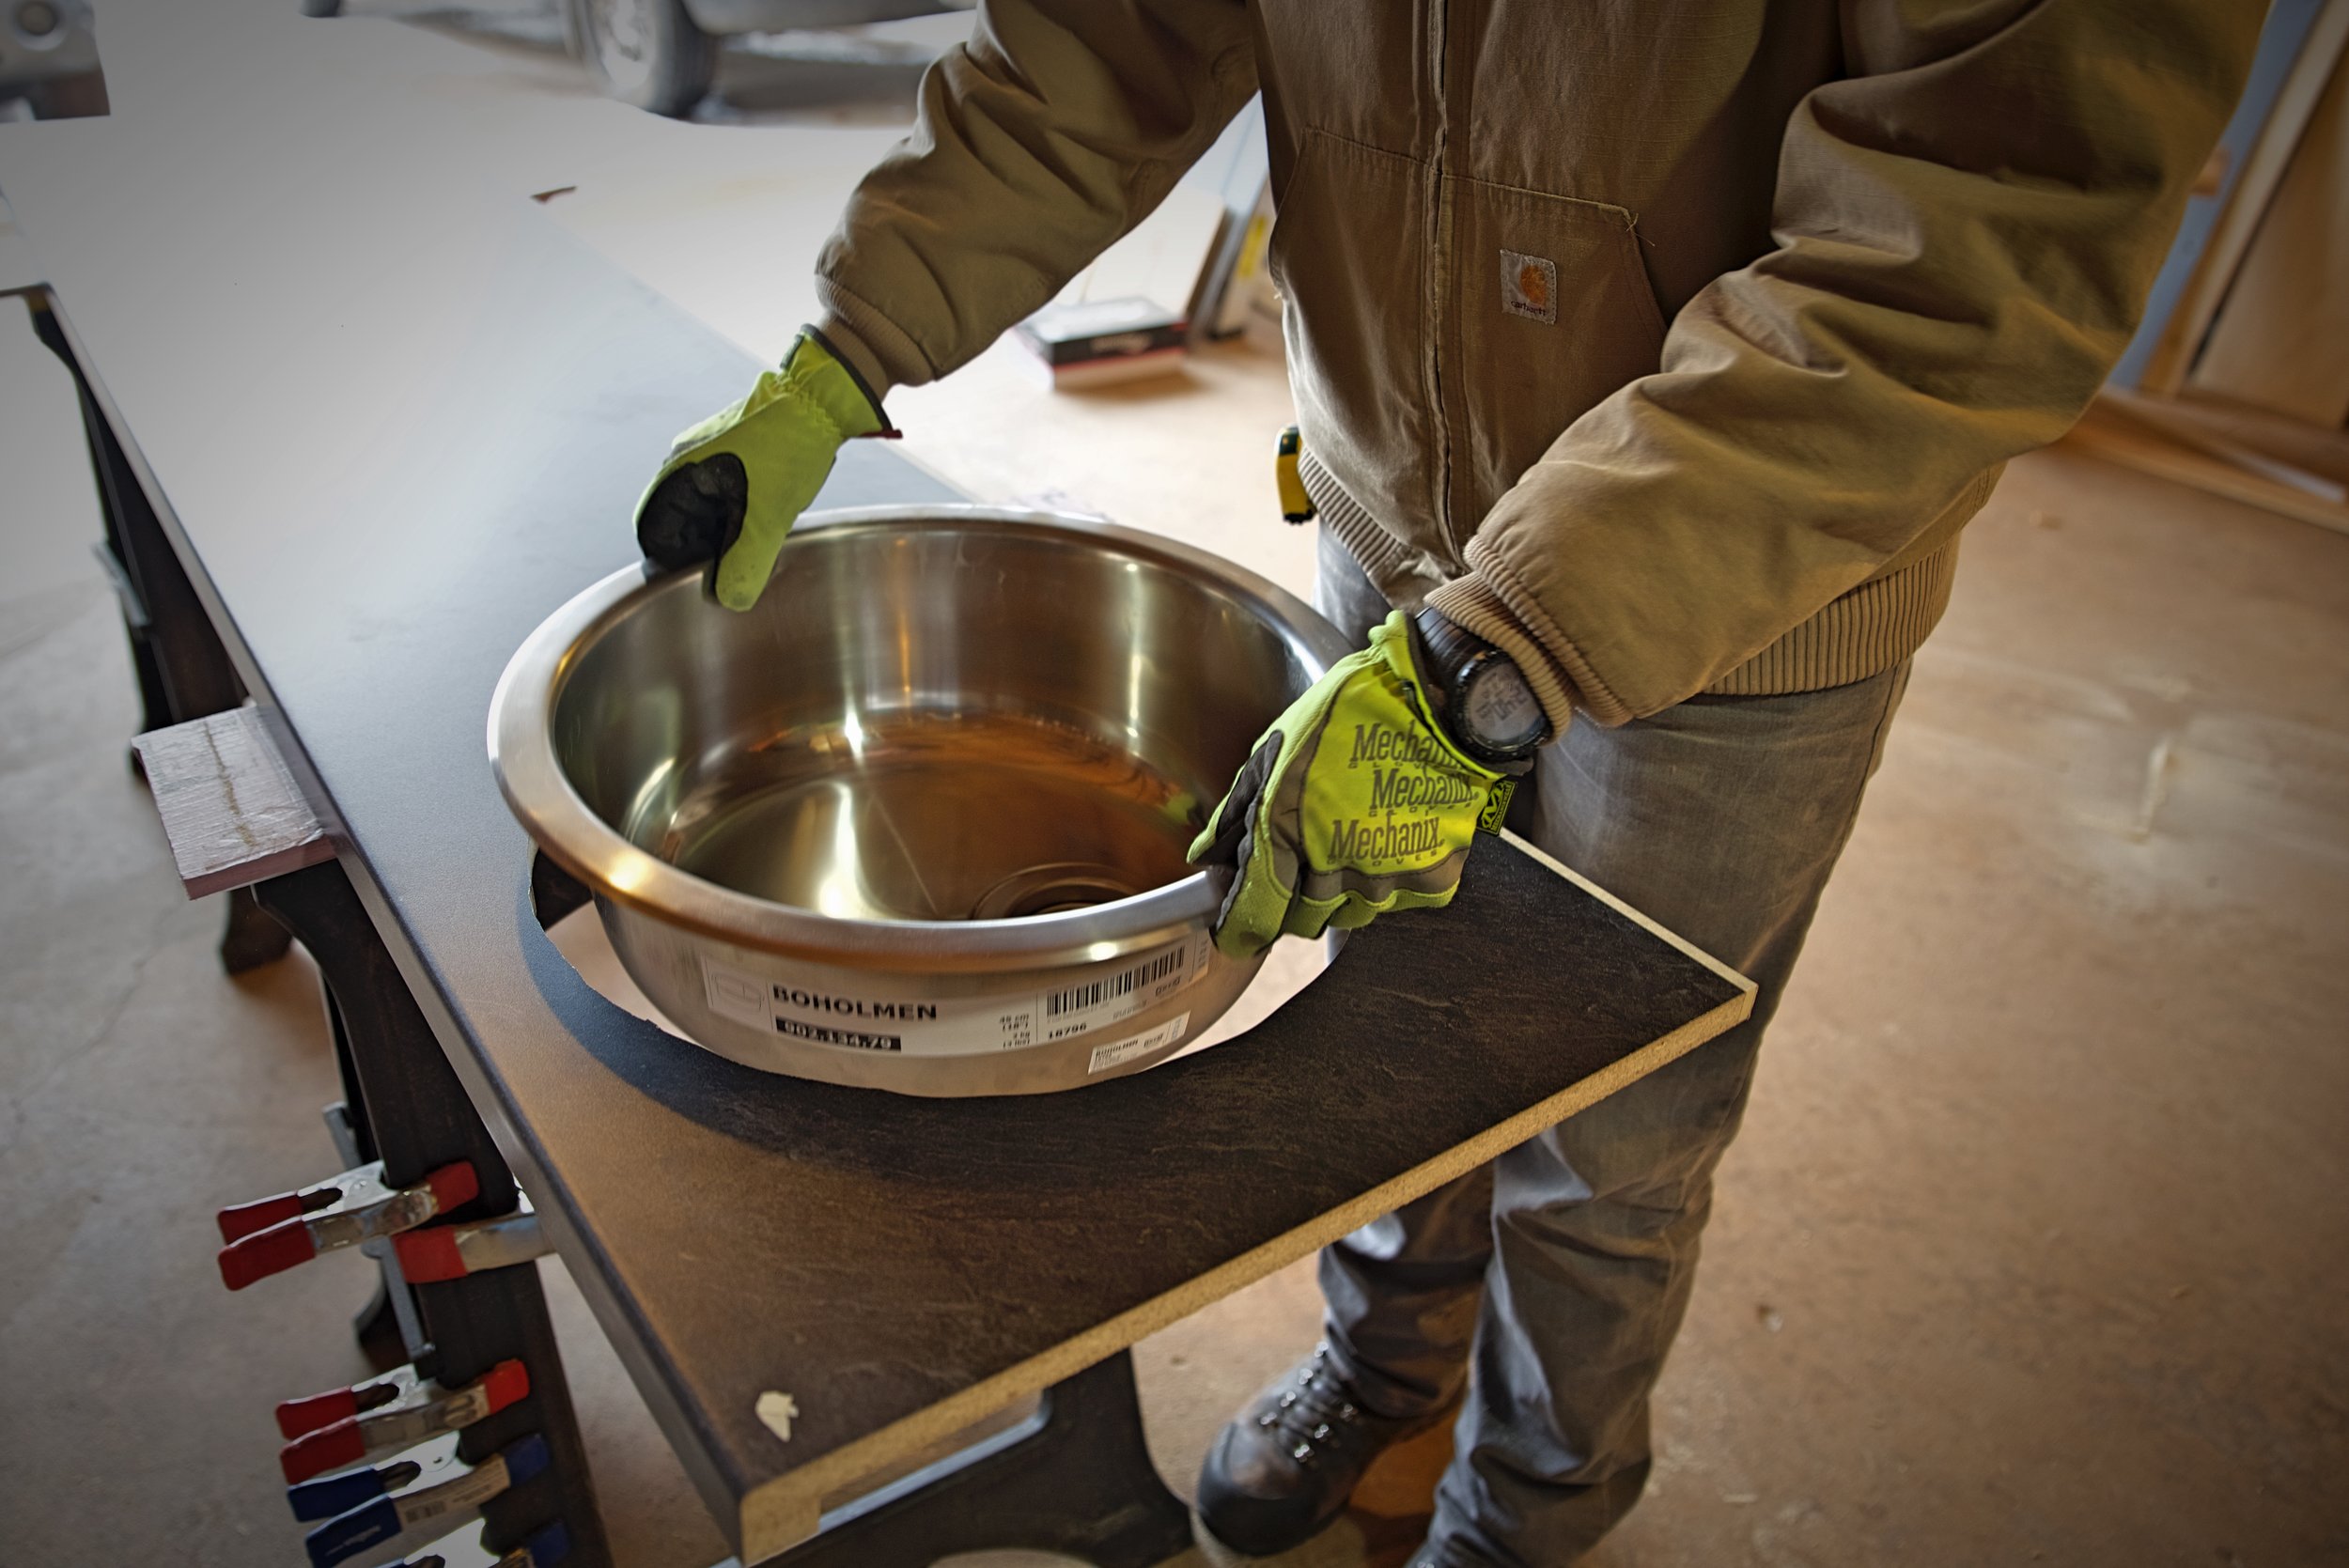
Ian test fits the sink, and fortunately it fits well.
Of course we still had to cut a circular hole for the sink. We traced the sink on the bottom side of the countertop, and then we moved the line in about a half inch, so that the lip of the sink would rest around the edge of the hole. Since the cut would be hidden by the lip of the sink, we didn’t tape the line to prevent any chipping of the laminate surface, and we weren’t concerned about making the cut really smooth or precise. We used a jigsaw to cut the hole, and we cut it in three separate cuts to make the curves a little bit easier. (For more on installing the sink, check out our article about our water system.)
We used little corner braces to mount the countertop.

We screwed through the bottom of these corner braces to attach the counter.
With the counter cut to the right shape, we were ready to install it in the van. Fortunately it fit perfectly when we tested it. To mount the countertop to the cabinets we used a simple system of corner braces. We cut small scraps of 1/2'“ plywood with two 45-degree angles in opposite directions on either side, creating a trapezoid shape. We attached these corner braces to the walls and front braces of the cabinets with a pocket hole and pan head screws. These pieces helped brace the cabinets and keep them square even with all the twisting they go through on rough roads. We then screwed through these from underneath straight into the bottom of the cabinets with a 1” countersunk screw. Do not use a screw that is too long or drive it deep into the underside, or you will be buying yourself another countertop. A No. 8 screw will give you a good bite into the particle board of the counter’s bottom side.

Ian attaches the corner braces using pocket holes.
We are happy with the look of the pre-fab countertop, even though we originally wanted to create our own countertop.
We are very satisfied with our cabinets and their usefulness to the van. They hold our water system, propane system, stove, dishes, and our food. Despite not having any prior cabinet building experience, our simple cabinetry has held up through over 50,000 miles of driving without requiring any repairs. Besides being durable, the simple plank cabinet doors and the handmade baskets add rustic charm to our conversion, and they give us a pleasant place to prepare food each day.

The cabinets fit with the style of the van. Because of the extra time we took in the design stage, we also have really useful areas for storage and cooking.