
Rust Abatement
Violet B. Rust Queen
Rust is a really common problem on Sprinters. This is especially the case if you opt for an older van like we did. After 10 Minnesota winters, Violet B. (our van) had quite a bit of rust on the lower body panels. Fortunately rust removal and abatement is actually simpler than you may think.
Tools
Broom, dustpan, cleaning rags, shop vac, etc.
Putty knives, screw drivers, and other scrapers
Beer and friends
Materials

You can see the panels that have been taken down in the left of the picture and where they have been removed on the right.
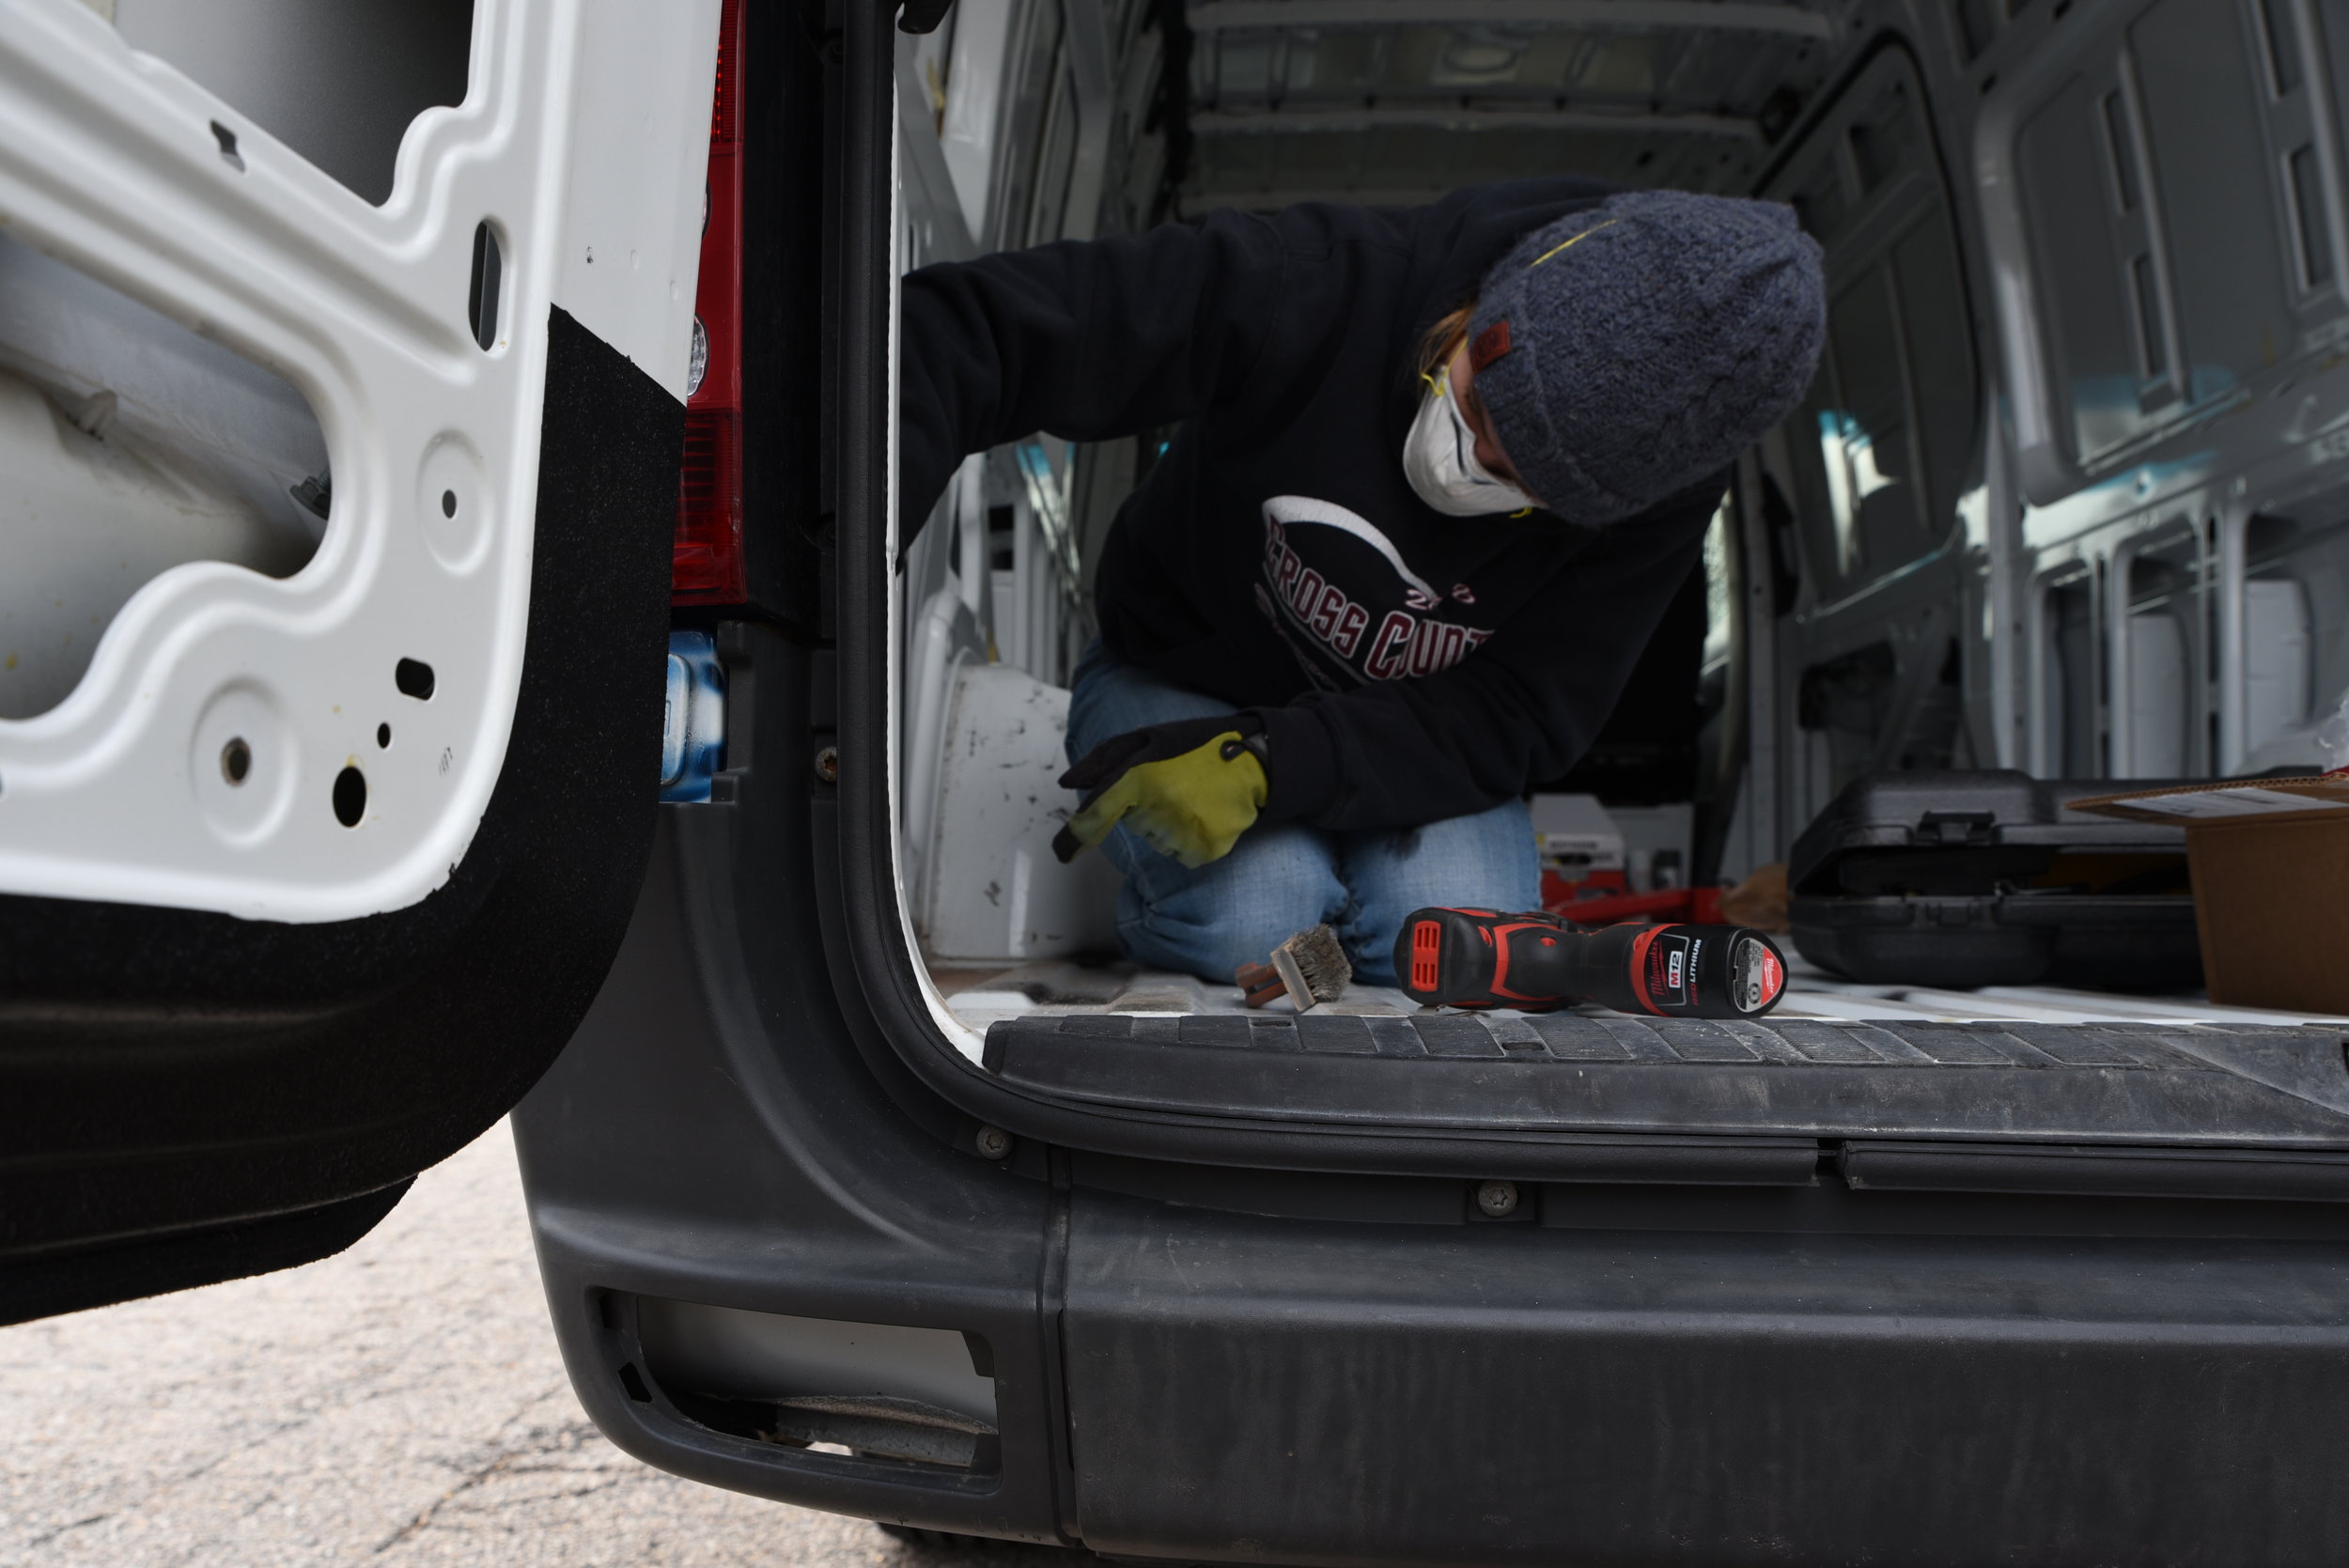
First we removed all of the inside panels and the flooring that came with the van. These were attached with torx bolts and were simple to remove with a power drill and a set of torx sockets.
Then I deep cleaned the inside of the van. A lot of road dust had built up inside the panels and ribs of the vehicle. We wanted the van to be totally clean before we began our build.
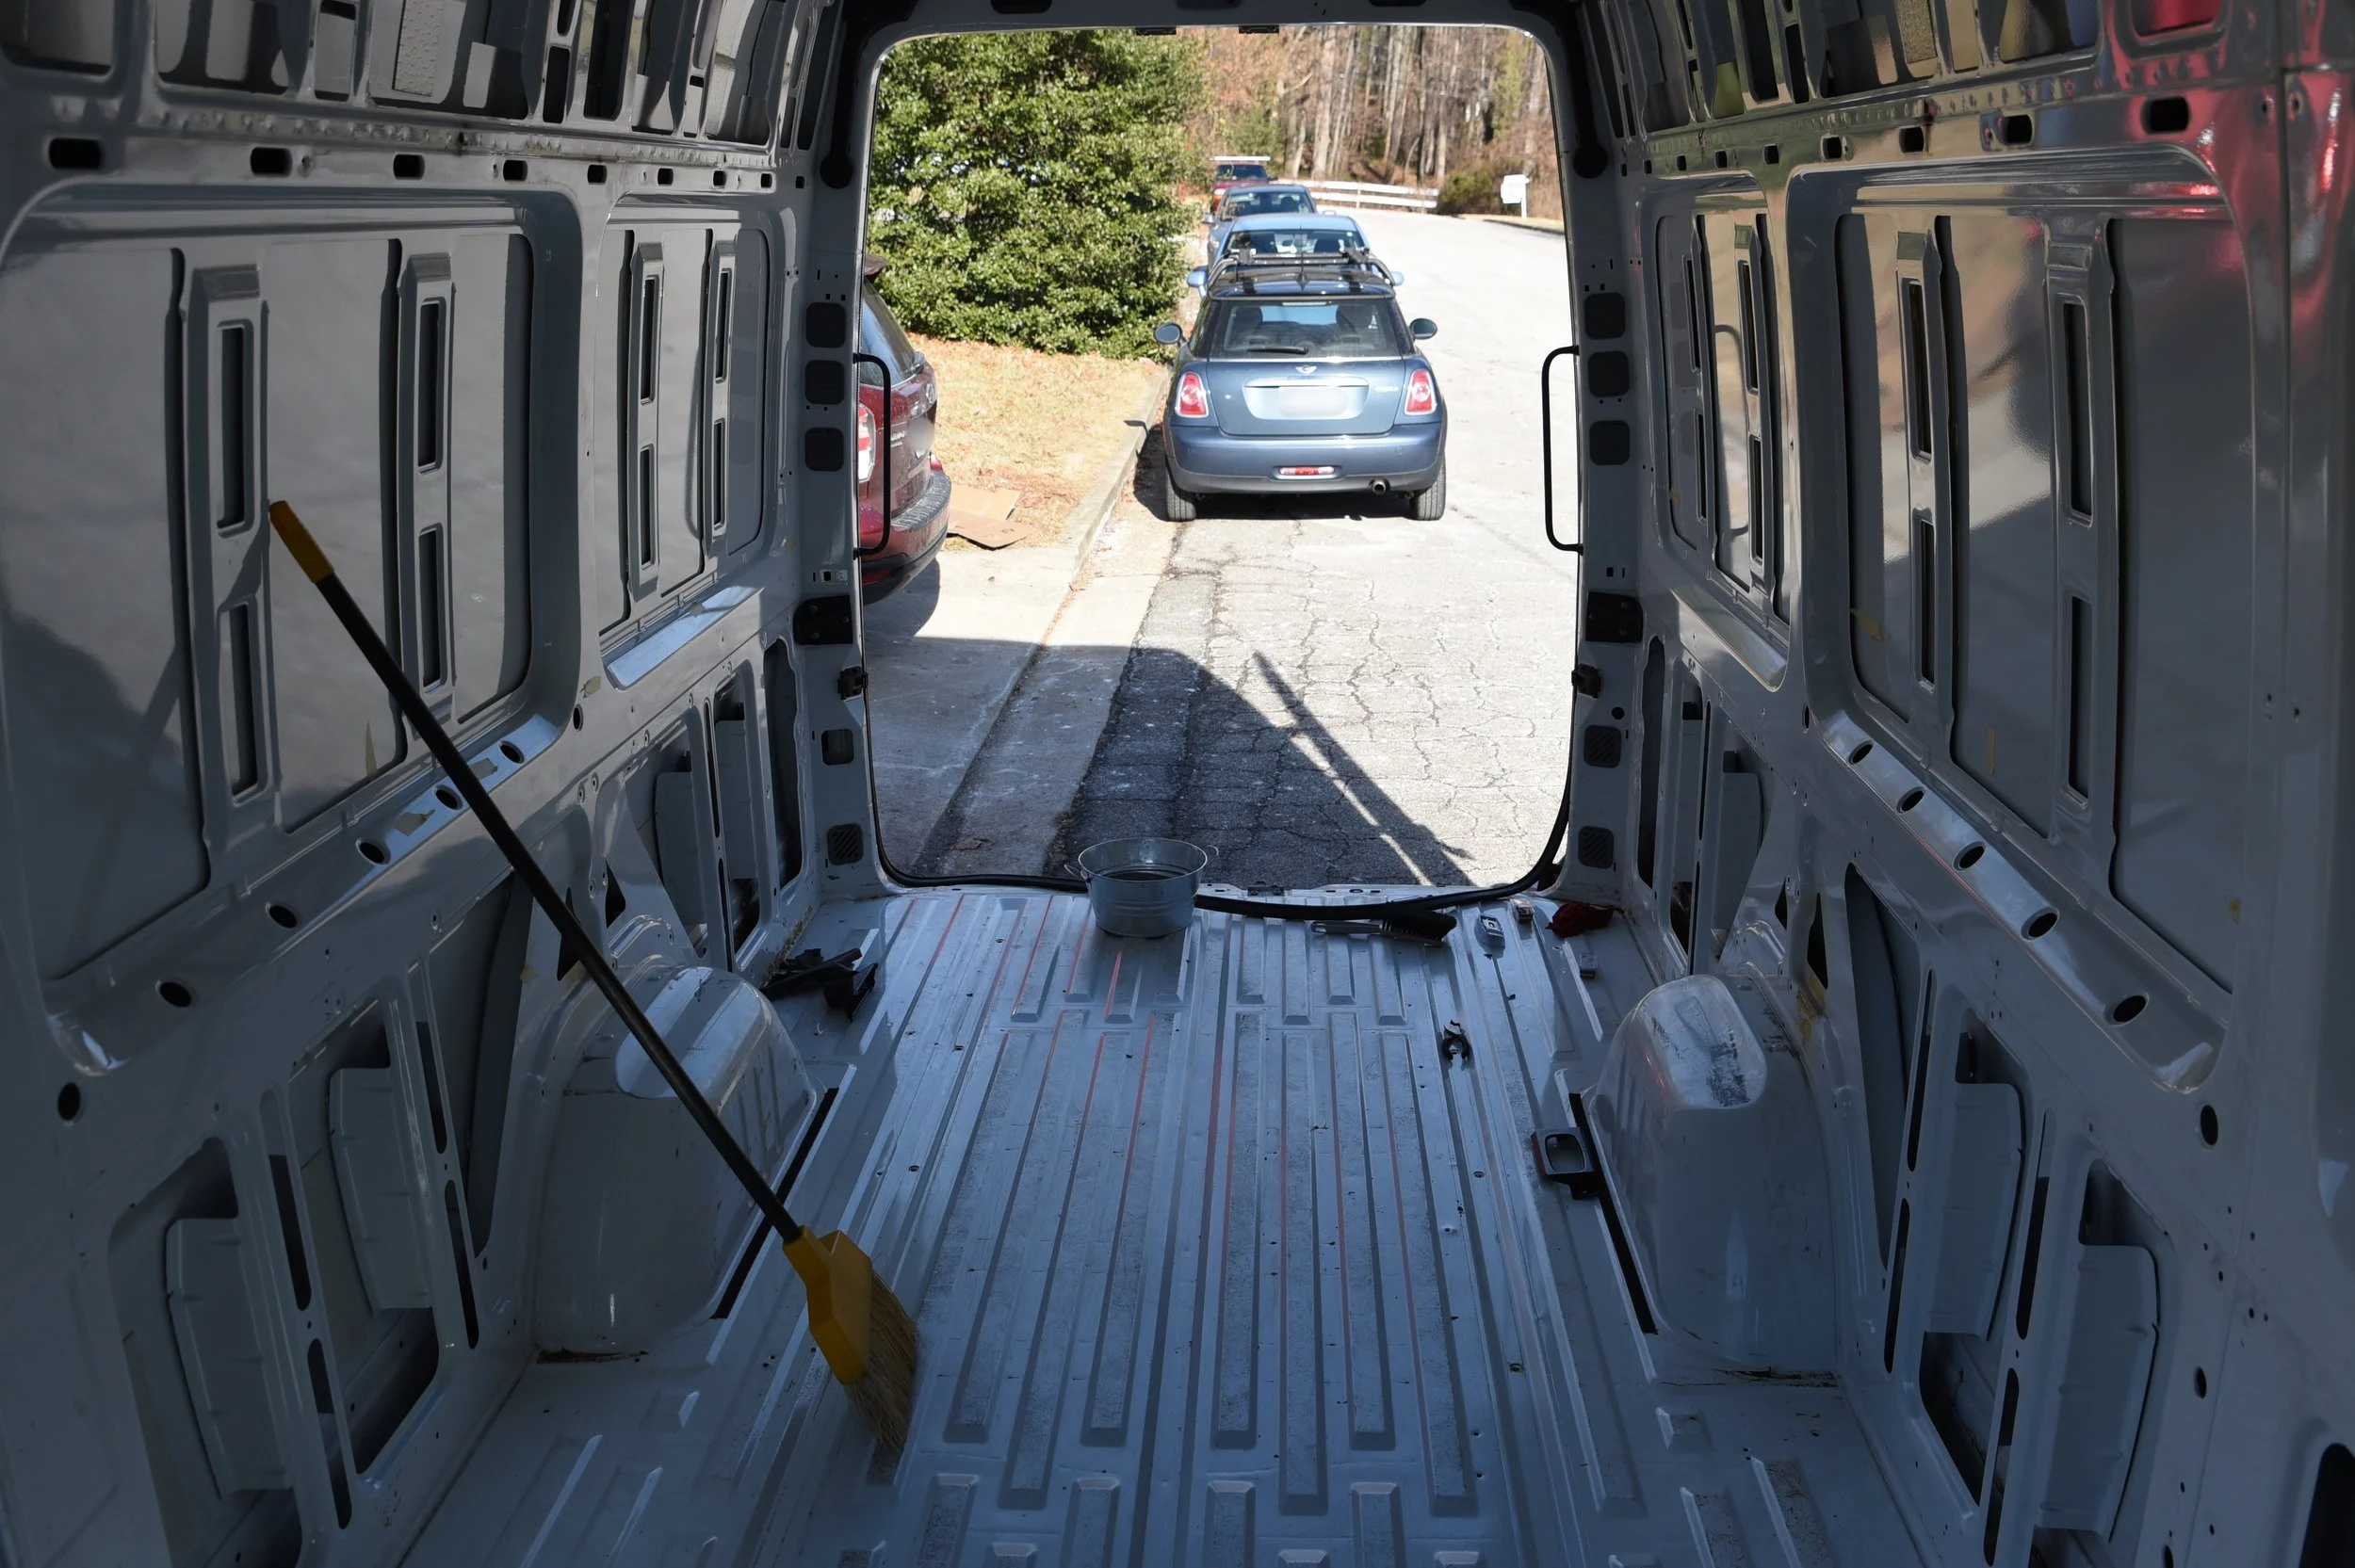
If you’re buying and converting a used van, you’re definitely going to want really scrub all of the dust out of it before getting to work.

Ian's dad, Brian, removes the crusty, brittle fasteners that attach the plastic trim to the van.
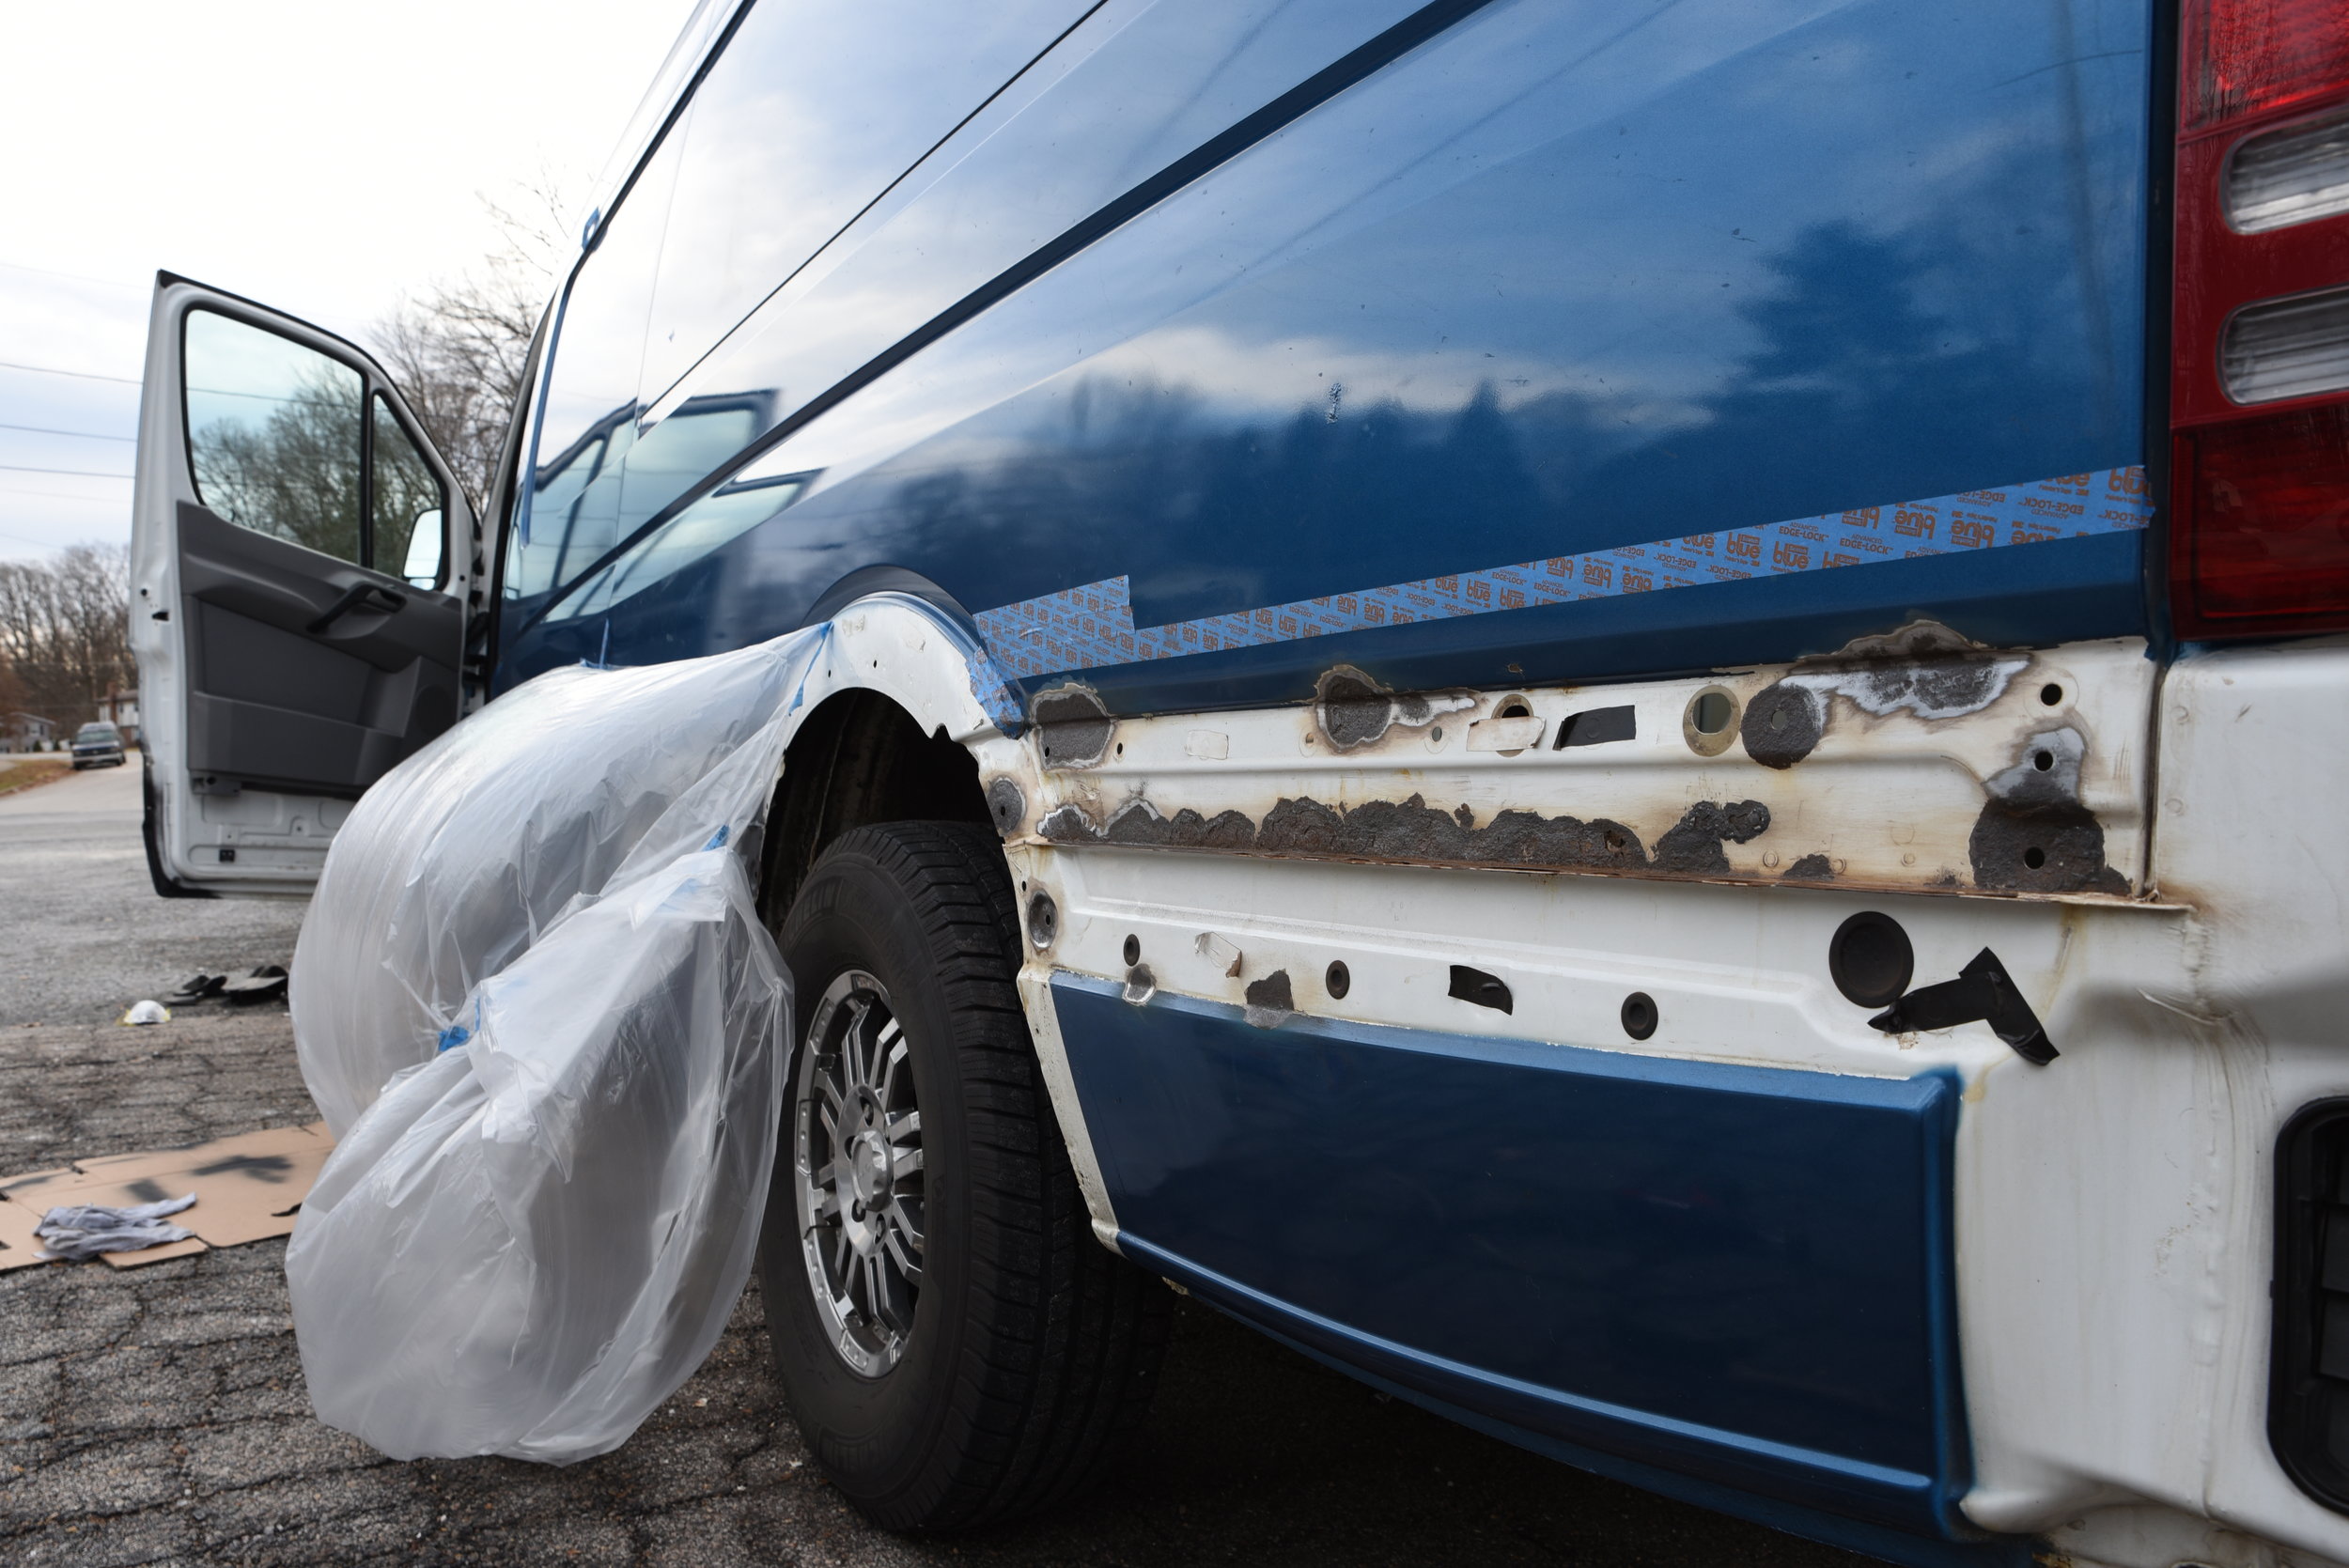
At the same time, Ian and his dad were removing all of the plastic exterior trim panels using trim panel removers. This trim is attached mostly with plastic fasteners that had become quite brittle over time, so it took quite a bit of wrestling to get them off. We had to buy replacement fasteners for the ones that we broke as well. They are kind of hard to find, but we managed to find these on Amazon.
With all of the plastic trim removed, along with our "consultant", Danni, we were able to assess the true condition of the vehicle's body panels. We covered all of the holes with electrical tape so that water didn’t get inside the panels of the van and washed the exterior of the van. Then we got to work removing the rust.
Danni, the rust consultant, checks out the condition of the vehicle with Ian.

We had to cover the holes prior to washing the vehicle in some "balmy" January weather.
Ian’s dad scrapes away some huge patches of rust underneath the plastic trim panels. For some reason these areas remained the original white color when the van was repainted blue by the previous owner,
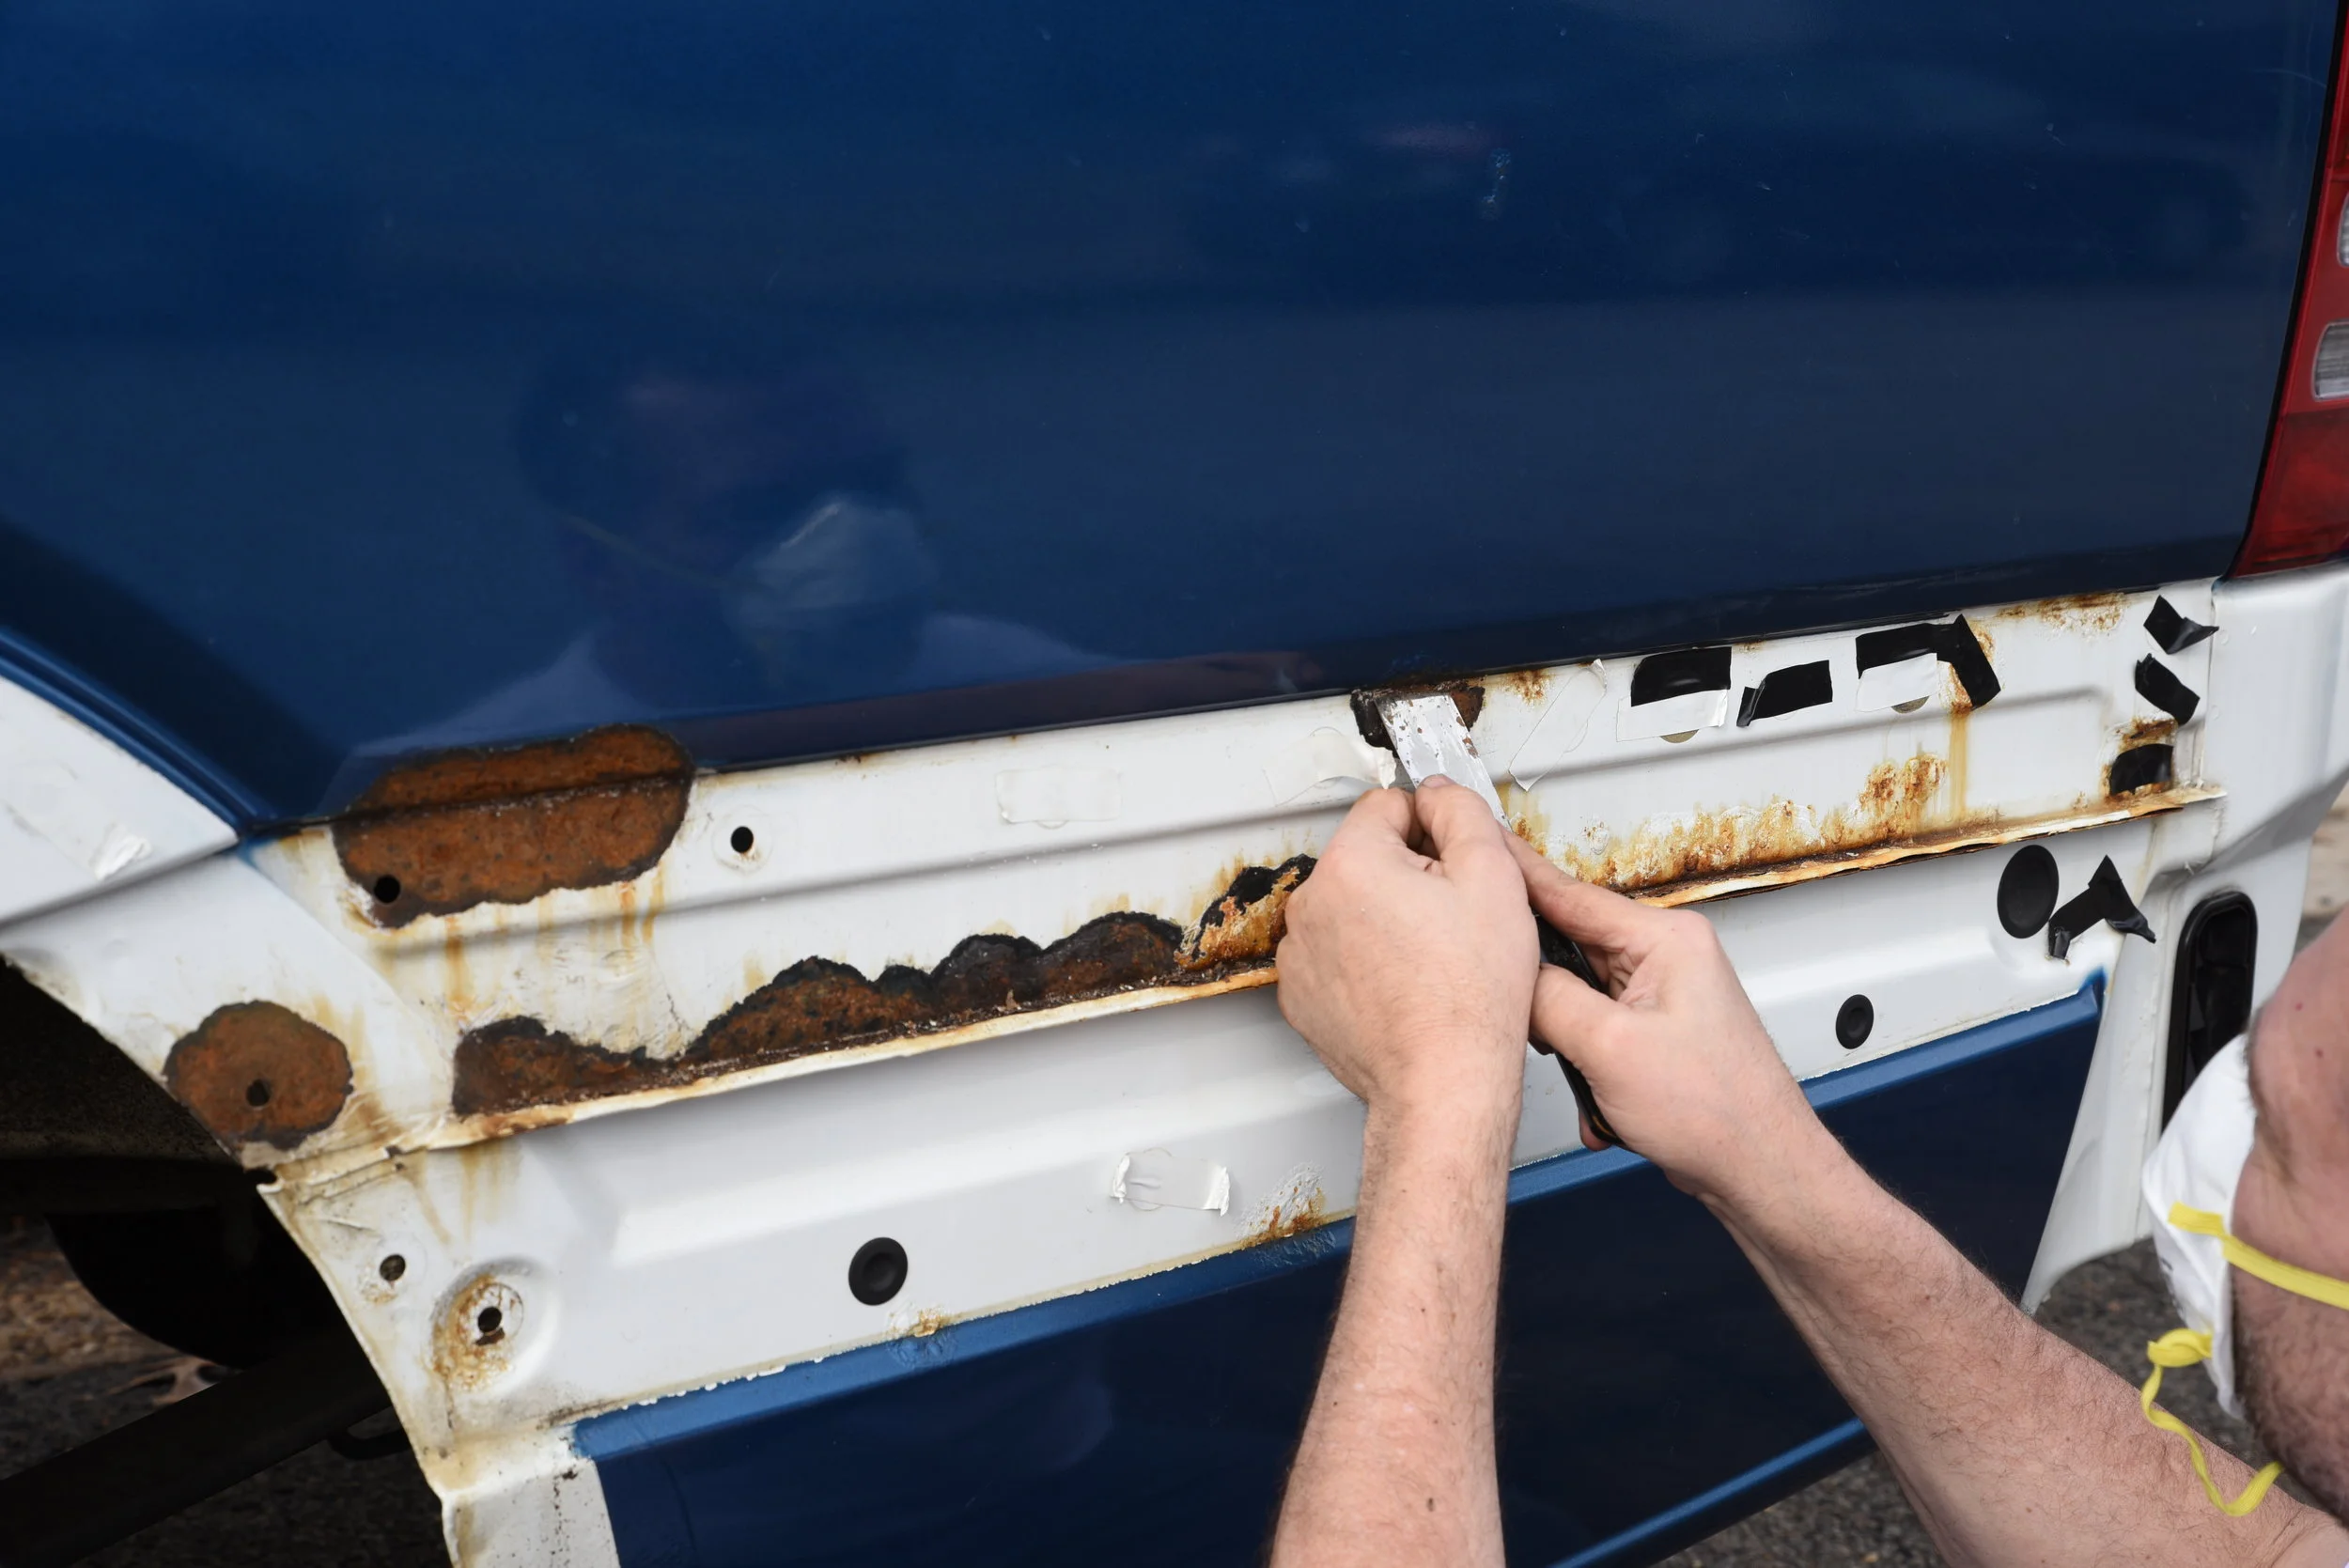
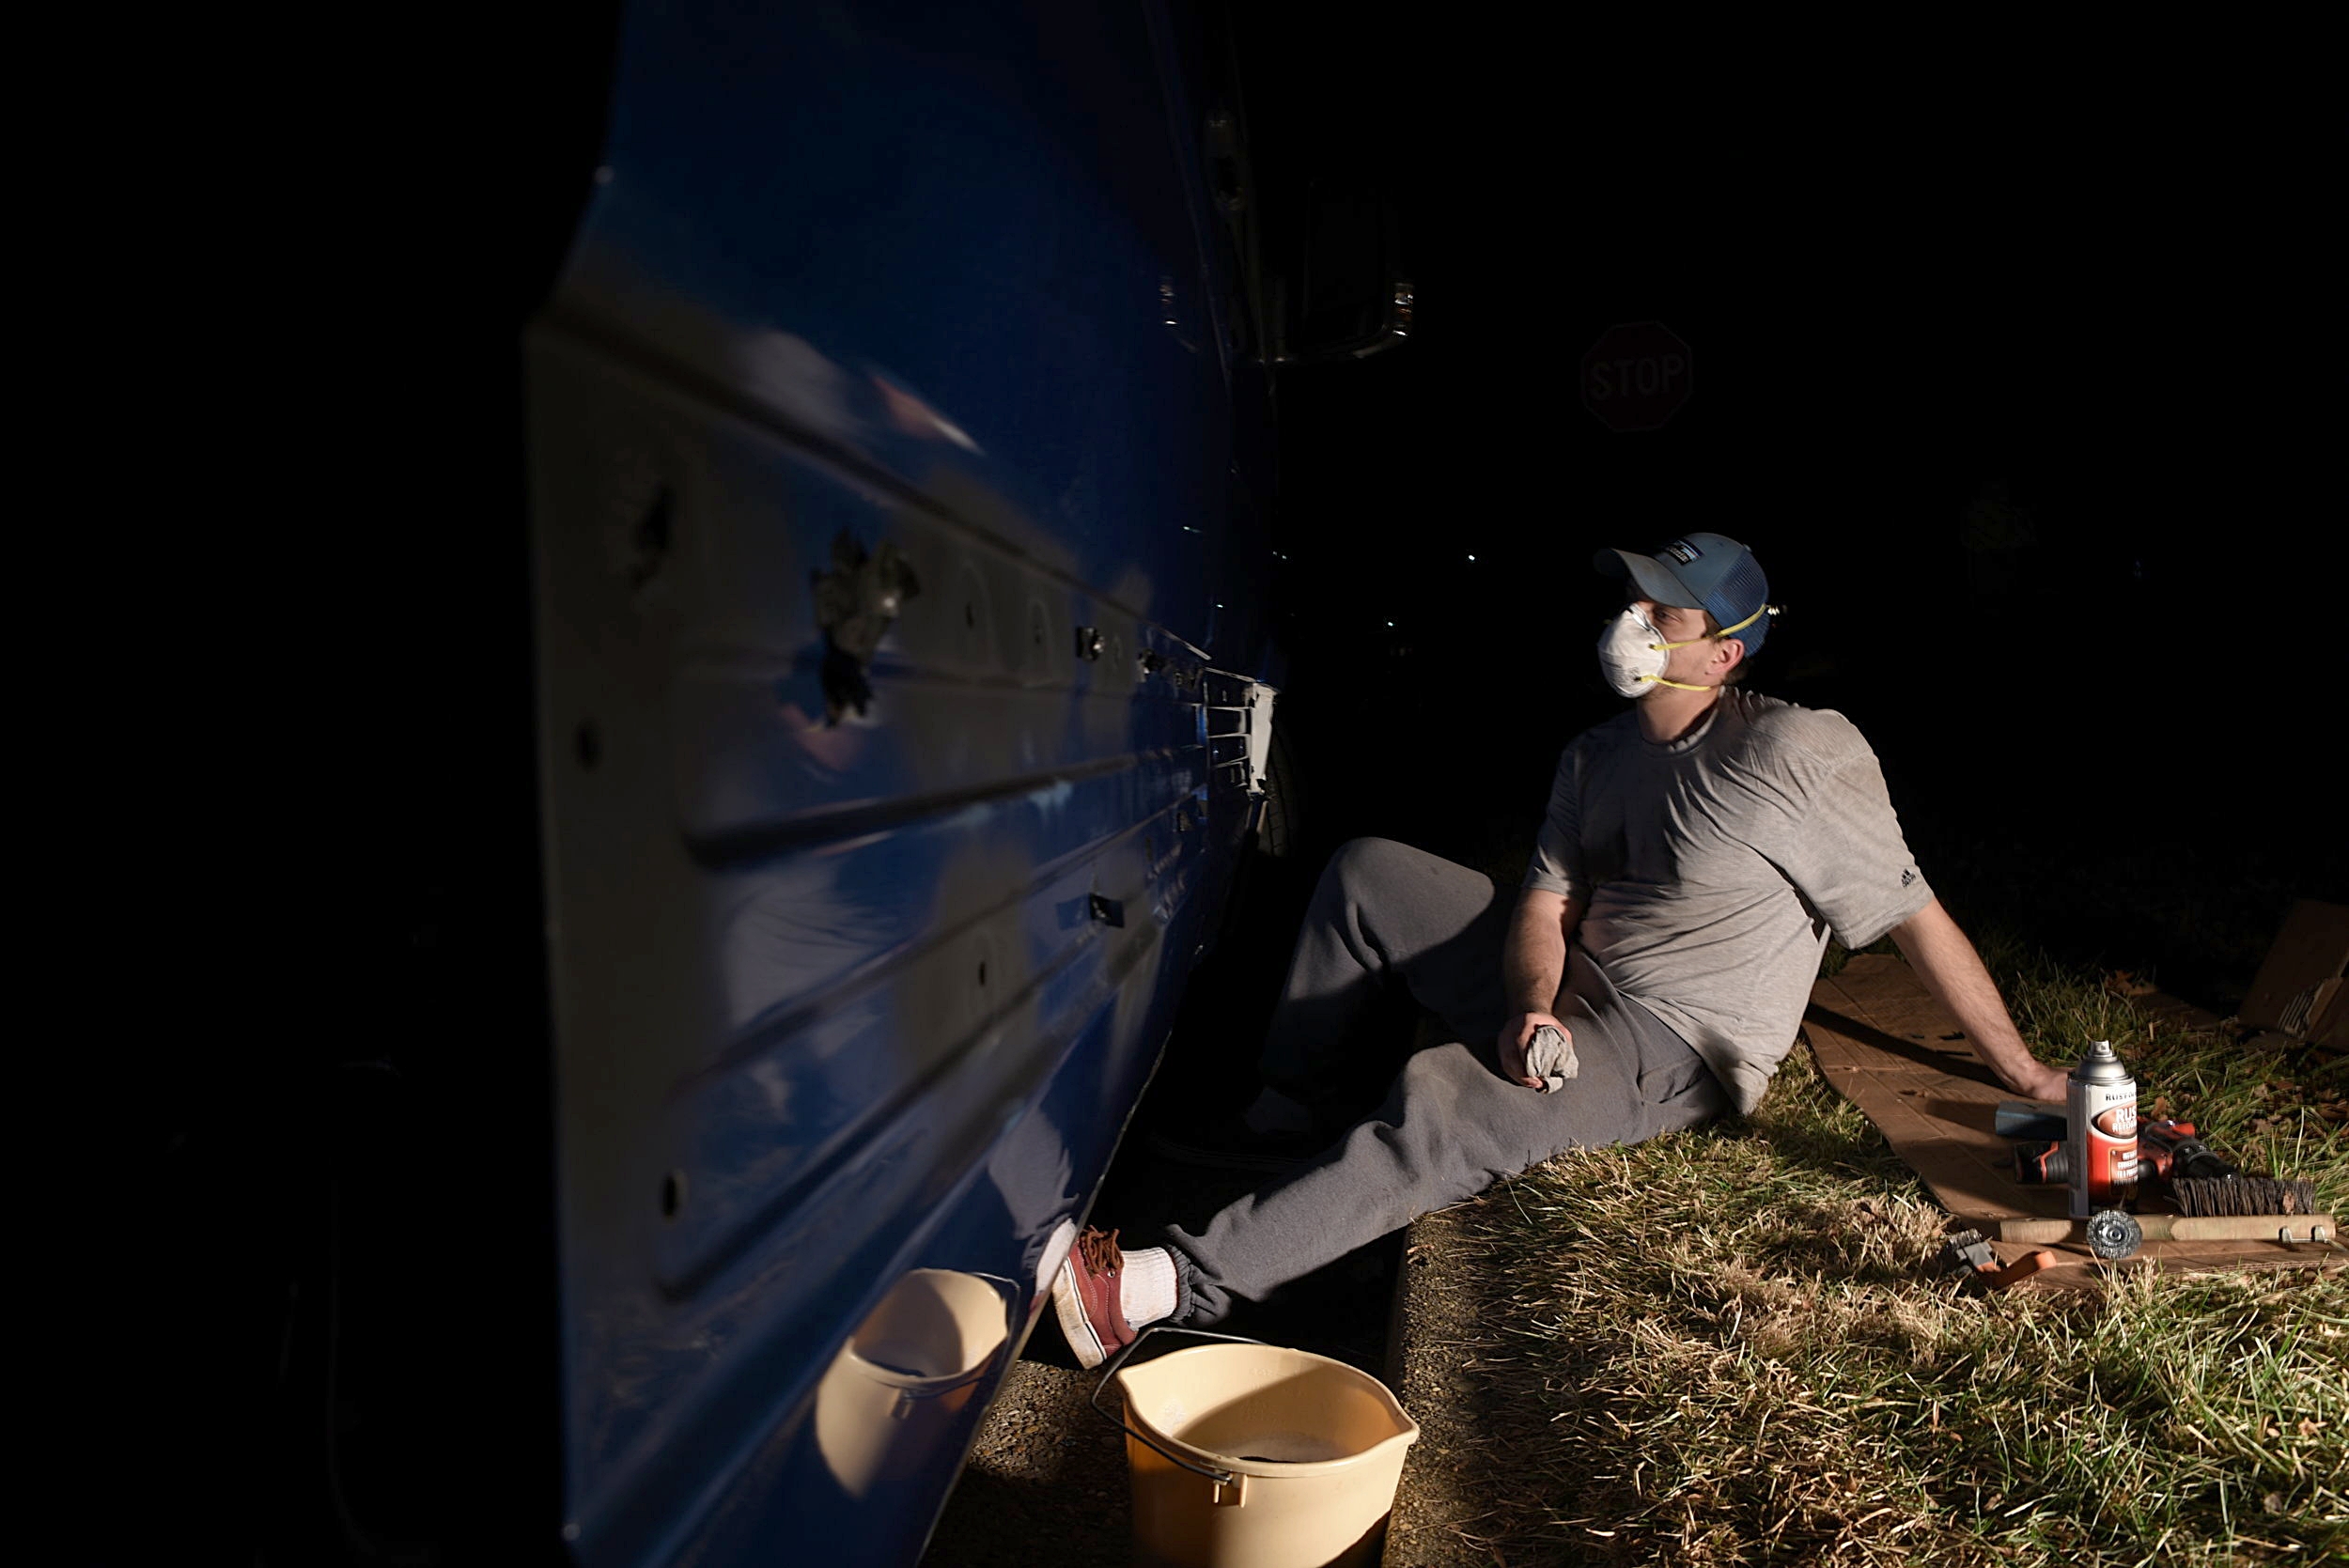
The first step in removing the rust was to scrape as much of the flaking rust away as we could. We mostly used putty knives and flathead screw drivers for this process.
After scraping the rust, we used a wire wheel and sanding wheel for a drill to clear the paint and rust off every area where rust had developed. We also used handheld sanding blocks and wire brushes as well to really get into the places where the metal was pitted. The goal is to have at least a quarter inch of clean metal surrounding the affected area so that you can be sure that you have reached the end of the rust.

Rust abatement is kind of tedious, so have some friends over to help you out!

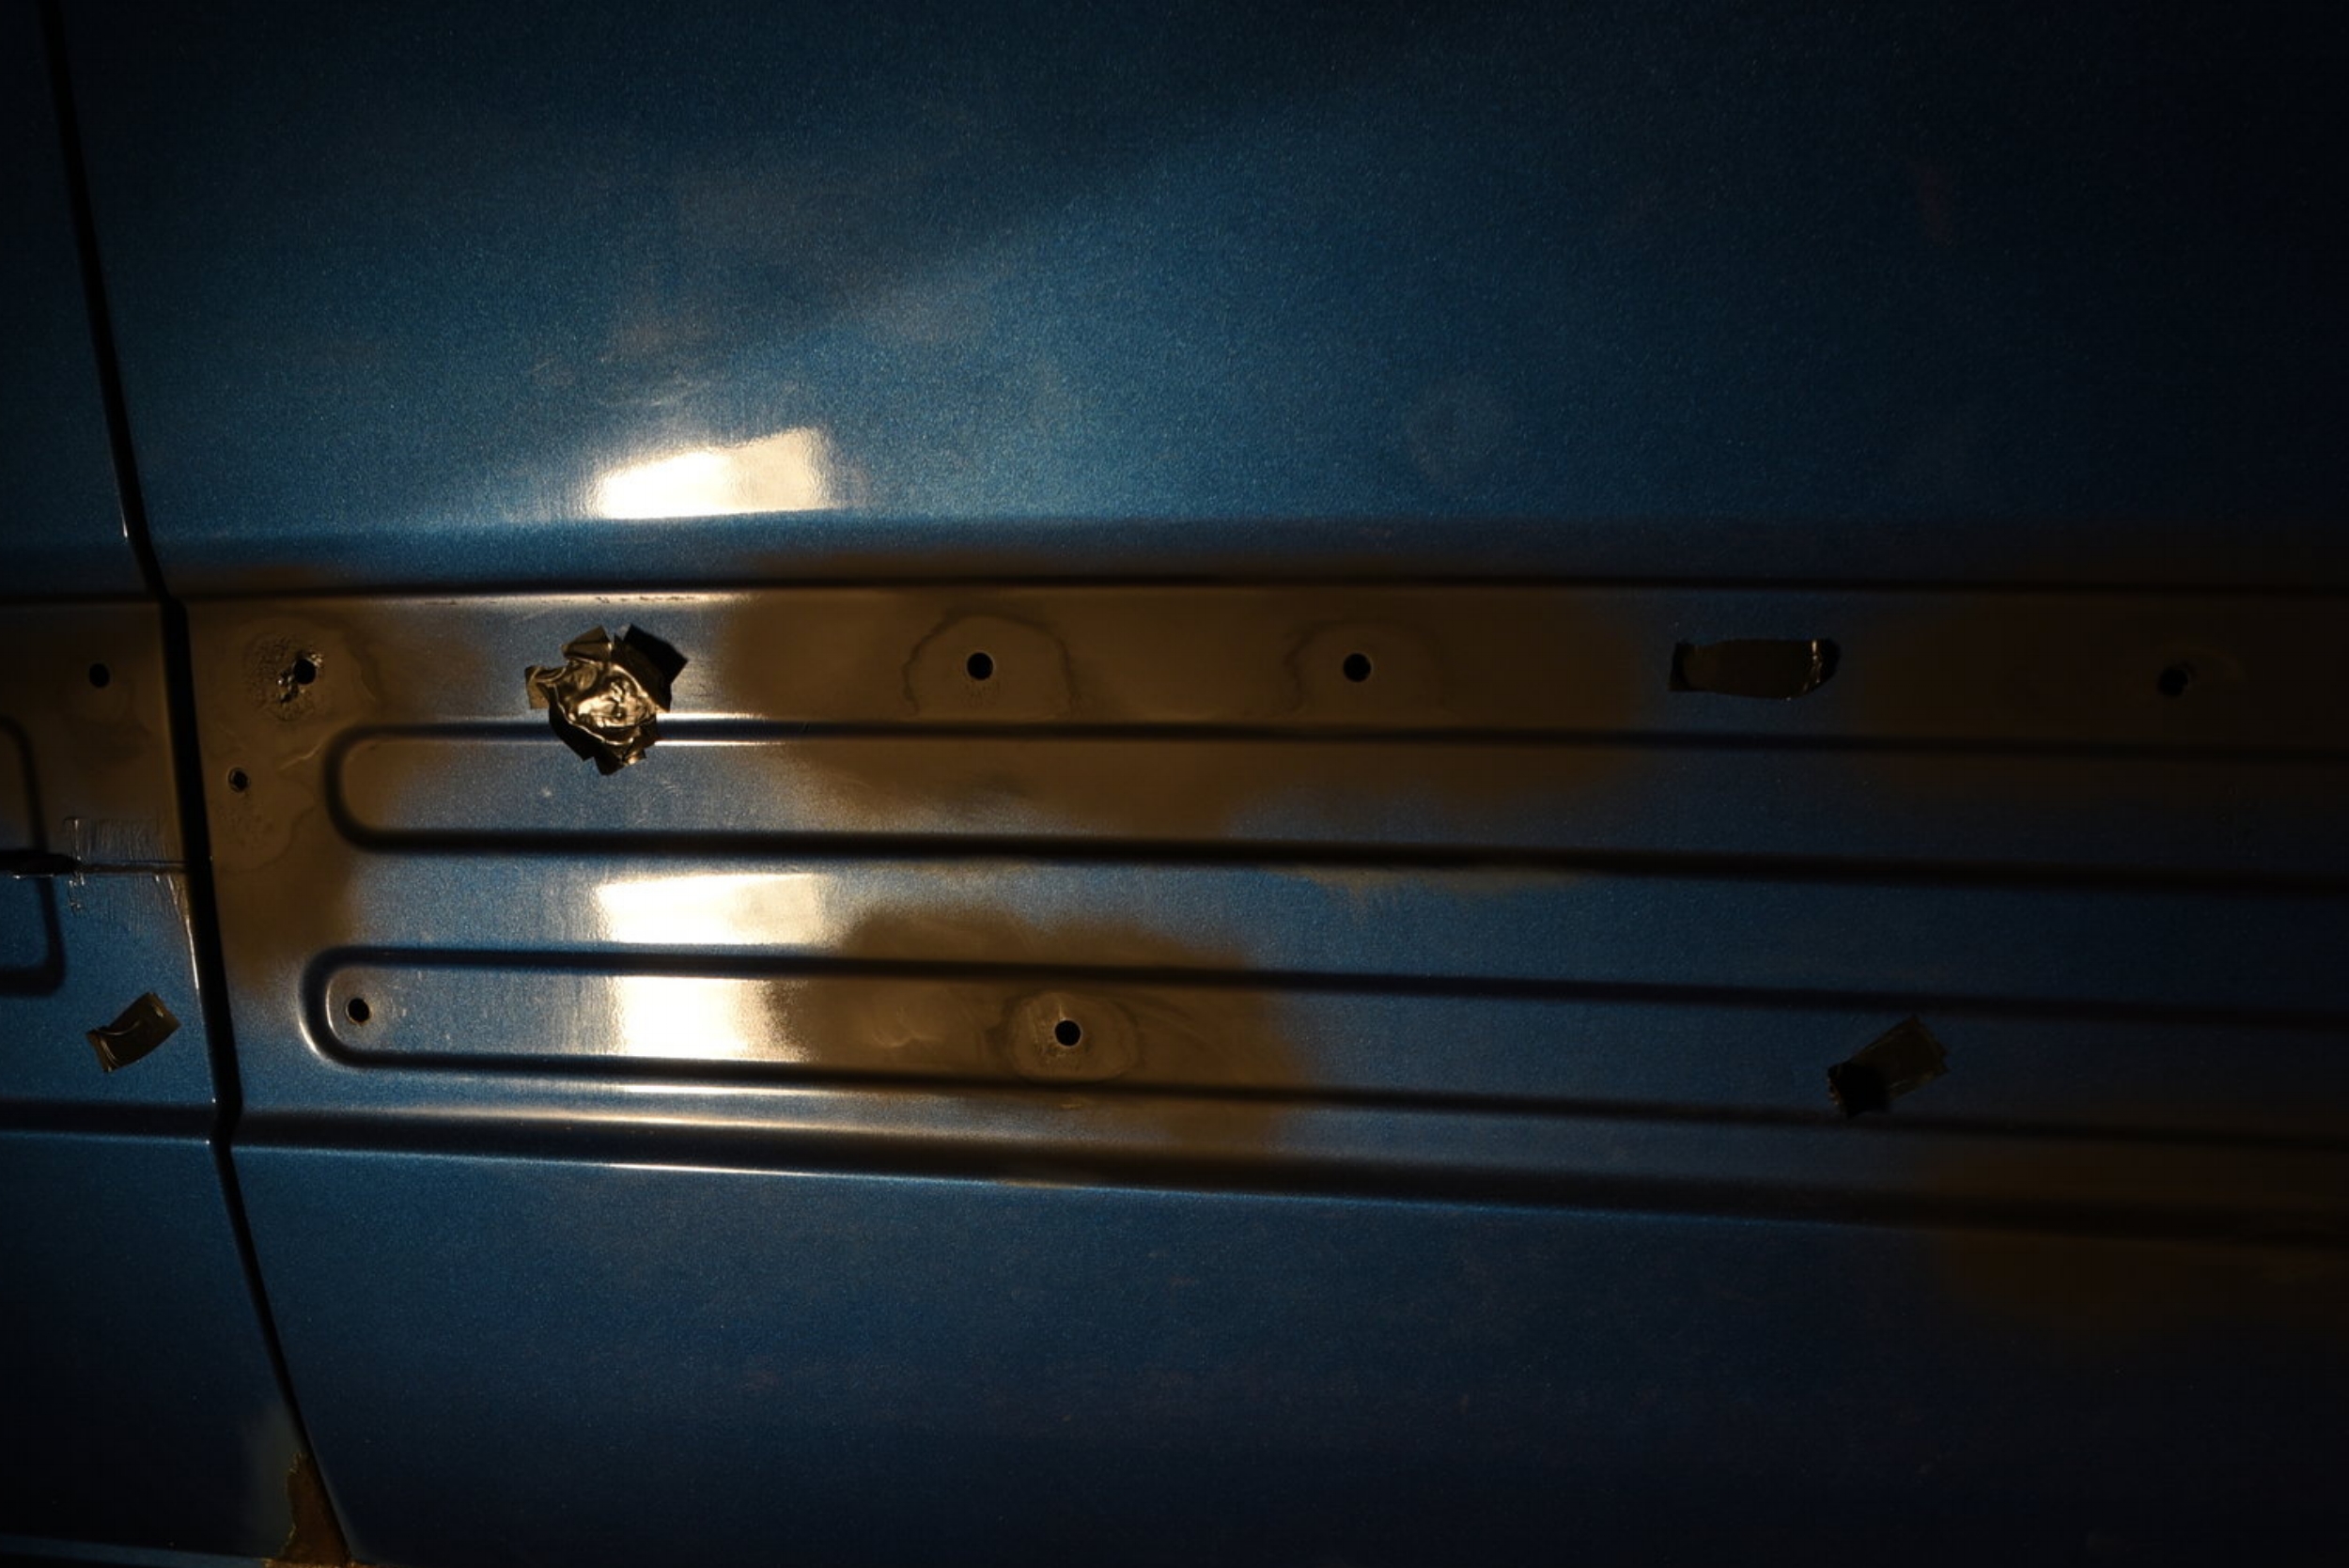
In this picture, you can see the rim of clean metal surrounding the rust patches.
It's crucial to have friends and beer for this process, because it is very time consuming and tedious. It took us about a week to deal with all the rust.
The Sprinter van’s panels has these v-shaped pockets that can collect water that gets underneath the panels. There was lots of patches of rust inside these panels that was very difficult to remove.
After we removed all the rust spots, we wiped each area down with a damp cloth in order to get all the dust off. Since we were sanding paint, we wore masks most of the time to avoid inhaling the dust--especially when we were working on the interior. Avoid trying to take a sip of beer through your mask.
Ian takes a moment to survey his work, before applying rust converter,

We wiped down all the previously rusted spots after sanding them to clean off the dust.
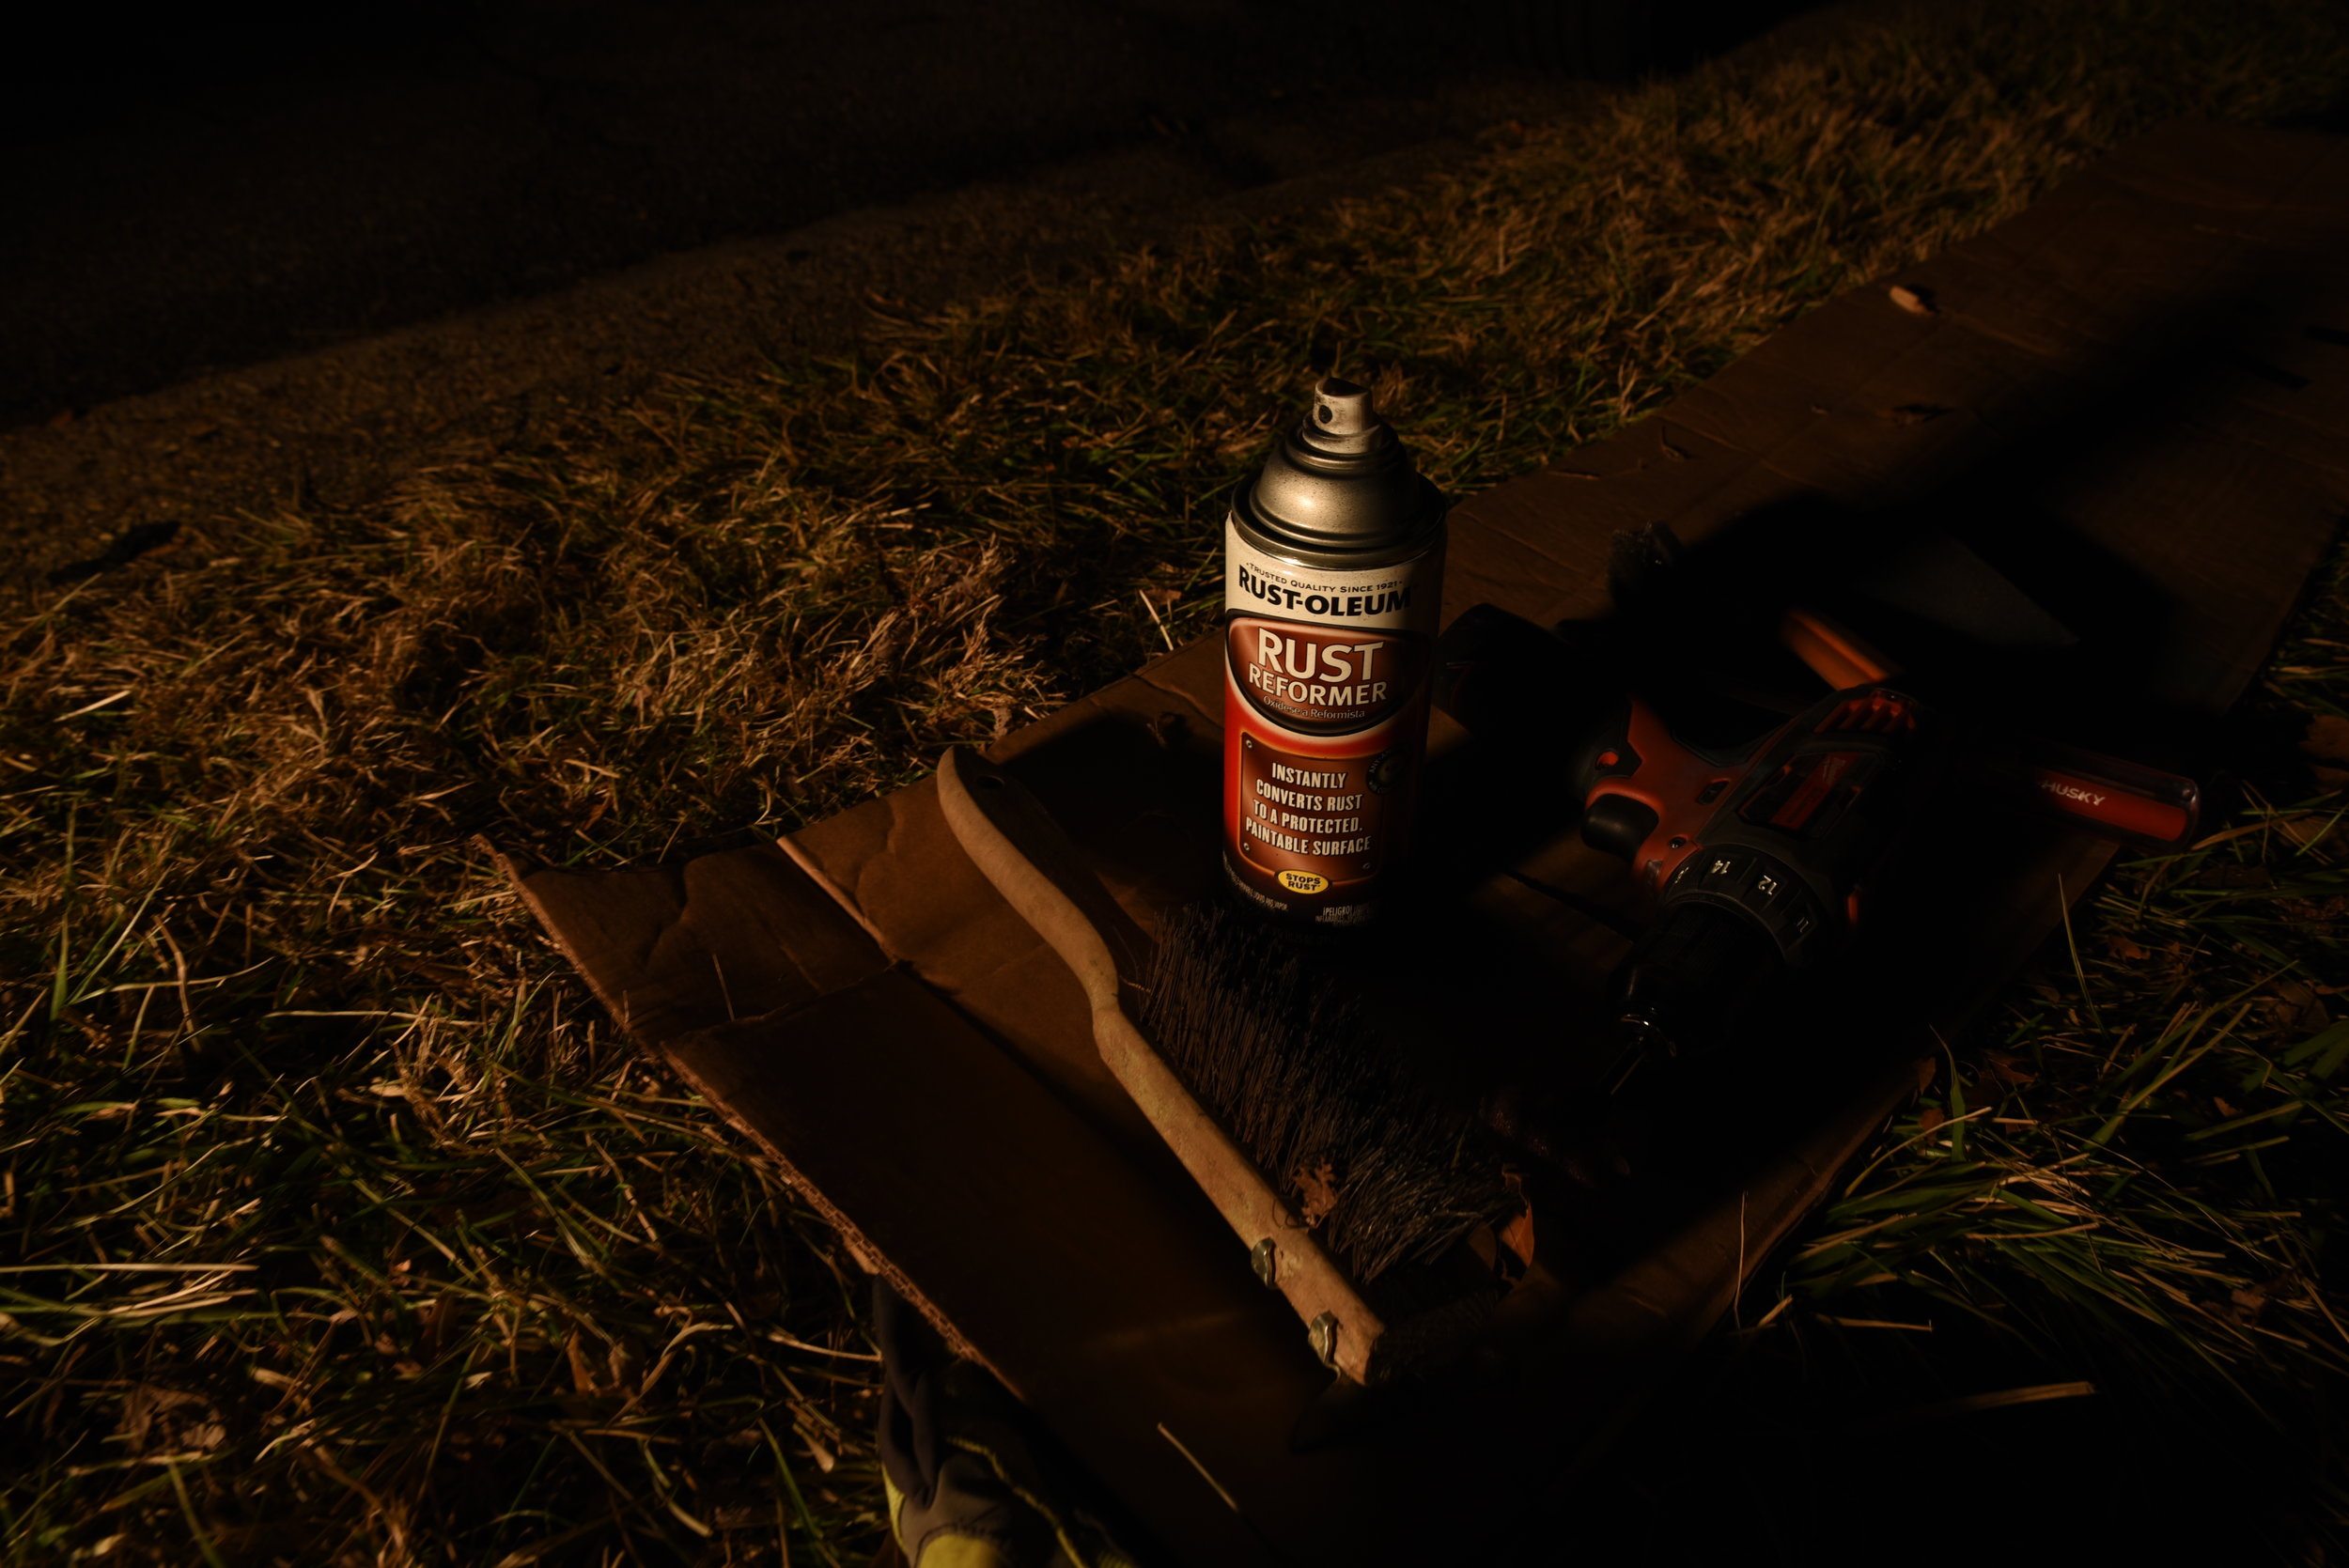
After the spots were clear of dust, we applied a rust treatment. We went with Rustoleum Rust Reformer, which is supposed to "stop rust in its tracks." Rust never sleeps, but we hope with all the sanding and applying the reformer, it will at least slow to a crawl. After about 2 years of full-time travel, we’ve had very little rust reappear, so we think that the rust reformer performed well.
The van after the rust had been removed and we had applied the rust reformer.
This rust reformer, after thorough rust removal, has done a really good job of halting the rusting process.
Our van is a custom color of blue that was painted before we purchased it, so it would be difficult to get a good match. Since most of the rust was on the bottom of the van, we decided to use a truck bed liner instead of paint. It's also a more robust finish that covers the uneven surface where we had sanded away the rust. We think it gives the van a kind of sporty, rugged look too!

Quasimodo tapes the line above the wheel well for the bed liner.
To apply the bed liner, you’ll want to get an early start, because once you mix the two part compound, it can only be applied for a few hours afterward. First thing in the morning, Ian taped off all of the lines for the edge of the truck bed liner with painters’ tape. Getting a nicely shaped curve above the wheels was tricky.
Once the line was taped, Kaylee came along after with a sanding block and roughed up the paint, because the bed liner won't adhere to a smooth surface like paint.
After roughing up the paint, we wiped all the dust off with a dry cloth, followed by a shop towel with isopropyl alcohol to make sure the surface was totally clean of dust and residues.

You can use either isopropyl alcohol or mineral spirits to remove any residues or waxes.

Kaylee really gets into the dusting.
There are a lot of different truck bed liner products out there, but we decided on the Rustoleum Pro-grade Truck Bed Liner. One of the main benefits of this product is that you can roll it on rather than spray it, since we don't own a paint gun.
You can also buy this product in aerosol cans. Doing the entire Sprinter that way would be very time consuming, since it would require so much masking. It would also be very difficult to get an even coat using rattle cans. However, if we need to do touch ups later, the aerosol cans will be very handy.

This two-part truck bed liner has held up really well over time. We haven’t had any chipping or flaking.
The bed liner has a part A and part B. The kit comes with a mixer attachment for a drill. After mixing the part A until it is an even consistency, you add the Part B, which activates the epoxy in the bed liner. Finally the mixture has to sit undisturbed for 15 minutes prior to it's application. Once it's mixed, the bed liner remains workable for about three to four hours.
This stuff basically smells like hell's underbelly, so masks to protect yourself from the fumes are a must. You also will need nitrile gloves and old painting clothes.

After the two-part epoxy bed liner has been mixed, it has to sit for 15 minutes.
Unfortunately we don't have any pictures of the application process, because the bed liner is extremely sticky and gets everywhere. It was impossible for us to use our camera.
First we applied the bed liner with brushes in the hard to reach places--anywhere the roller wouldn't reach. With the brushes, you need to use a dabbing rather than a brushing technique in order to get the correct texture. Make sure you use brushes that you are okay with destroying.
After the hard to reach areas all had one coat, we went back and did a second coat again with the brushes. The instructions say to wait 15 minutes before applying a second coat, but we were able to give it more time to dry. By the time we had finished one side of the van the other side had already been drying for about 30 minutes.
After all the hard to reach areas had two coats, we went back and did all the flat areas with the paint roller. Again we were able to work without waiting for the bed liner to dry, because by the time we had applied the first coat to second side of the van, the other side's first coat was dry enough to apply the second coat.
Once the second coat was dry on the whole van, we did a bit of touching up anywhere the texture wasn't quite right.

Ideally the bed liner would have been applied during a 3-day period with no rain, but that’s hard to find in January in Virginia.

The interior plastic panels came in handy for protecting the van from rain.
The bed liner needs 48 hours to cure completely and since rain was predicted, we had to cover the van with plastic to protect it. We left if for about three days rather than two since the weather was so humid.
Ta Dah! Here's what the van looks like once we removed the plastic covering when the bed liner was cured.
We were pretty pleased with how even the bed liner looked after our DIY application.
Here’s how the bed liner looked before we reattached the exterior trim panels.
The final step was to reattach all of the plastic trim panels on the exterior. Since they all overlap, you have to make sure that you are reattaching them in the right order.

Applying silicone to the fasteners to make them more secure and water tight.

There are a surprising number of pieces of plastic trim on this van. It was a bit of a puzzle to put it back together again.
We used a little bead of silicone caulk on the back of each of the plastic fasteners to create a better seal so that water wouldn't get into the van’s inside panels. We also used a file to scrape out any bits of the grit from the bed liner that had gotten into the holes of the van so that the fasteners would fit properly.

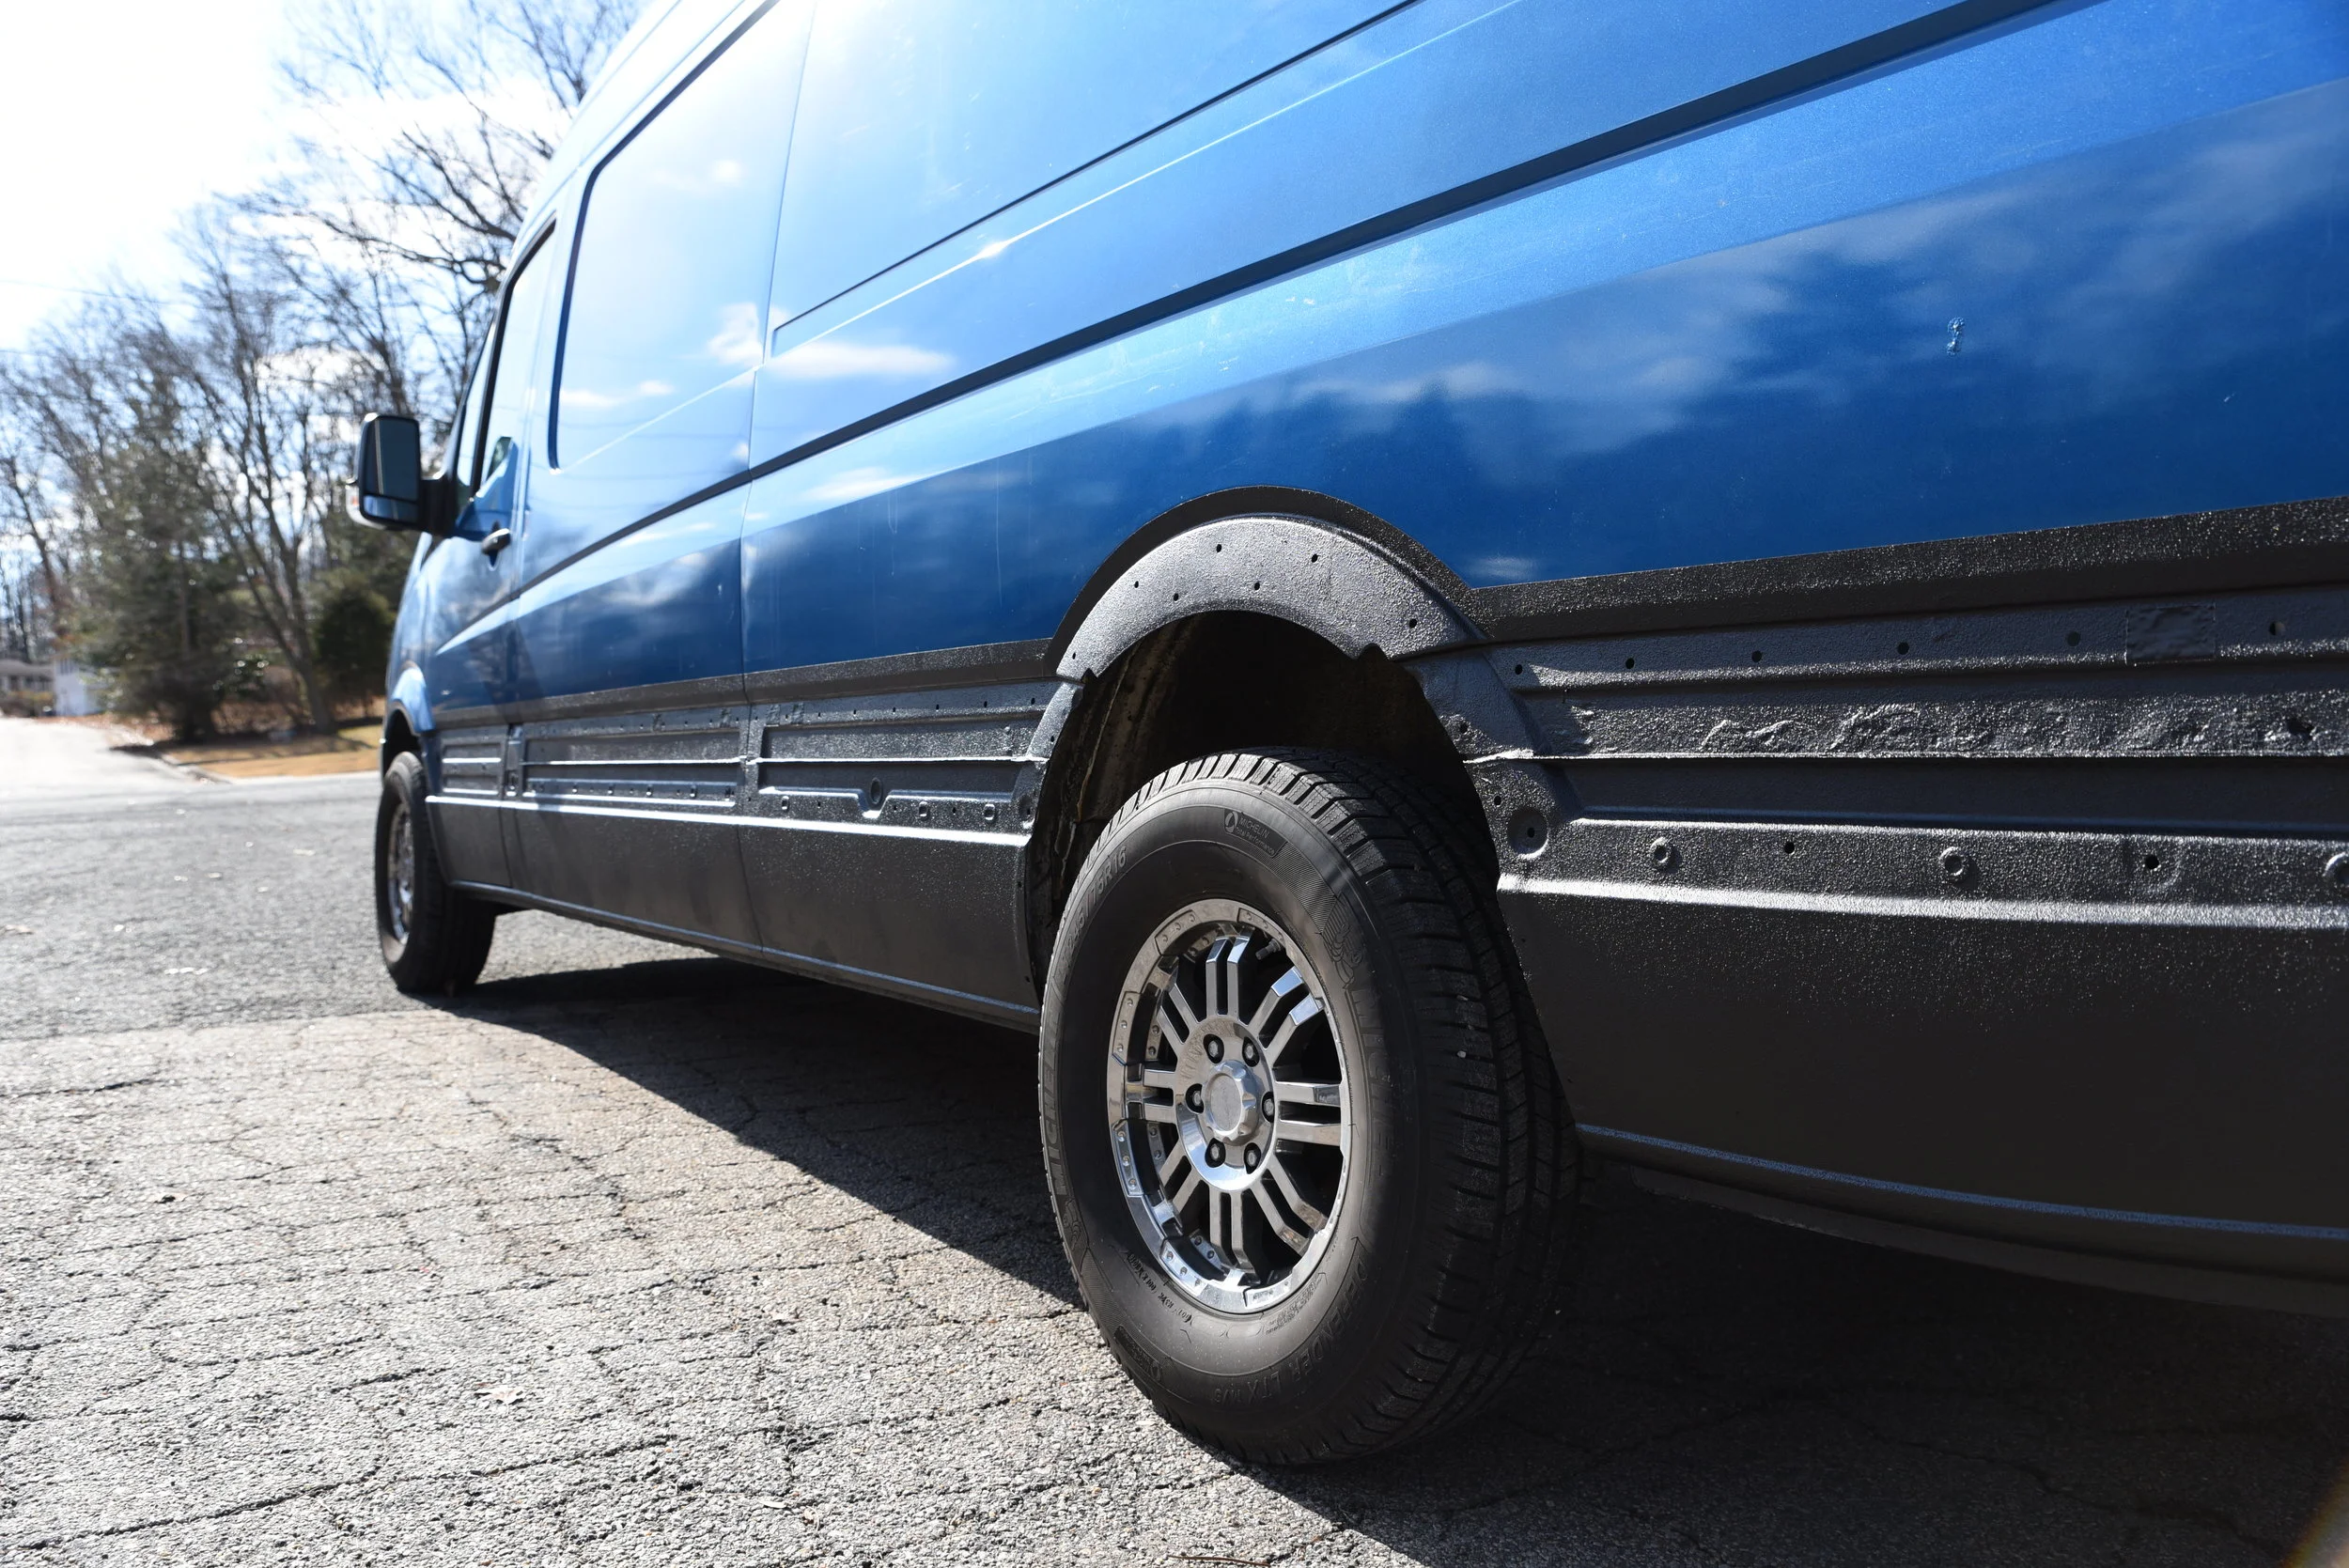
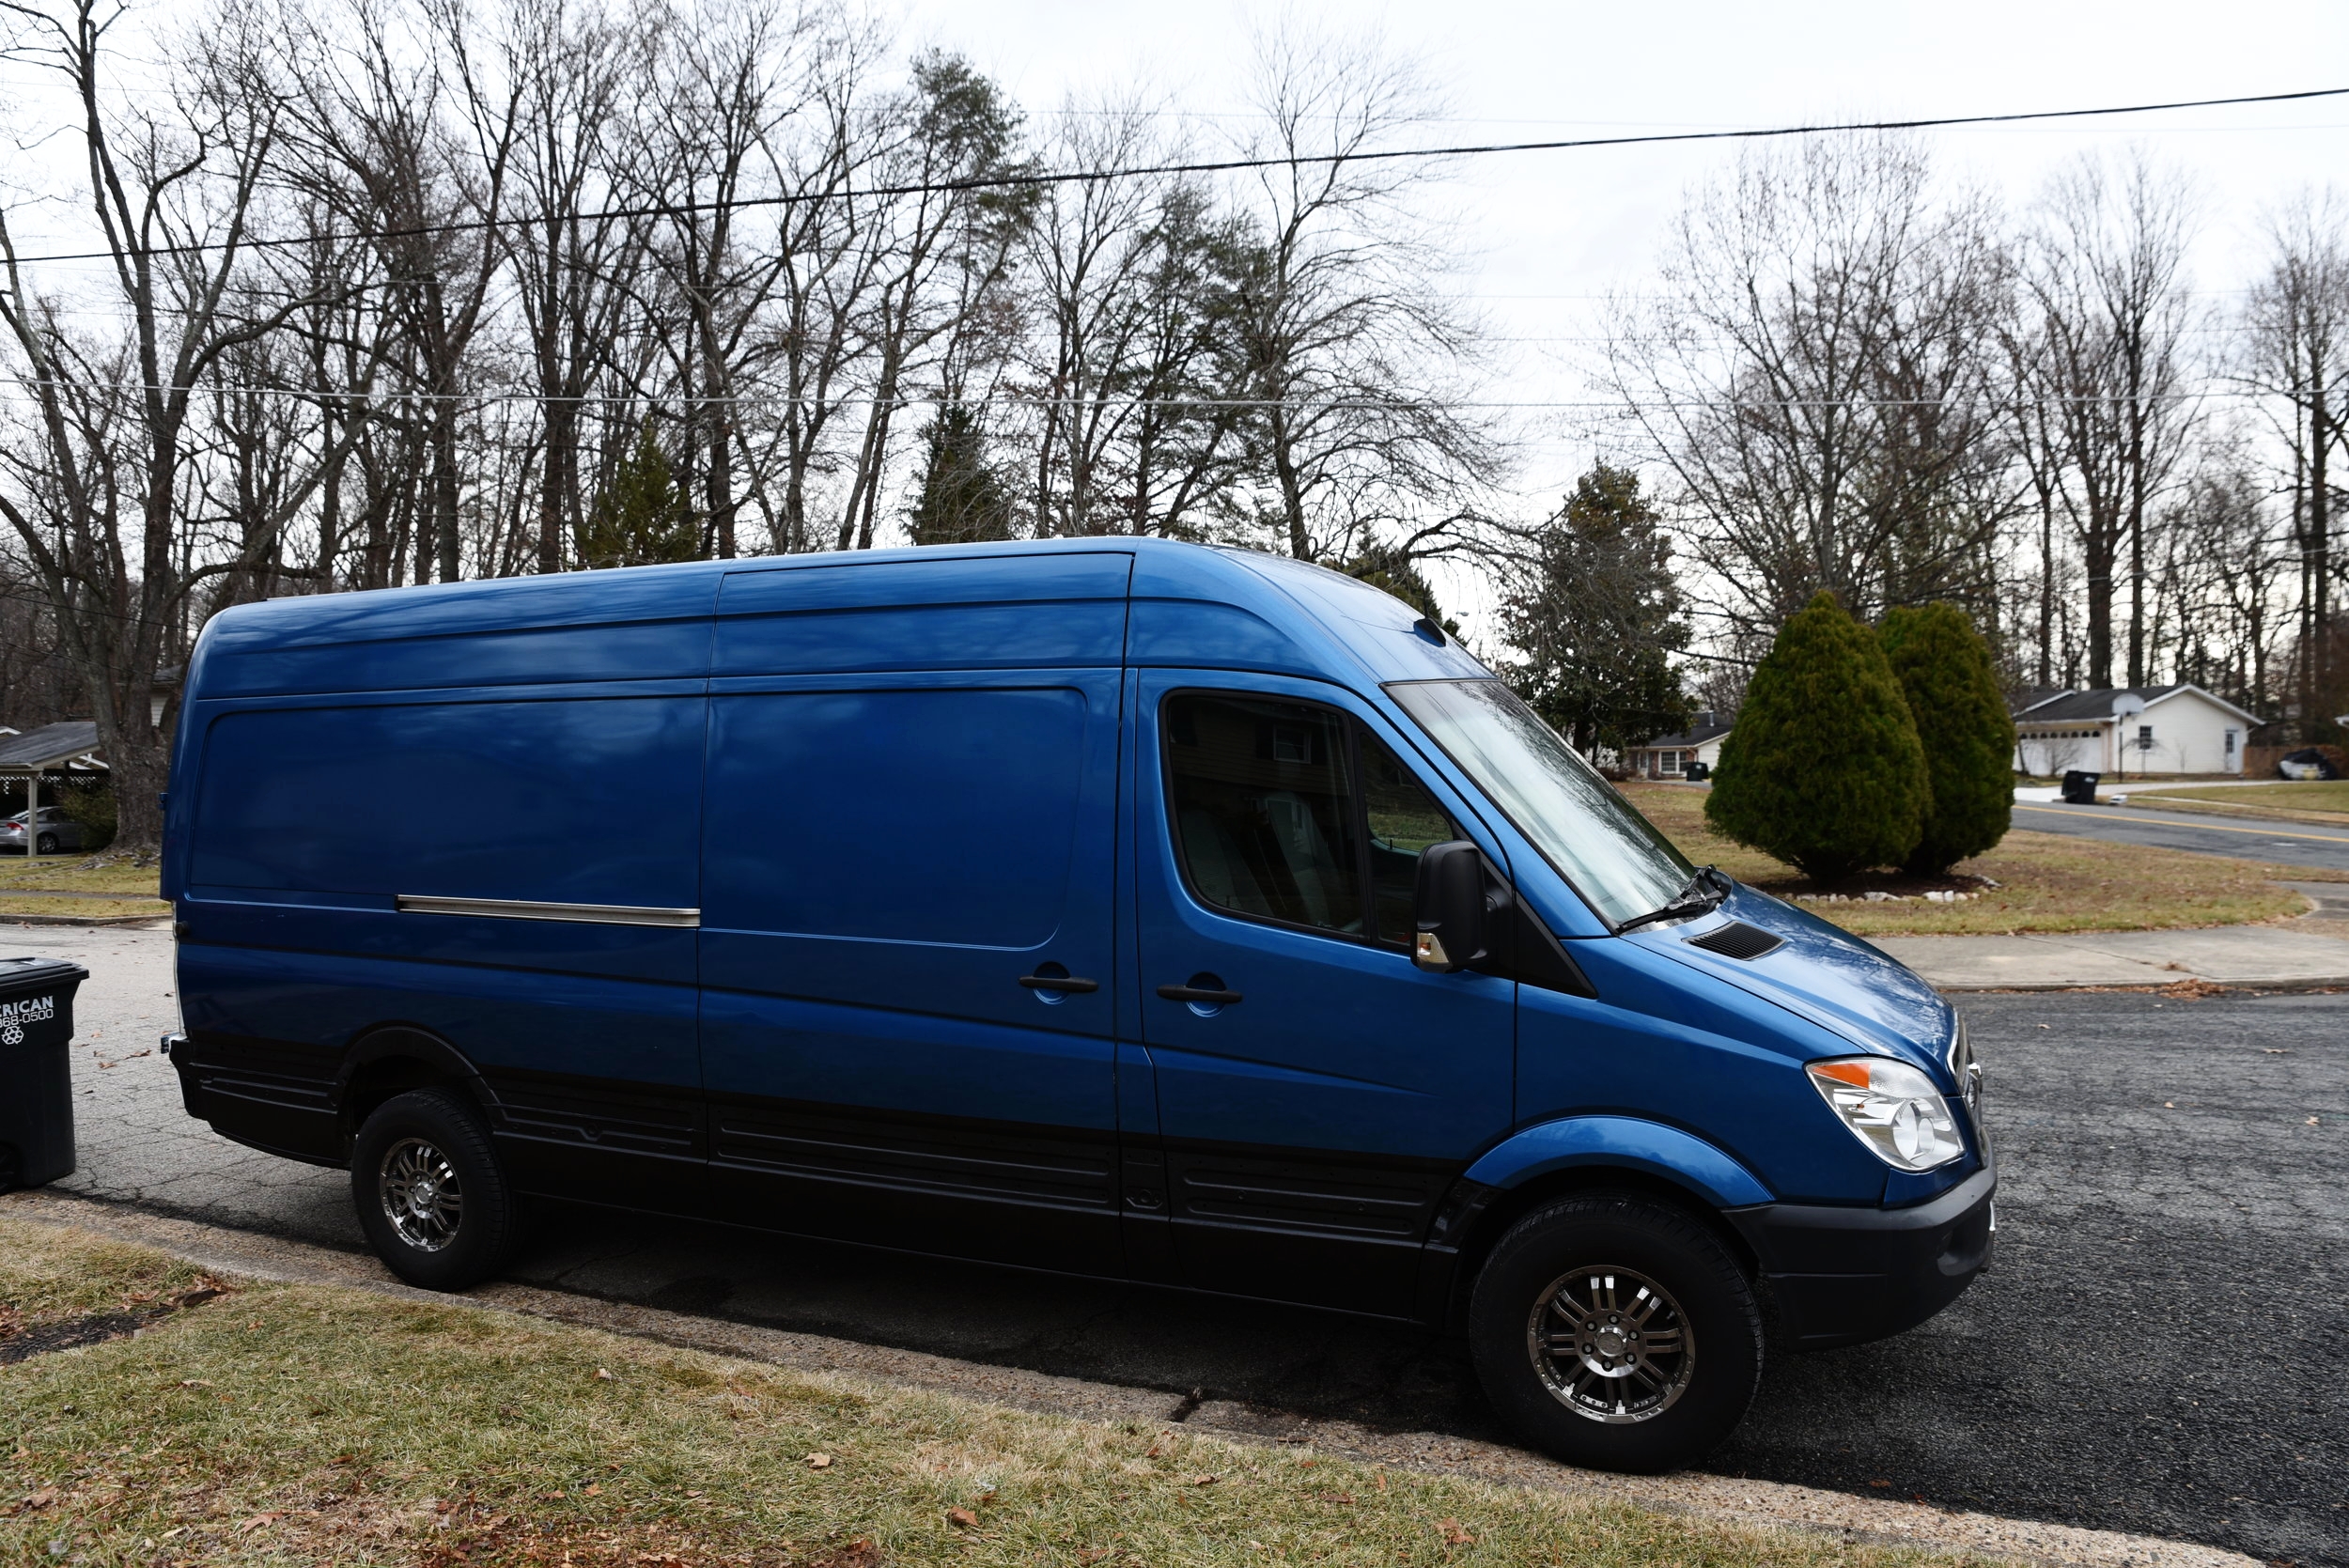
The fresh bed liner gives the van a nice rugged look—perfect for a self-converted Sprinter camper van!
Here's what the van looked like once finished. We think it turned out pretty great! Aside from the sporty look, we like that after 2 years of full time travel through wet, salty, snowy, and muddy conditions, we’ve had very little rust reappear.