
Laying Our Flooring
Laying the Groundwork
Vinyl flooring was an obvious choice for our van. It's flexible, simple to install, waterproof, and easy to clean. Not to mention that we were able to get some left over vinyl flooring for free. We also covered part of the large step by our sliding side door to increase our floor space and create useful little shoe storage cubbies.
Tools
Materials
Subfloor and Reflectix
Storage Step
3/4” AB plywood scrap
Cedar plank (1- 1x6 piece)
Insulation and Plywood Floor
1/2-inch rigid XPS insulation board
1/2-inch AC underlayment-grade plywood
Vinyl Floor
Vinyl sheet flooring
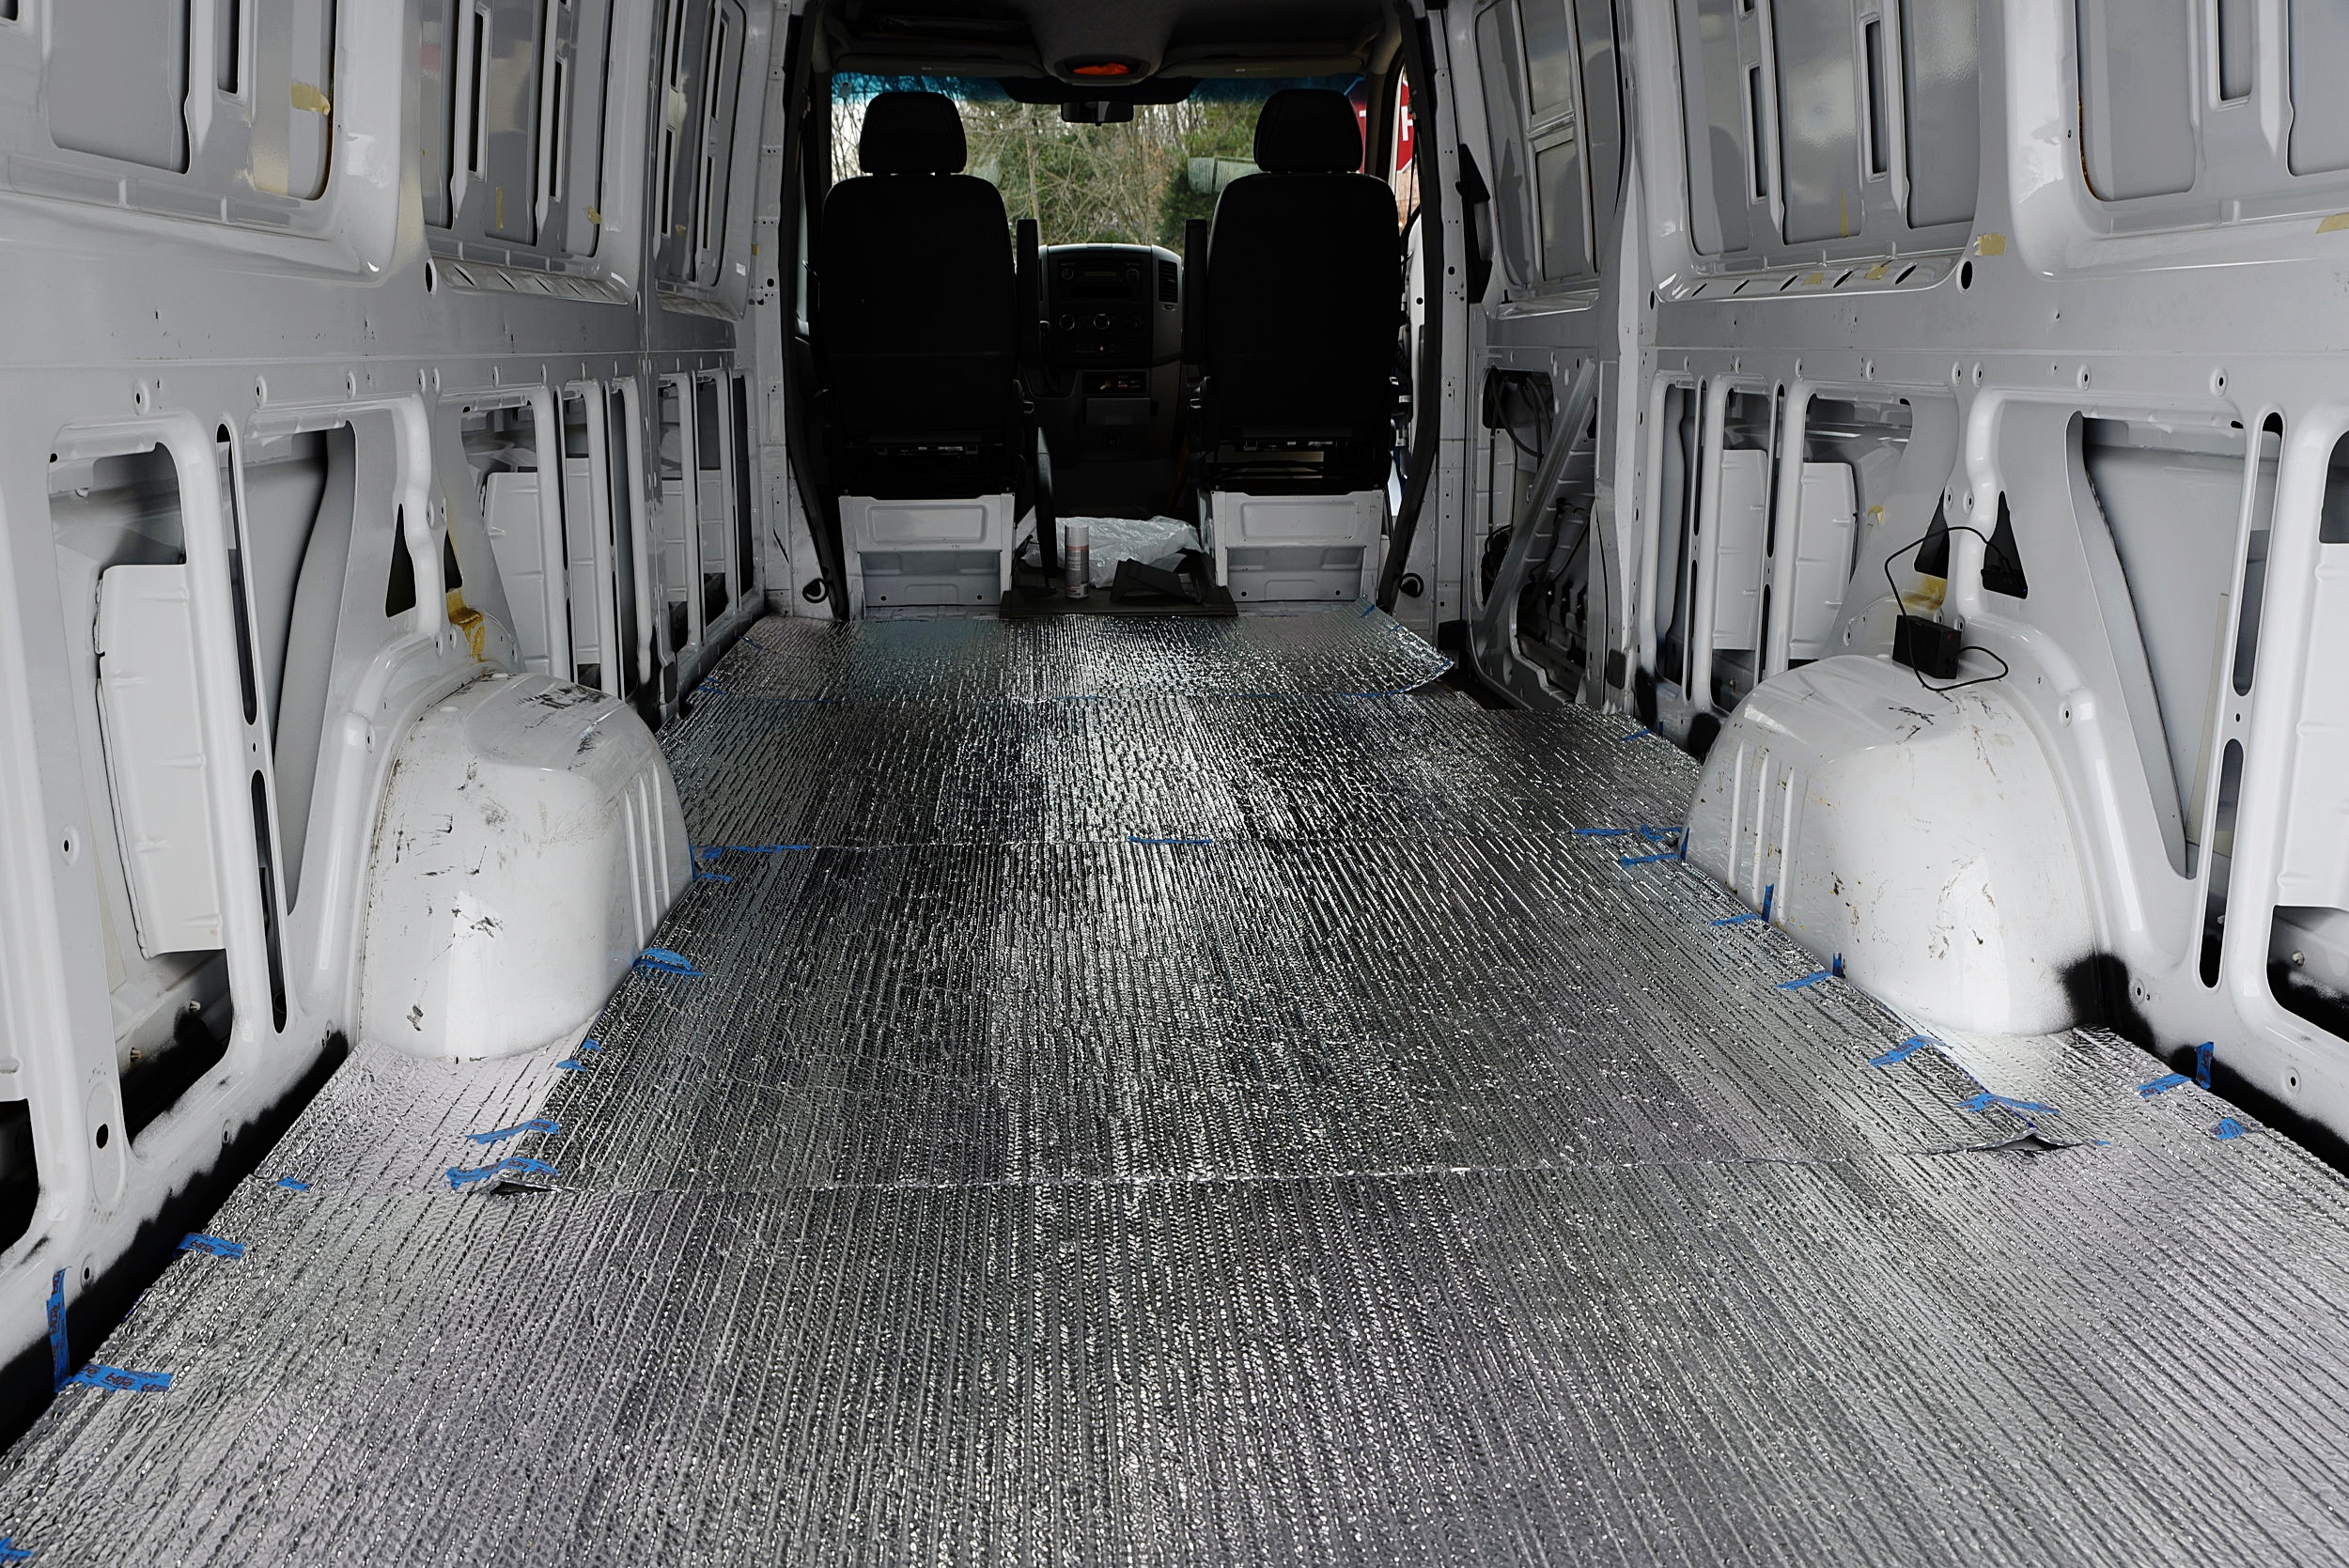
The Reflectix underneath the subfloor of our van.

The subfloor of our van that came with it when we purchased it.
Subfloor and Reflectix
Our van came with a gray plywood floor already in it. This sturdy floor has holes in it that originally held tie-down rails for hauling cargo. We removed the rails to reduce weight, and used this original plywood floor as a subfloor.
Underneath the subfloor we installed Reflectix bubble wrap insulation. (See Insulating Our Van to learn more about how we insulated our floor.)
We used self-tapping sheet metal screws to attach the subfloor to the metal floor of the van in a few places. We wanted to make sure that the "foundation" of our van floor didn't shift at all, but we didn't go crazy with the sheet metal screws, because we didn't want to create many extra holes in the van where rust could form. (Learn about how we dealt with the rust on our Sprinter van here!)
Adding Storage Cubbies to Our Step
Sprinter vans come with a very large step that runs the length of the side door. We decided that we would rather have additional floor space and storage cubbies rather than a 4.5-foot long step. The end result was about a 16-inch step and two fairly large and useful storage cubbies for shoes or other wet or muddy items. These cubbies have come in really handy (although it still seems like there are always shoes everywhere!)
The first step of our step was to extend the subfloor with a sturdy piece of high quality 3/4” plywood. Fortunately we had some scrap wood that was just about the perfect size.
We fit this piece very snugly into the space. This piece needed to be very stable and strong, because it supports about half of the weight of our fridge and withstands us repeatedly stepping on it as we get into the van. It even needs to hold us when sit on the edge of the floor by the door.
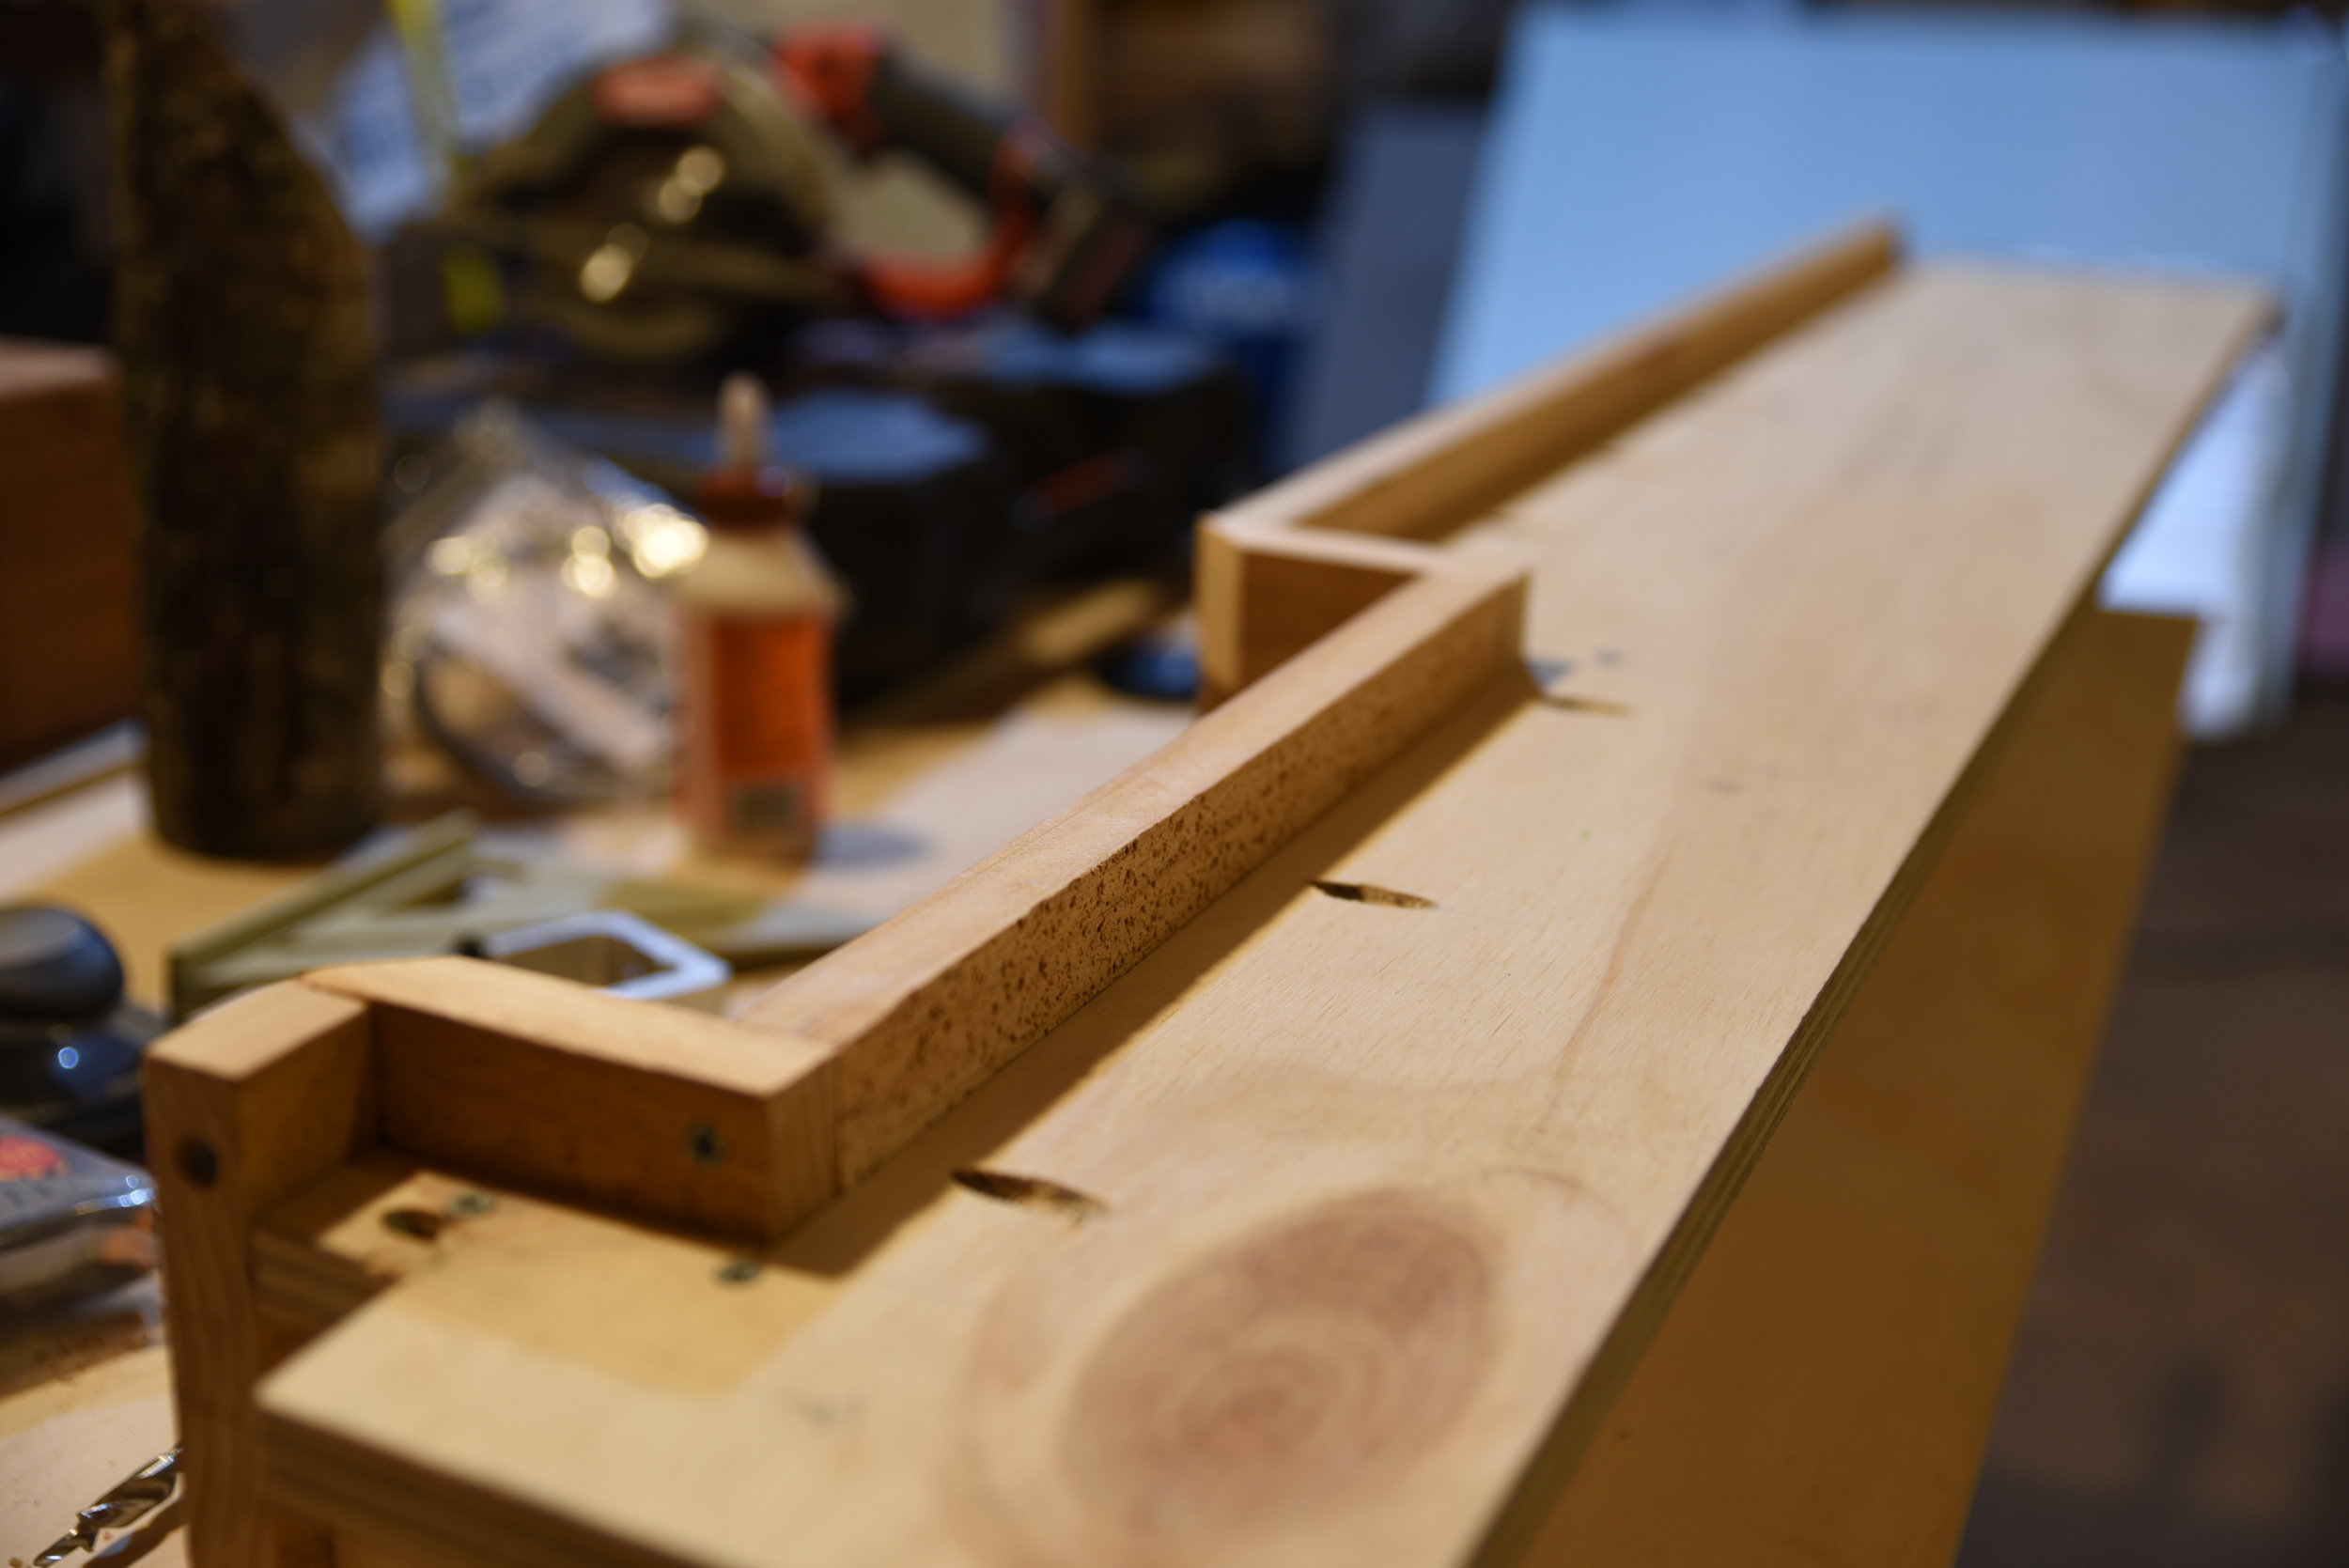
Ian was able to get the perfect, precise shape without a table saw by using a circular saw with a fence and finishing with a handheld pull saw.
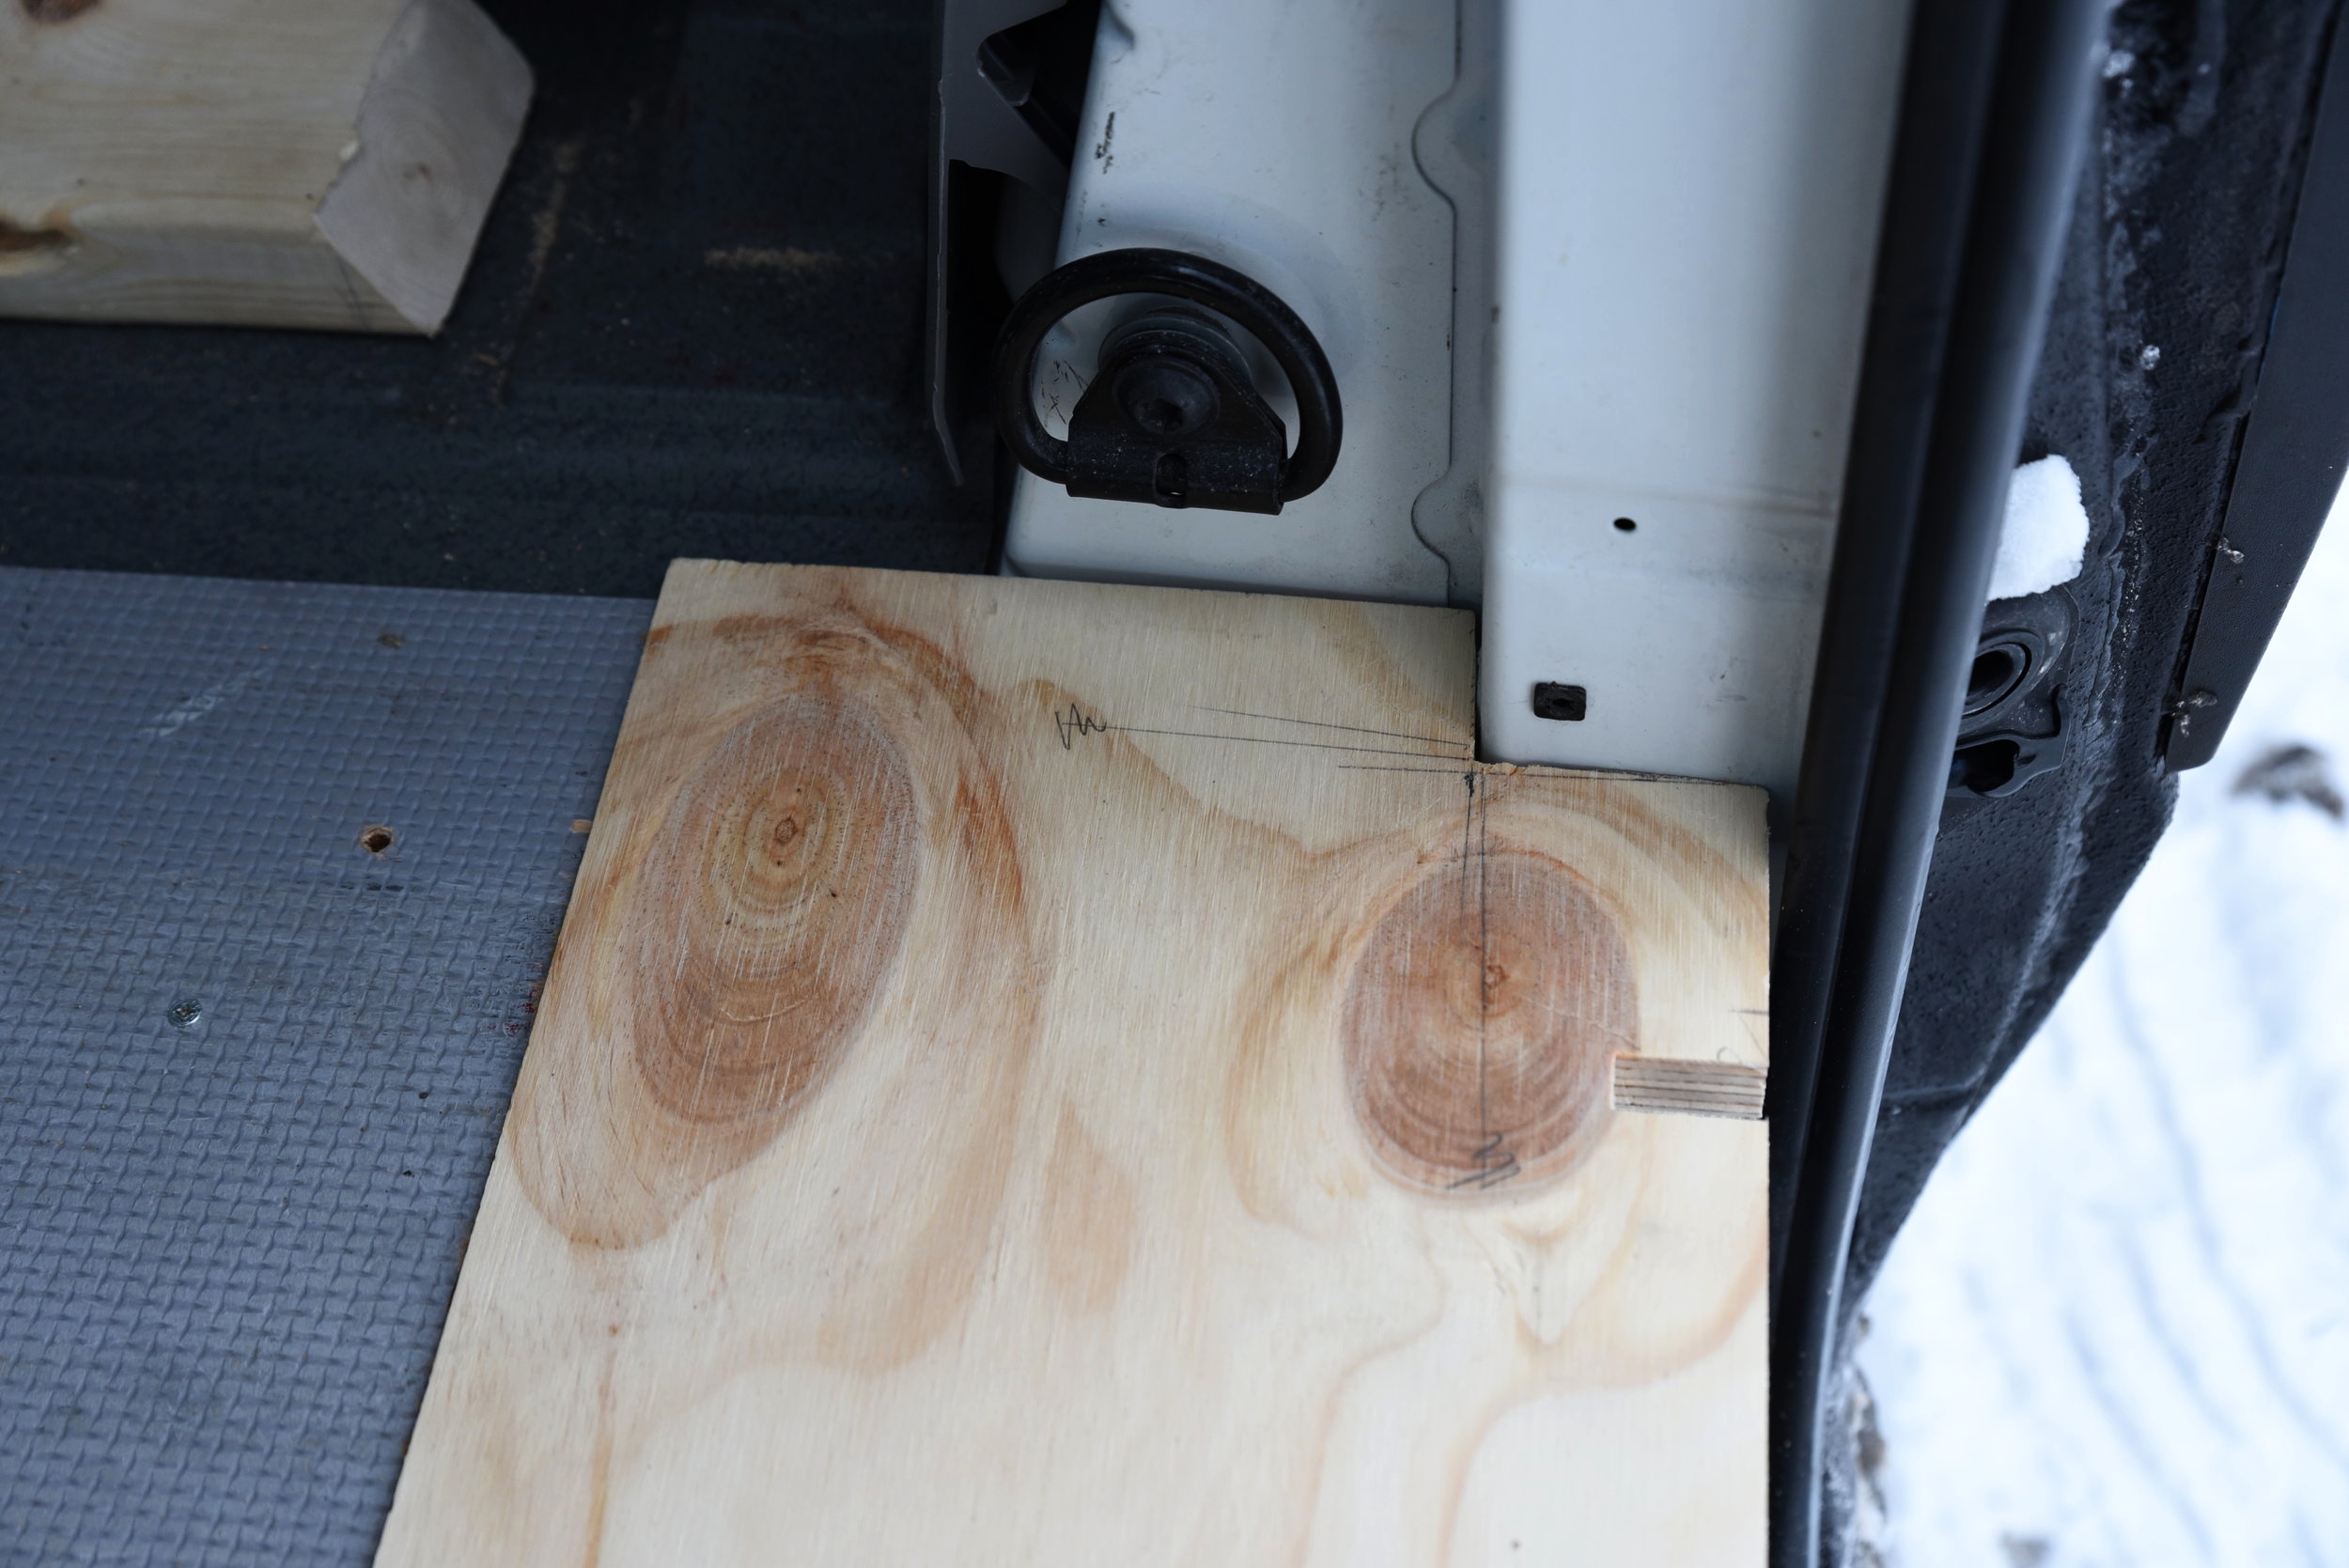
We made sure that the step had a very snug fit, because it's not attached to the van itself, only to the rest of the plywood flooring.

The step is made from a sturdy, high-quality 3/4-inch plywood.
Next we added four uprights that serve as both dividers for the cubbies and as supports for the extra floor space. We also added some beautiful cedar trim to the cubbies and the step area. The cedar is attached to the step with pocket holes so that they would be hidden by the floor and not visible from the front.
The support part of the step is part of the subfloor and our flooring lays on top of it, so we attached the trim in such a way that it would be flush with the final level of the floor, so that it would provide a clean finish at the entrance of our van.
The cubbies have rounded corners that were made using a Forstner bit on each corner. These types of bits create a clean exit so it's perfect for working with solid wood. We cut in between the holes with a jigsaw and then sanded the edges smooth by hand and with a corded finishing sander.
After sanding the step, we sealed it with a water-based polyurethane with a satin finish so that the step would be protected from dirt and moisture. We chose water-based, because it is lower in odor and VOCs making it a safer choice for a small space like a van. We applied three coats for a durable finish.
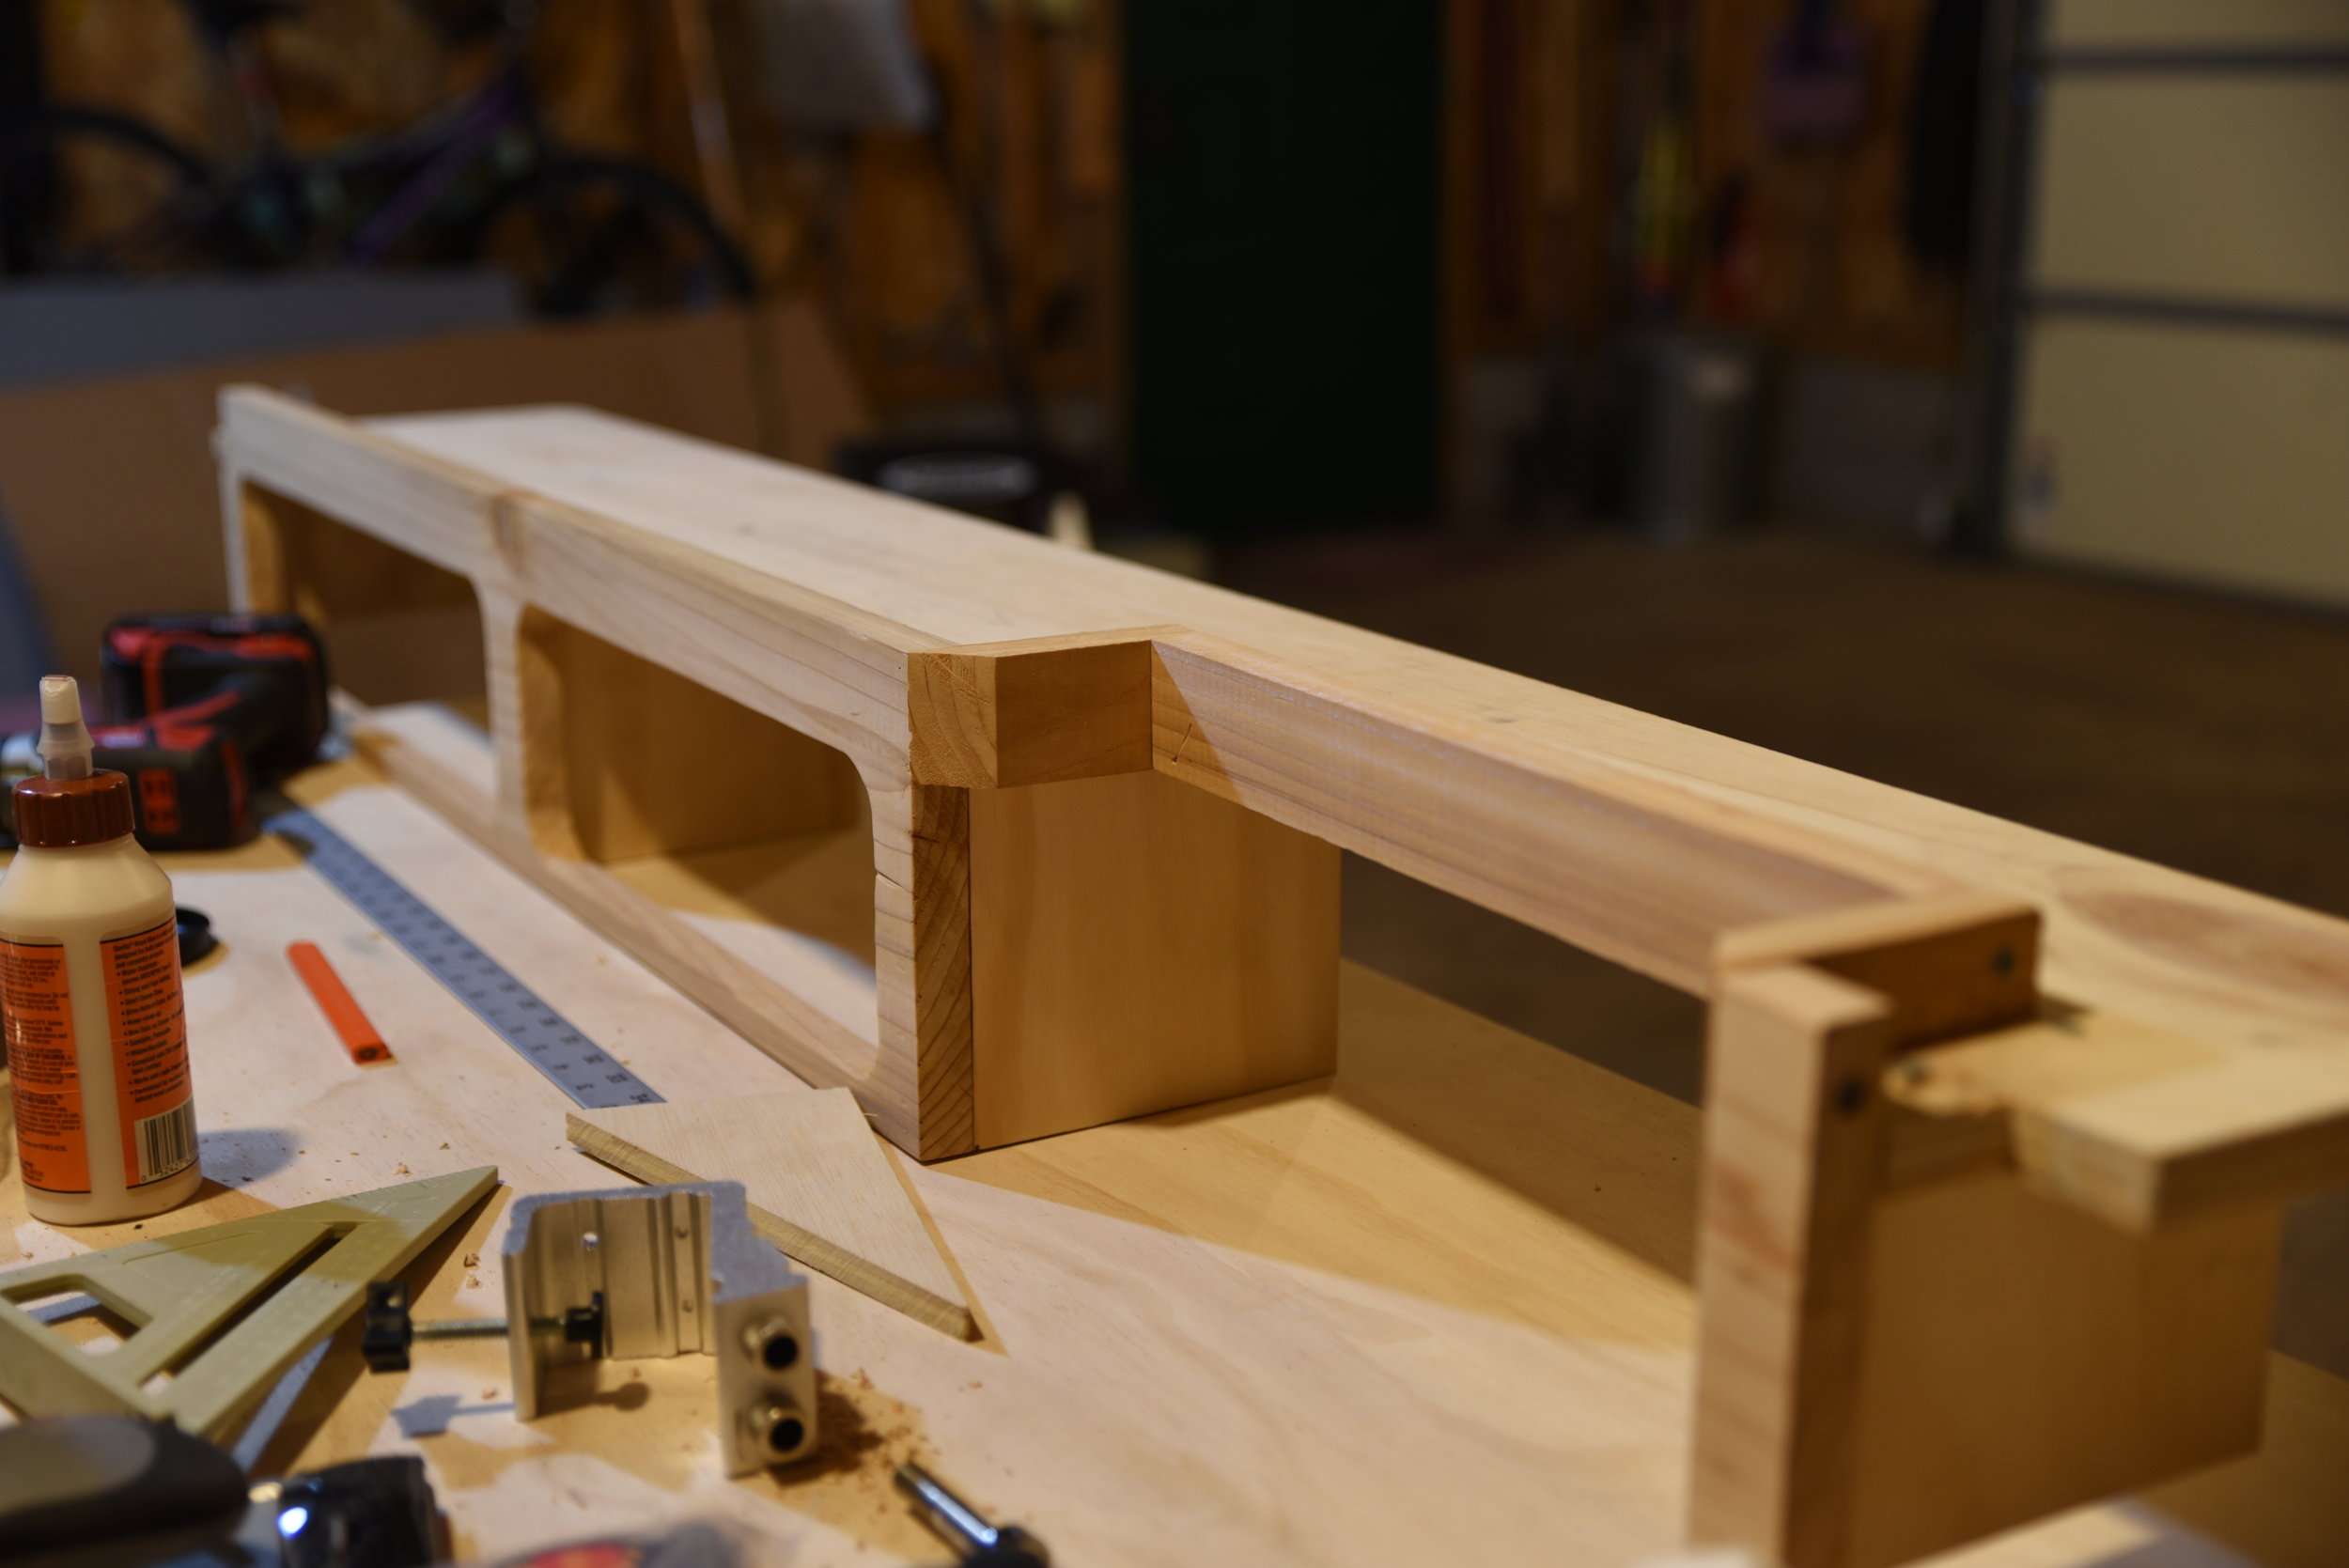
The cedar trim was cut from 6-inch planks, and it matches the cabinetry and our walls.
The trim was attached using pocket holes, and lies flat with the finished vinyl floor.
Rigid Foam Insulation and Plywood Floor
On top of the gray subfloor and our new storage step in our living area, we laid 1/2 inch of rigid foam XPS insulation. Under our bed platform storage area, we simply left the gray subfloor without any additional finishing.
Fitting the foam insulation was super simple. We just cut it to the width of the van, about 70 inches, and then we cut out sections for the pillars in the walls and around the space that we left for our step using a utility knife. (Check out Insulating Our Van for more information on the insulation in our floor and the rest of the van.)

1/2-inch XPS insulation under our floor adds an R-value of 3.0 to keep or toes warm on cold mornings.
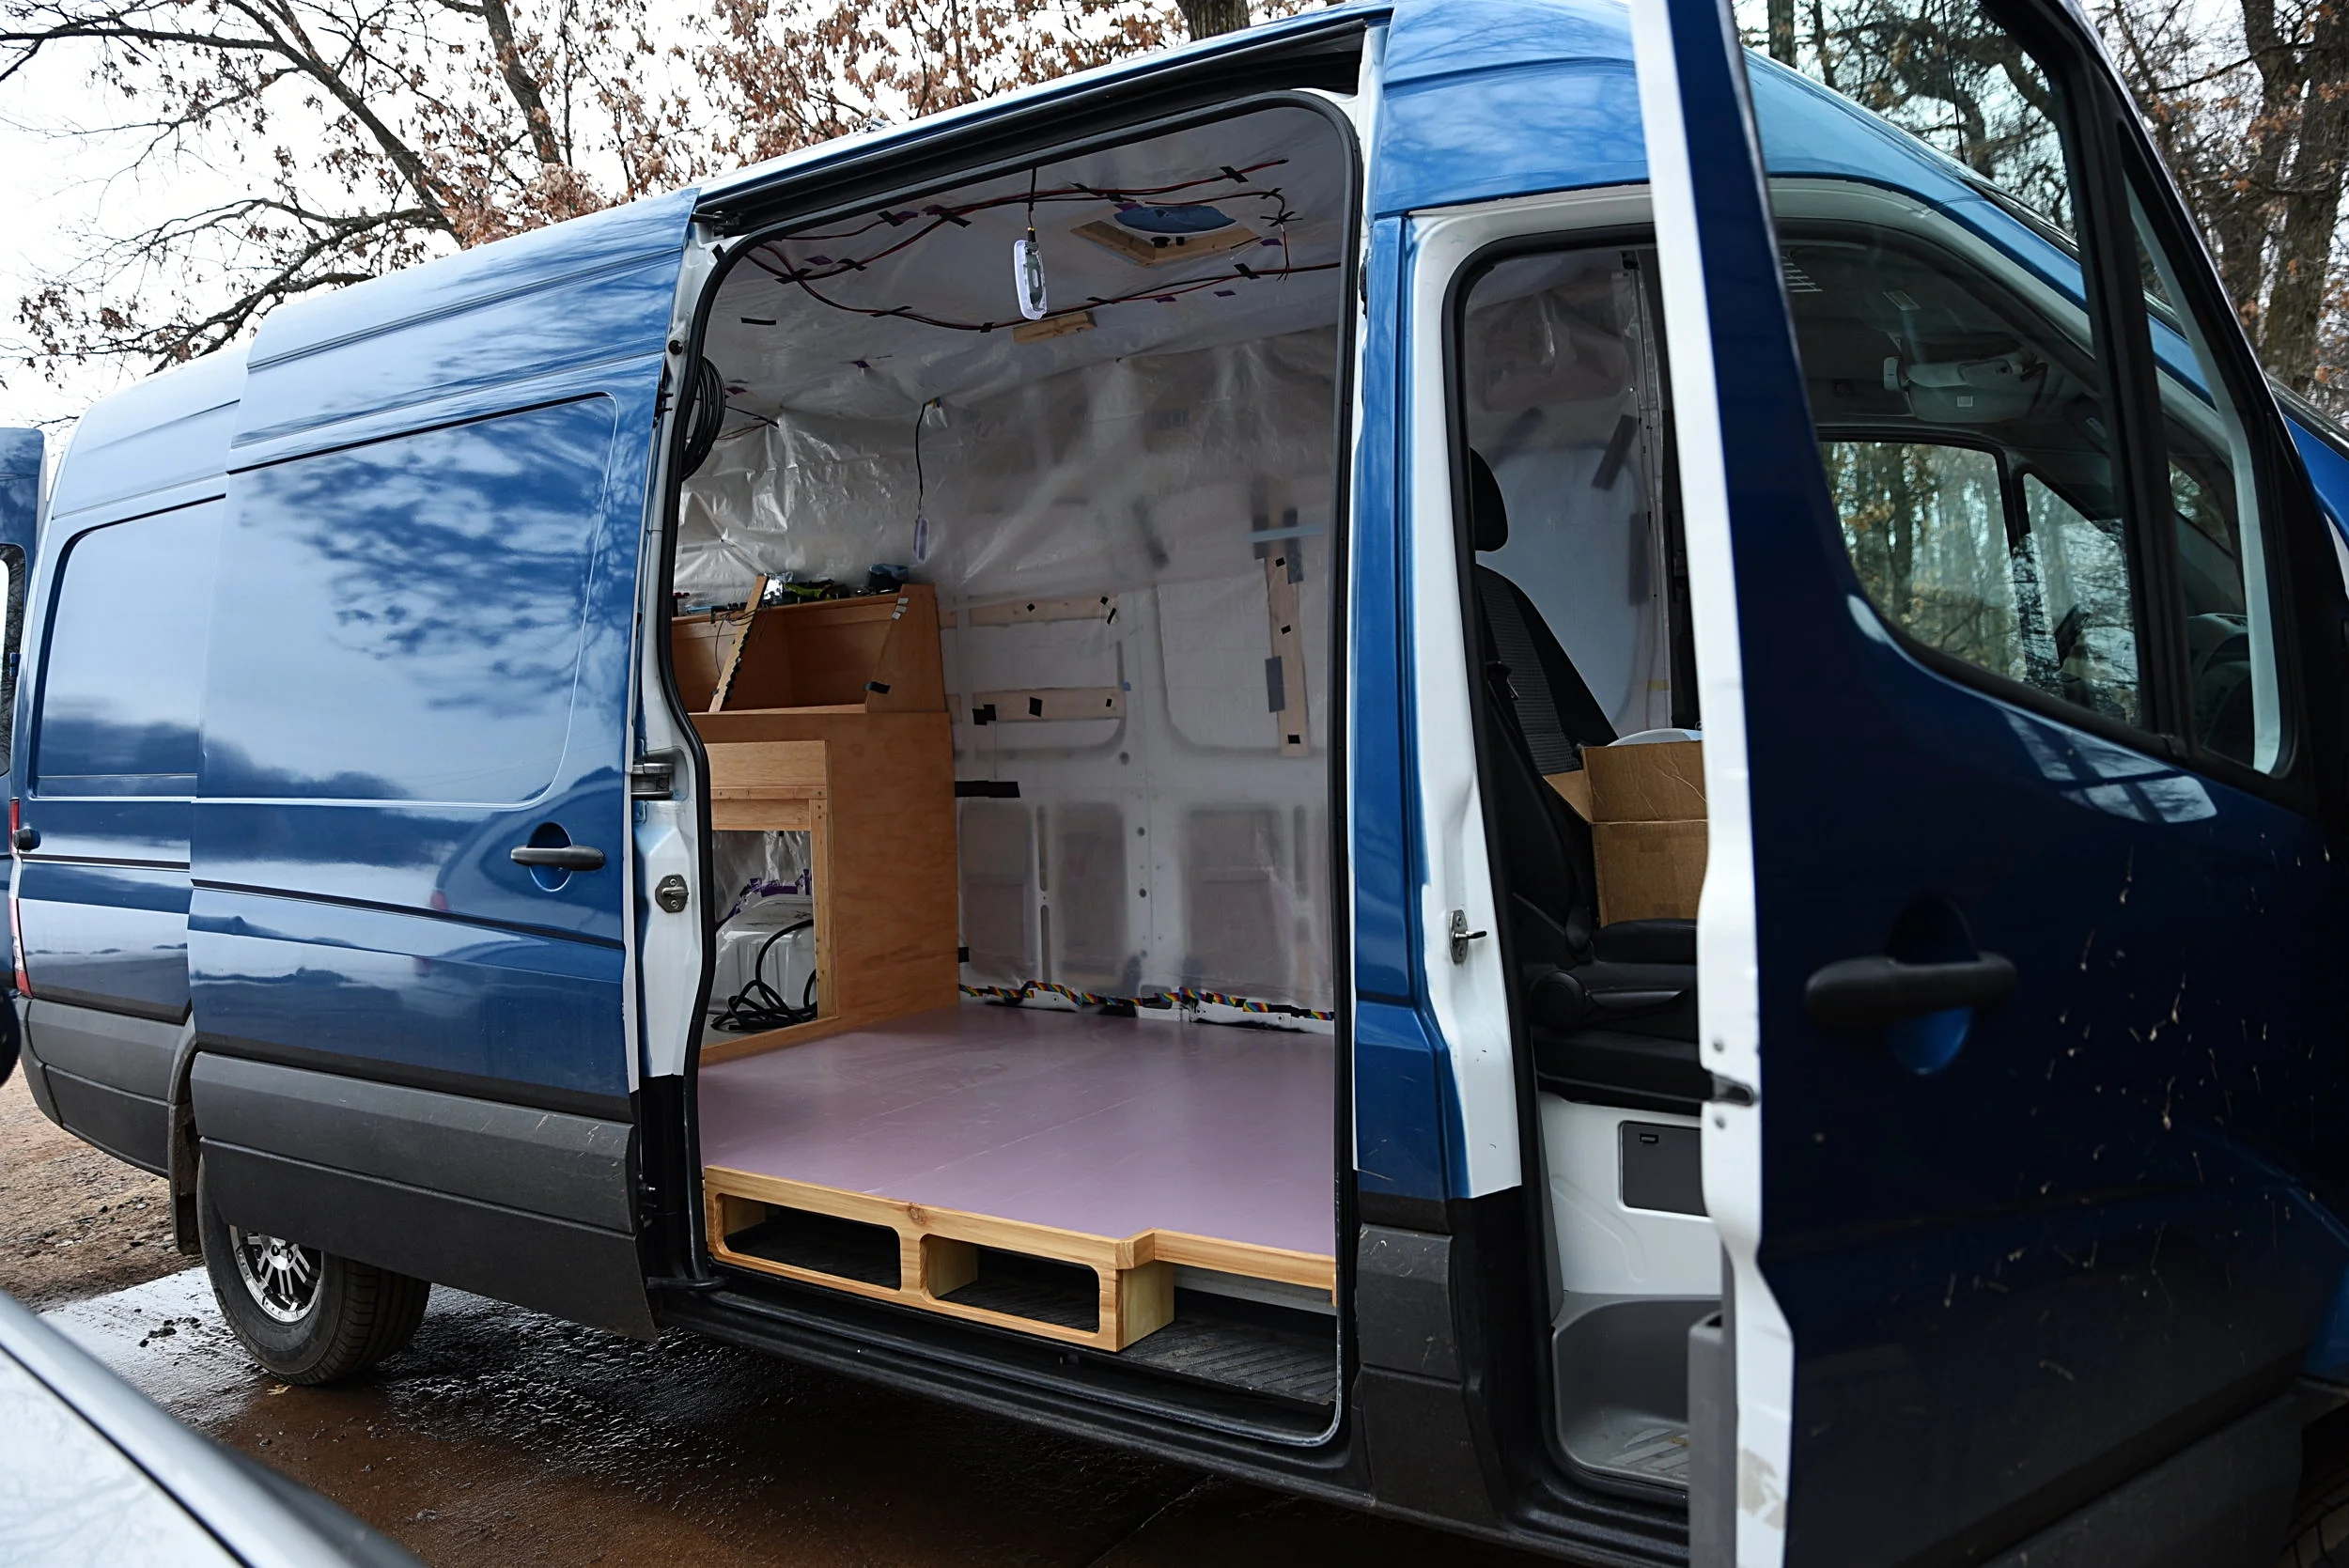
The finished storage area in our step adds floor space and a place for shoes.
After we had the foam insulation fit perfectly, we used the foam as a template to cut our plywood underlayment. We used an 1/2-inch, AC-grade, 3-ply underlayment. The A-side provides a smooth surface on which to lay our vinyl flooring. We alternated where our seams landed though so that the seam in the rigid foam insulation did not lay directly beneath the seam in the plywood floor.
We screwed the plywood underlayment to the plywood subfloor and our step storage through the layer insulation. We used 1-1/4-inch countersunk wood screws to attach the underlayment to keep a smooth surface on which to lay our vinyl flooring.

Ian lays the plywood underlayment portion of the flooring in the van.
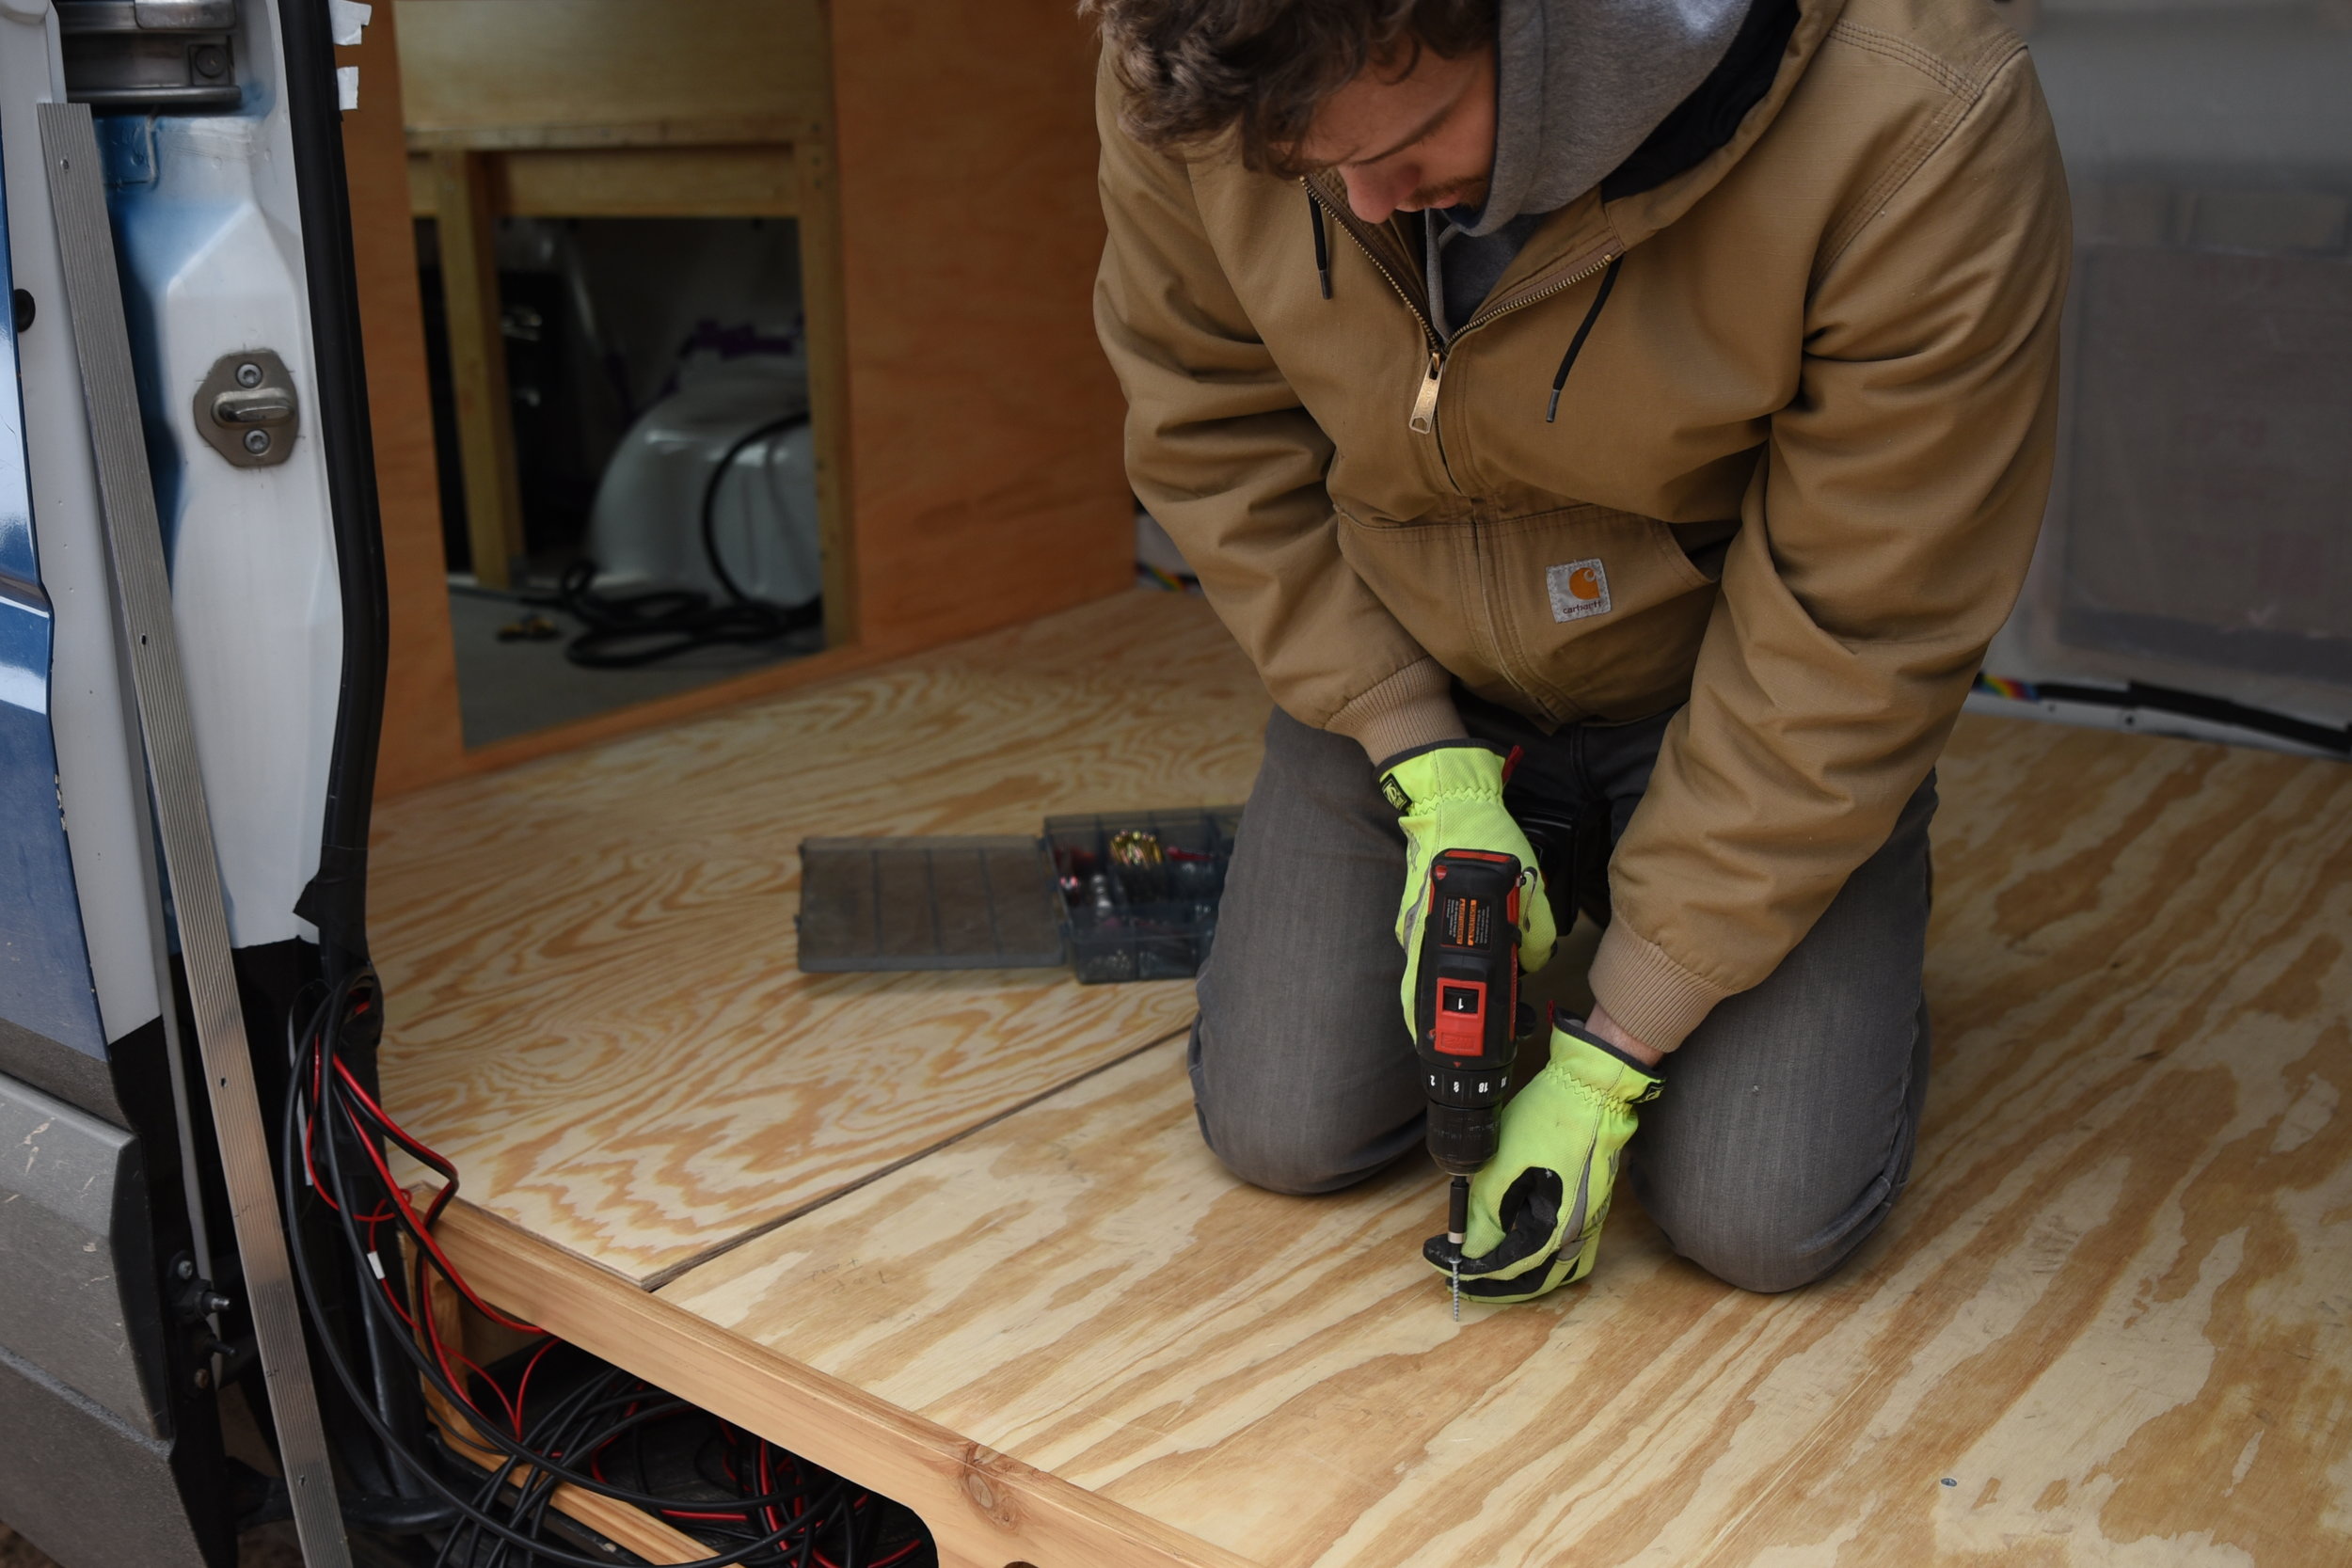
Ian screws the plywood underlayment through the foam insulation into the plywood subfloor below.
Adding a Vinyl Floor
Vinyl is a great choice for van living. It's a cheap and fairly durable surface that is super flexible. While click-in laminate planks can give a slightly more realist wood floor look, water can seep in between the planks. We got some extra vinyl sheet flooring for free in an attractive dark wood floor pattern.
Prior to screwing in our plywood floor we brought it indoors and used it as a template to cut our vinyl floor. Our vinyl floor has a "hardwood" pattern, so we lined the plywood underlayment up with one of the planks to ensure that the pattern was straight on our floor.
Once we had the vinyl sheet lined up where we wanted it, we slid a board underneath the edge to protect the floor of the house. Then we cut around the perimeter using a utility knife.

We used the plywood underlayment as a template to cut the vinyl to the correct size and shape.
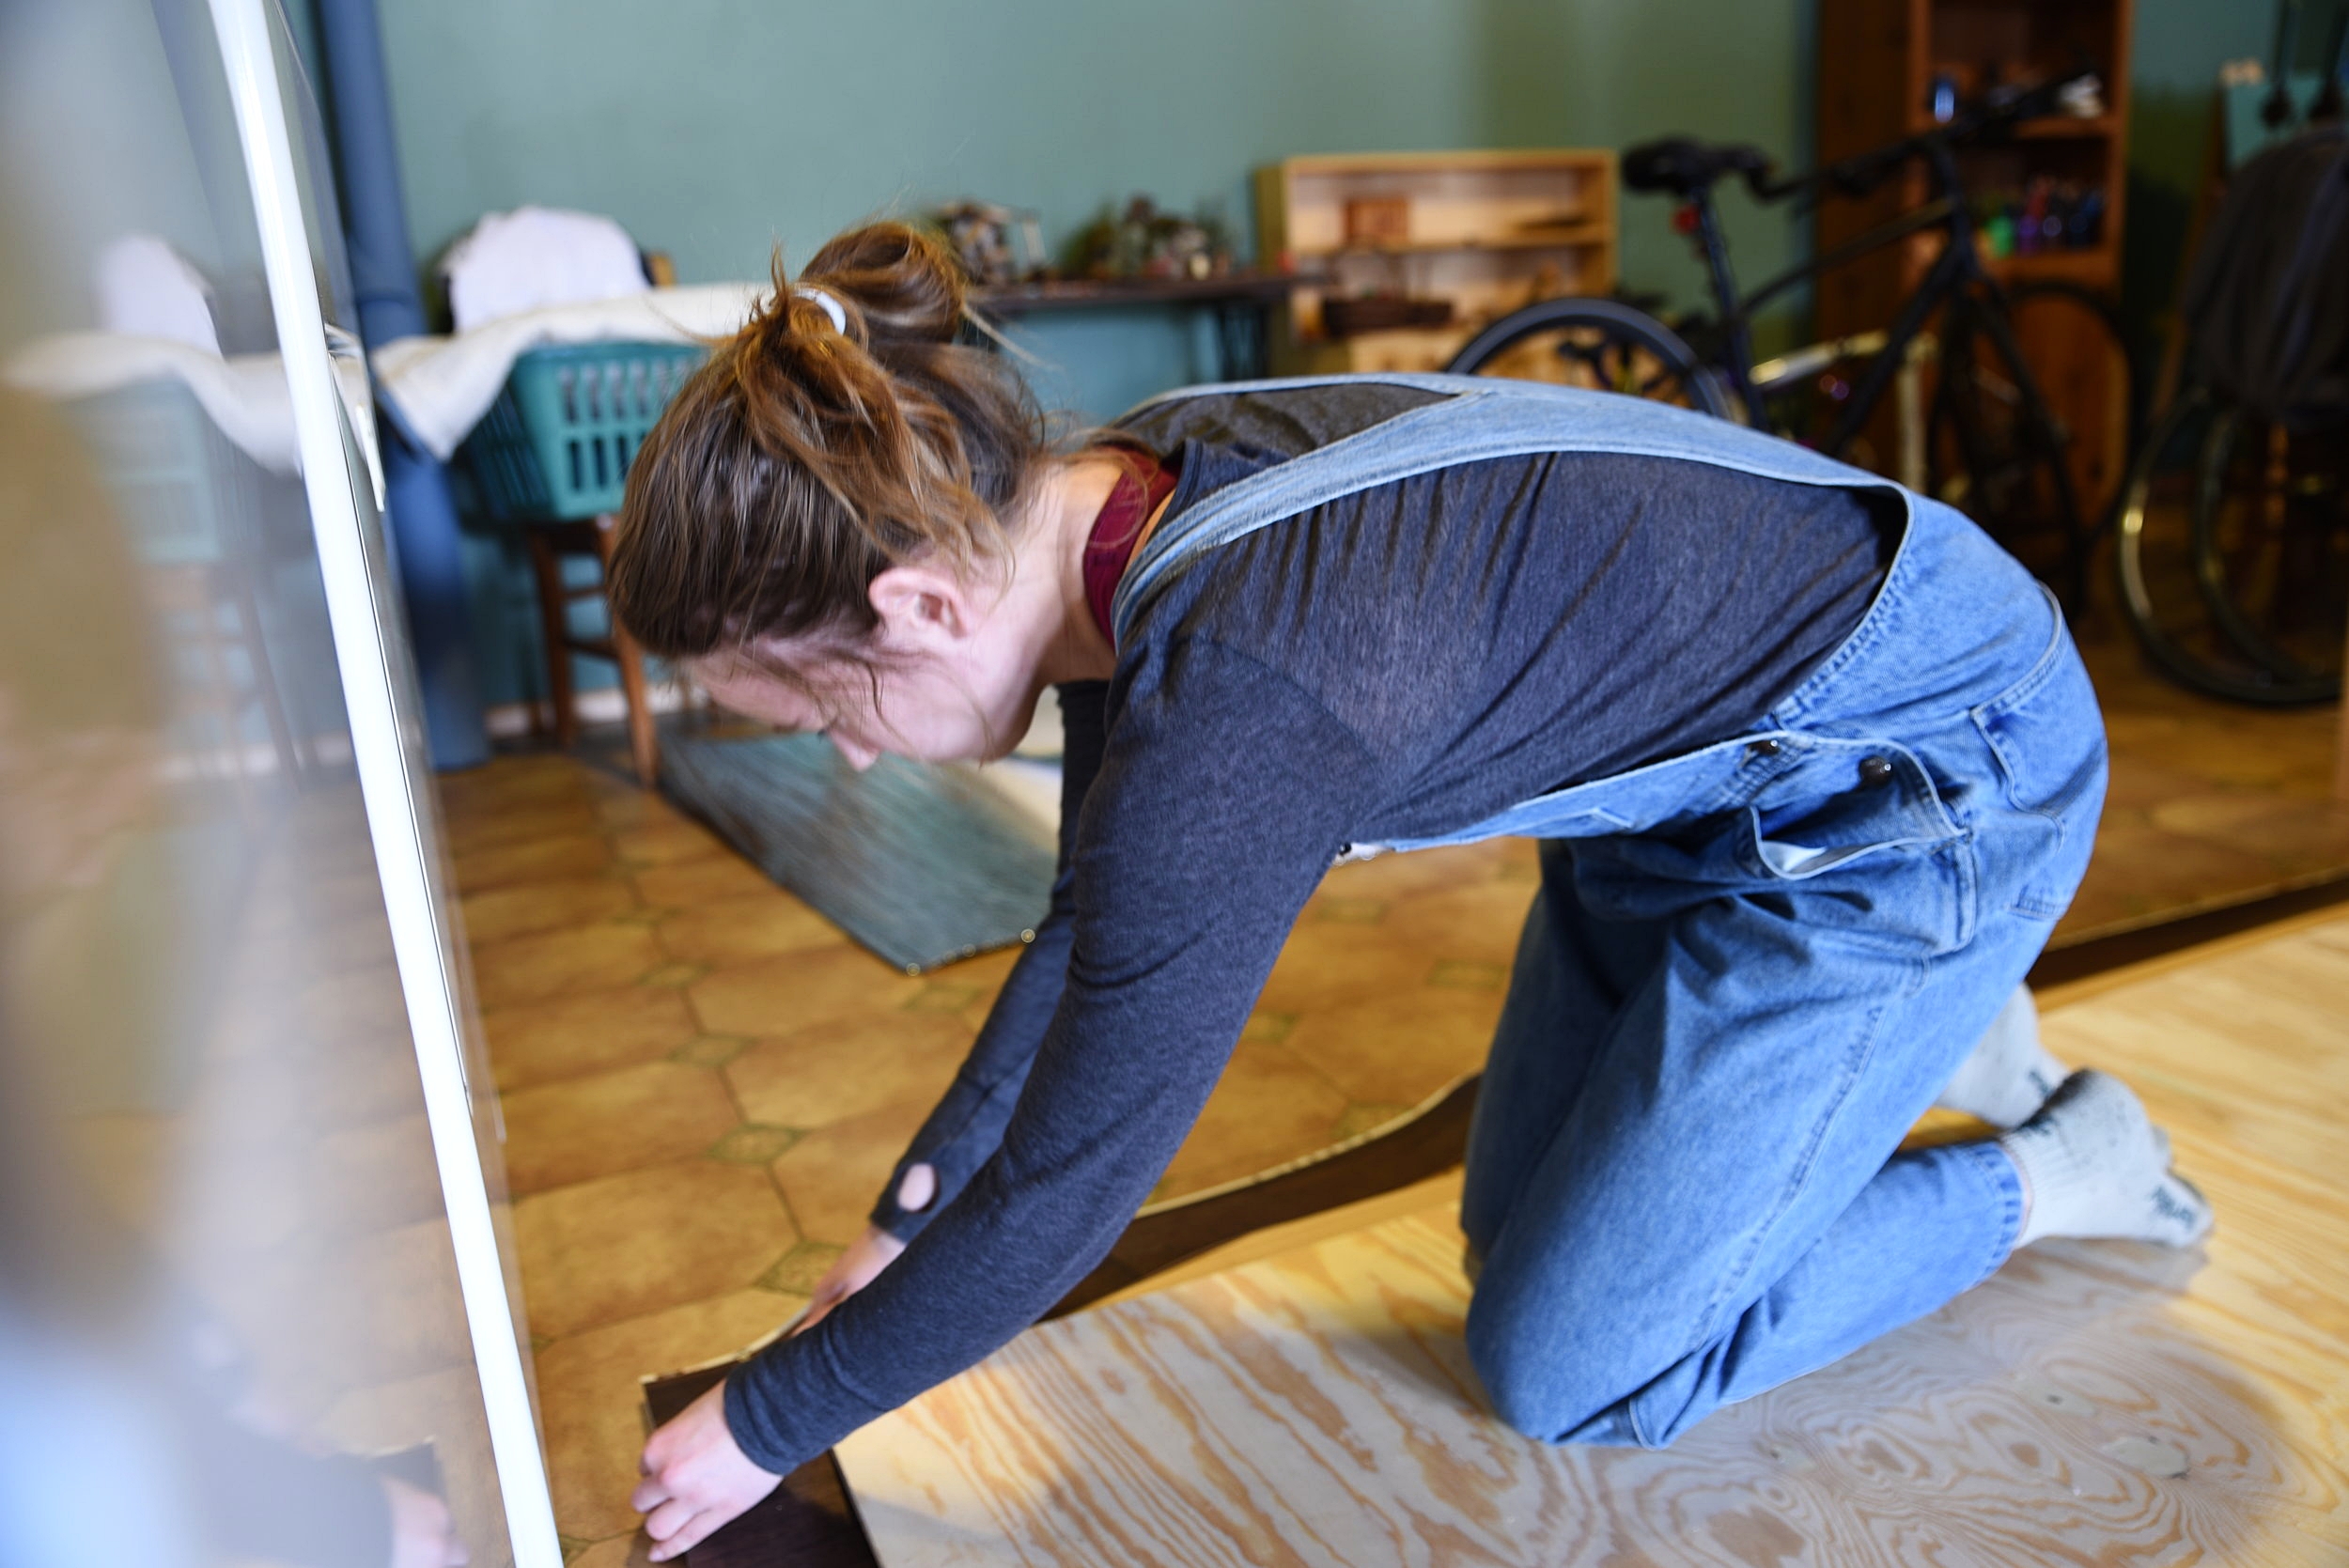
Kaylee uses a utility knife to cut the vinyl sheet flooring.
With the vinyl cut, we test fit it in the van and trimmed it in a few places. Once we got the fit just right, we removed the vinyl and did as much other work as we could before installing it to avoid scuffing or nicking it.

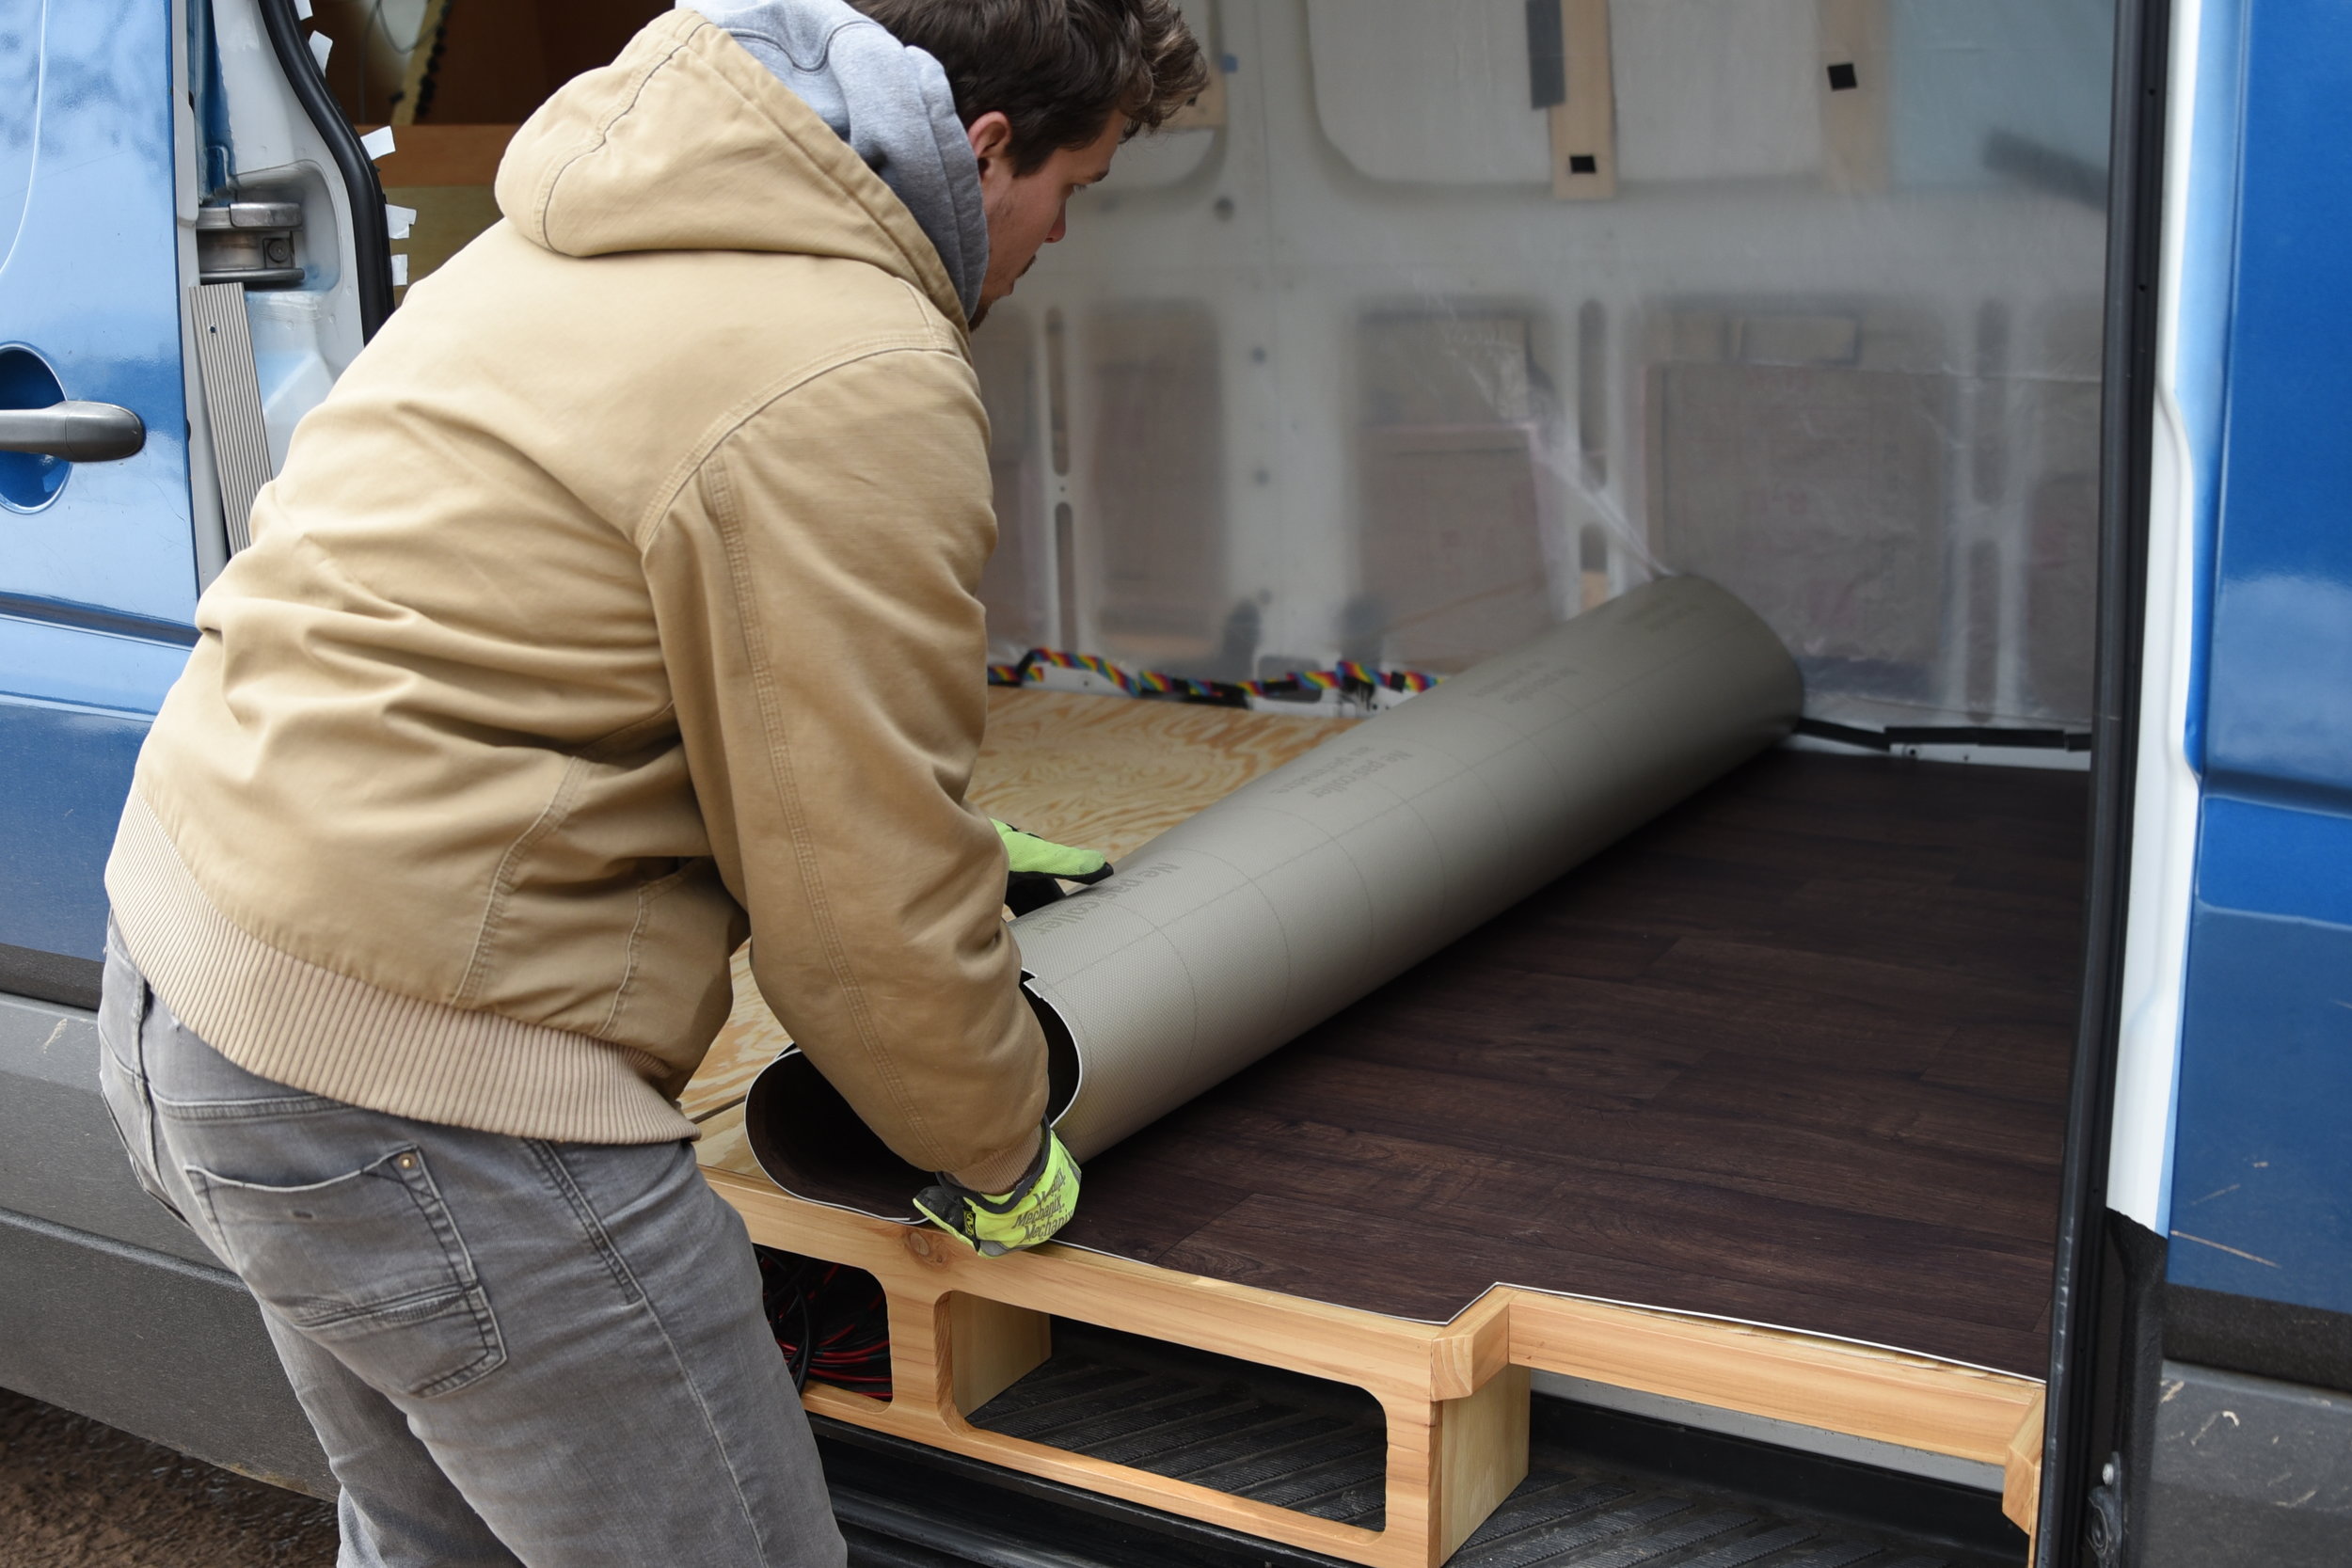
Ian rolls back the vinyl flooring for storage until we were ready to install it. Delaying the installation of the vinyl helped prevent us from scratching or scuffing the finished flooring.
However the vinyl floor also serves as the bottom surface inside our cabinetry, so we couldn't delay installing it too long. Prior to installing the vinyl, we did a very thorough sweeping and cleaning of the plywood underlayment so there wouldn't be any sand or grit underneath the vinyl.
To adhere the vinyl sheeting to the plywood underlayment, we used a high-strength contact spray adhesive from 3M. Since it's a spray, we masked off the few places that we didn't want to get adhesive on.
The adhesive has to be sprayed on both the floor and the bottom of the sheet of vinyl. Once we laid the vinyl in the van, we carefully rolled it back about half way, being careful to keep it straight.

We used this high-strength adhesive to attach the flooring in our van.

Ian sprays the adhesive to attach the vinyl flooring in our Sprinter.
Then we sprayed it both on the floor and the sheet vinyl. After letting it sit the prescribed two minutes and allowing it to get tacky, we rolled the sheet of vinyl back on to the plywood, being careful to not create any air bubbles. We used our hands and feet to smooth it out and remove any air that may have been captured under the floor.
After the first side had bonded for 10 minutes, we repeated the same process with the adhesive on the other side. After adhering, we weighed down the corners with heavy items and let it sit for a day before walking on it to make sure it had bonded properly.
Afterward we covered the floor with a thick plastic sheeting to protect it during the rest of the build.

Ian rolls the vinyl flooring out onto the Spray adhesive in the van.

We weighed each section of flooring down while adhesive was curing.
In our finished van, the faux-hardwood vinyl flooring provides a nice contrast to the lighter cedar paneling and cabinetry. It's super easy to clean and it offers a durable, waterproof bottom to our cabinets and the bench that holds our fridge. The shoe cubbies are very useful for quick storage of dirty shoes and other items, and the cedar on the step storage adds a nice finish to the main entrance of our van.