
Vanlife Removable Chuck Box

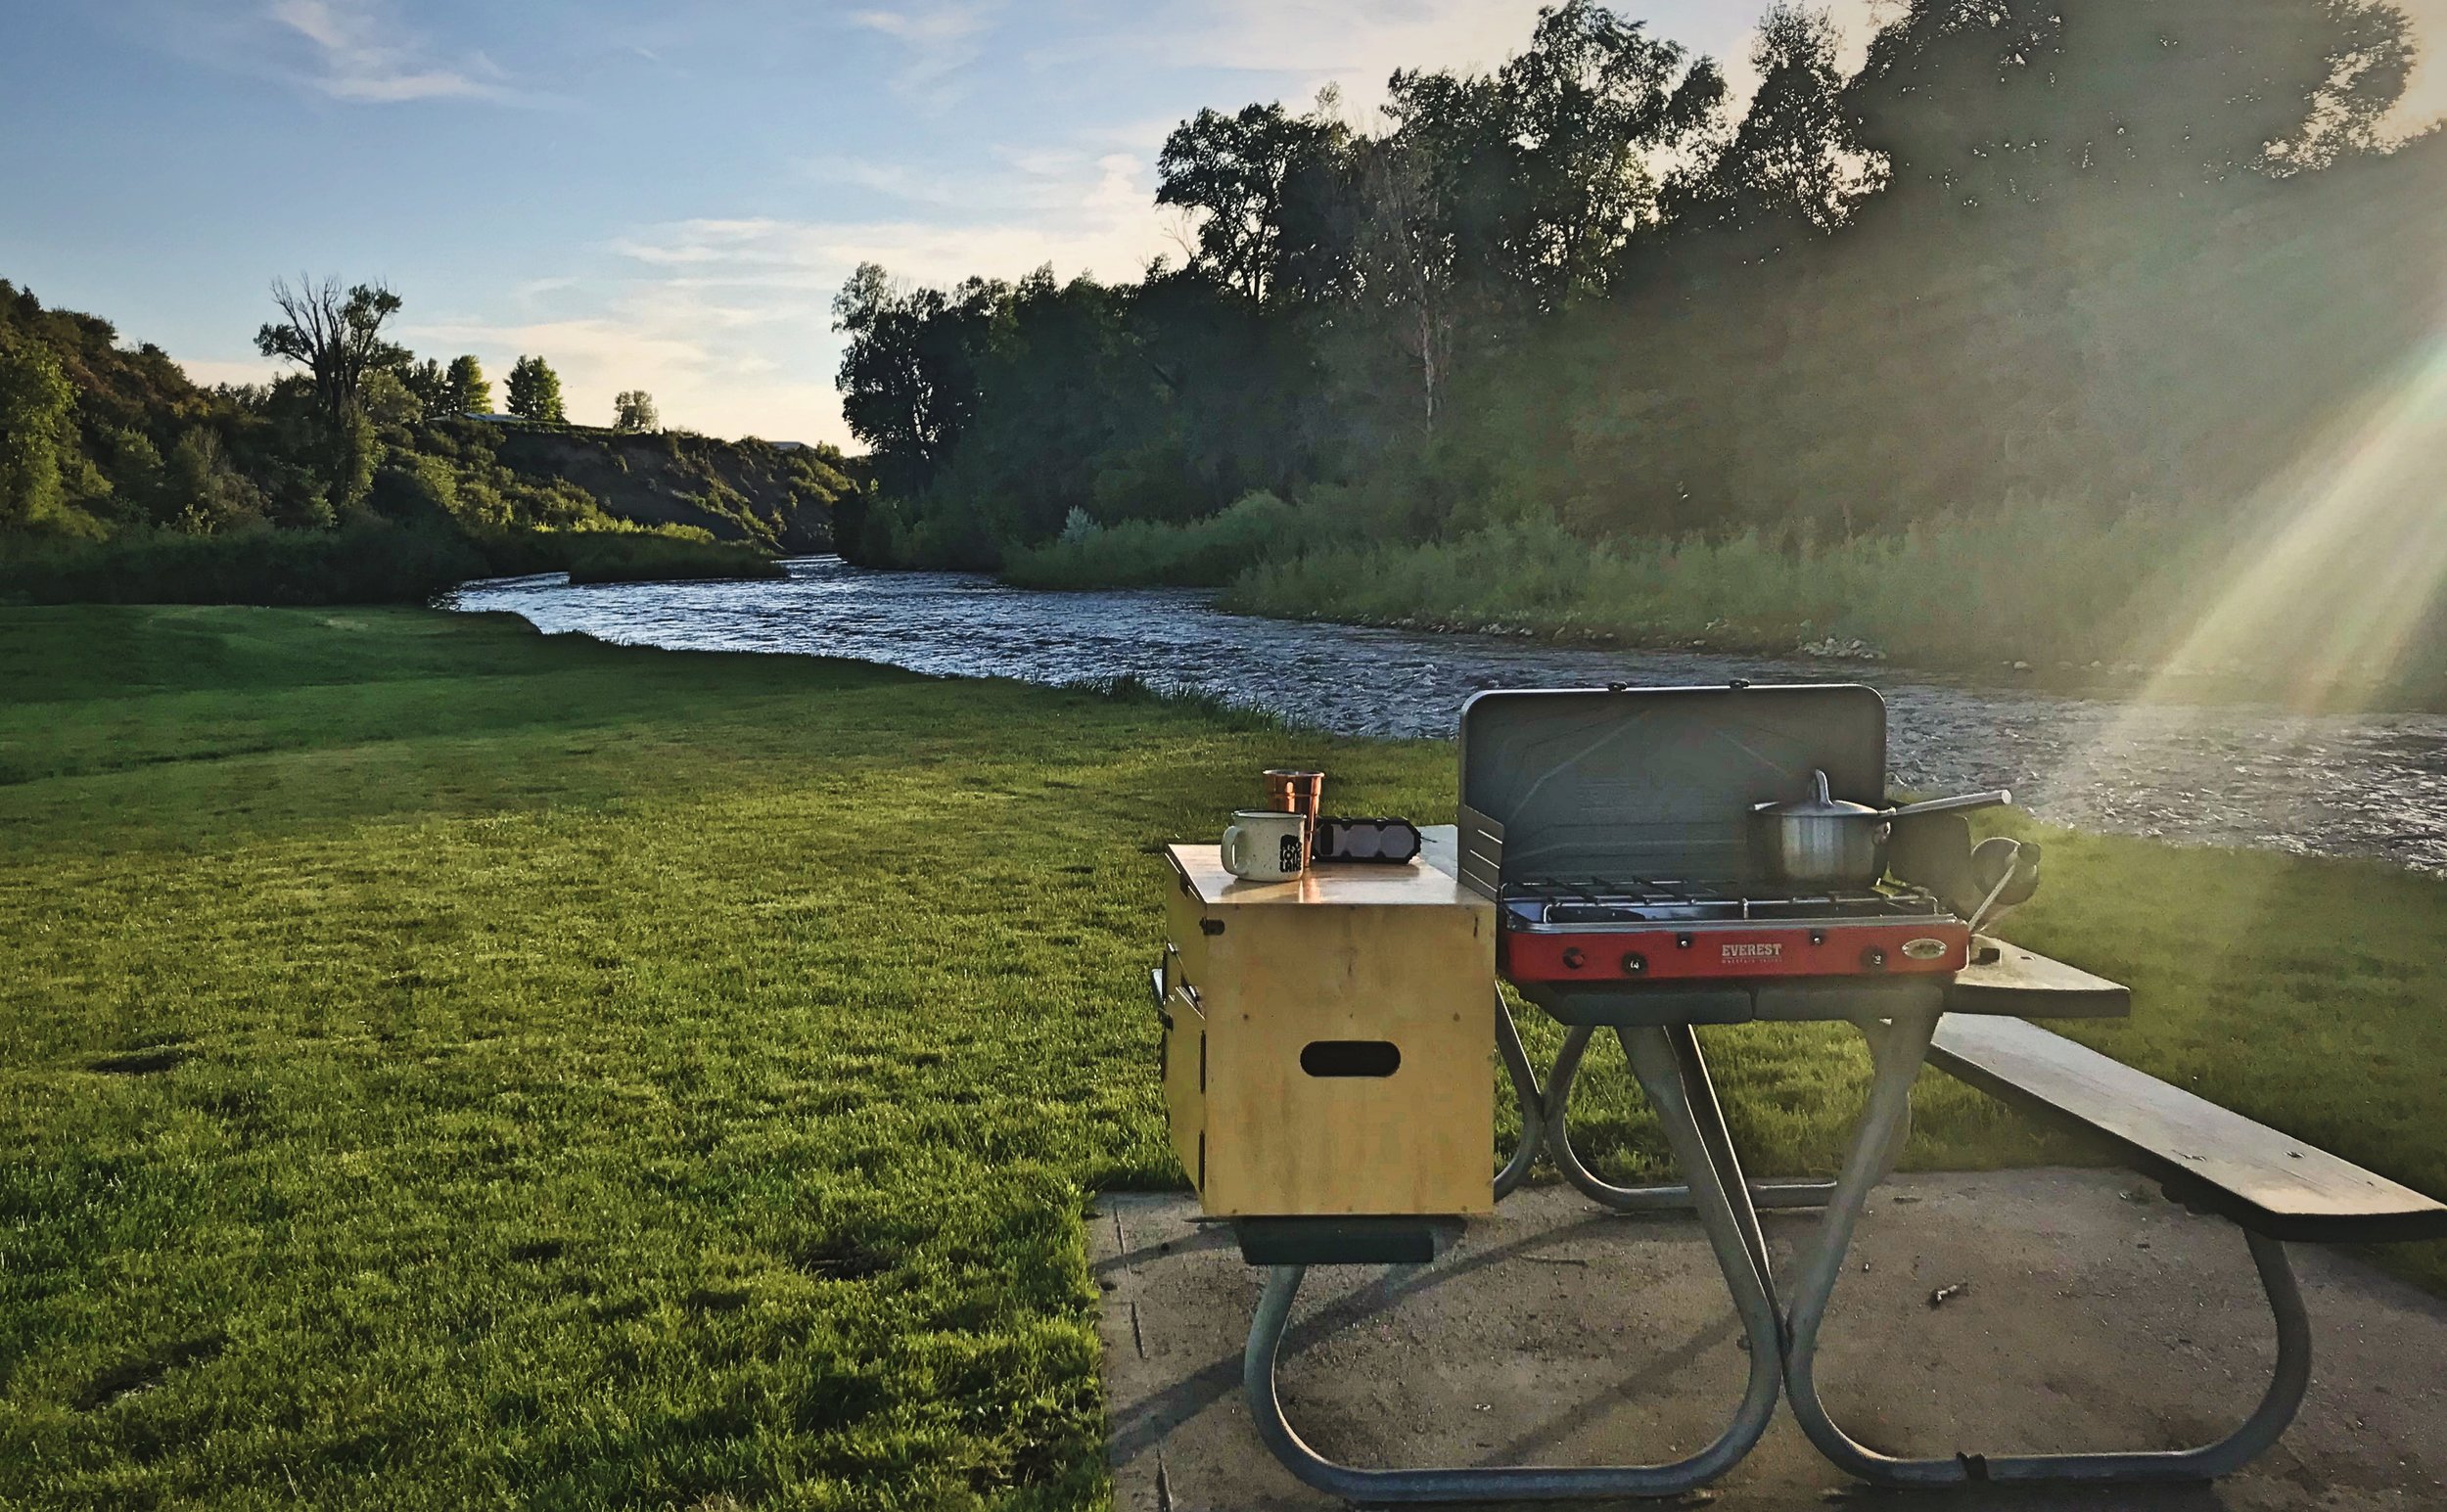
Cooking with our chuck box along the White River in Meeker, Colorado.
One of the keys to a happy vanlife is being able to cook and eat comfortably while on the road. An organized kitchen will make your life so much smoother. To store our camp stove and our cookware, we designed a removable chuck box. This simple plywood chuck box is built into our cabinetry, but we can remove it and take it out to a picnic table so we can easily cook outside while on the road. Cooking outdoors is enjoyable on its own, but on hot days being having a no-fuss way to cook outside the Sprinter is much nicer that cooking inside the hot van.
Tools
Materials
1/2" sanded plywood
Countersunk screws
1/4" x 1-1/8" flat pine trim (a small scrap)
Varathane One Step Water-based Stain and Polyurethane (in Honey Pecan)
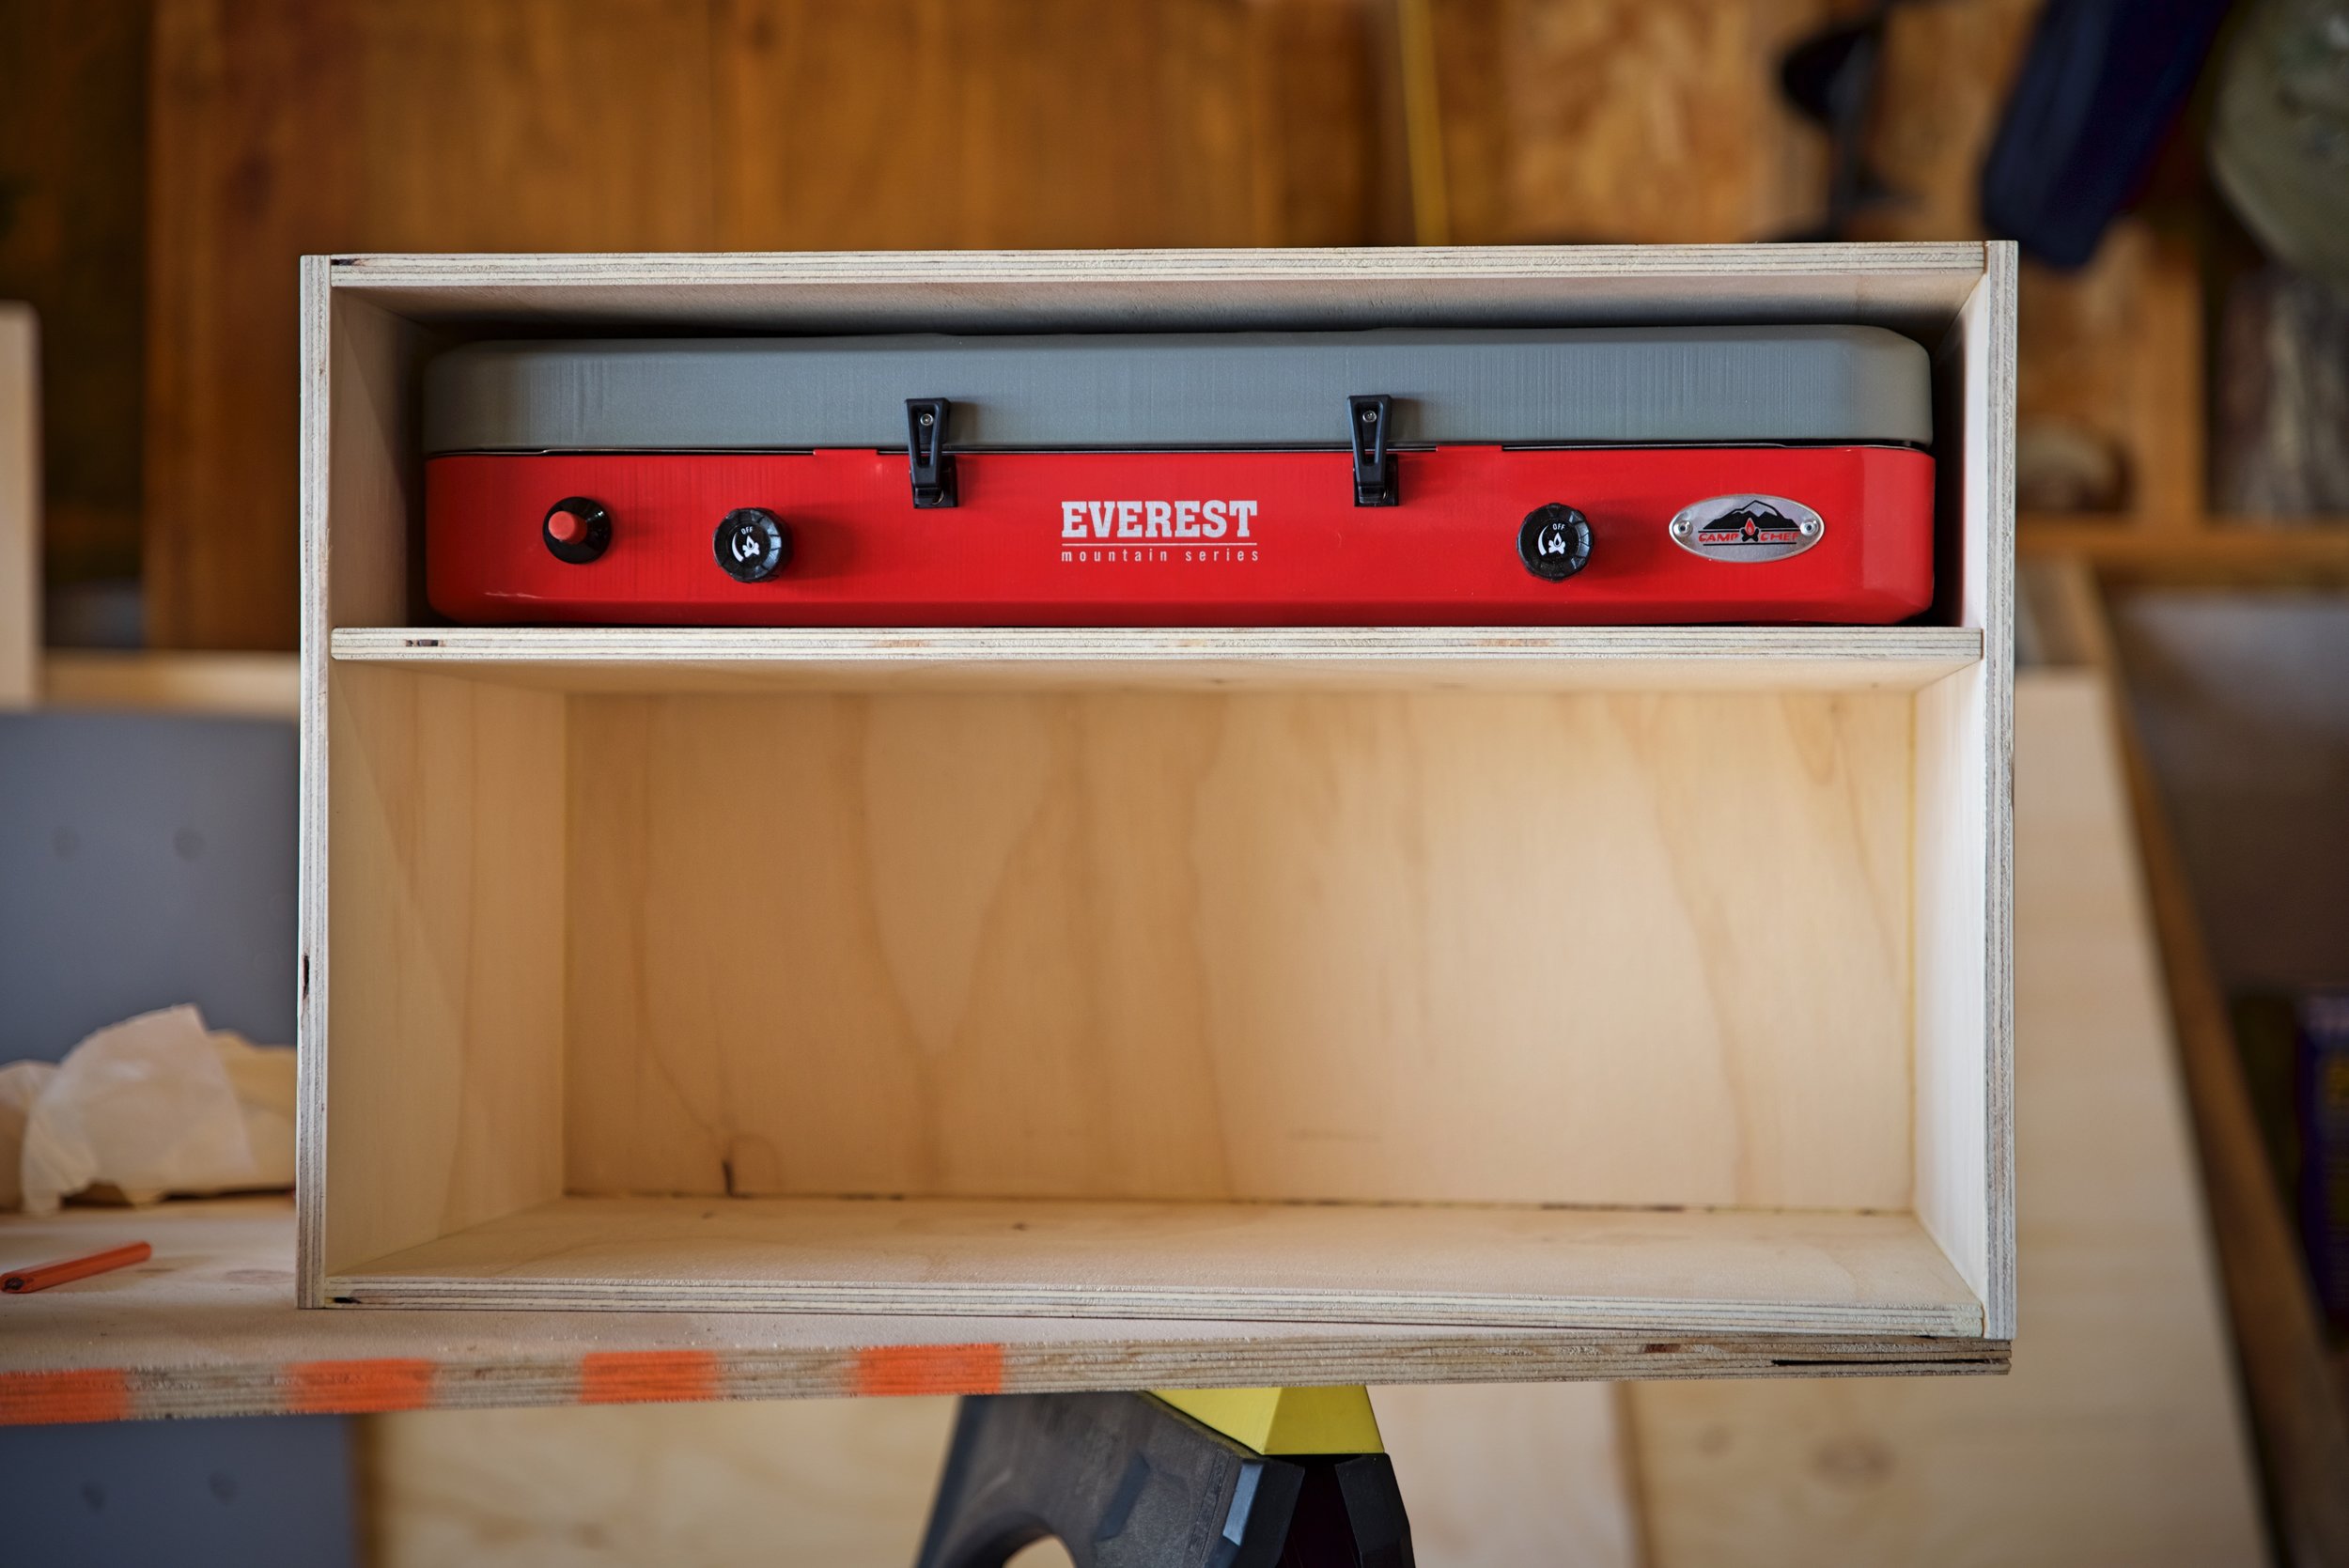
We designed our chuck box around the specific kitchen items we wanted it to contain. The box has two compartments. The top shelf holds our Camp Chef Everest 2-burner stove. This is a great stove to use for vandwelling, because it gives you great control over temperature for a camp stove. (For more on why we picked this stove and how we cook with propane in our van, read “Constructing a DIY Propane Locker for our Camper Van.”)
Our chuck box is just a simple plywood box with two compartments. This entire box can be removed for outdoor cooking.

The top compartment of the chuck box is for storing our stove, and we built it to the precise dimensions of this stove.
The second compartment in the chuck box holds our pots and pans for cooking, as well as some other items like plates, coffee thermoses, and salt and pepper. This is just an area of open space, so we can put whatever ingredients and dishes are needed to prepare a meal in here before we carry this out to the picnic table where we are cooking.

The bottom compartment of our chuck box holds our dishes and pots and pans.

When we want to cook outside, we can put the ingredients and utensils in this compartment to bring them out to the picnic table.
Our camper van chuck box is constructed 1/2" AB-grade, sanded plywood. After we had designed the chuck box based on the dimensions of the kitchen items we would store in it, the next step was to cut the plywood. Since this chuck box is part of our cabinetry, we had to be really precise with the cuts we made so that the box wouldn’t be wonky when we put it together because of crooked cuts. A table saw would have been perfect for cutting the plywood for our chuck box, but we didn’t have one. We used our circular saw to cut the plywood for the chuck box.

Ian cuts plywood for the chuck box and the cabinetry.

Having someone to hold and catch the piece you are cutting is a really big help
To keep the cuts straight, we used a fence attachment for the circular saw where appropriate or we clamped the factory edge of another piece of plywood to the top of the board to create a fence for the saw to help us keep it straight. Besides fences, moving the saw slowly will help you keep the cut straight and avoid splintering of the wood. Having someone else catch the piece you are cutting will also prevent any of the layers of the plywood from breaking or splitting apart as you get to the end of the cut.

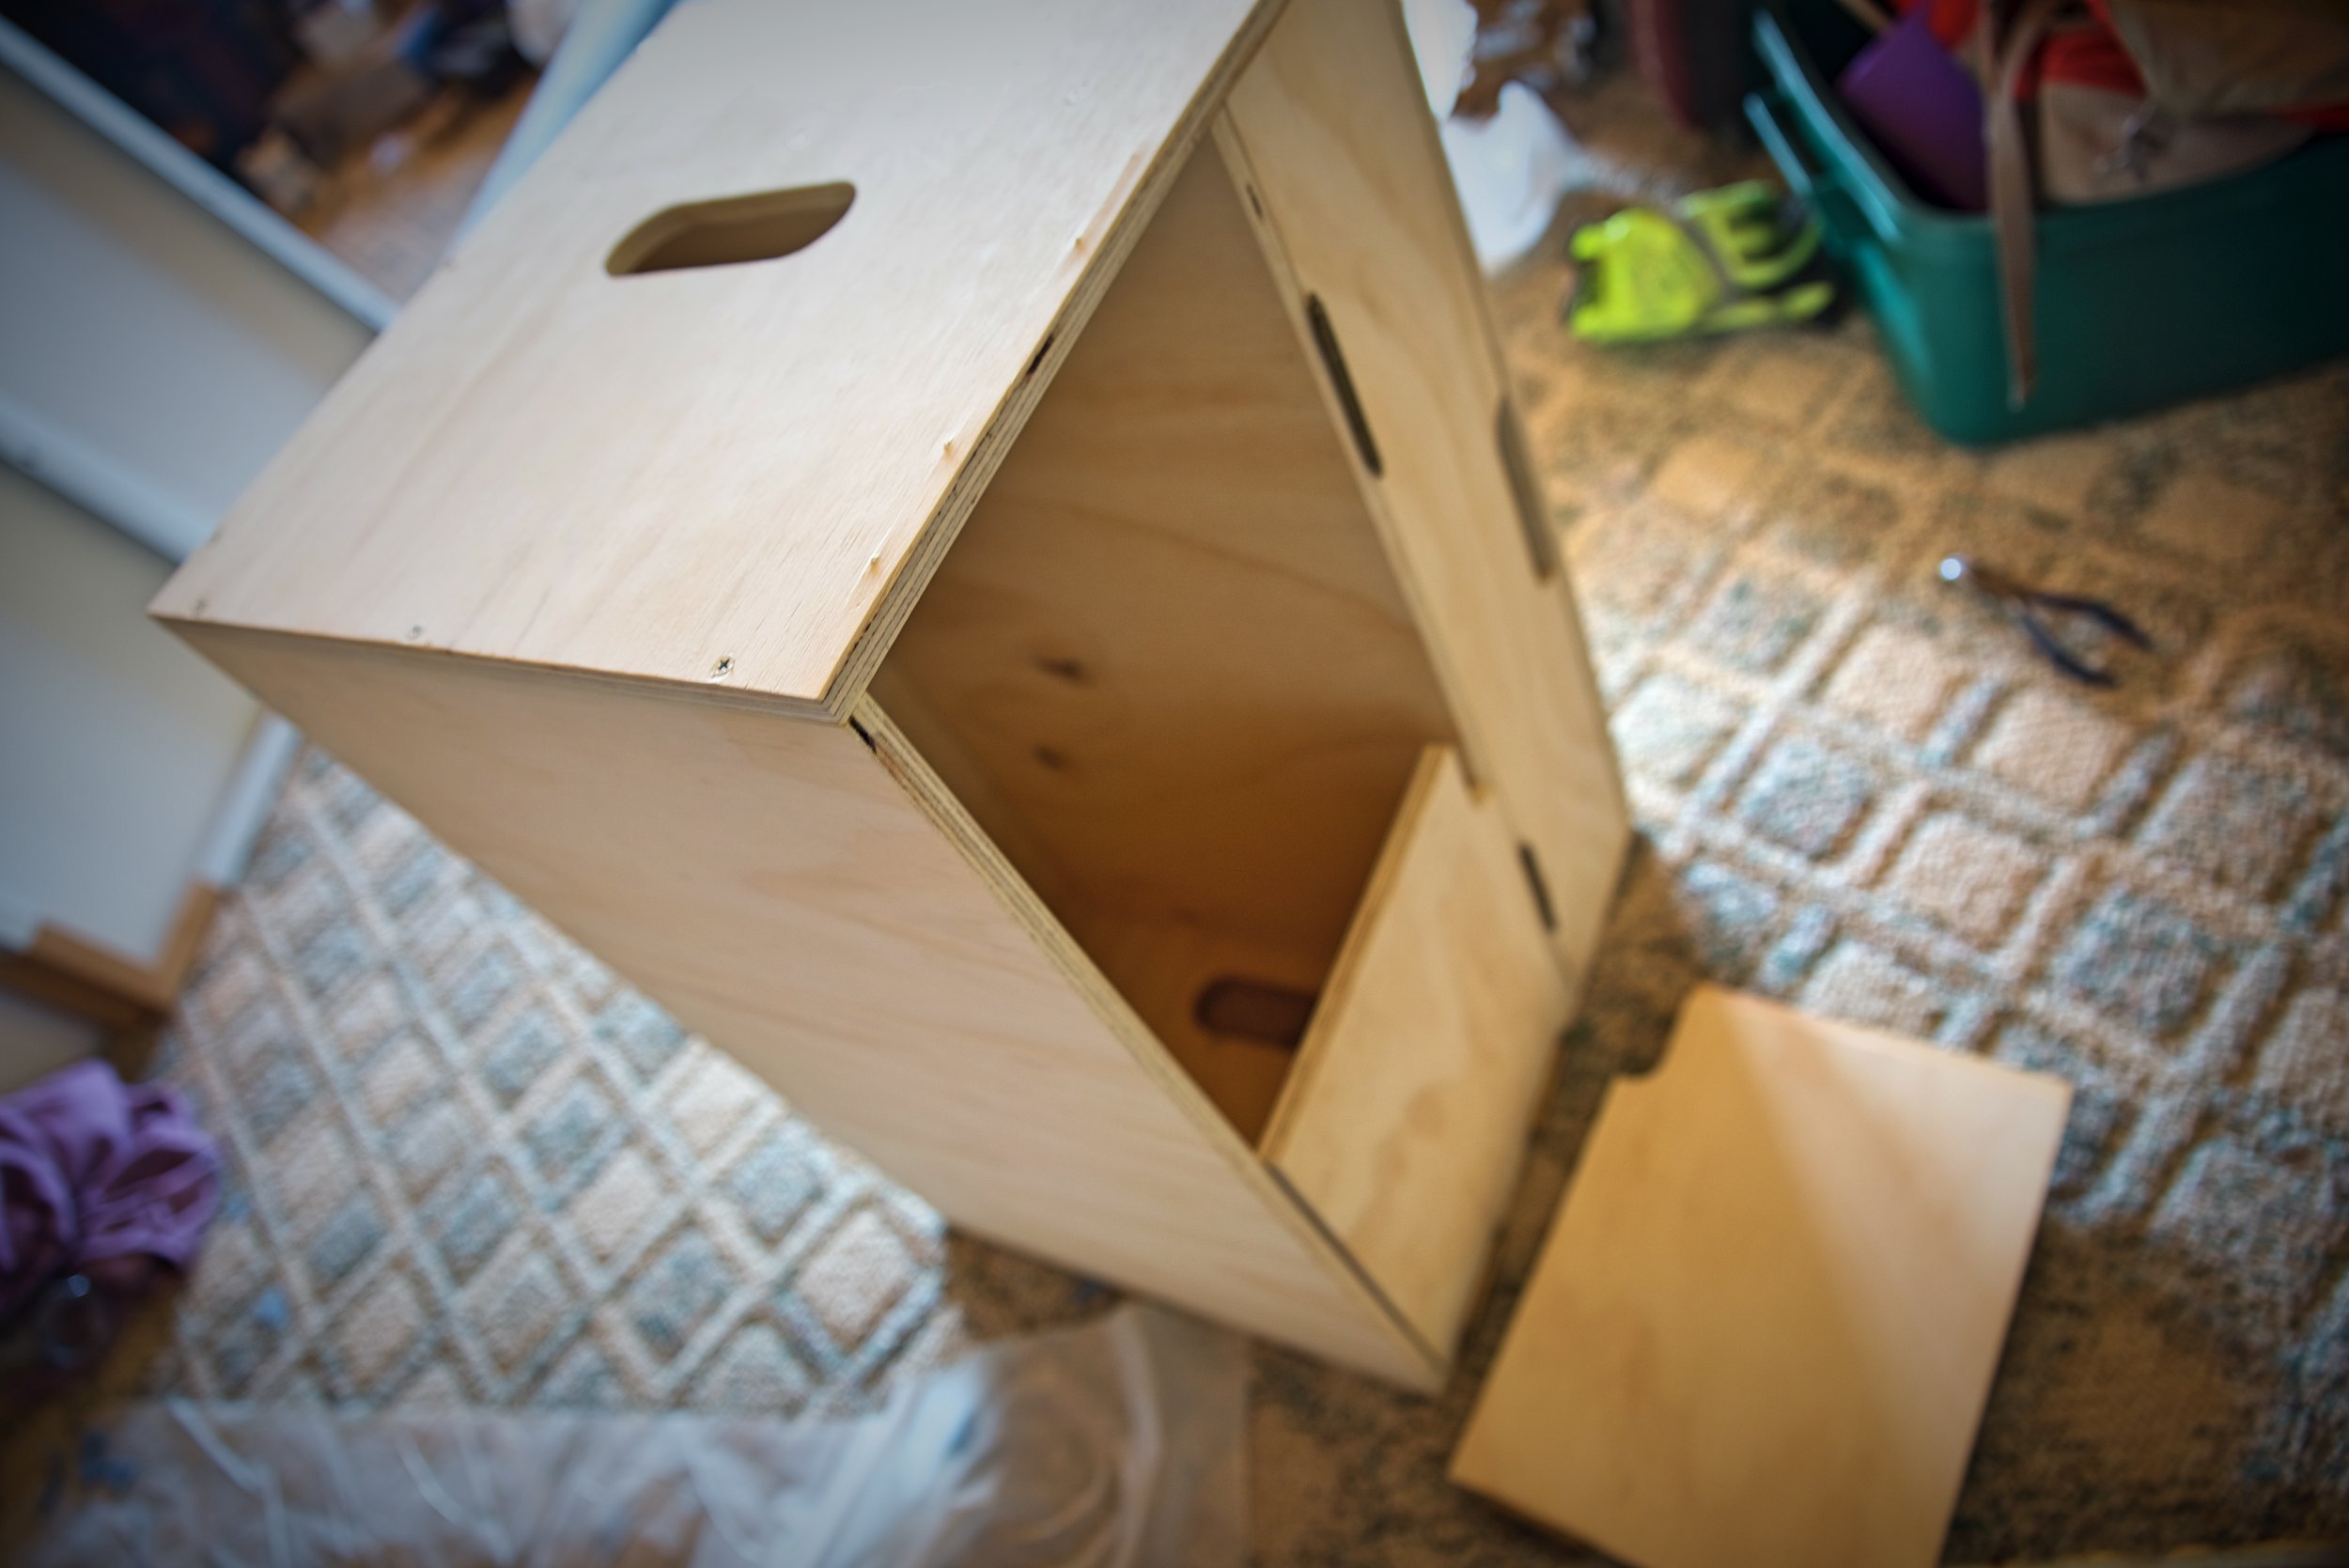
Our chuck box is a very simple plywood box with two sections and hinged doors. It’s screwed together with countersunk screws and reinforced with wood glue.
The box is screwed together with countersunk screws. When working and trying to screw into the end grain of plywood, it’s very helpful to pre-drill the holes for the screws with a countersink drill bit. If you don’t pre-drill the holes, you may splinter the plywood as the screw pushes into the end grain. We also used wood glue to reinforce the joints, although in hindsight, that probably wasn’t necessary.

Ian attaches a small piece of trim to the back of the door to fill the gap between them.

This piece of wood overlaps behind the gap in the doors.
The doors of the chuck box are inset/European style cabinet doors, rather than overlay doors like we have on the rest of our cabinetry. There is no frame to attach the doors to, so we had to go with an inset door. The top compartment that holds our stove has a single door that hinges downward with the hinges on the bottom of the door. The bottom compartment that holds our dishes has two doors that swing outward and meet in the middle. We used a small bit of left over 1/4" x 1-1/8" flat pine trim to create a small overlap to hind the gap between the mating doors (technically I think this piece might be called an astragal?)
The screws that came with the hinges were a tiny bit too long, and they poked through the plywood.
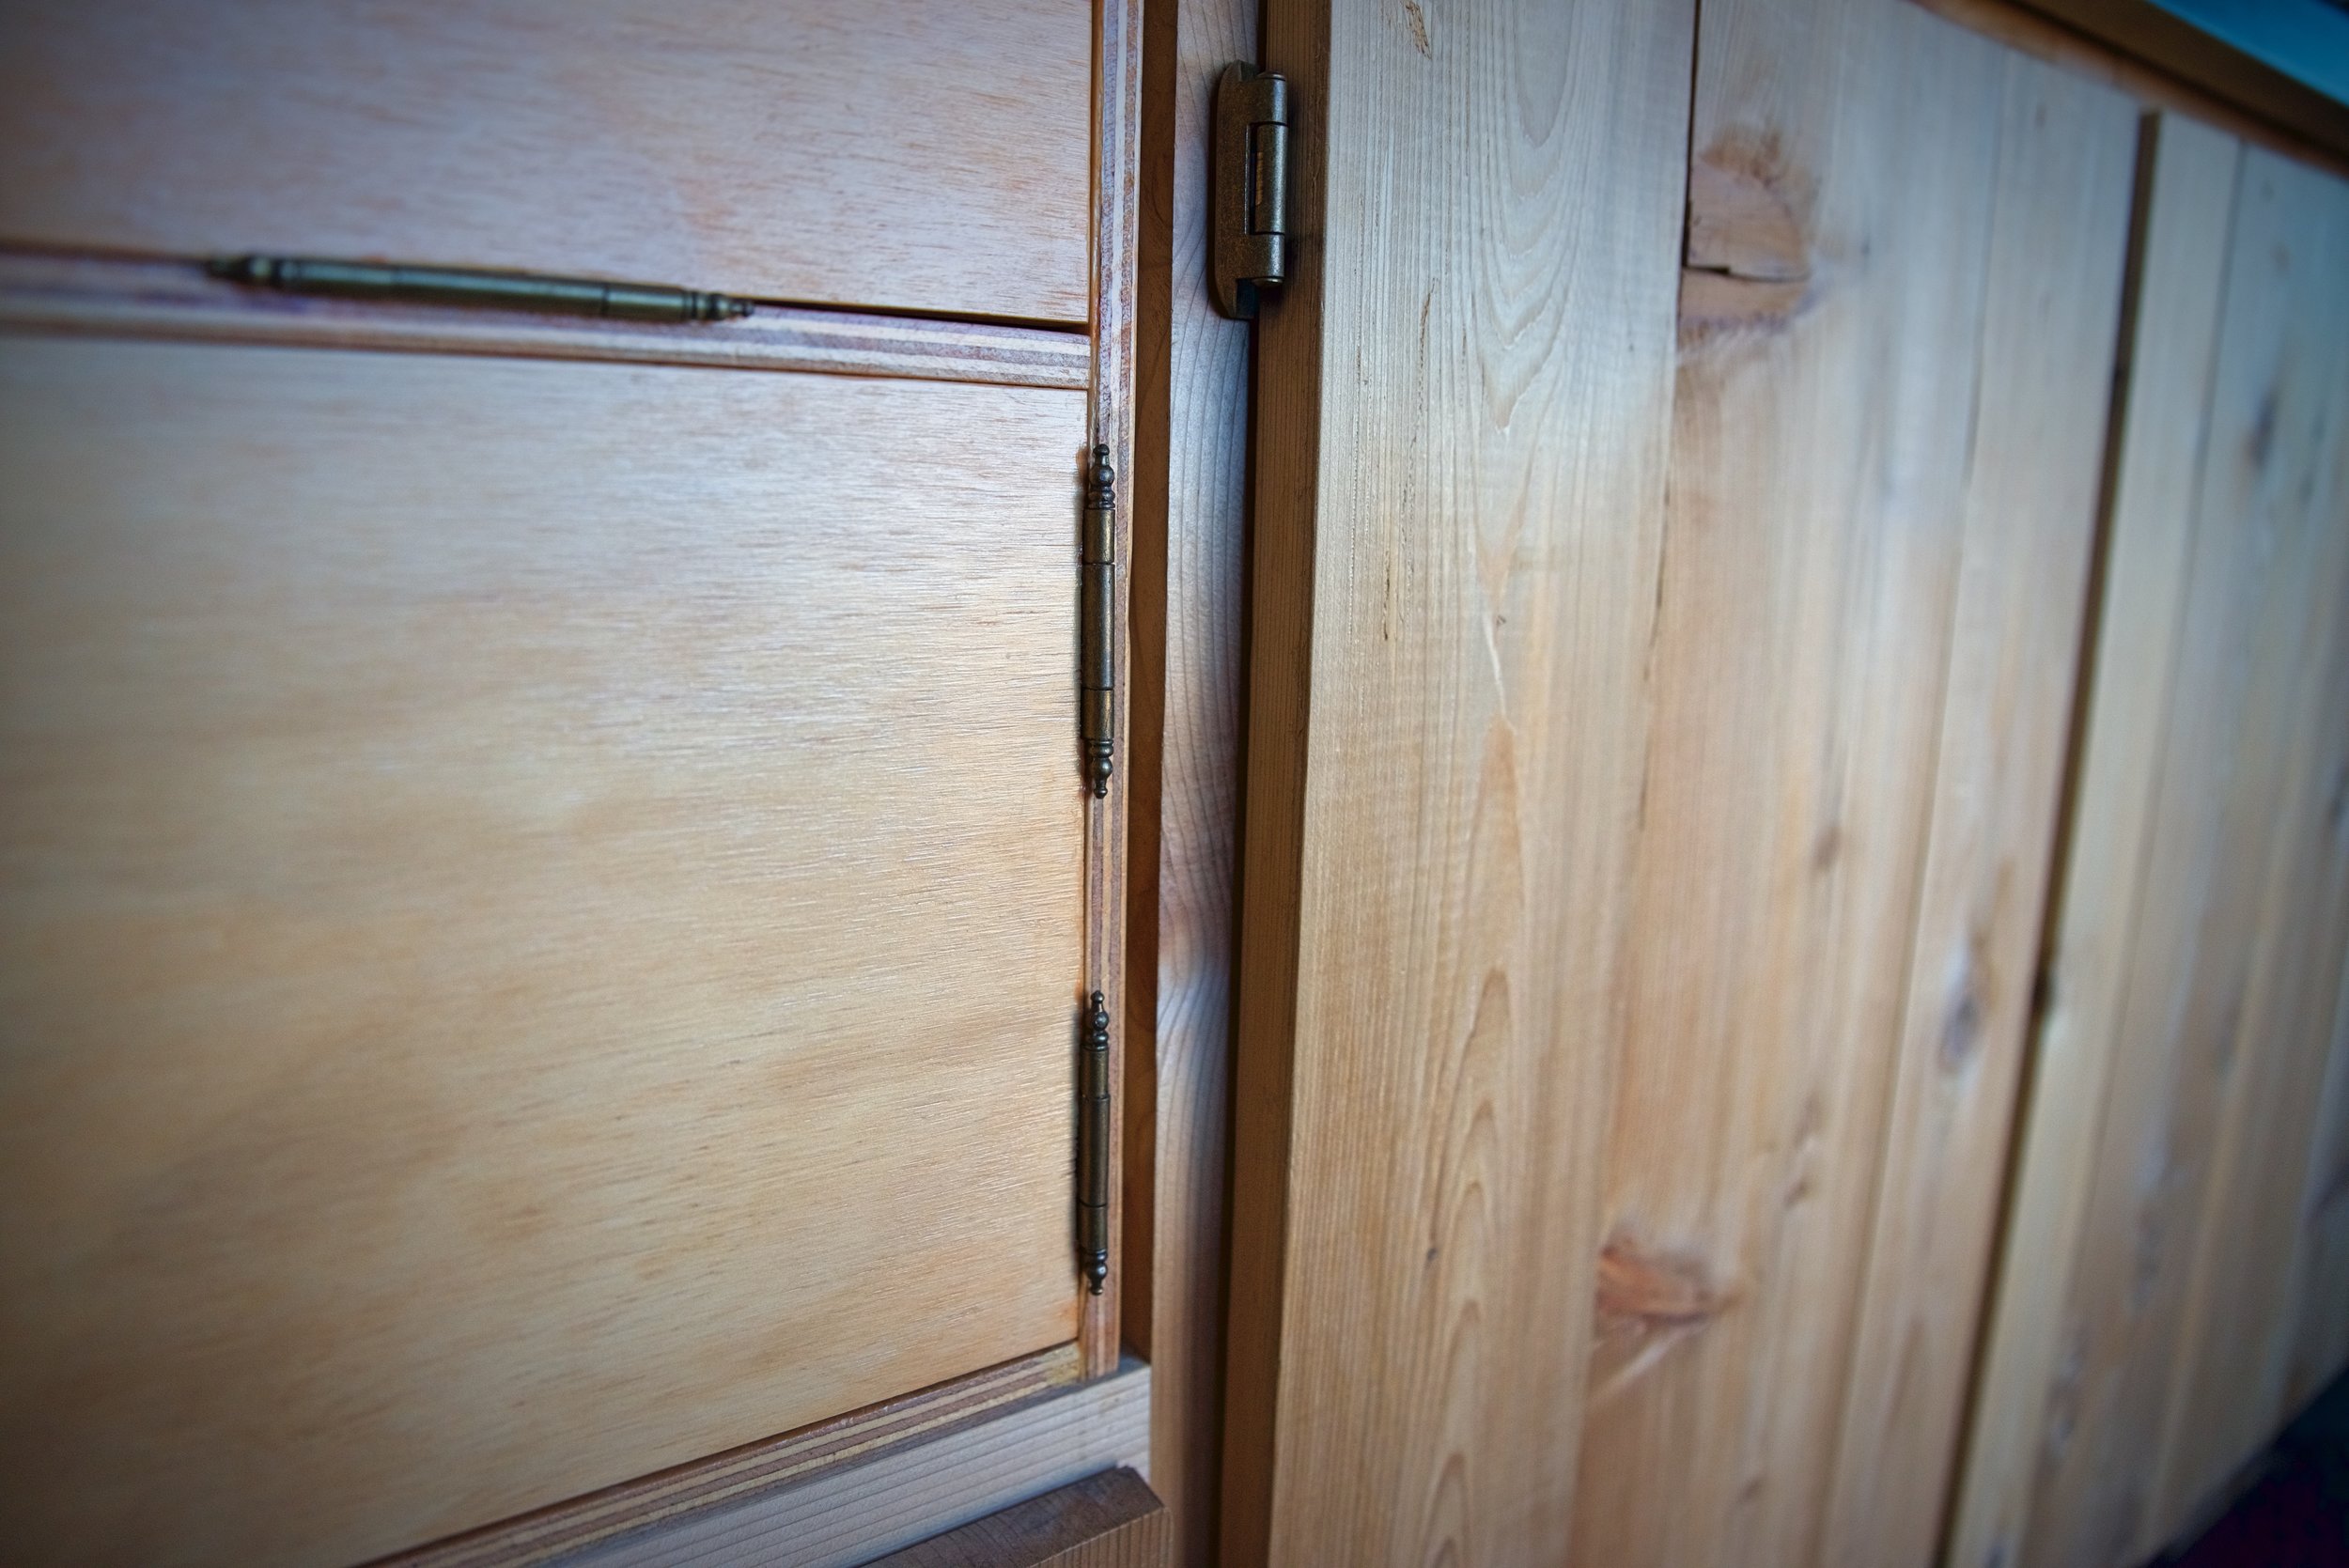
We used these cute little butt hinges to hang our chuck box doors.

These 2-1/2” butt hinges don’t require mortising, and they are mostly hidden except for this slim knuckle on the outside.
The hinges we chose have an antique brass finish to match the hinges on the rest of our cabinetry (for more on our cabinetry, read “Building Custom Cabinetry for Our Van”). The hinge is a self-mortising, butt hinge with a really cute little ball finials at the ends of the knuckles that adds a bit of flair to the chuck box. The hinge is mostly hidden except for a very thin knuckle. We were going to just use the screws the hinges came with for mounting the doors, but we ended up having to buy shorter screws, because the tips of the screws split the top ply of the 1/2” plywood.
A small piece of wood acts as a bumper to prevent the two doors on the bottom of the chuck box from hinging inward and so they are flush with the front of the chuck box when closed.
This small bumper prevents the doors from swinging inward.

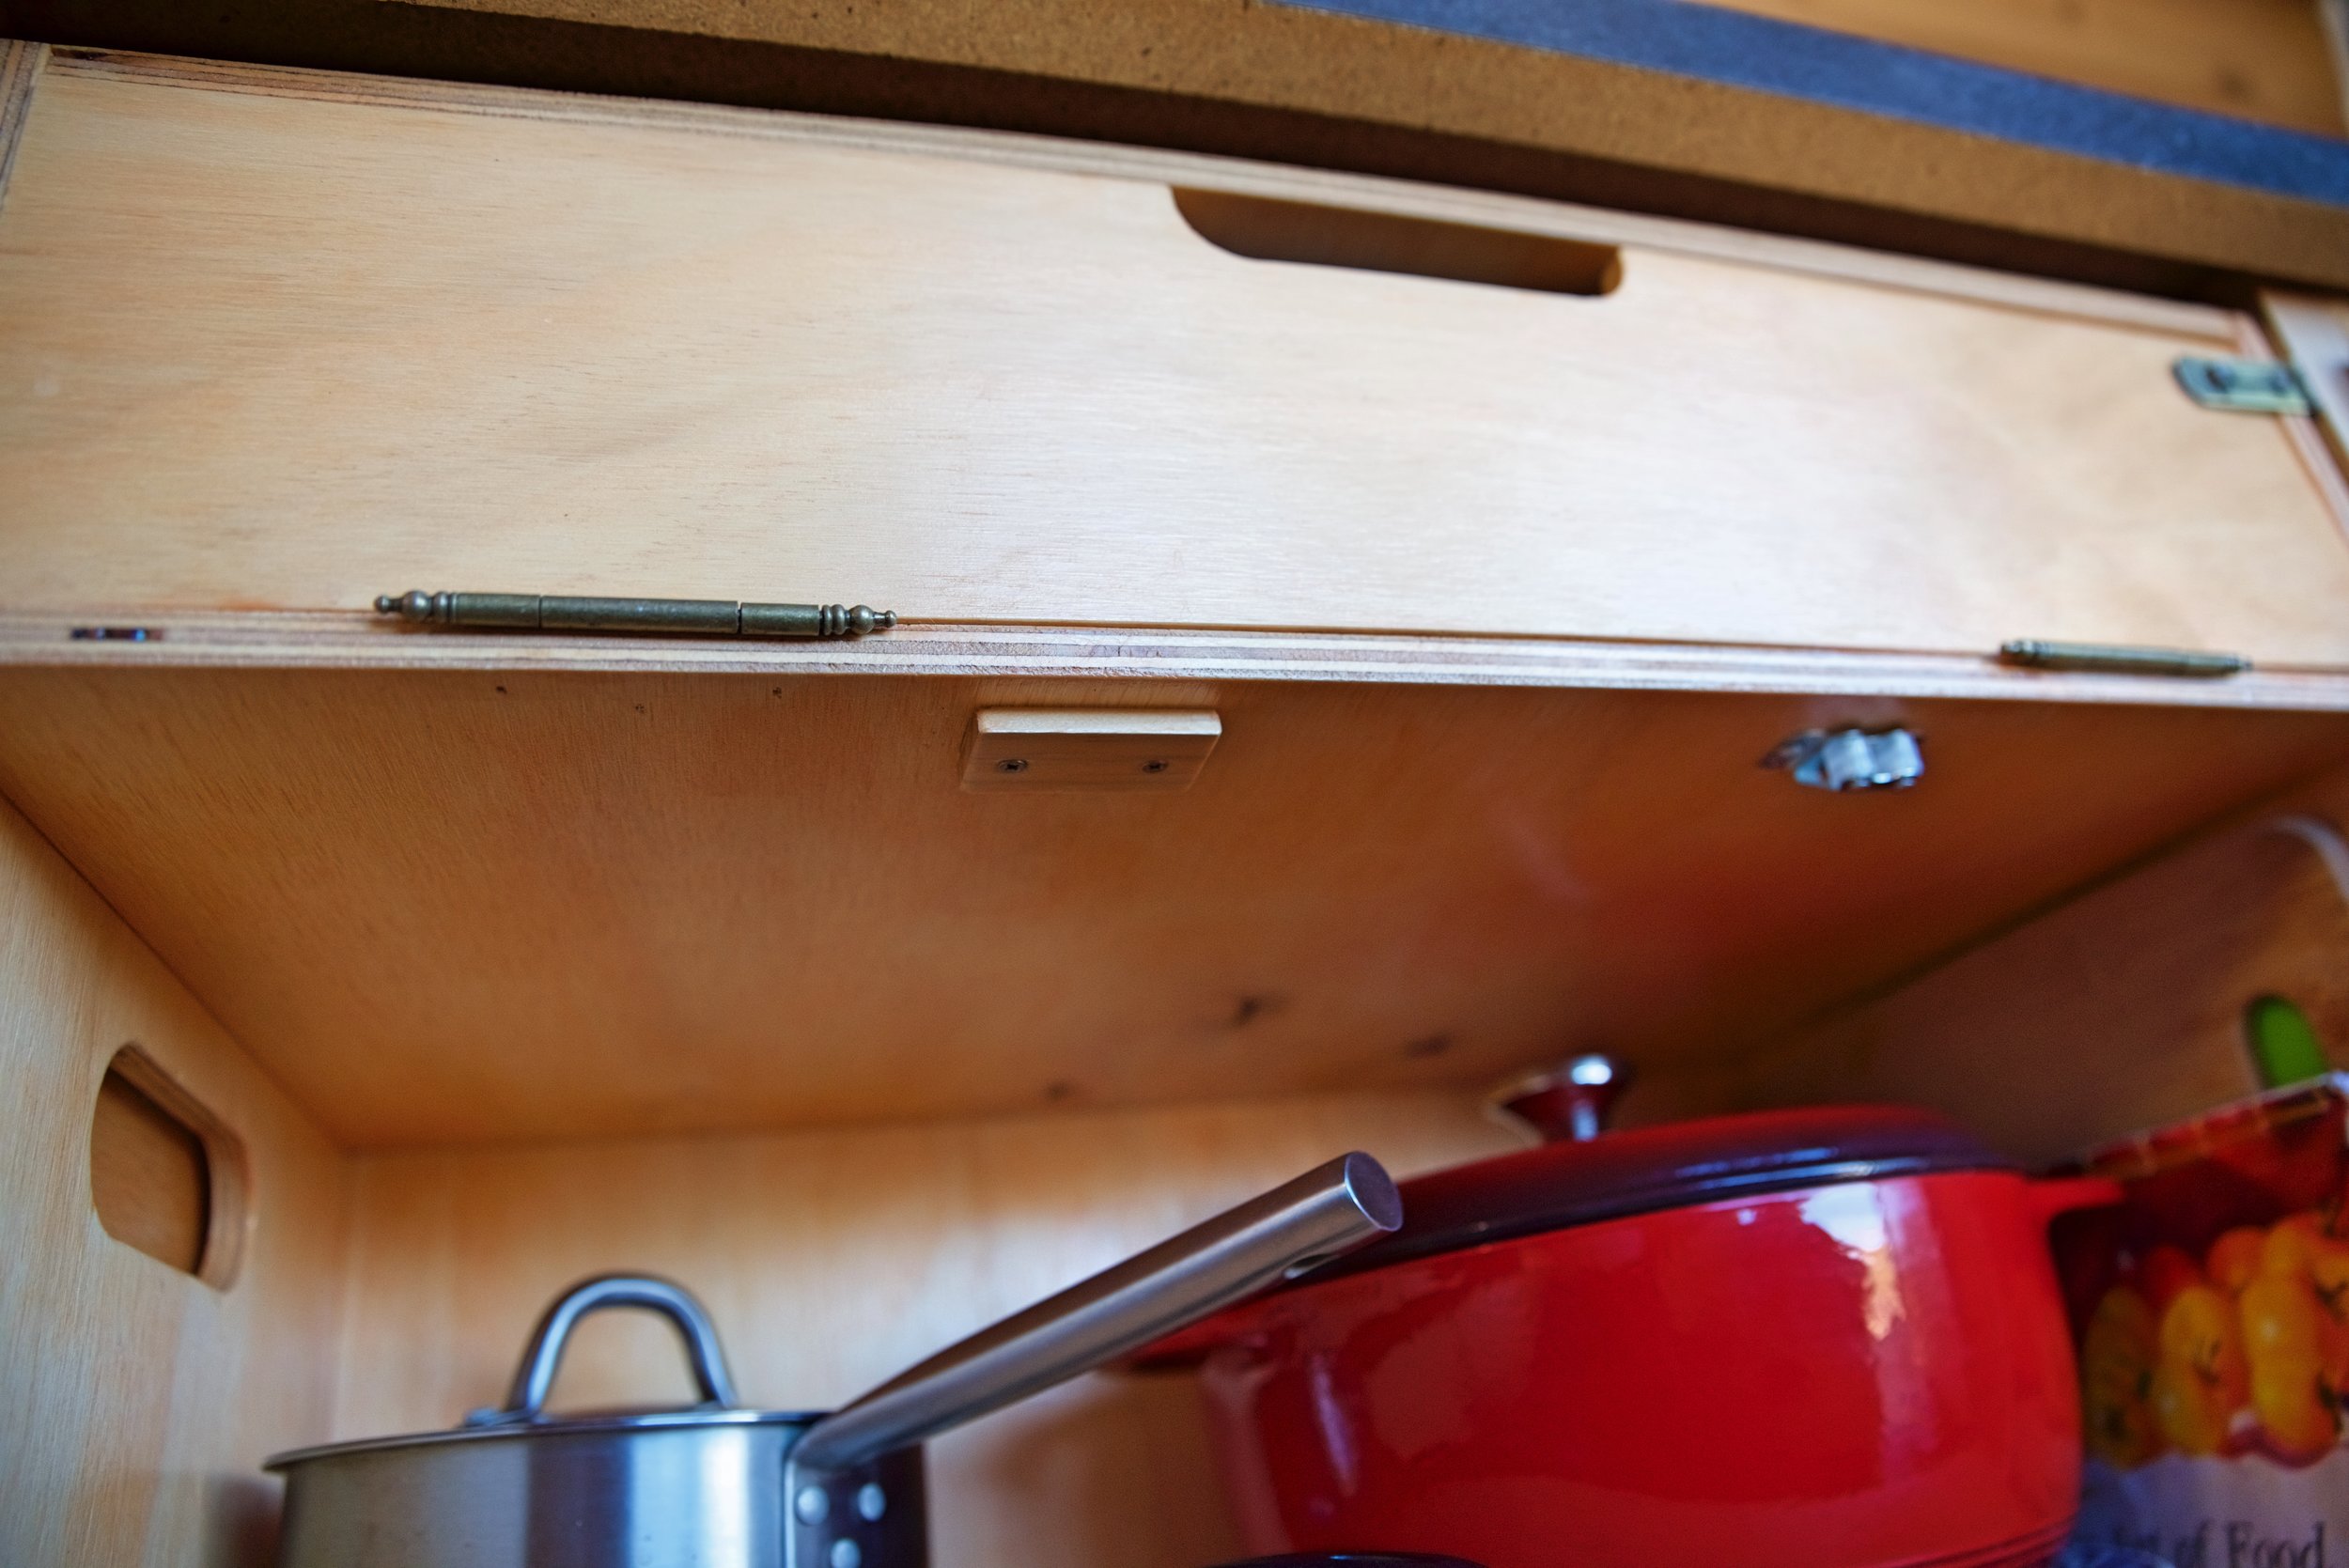
Ian installs a small roller catch on the inside of our chuck box.

We quickly realized that we’d need a stronger latch on the chuck box.
To keep the cabinet doors close, we started with a small roller catch on the inside of the chuck box door, but we quickly realized that if our big enameled pot slid into the door that was only kept closed with this roller catch, it would just pop right open. We decided to add a hook and staple latch to the outside of the outside of the bottom doors.
We had more difficulty finding a latch for the stove compartment because there was only a 1/2” strip of wood to mount it on. We ended up also putting a hook and staple latch on the top stove compartment. The nice thing about these latches is that the latch has a hinge within it, so we were able to mount the latch to the side of the box rather than into the end grain of the plywood by folding the latch at a 90-degree angle.

These latches keep the doors closed from the outside so that if the heavy pot slides into it, they won’t open.

The latch has a hinge within it because it’s designed for use on chests and boxes, so we were able to wrap it around the corner of the box.
None of our cabinetry has knobs or pulls, so we wanted the chuck box to match. We didn’t want to catch our belt loops or pockets on cabinet handles or knobs when walking through our van. For the chuck box we decided to use cut out handles on the doors. These cut-out handles match the handles on the fold-out table and large door on the front of our bed platform. To get the same profile for all the handles in the van, we traced two semi circles five inches apart from their outside edge. Then we connected the two with a straight line. We then cut this handle shape out using a coping saw, pull saw, and files. We didn’t use the jigsaw, because it chipped the surface of the plywood. The cut out for the two bottom doors is split down the middle between the two doors.
The chuck box also has two cut-out handles on the sides so that we can carry it outside. The handles are the same shape as the door handle are the same shape as the door handle cut-outs, except that rather than a semi-circle, we used a full circle to complete the shape on both sides. To cut these shapes out, we had to use a hole saw on the power drill and the pull saw.
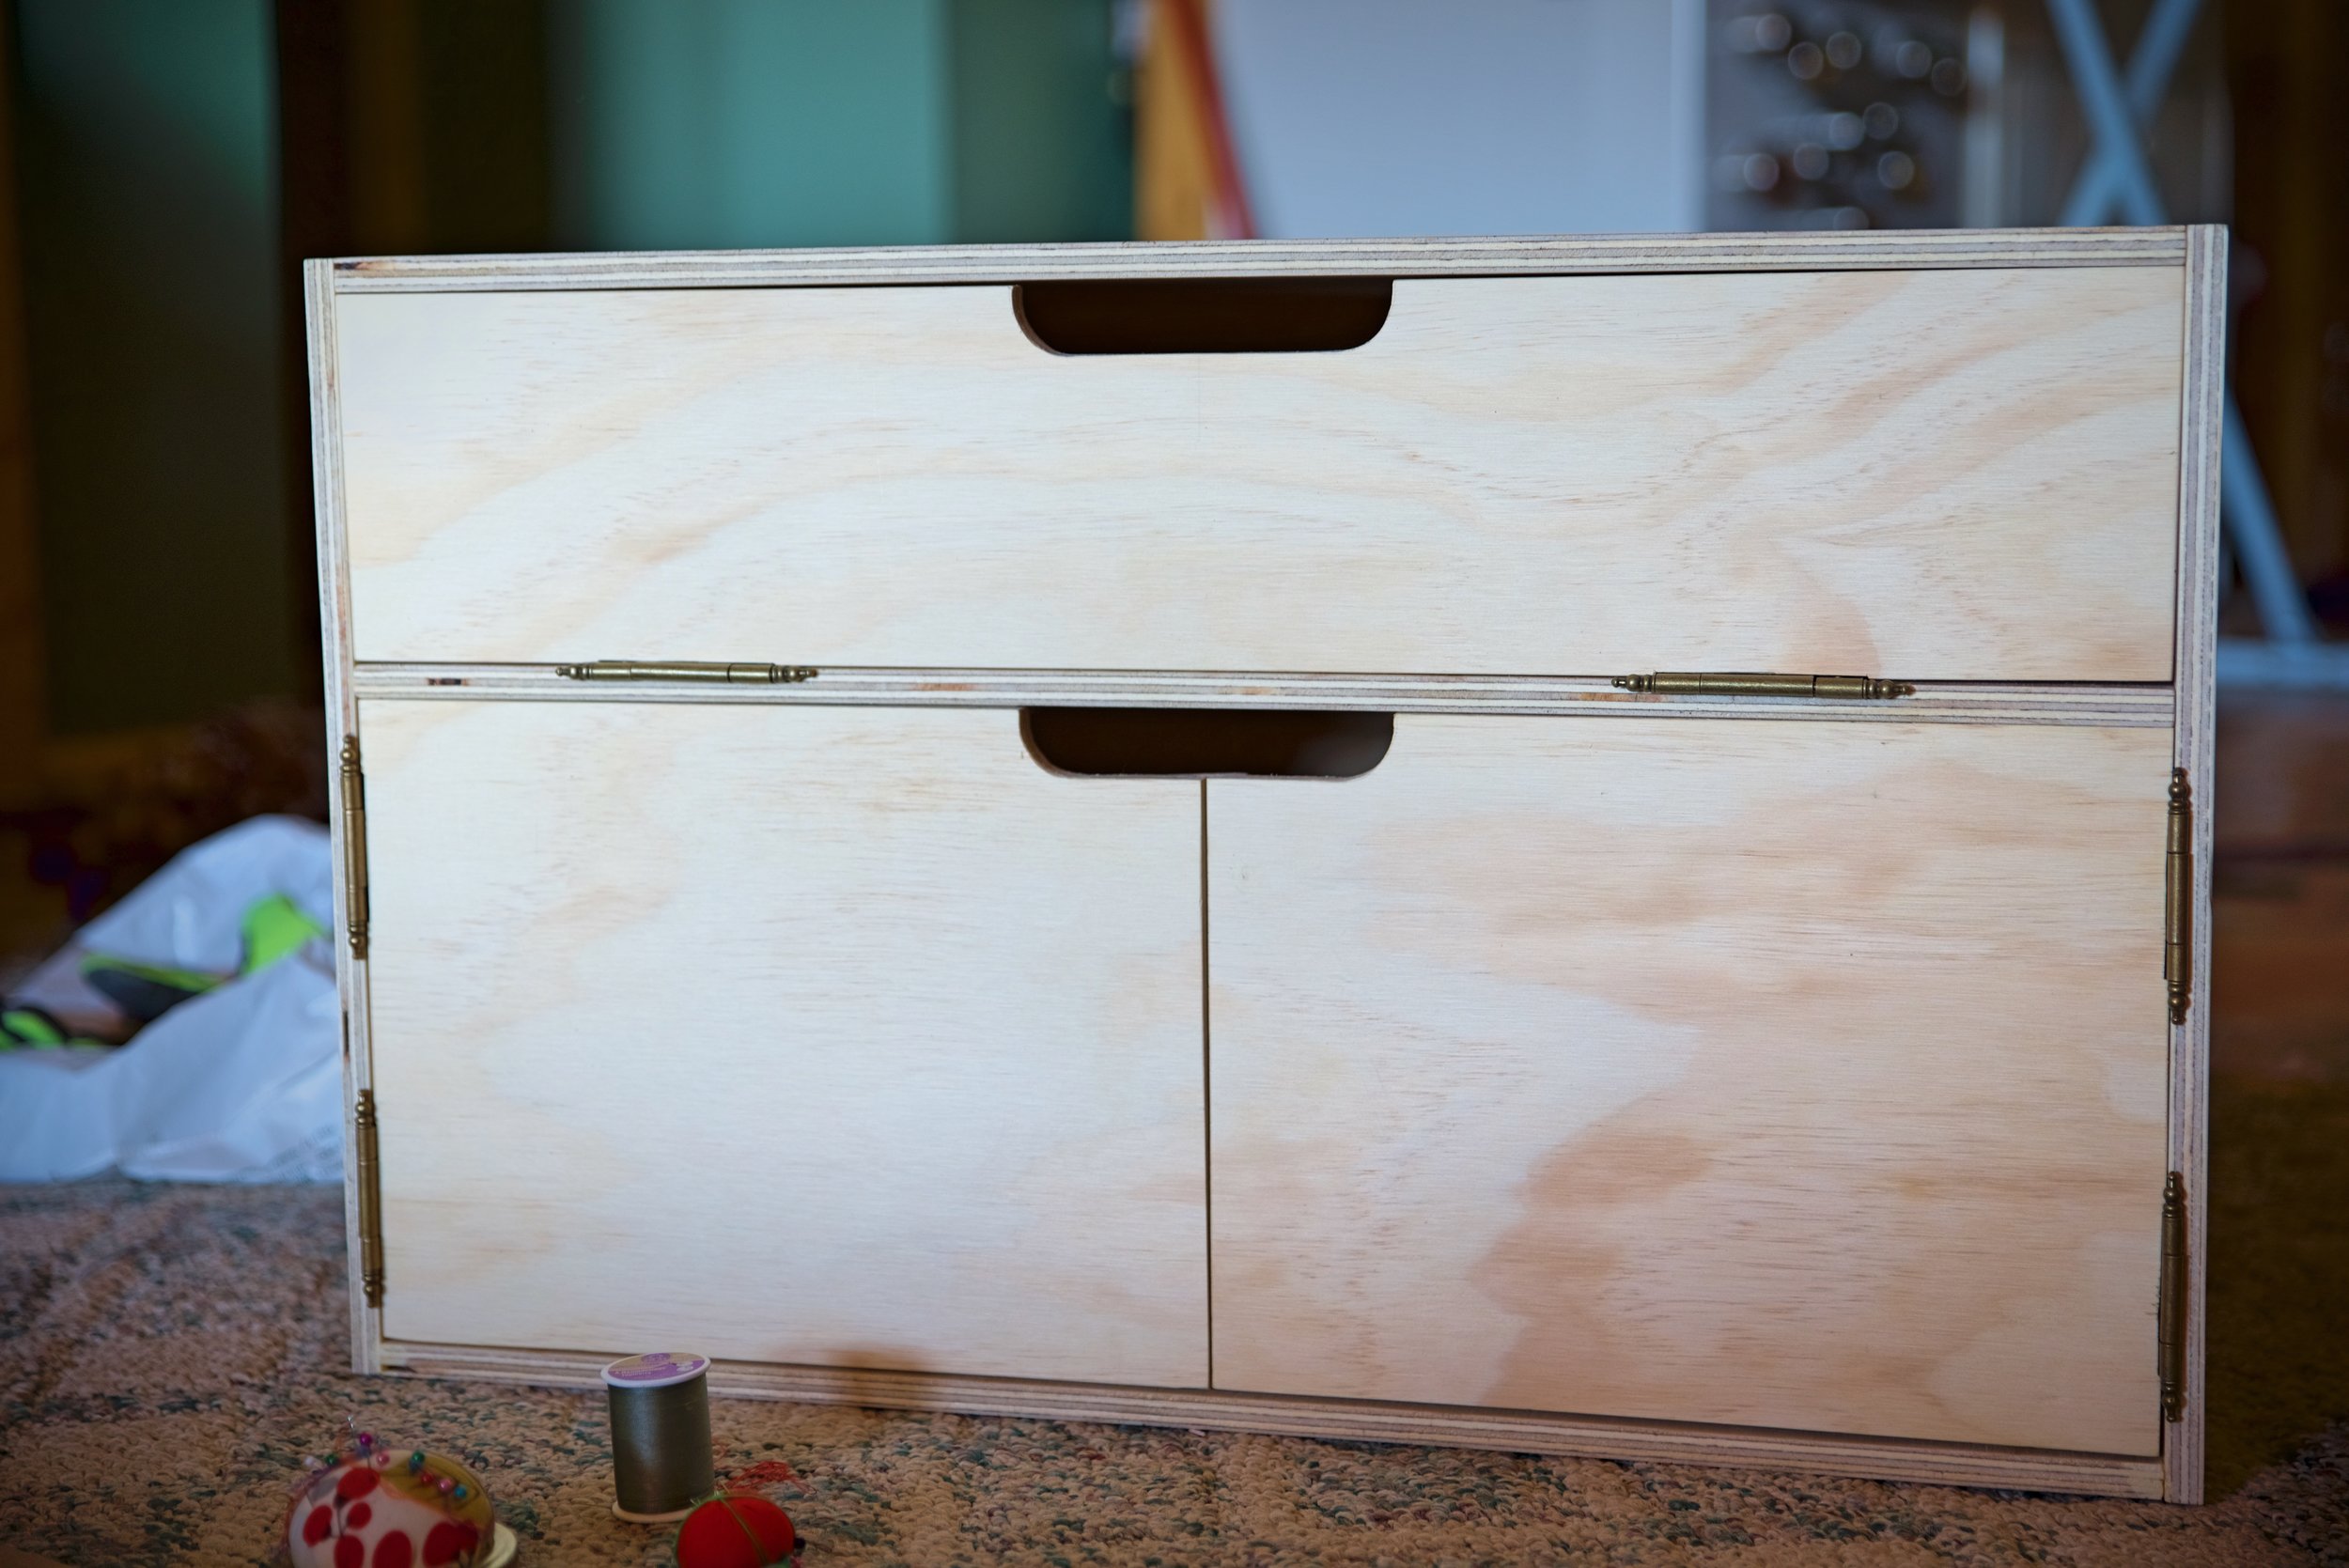
Here is the chuck box prior to finishing, with the cut out handles for the doors.
The handles in the side of the chuck box allow us to carry the heavy box outside when we want to cook.
As with the rest of the cabinets and plywood in the van, we finished the chuck box with water-based polyurethane. We began by giving it a thorough sanding and then wiping the dust off with a dry rag. In any places the cabinet walls are visible we used Varathane One Step Water-based Stain and Polyurethane (in Honey Pecan) as the first coat, so our cabinetry and the chuck box matches our bed platform and fridge storage bench. For the second and third coat, we just used clear polyurethane finish. (For an extensive discussion of why we picked water-based polyurethane, read our article about building the cabinets in our Sprinter.)
Polyurethane is most easily applied with a nylon-bristle brush. We applied three layers of stain and/or poly and sanded the stained surface of the chuck box lightly with a medium grit sanding block between layers.

Cooking inside the van is easy with the chuck box. All we have to do is pull the stove out and put it on the counter.
The chuck box fits inside this space in our cabinetry. It’s not latched into this spot, it’s weight and the friction keeps it in place.
The chuck box sits on a shelf, within a chuck box shaped opening in our cabinets. It’s not restrained or latched in in any way. The weight and friction of this big box doesn’t allow it to shift or fall out. Even on the roughest roads, like when we drove through Titus Canyon in Death Valley, we’ve never had the chuck box shift more than an inch.
We think the chuck box is an awesome addition to our camper van’s cabinetry. When we cook inside, all we have to do is pull our stove out from its custom slot and put it on the countertop. Our dishes are really handy and accessible in the chuck box as well. We love having the ability to cook outside when it’s hot or just when it’s nice outside.
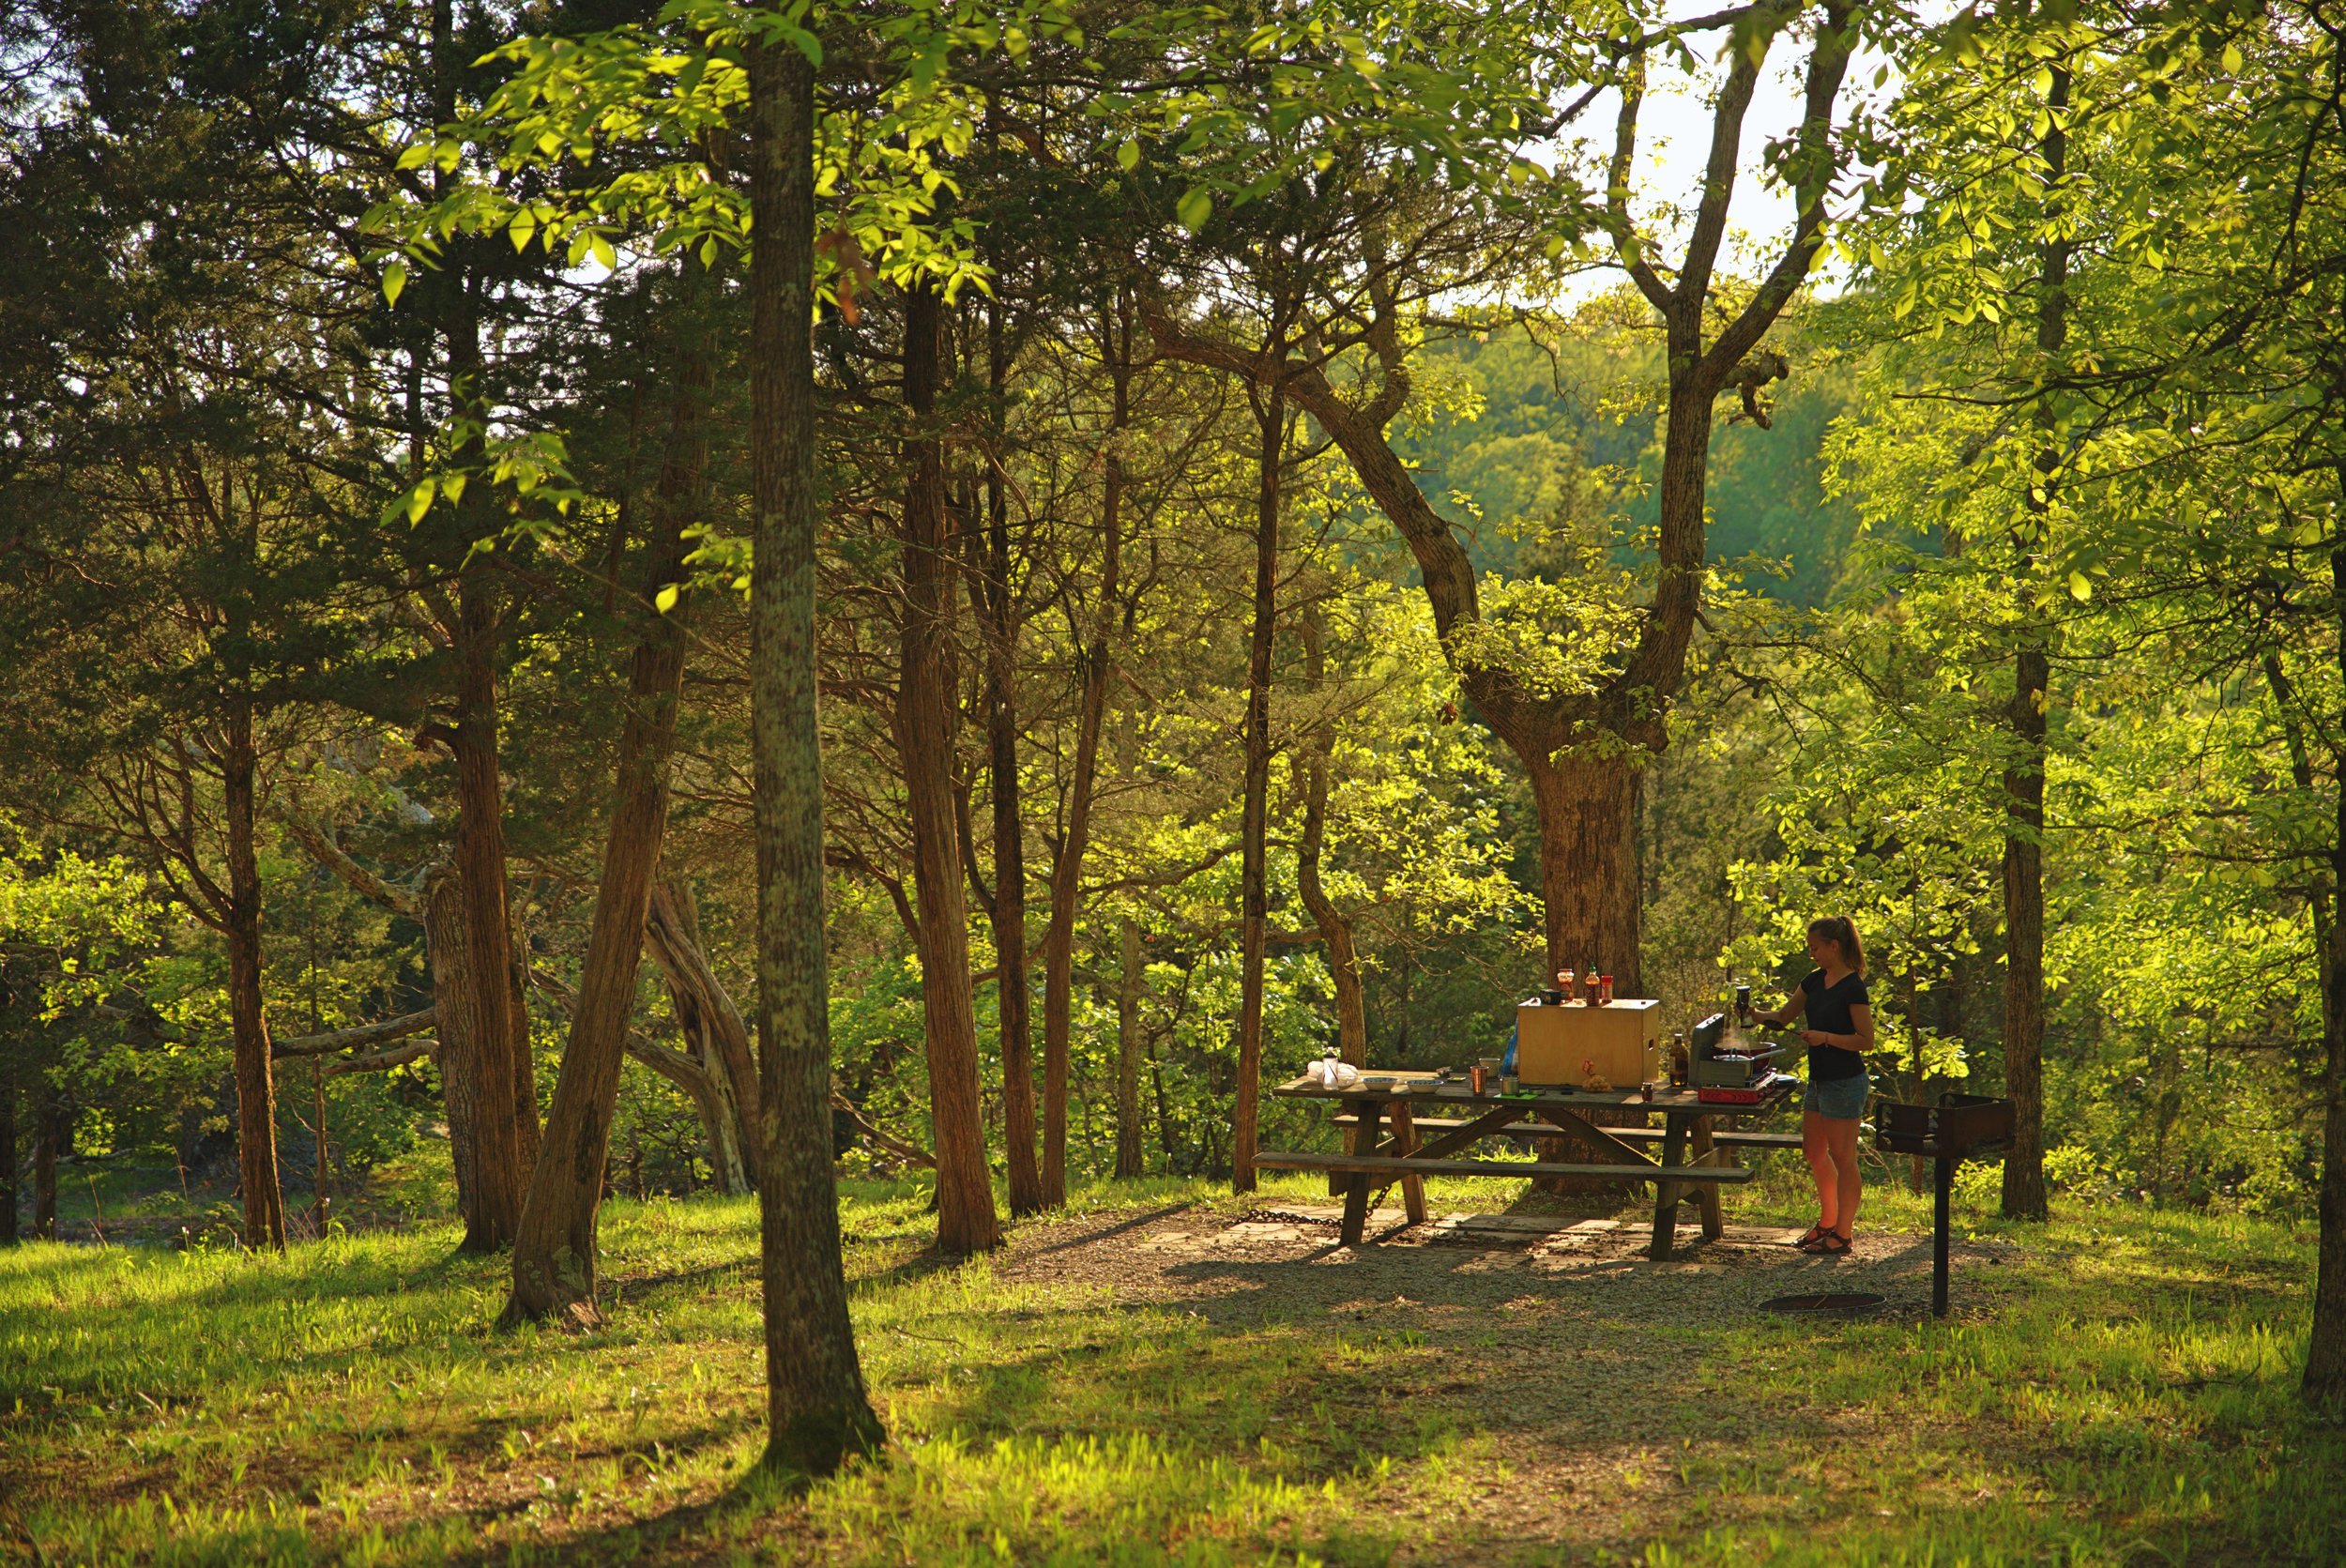
Cooking outside with our chuck box on a steamy night in the Shawnee National Forest. We met another vanlifer, but they didn’t have a fancy chuck box. They just had a couch in the back of their van…