Our Van Solar Power System

We’ll show you all the details of our camper van’s off-grid solar system and explain how it works in the simplest way possible.
Solar power is a common way is to power camper van conversions. It’s probably the best choice for a van build especially if you plan to boondock and go off the grid for any amount of time. With solar power you can save money by avoiding expensive campsites and enjoy many of the comforts of home in a completely sustainable way. There’s nothing better than getting free power from the sun all day long!
Tools
Materials
Renogy 20-foot, 10-gauge solar panel and controller connector cables
Dual USB socket charger, LED voltmeter, 12v power outlet and on-off switch
Why and How We Chose Our Solar Power System
Though our DIY van build in some ways is much like your basic RV, there were aspects of the typical RV rig that we wanted to avoid. Namely, the need to plug into a hook up or run a generator in order to charge our auxiliary battery was something we wanted to avoid. We wanted easy power in our van no matter how far from civilization we were.
A common solution is to purchase and install a solar array and related components on your camper van. Because neither of us had any real experience with solar, we began our research! There are many online sources for determining your solar needs and entire websites are devoted to this topic. Everyone's needs are different and highly dependent on your own personal power needs, so if you're looking to set up your own solar array for off-grid living we suggest that you do some in depth research of your own as well.

With some research installing the solar electrical system for your camper van is definitely doable.
12-volt electrical systems are generally pretty safe to work with compared to a 110-volt household electrical system. Still anytime you are working with electricity, you should be extremely careful. Do not take try to DIY your van’s electrical system without doing some serious research.

12-volt electrical systems are safer to work with than household systems, but you still need to be careful.

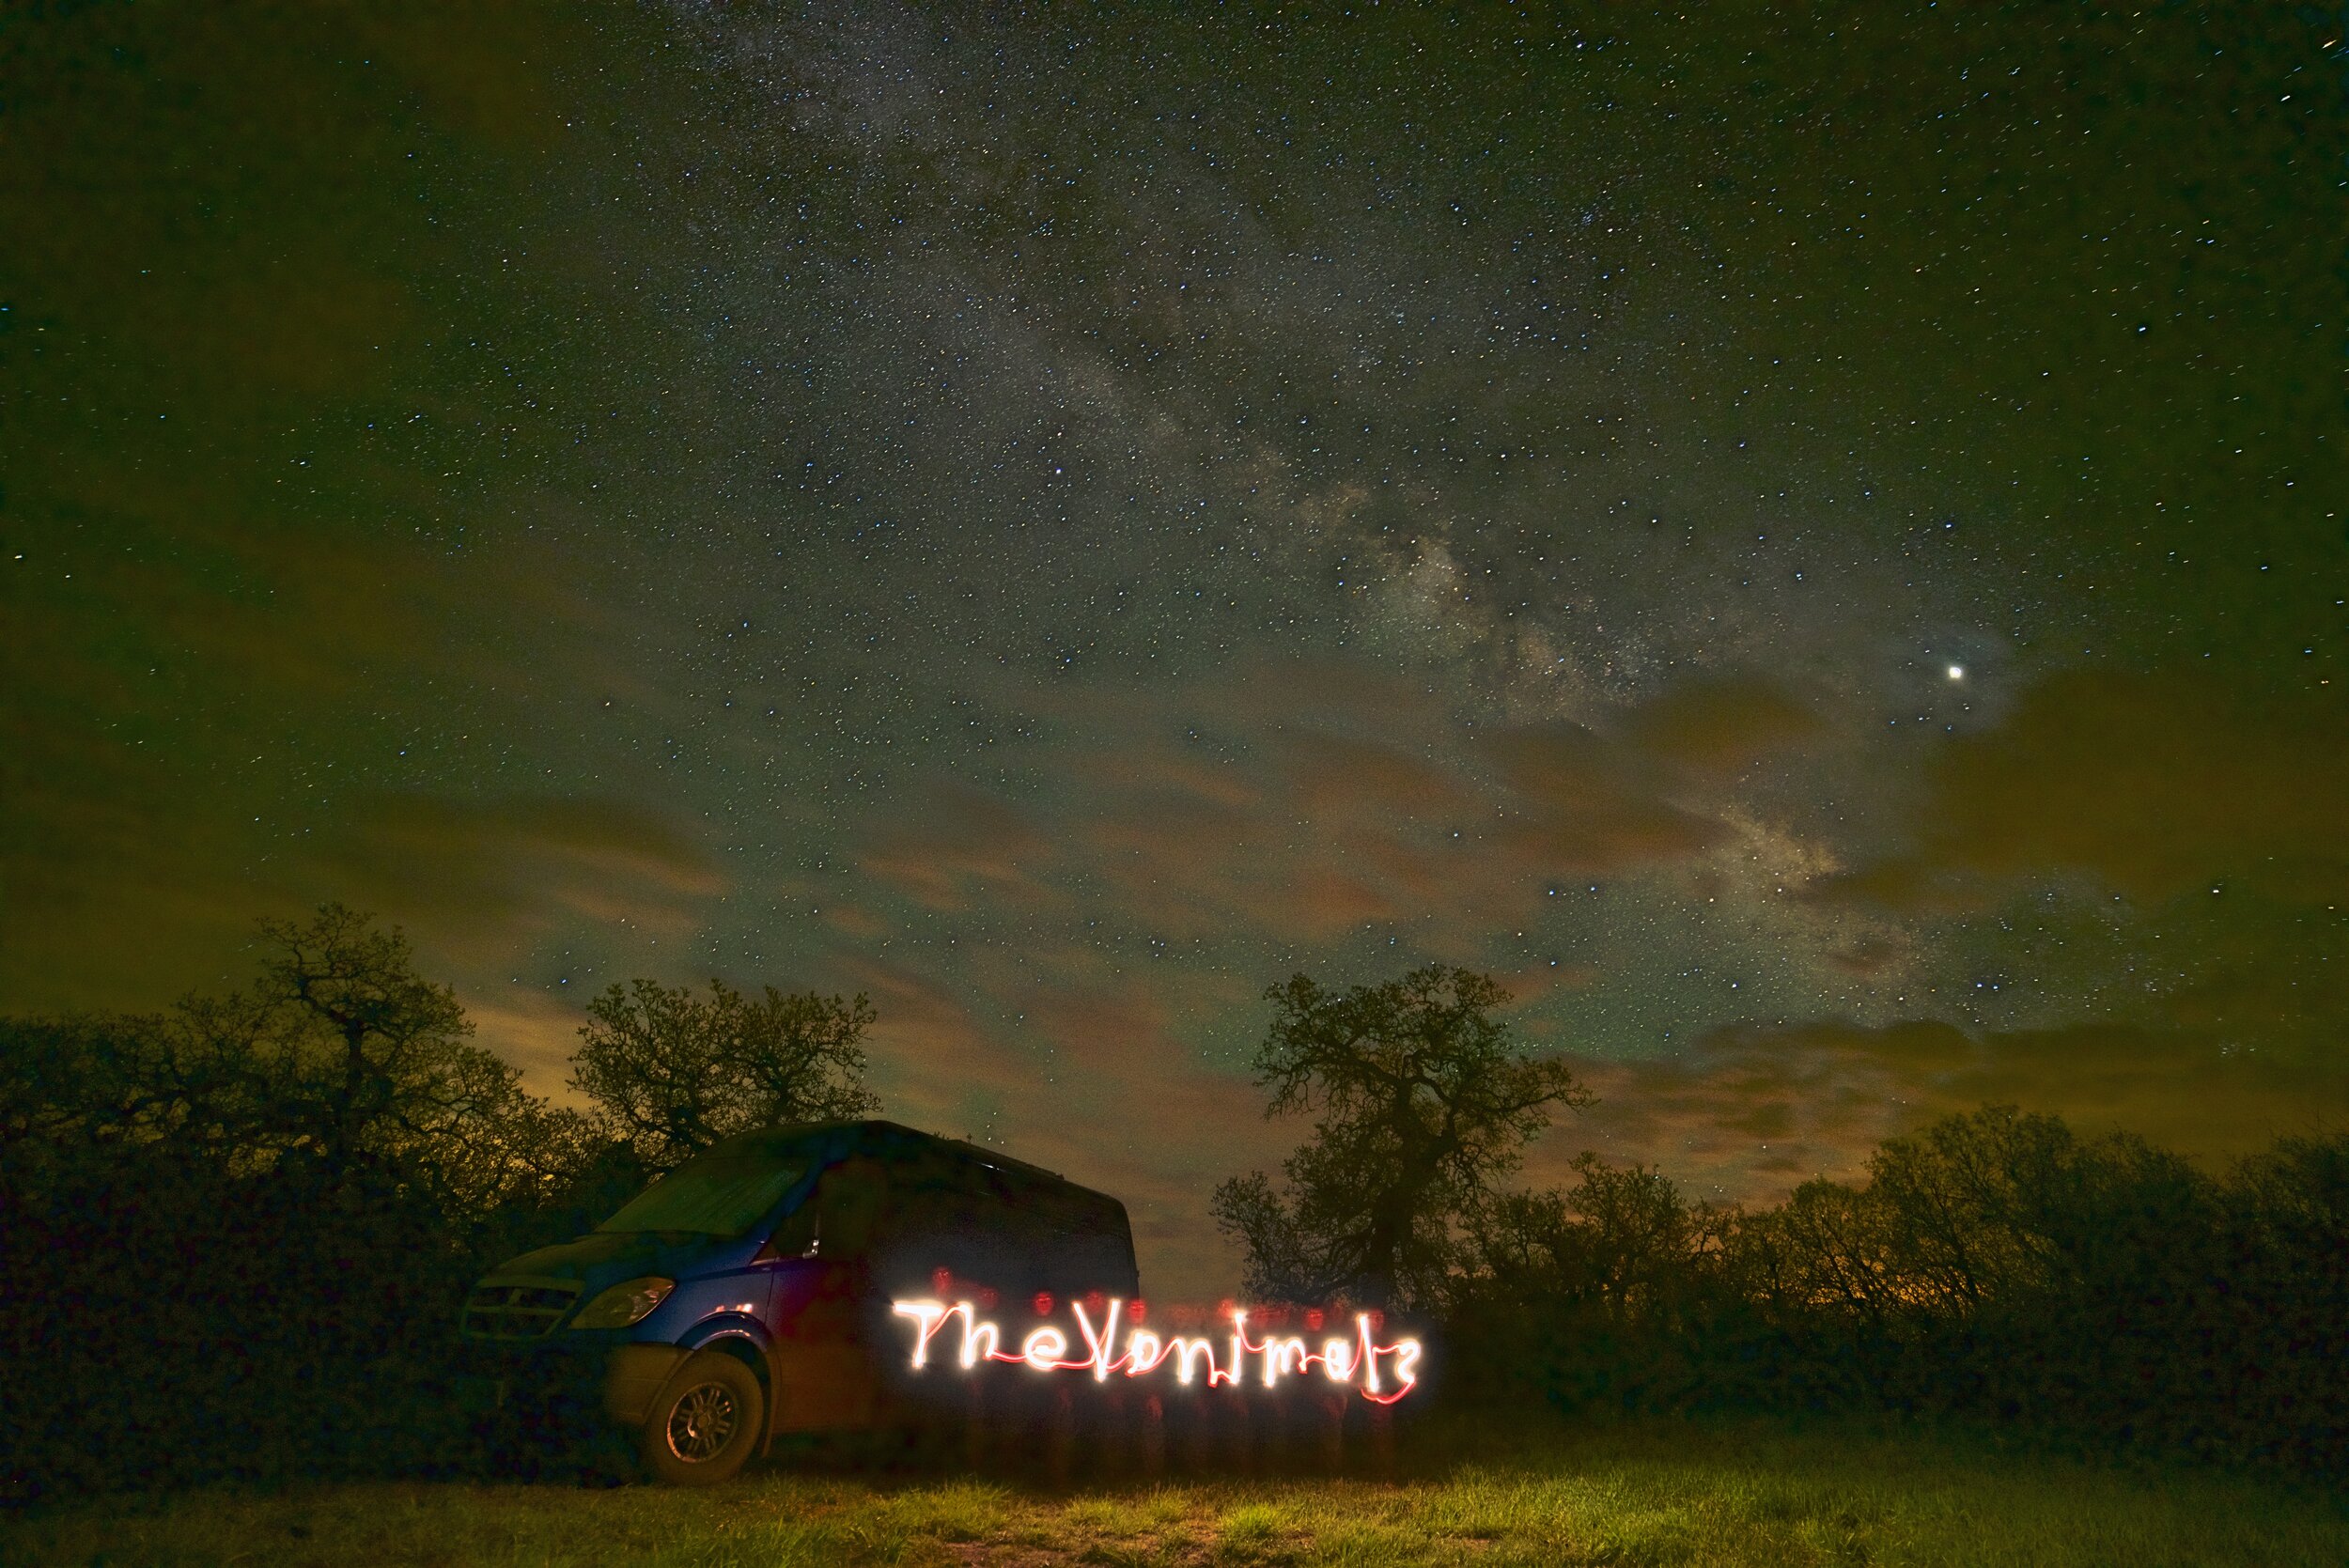
Installing a solar power system in your camper van will allow you to easily travel to remote places.
For our system, we tried to overbuild our system to prevent power issues down the road in case we ever had long periods without good sun such overcast or rainy days. We chose to purchase our components through Renogy. We purchased three 100-watt panels, an MPPT charge controller, and a 200ah GEL battery as the main components of our system.
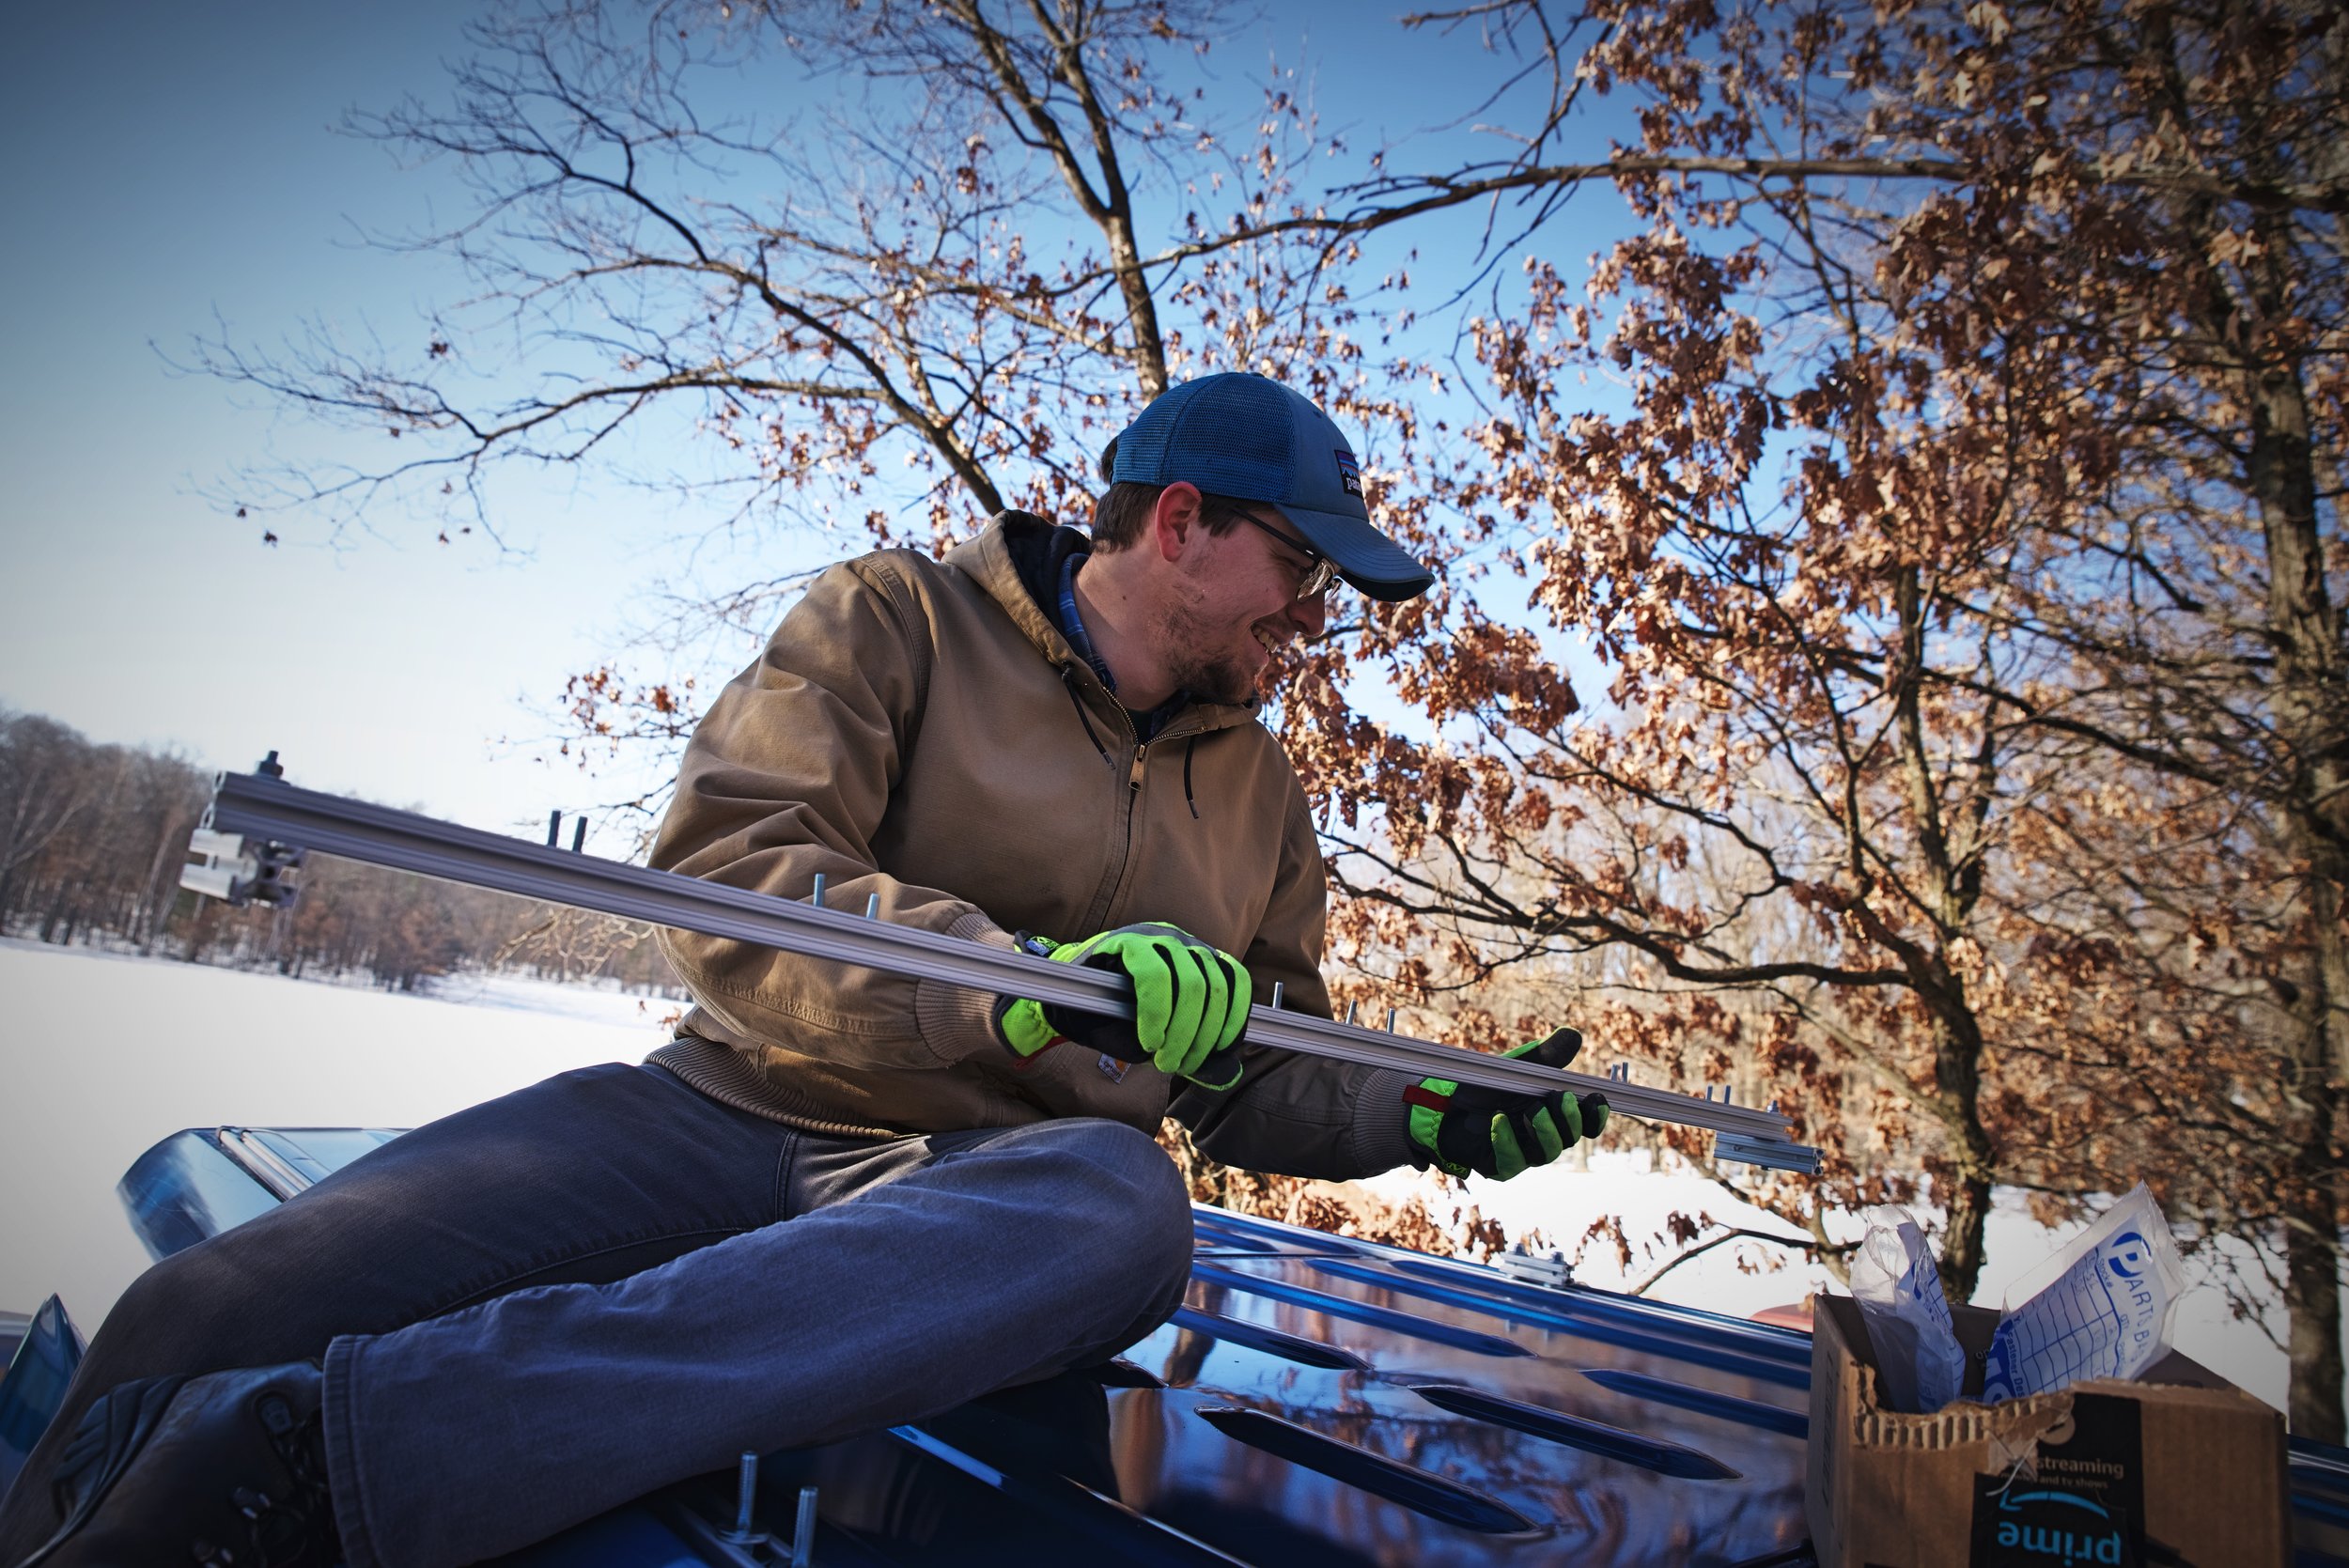
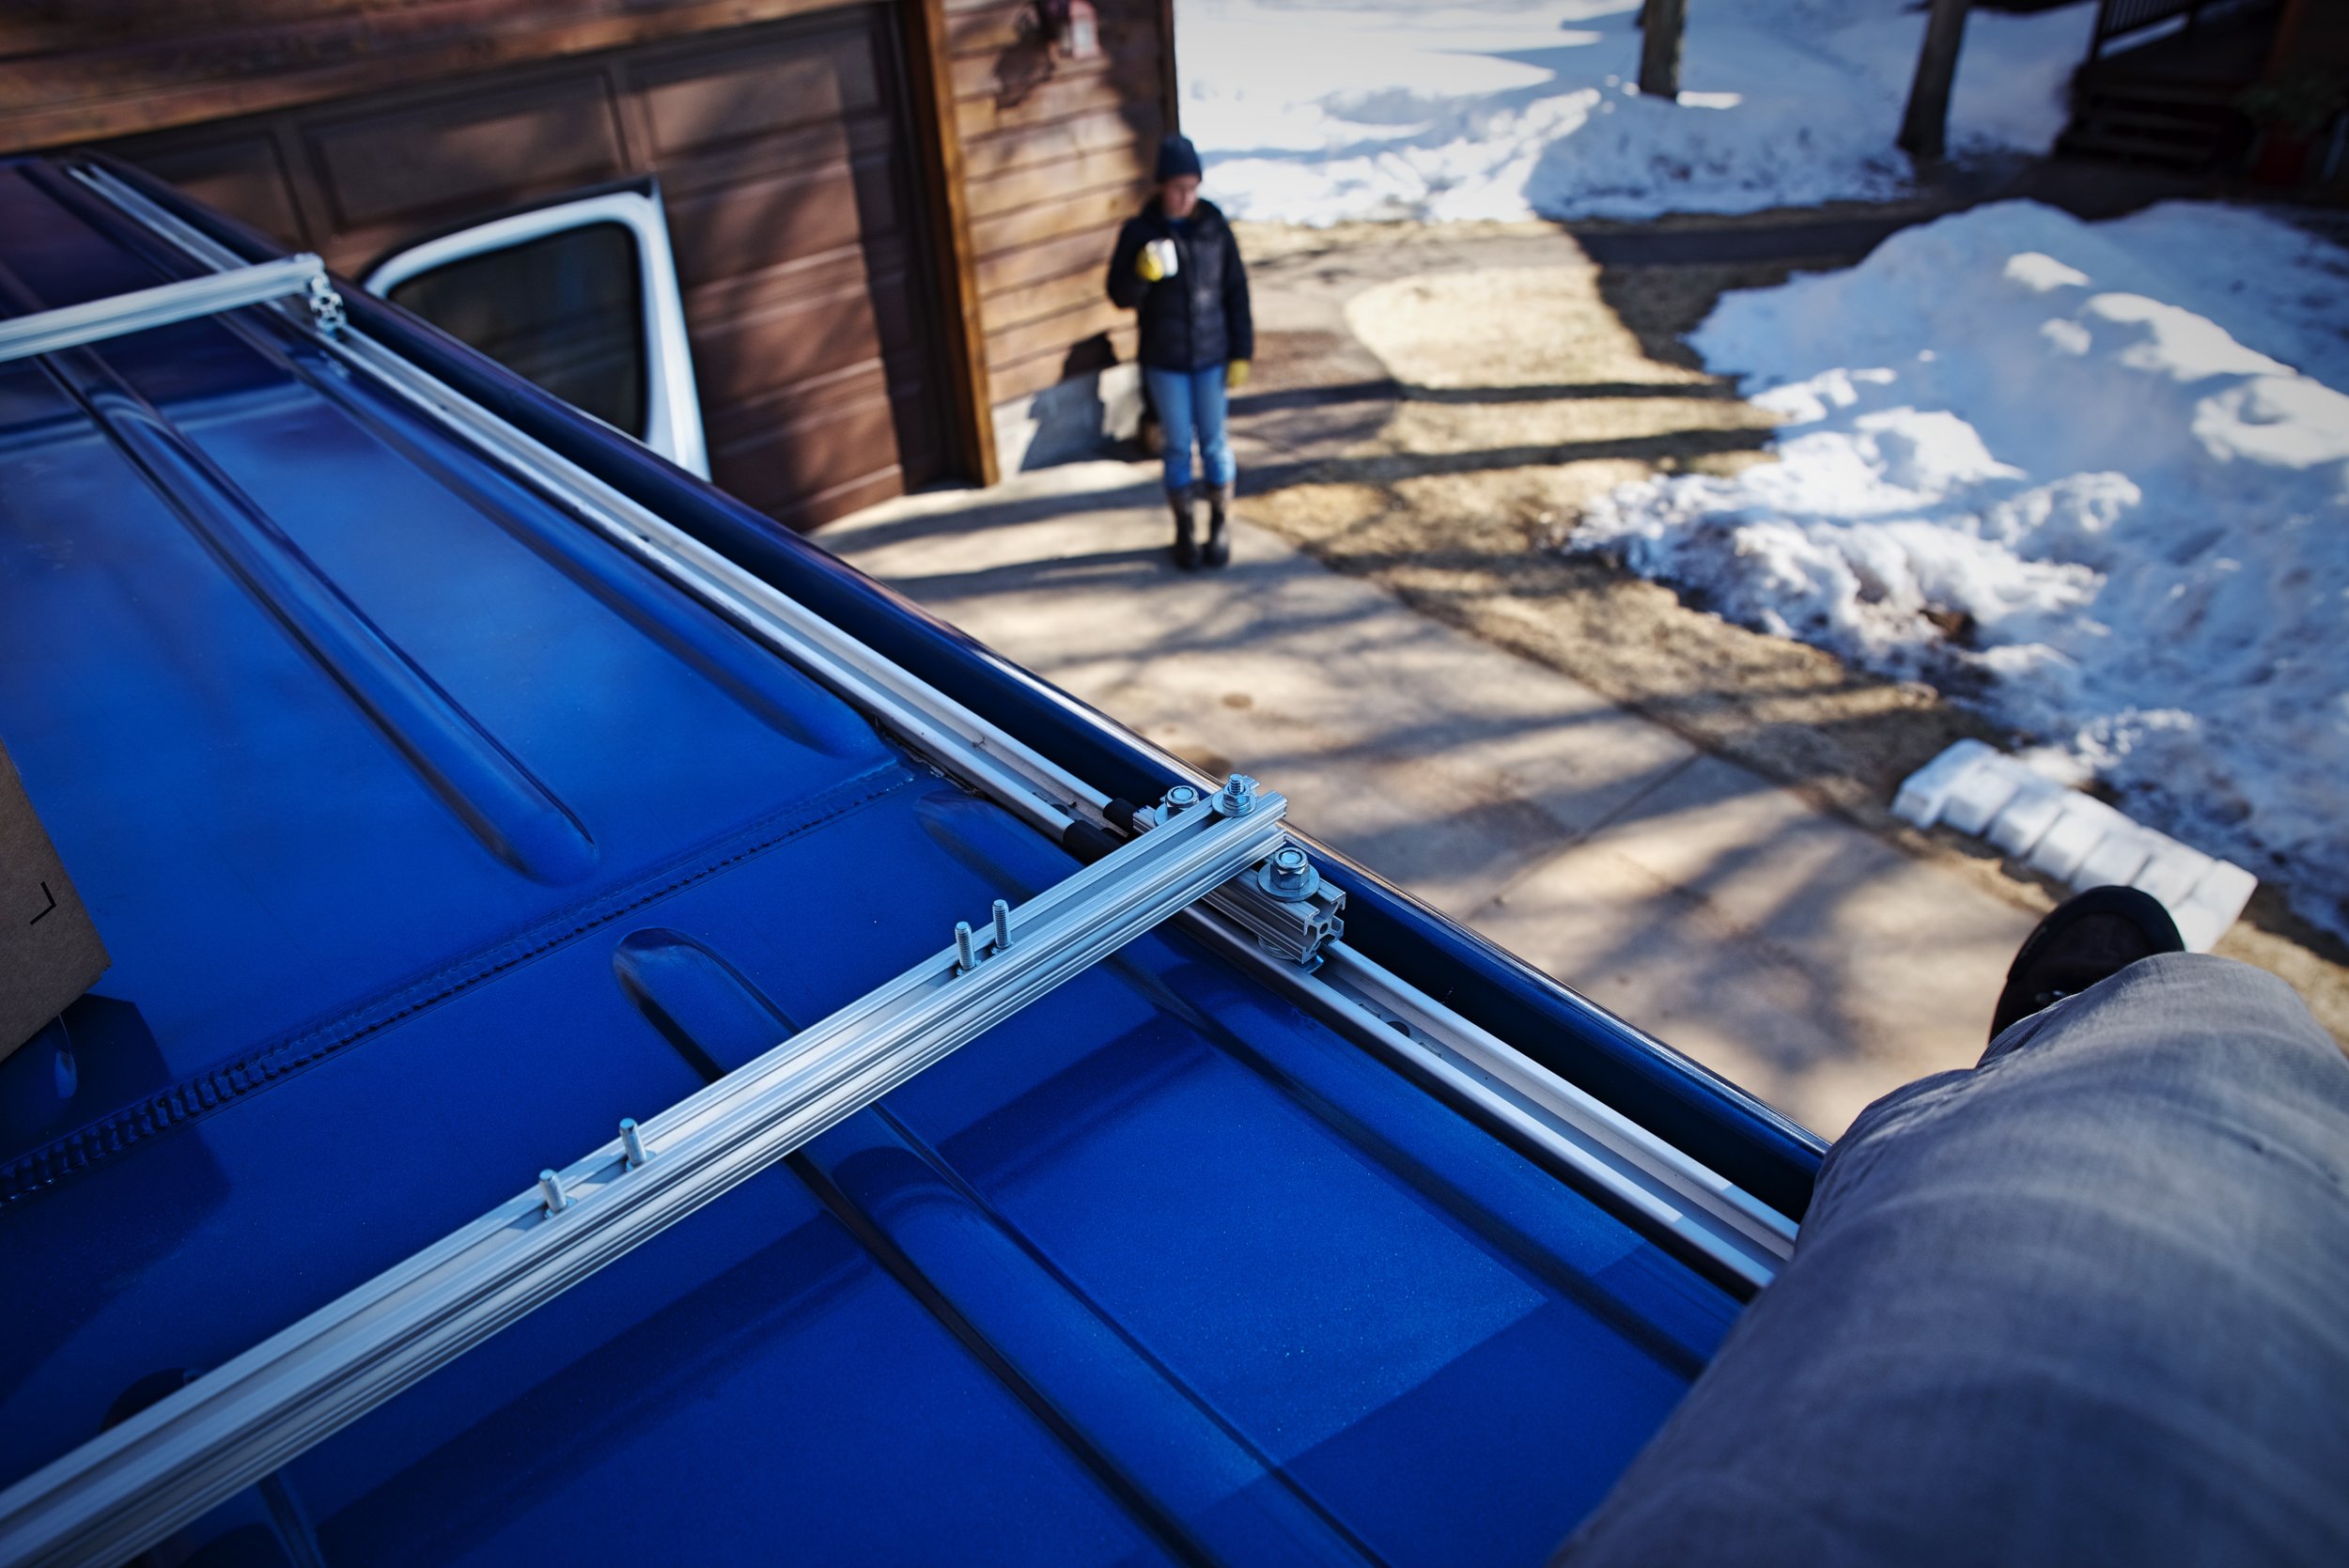
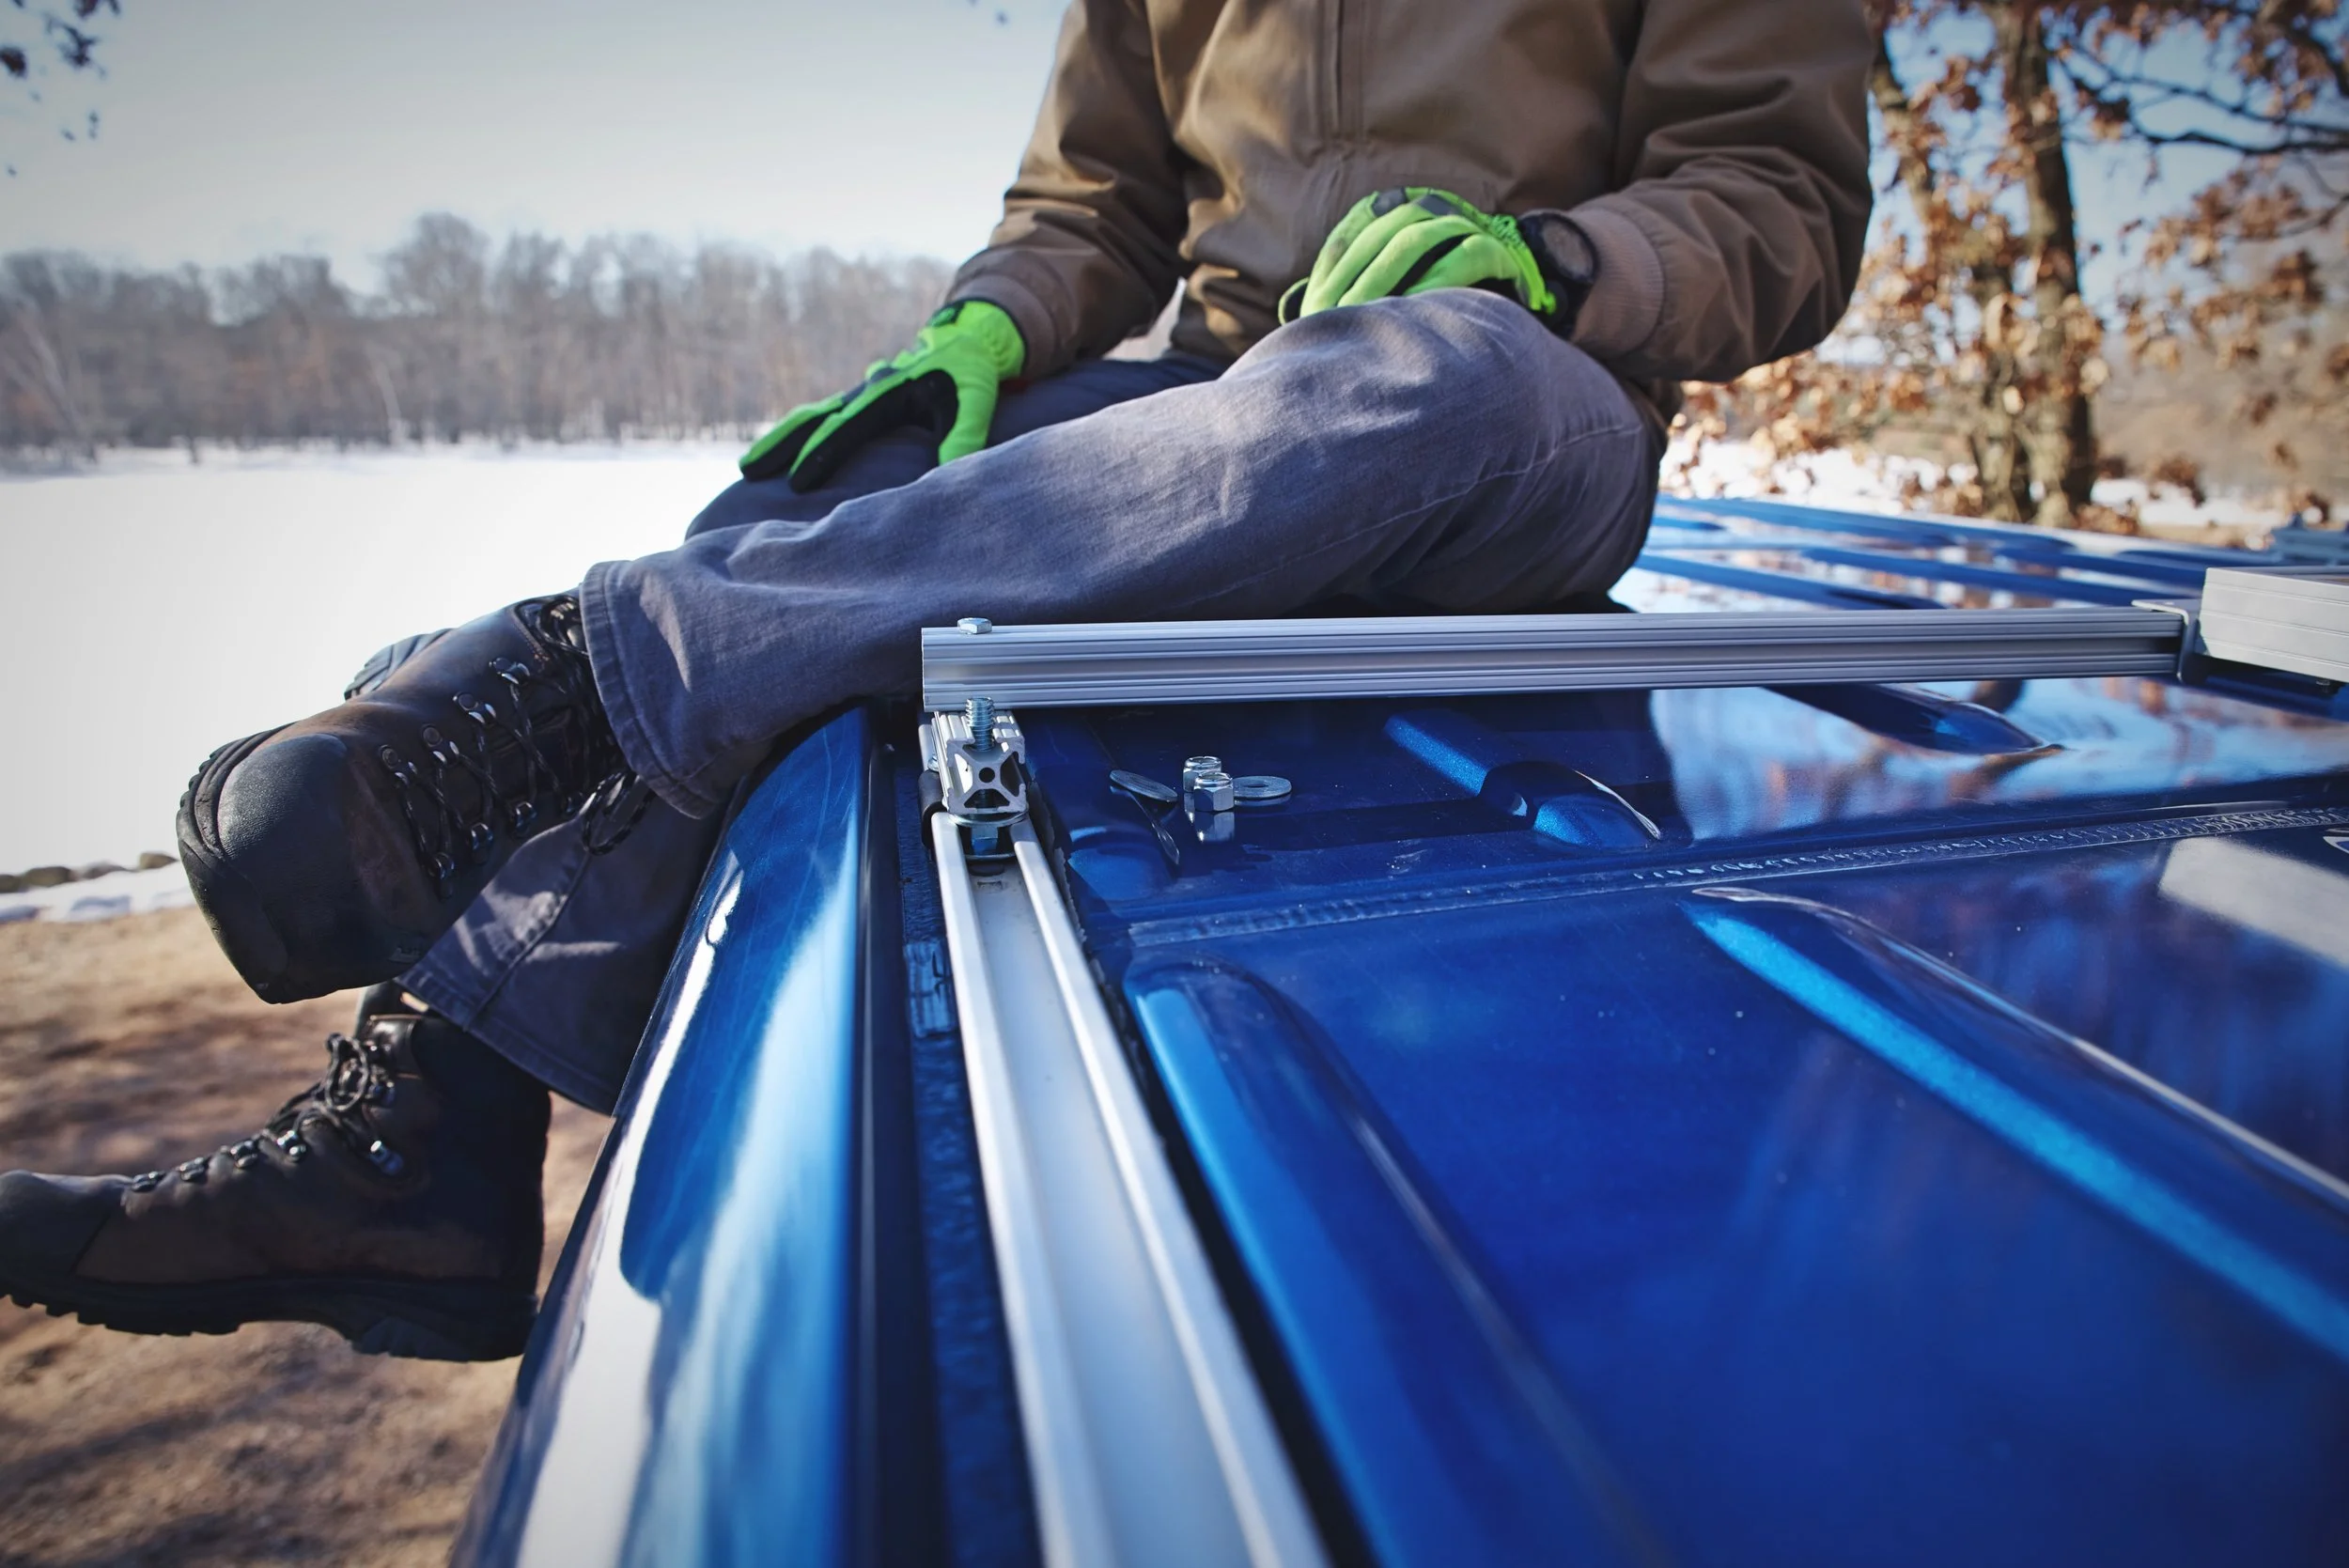
Ian installing the solar array on the top of our Sprinter camper van.

We built a low profile rack to install our van’s solar panels in a stealthy way.
A quick note on dual charging: we opted to keep our auxiliary battery system completely separate from our Sprinter’s battery and alternator. If you anticipate heavier electrical usage, you might consider a dual charging system. In this case, make sure you get a smart battery isolator to allow you to charge your batteries from your alternator as you drive.
A Simple Guide to Off-Grid Camper Van Solar Systems
On a sunny or even a cloudy day, the sun’s energy radiates onto your camper van’s solar panels. The photovoltaic solar panels collect this energy and converts it into electricity. The electricity is transferred through wires to the charge controller.

Building out your camper van with solar power is fairly easy to do as long as you understand the basics of solar power.
The charge controller is the “intelligent” part of your solar system. It regulates the electricity coming from the solar panels. The charge controller then sends this electricity to charge your van’s auxiliary battery. The 12v battery holds the electricity until you are ready to use it. When you are ready to draw this energy, whether it be flipping a light switch or the fridge kicking on, the energy is sent back through the charge controller, through a fuse box, and out to these devices (also called “the load”) through wires.

Ian works on building the aluminum rack for our van’s solar panels.
The fuse box splits out the solar power in your camper van out to the load.
Unless you have an inverter, most solar systems are 12-volts. Our entire system is designed as 12-volt DC power. We have a 12v fridge, fan, lights, USB outlet, even a 12v propane detector. Many vanlifers decide to install an inverter so that they can plug items like a laptop into 120v AC power. We even bought an inverter, but ultimately realized that with our low-tech lifestyle we didn’t regularly need AC power. We saved money by returning it.
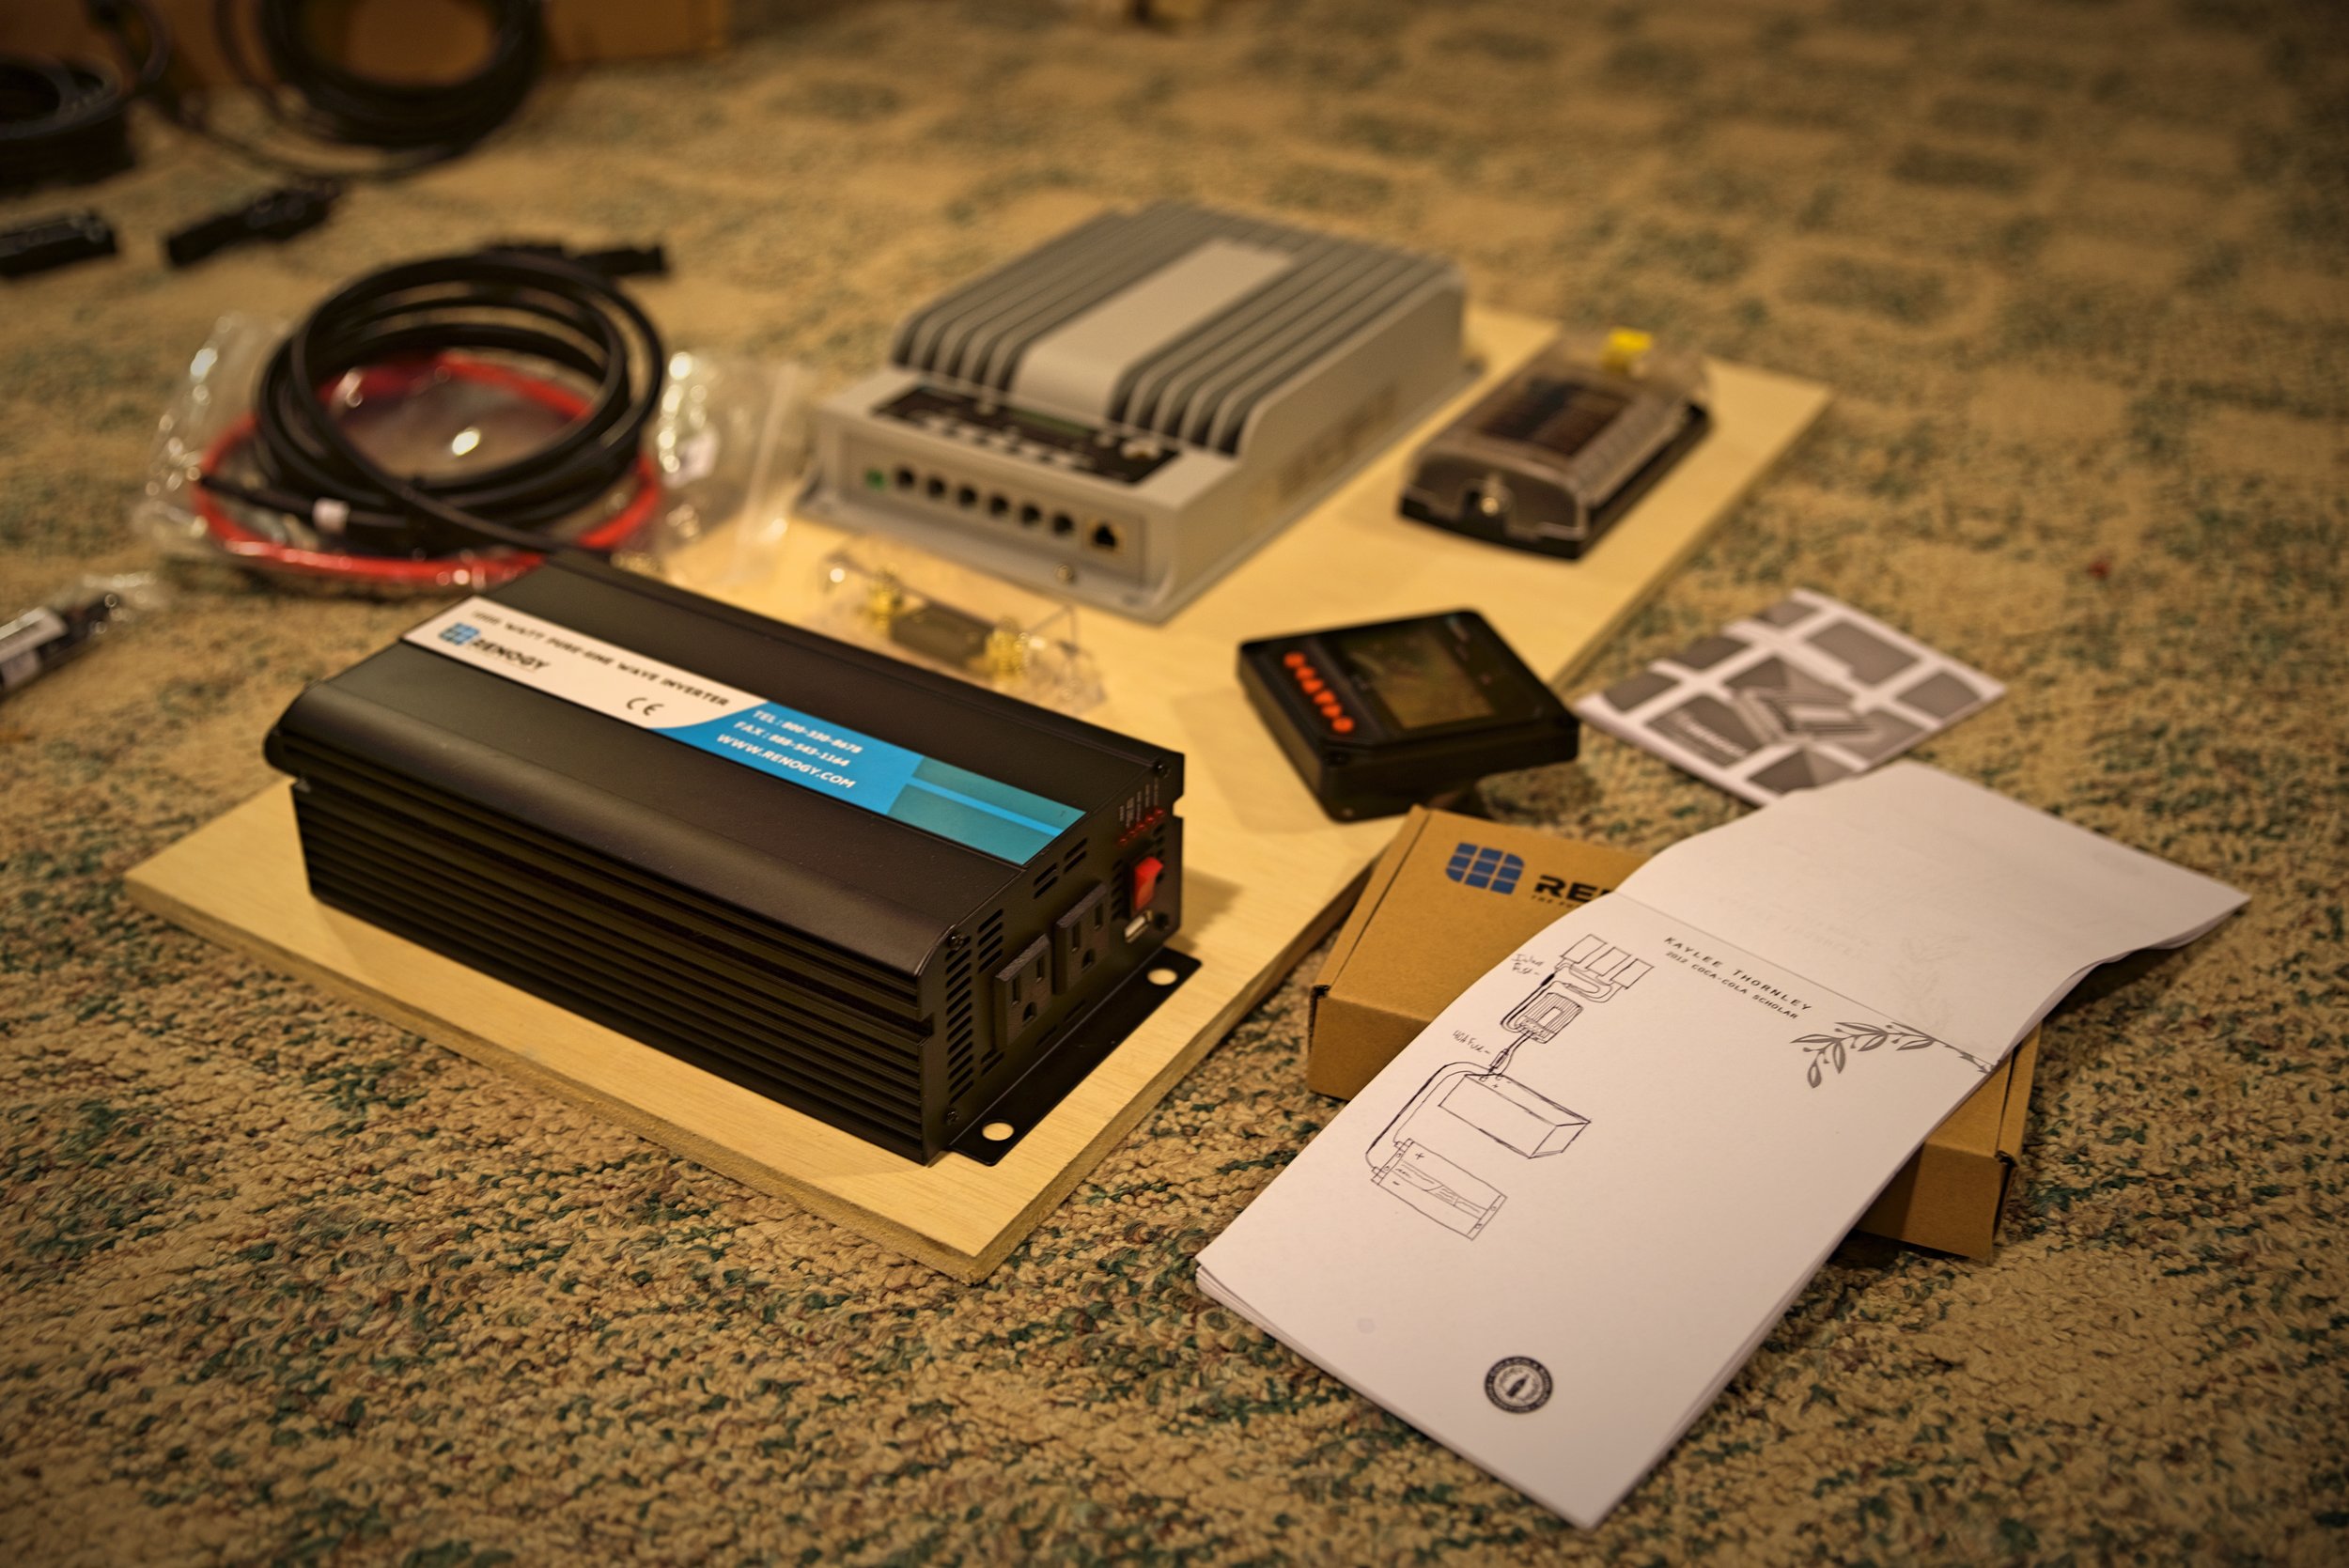
We originally purchased an inverter so we could have AC power in our camper van, but we realized that we didn’t need it and we returned it.
Selecting a Battery for our Van’s Solar Power System
To chose the battery for your van, the first thing you need to think about what you will need to power in your van. If you are going to be making smoothies in your Vitamix every morning and using your computer to work in your van, you might need higher capacity. We only needed one battery, but you can wire together multiple batteries if you need extra juice.
Figuring out what size solar battery you need will be based off of what you need to power in your camper van.
Calculating Your Anticipated Energy Draw
If you want to get technical about your solar needs, you should add the wattages of all the devices you will use daily and divide it by 12v. You can usually find the wattage for a product in the manual or find it online. Many products designed for campers or RVs will just give you the Amp hours directly along with the wattage. Here are a couple of formulas to keep in mind:
Watt Hours (Wh) = Watts x hours of use
Amp hours (Ah) * 12 volts = Wh
Wh / 12V = Ah
To figure out the load in your camper van, you need to add the watt-hours of all your devices, thinking about how long they will run each day.
Something like your van’s fridge will draw 24 hours per day, but a USB outlet will only draw while you have something plugged in.
We added up the watt-hours of all the devices we anticipated using, but, of course, it’s difficult to know before you live in a van. You don’t really know how many hours you will be actually using your system. We tried to overestimate everything for our actual life in the van since we were only using these devices for a fraction of the day. For us the list of devices with an over-estimate of usage was:
Eight 12 volt lights- 3w each 24w if the were all on at once, but we estimated a usage 4 lights at 12 hours per day = 12w x 12 hours = 144Wh
Fridge- 50 watts while cooling, but we read that on average it takes 1.3Ah to maintain 40 degrees = 15.6w x 24 hours = 374.4Wh
Propane Detector- 75mA or 0.9w x 24 hours = 21.6Wh
6 USB Outlets (2/socket)- estimated draw of 5w/outlet with something plugged in and charging (30w total), 2 outlets per day for 4 hours each = 10w x 4 hours = 40Wh
Fantastic Fan- 30w on high, but it has a draw of 1.86Ah or 22.32w for 12 hours (running overnight on low and while cooking) = 22.32w x 12 hours = 268Wh
Miscellaneous draw (voltmeter, battery meter, phantom load)- 10Wh (probably less but you want to factor it in)
We calculated that the amount of energy needed each day was 858Wh. Battery capacity is measured in amp hours. Next we had to convert our estimated watt-hours to amp hours.
859Wh / 12v = 72Ah
It’s best to overestimate the amount of power you will use in your van so that you won’t run into power issues if it’s cloudy or snowy and you’re not getting as much solar power.
Once you know your projected draw in Ah over a 24-hour period, you can select a battery. Again, you will want to calculate some buffer into it. Most batteries should only be drawn down to 50 percent of their capacity (and ideally not that much even). For example a 200Ah, actually only has a 100Ah of capacity.
This little remote solar meter allows us to make sure that our battery is staying “healthy.”
Since we had calculated 72Ah of energy usage, we selected a 200Ah battery to ensure we would have enough capacity. You want at least a little extra capacity to make you have enough even if it’s cloudy for several days in a row.
You need to overestimate battery usage so that you can keep important devices like a propane monitor running 24/7.

You won’t want to have to stop using your fan on a super hot day just because your van battery is running low.
Types of Batteries
There are essentially four types of batteries used for solar systems: Lithium Ion Batteries, Lead Acid, AGM, and Gel Batteries.
Lithium Ion Batteries or LifePO4 batteries are like the ones in your phone. They are a great choice for vanlife! They are safe for putting into your living space, because they don’t off gas very much. They can be depleted 100%, and they have the longest lifespan of any of the batteries. The only issue is that they are rather expensive. But they have come down in price a lot since we built our van, so they might be a great option for you!
Lead acid batteries are what you’d typically find as car battery or golf cart batteries. These batteries are cheap! But there are several risks that come with using lead acid batteries in your van build. In the unlikely scenario that they break or corrode and leak, you’ll have dangerous battery acid (the electrolyte) everywhere. The bigger risk however is off gassing. The gasses these batteries produce if they are overcharged is toxic and flammable if they are in an enclosed space (such as the cabin of a campervan where you are sleeping).

There are several types of batteries that are used for solar power storage in camper vans. It’s important to select the safest one you can while keeping within your budget.
AGM batteries and gel batteries are pretty similar. AGM, or absorbed glass mat, holds the electrolyte in a suspended state in fiberglass mats. Gel batteries store the electrolyte battery in a paste-like substance. Both batteries have electrolyte held in a solid state so there is no risk of a spill of battery acid. Both AGM and gel batteries are sealed so there is no risk of off gassing into your living space.
We selected a gel battery over an AGM battery because they are better in higher temps, such as a sealed van left out in the Texas sunshine. They also are a better than AGM batteries in situations where you have a long slow draw. For example, if you ever plan to leave your van sit for some amount of time while traveling elsewhere.
We chose a Dometic Deep Cycle Gel Battery. This battery is maintenance free. Dometic makes products designed for off-grid, mobile solar systems in boats and RVs. We were able to get a charge controller and other components designed precisely for our type of system. Despite being a bit more expensive than other brands, this compatibility made sense to us so it was worth the extra spend.
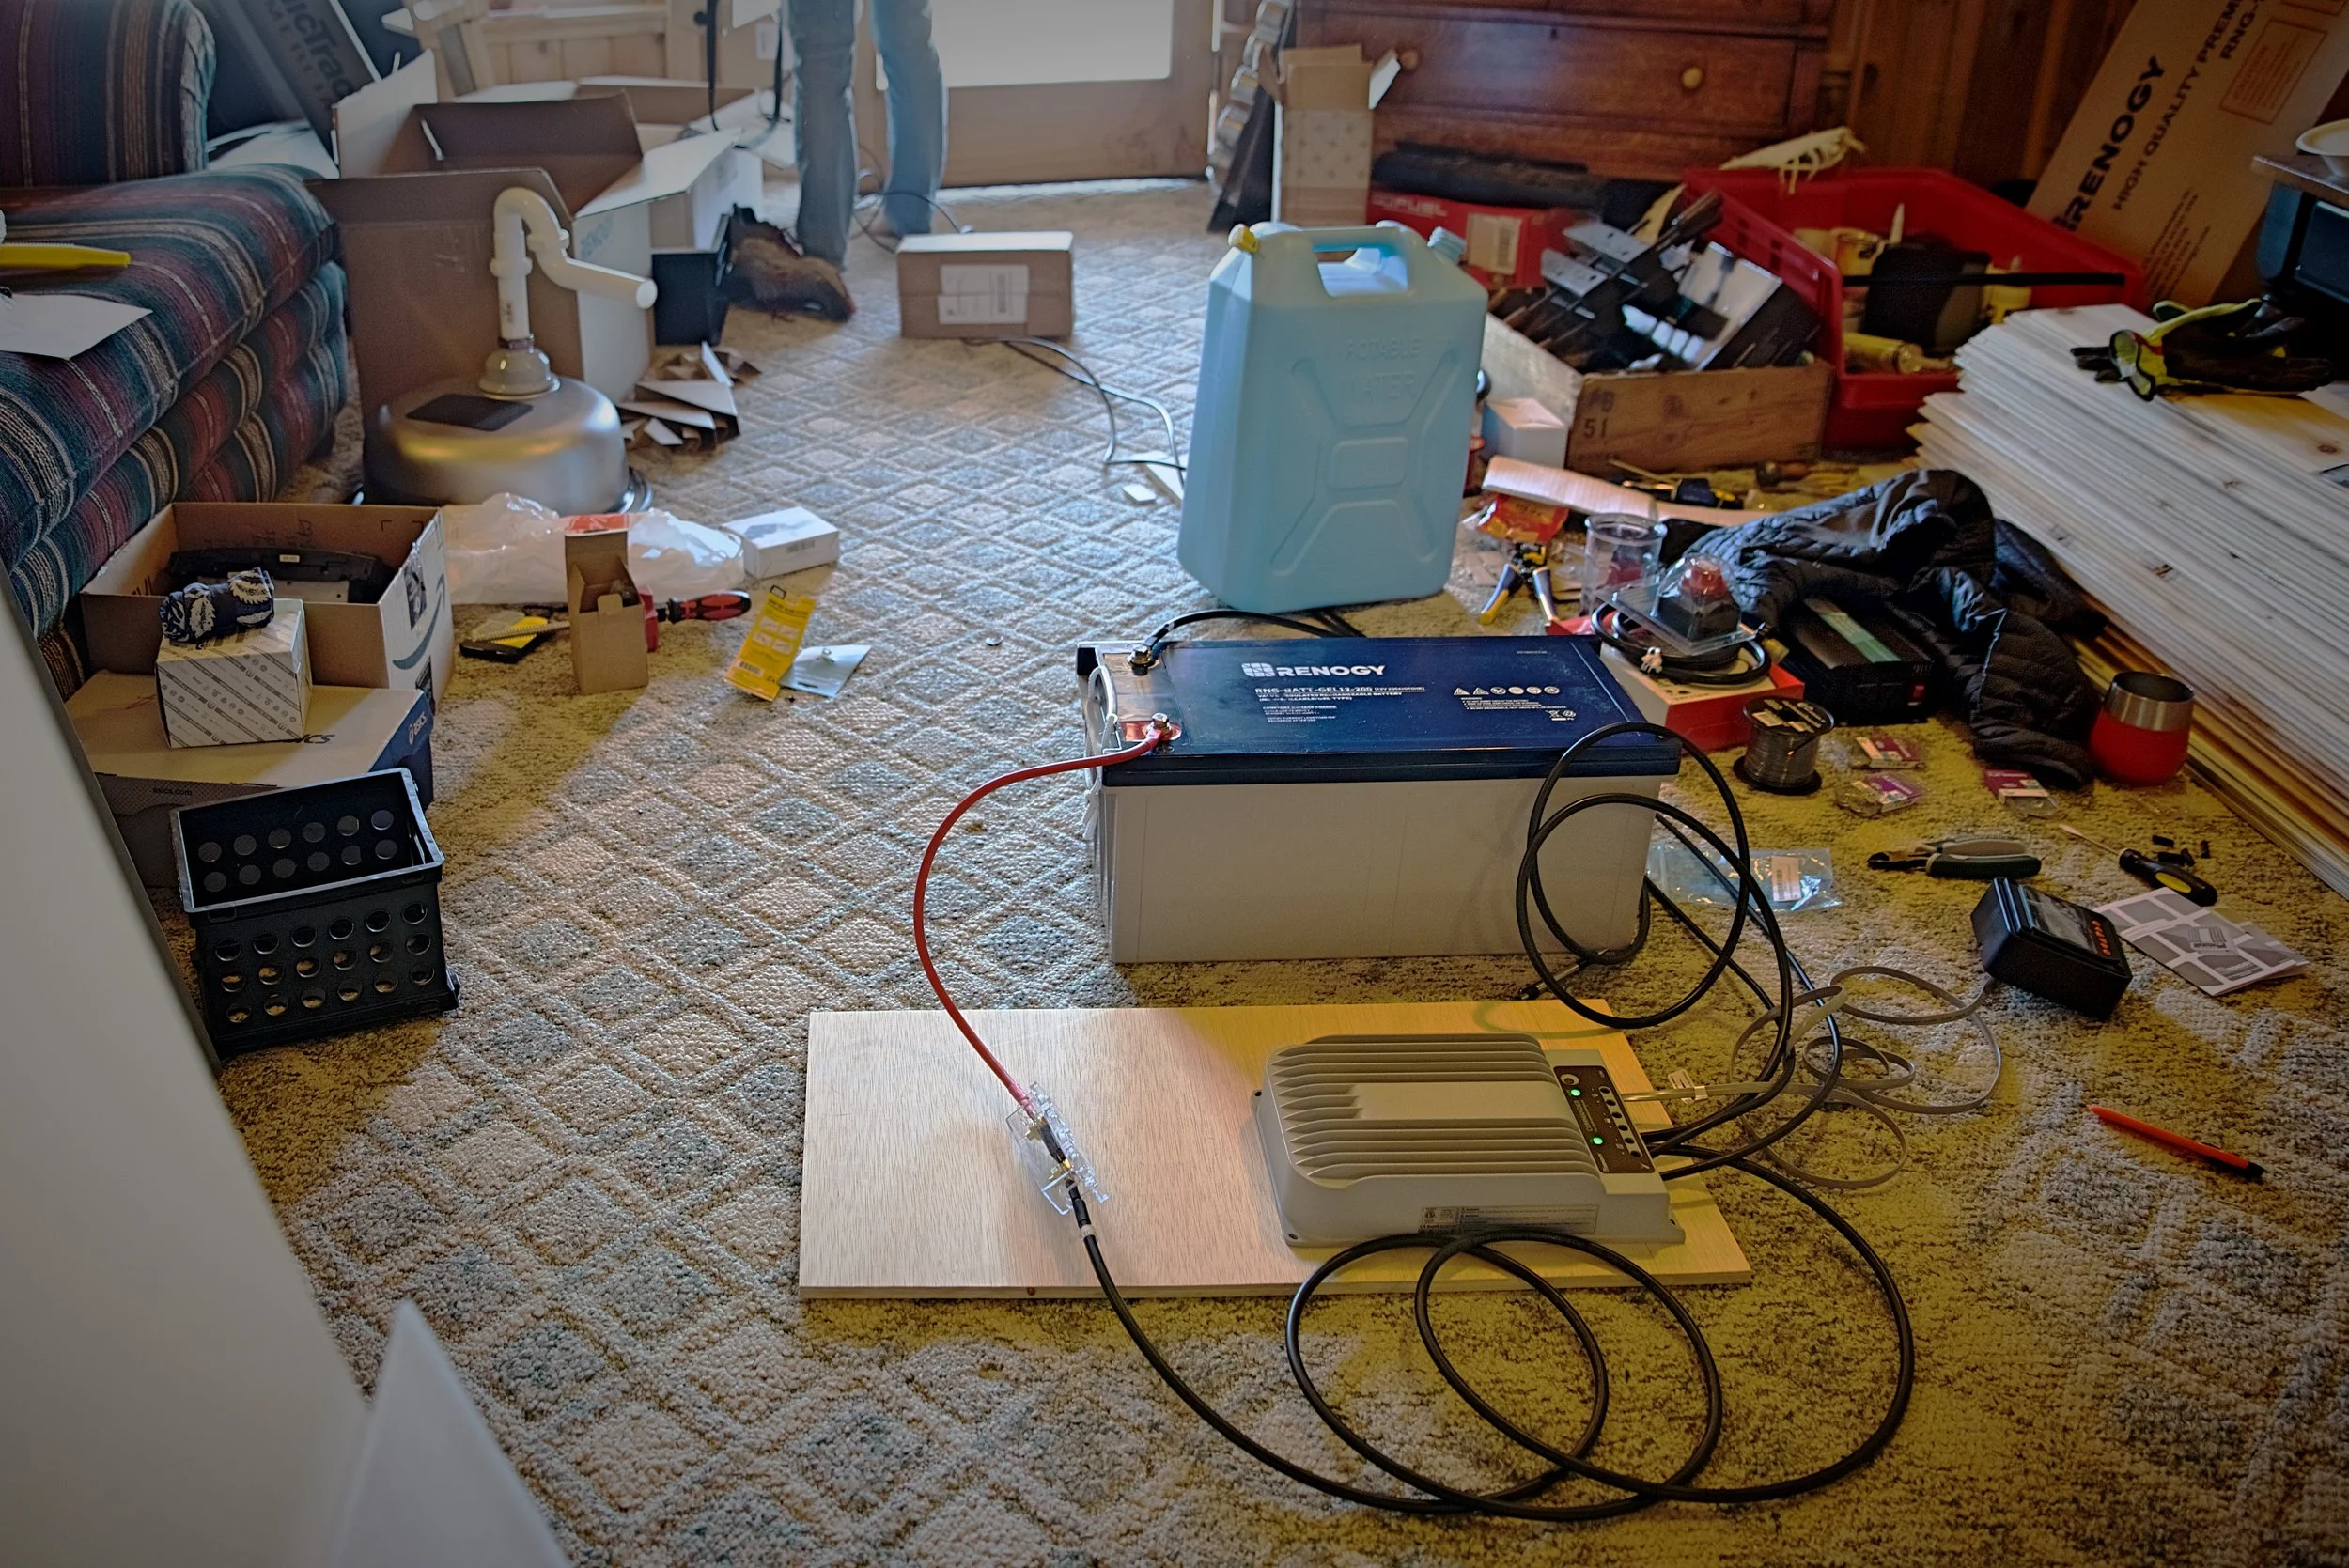
We selected a 200Ah Gel Battery for our camper van conversion. We tested our solar system set up prior to mounting everything in our camper van.
Picking Out Solar Panels for a Camper Van
After you have calculated your estimated draw and the capacity you need in a battery, you should select solar panels to match. Solar panels are measured in watts.
To find out how many panels you need in watts, you should take your estimated consumption and divide it by the number of full hours of sunshine (between 5 and 6 hours is the common amount).
859Wh / 5 hours of sunlight = 171.8 watts
Even though we probably could have gotten away with 200 watts of solar panels, we opted to install a 300 watt array. We chose three 100w solar panels to charge our 200 Ah battery.
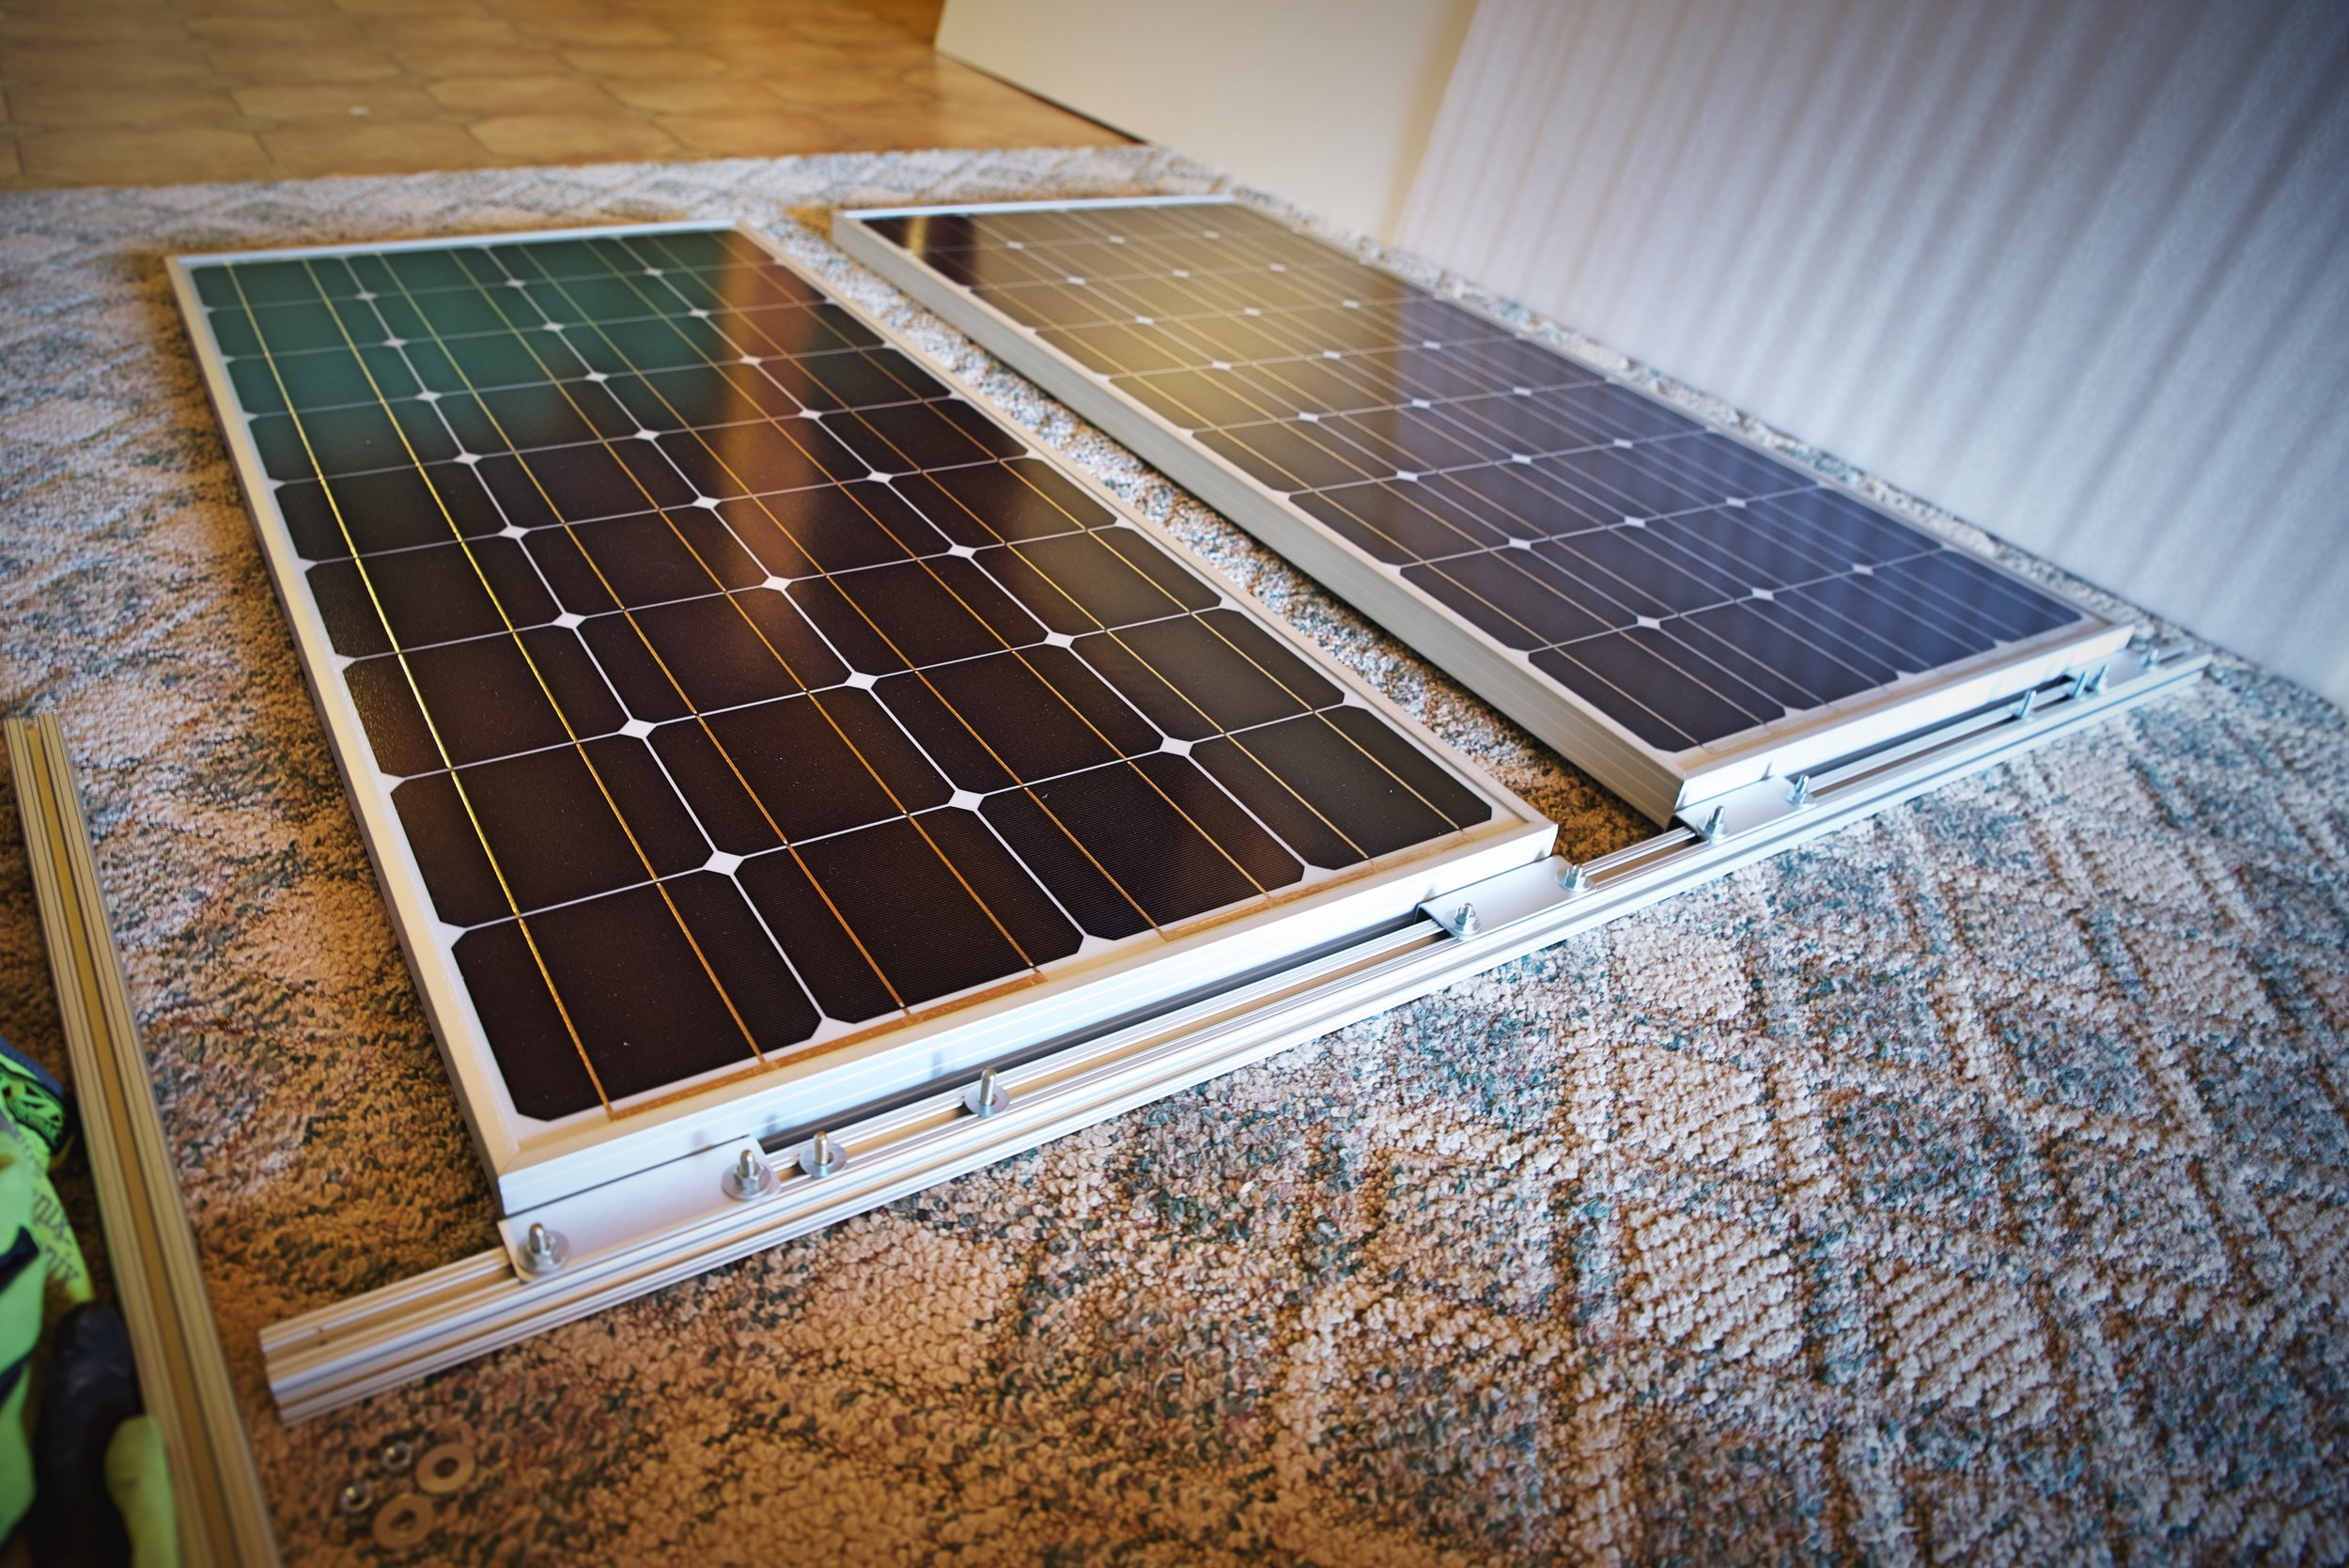
We have three 100-watt solar panels that provide power for our van.
Calculate how many panels you need by dividing your consumption by 5-6 hours of full sunlight.
Traditionally 300 watts of solar panels might be considered more than is needed for a 200Ah battery. However, we wanted to ensure that we were able to maintain appropriate battery levels even on cloudy days (and weeks)! We had plans to travel in the cloudy Pacific Northwest, spend time camping in shady forests, and during the winter with snow. Having a larger system allows us to be completely off-grid. We never have to worry about our food spoiling in our fridge or not being able to run our fan on a blisteringly hot night.
With an appropriate charge controller, having extra solar energy coming in to charge your battery is always a good idea. This allows you to maximize the potential energy available during the peak sunlight hours.

After calculating the size of our draw, we decided to have three 100-watt solar panels in parallel on the roof of our camper van.
Choosing a Charge Controller and Why You Need One
A charge controller is a device that regulates the voltage coming into your battery to prevent overcharging. Most 12v solar panels will put out 17 and 21 volts. There’s a lot of complex information online about why putting 17 volts straight into your battery is bad for it, but basically will overcharge it and eventually destroy it.
You want up to 14.4 volts to be going from your solar panels into your battery to keep it “healthy” for a long time. The charge controller gives your system the intelligence to regulate the voltage, and protects your battery.

You do not want anymore than 14.4 volts to be going into your battery from your solar panels.
The charge controller is the intelligent part of a camper van solar power system.
Likewise, depending on the charge controller you select, it can also prevent you from over-discharge by shutting off your system before drawing your battery below 50 percent capacity. So you definitely need a charge controller for your off-grid solar system
There are two types of charge controllers: PWM (Pulse Width Modulation) or MPPT (Maximum Power Point Tracking). PWM charge controllers are cheap, so at the bare minimum you should get one of these to protect your battery. However, they are designed for small-scale systems and dissipate extra energy to your system as heat. MPPT charge controllers will actually regulate the current and maximize the production output of your solar system so you can get a 90% or higher efficiency from your solar panels.
Sizing Your Charge Controller
To size your charge controller you should take the maximum short circuit current rating for your solar panels (in our case 6.24 amps) and multiply it by the number of panels you have in parallel (in our case 3). Then add a little bit of safety by increasing that number by 25 percent.
6.24amps x 3 x 1.25 = 23.4 amps
You should also calculate the maximum draw on your system in amps at one time. To do this, add the wattage of all devices if you had them turned on at one time (not the watt hours, just the watts at one point in time). For us, if we had every light switch turned on, the fan was running on high, the fridge was cooling, and we had a device plugged into every outlet would be about 135 watts.
135 watts / 12 volts = 11.24 amps
Whichever number is higher is minimum amperage you need for your charge controller. (Learn more about how to size your charge controller).

We selected a 40amp solar charge controller for our camper van system.

To size your van’s charge controller correctly you need to calculate the maximum amperage of your solar panels and your load.
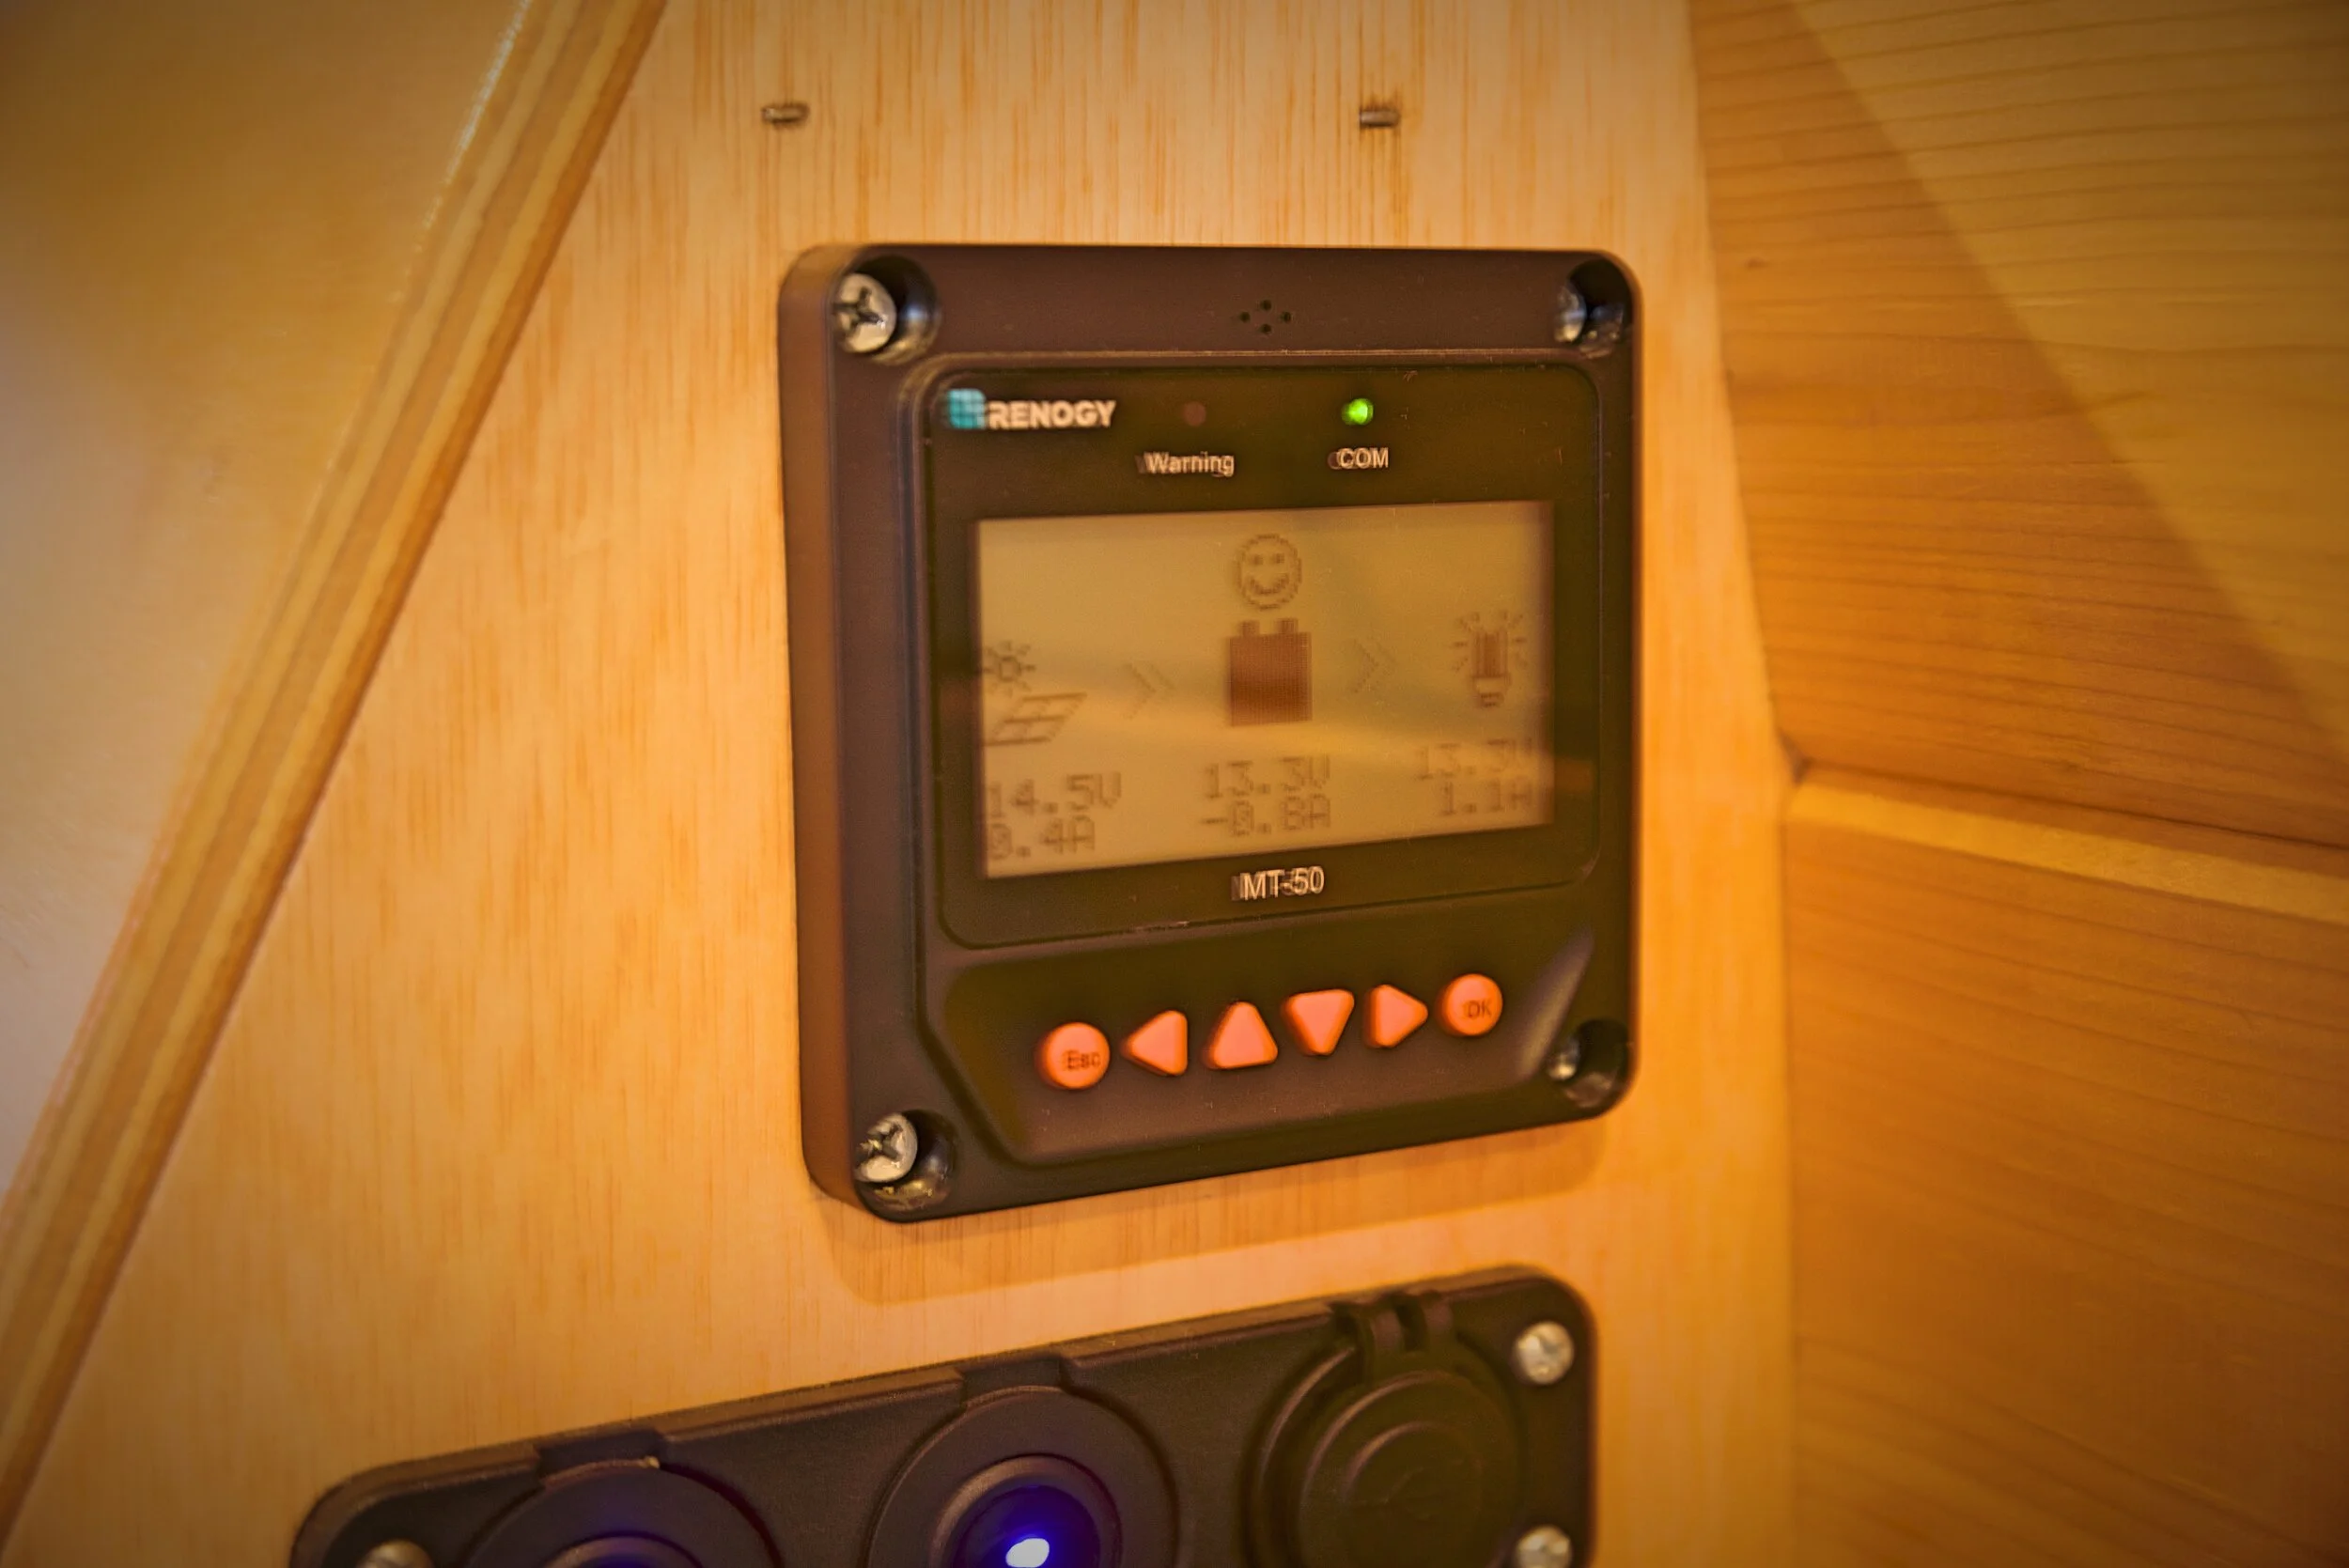
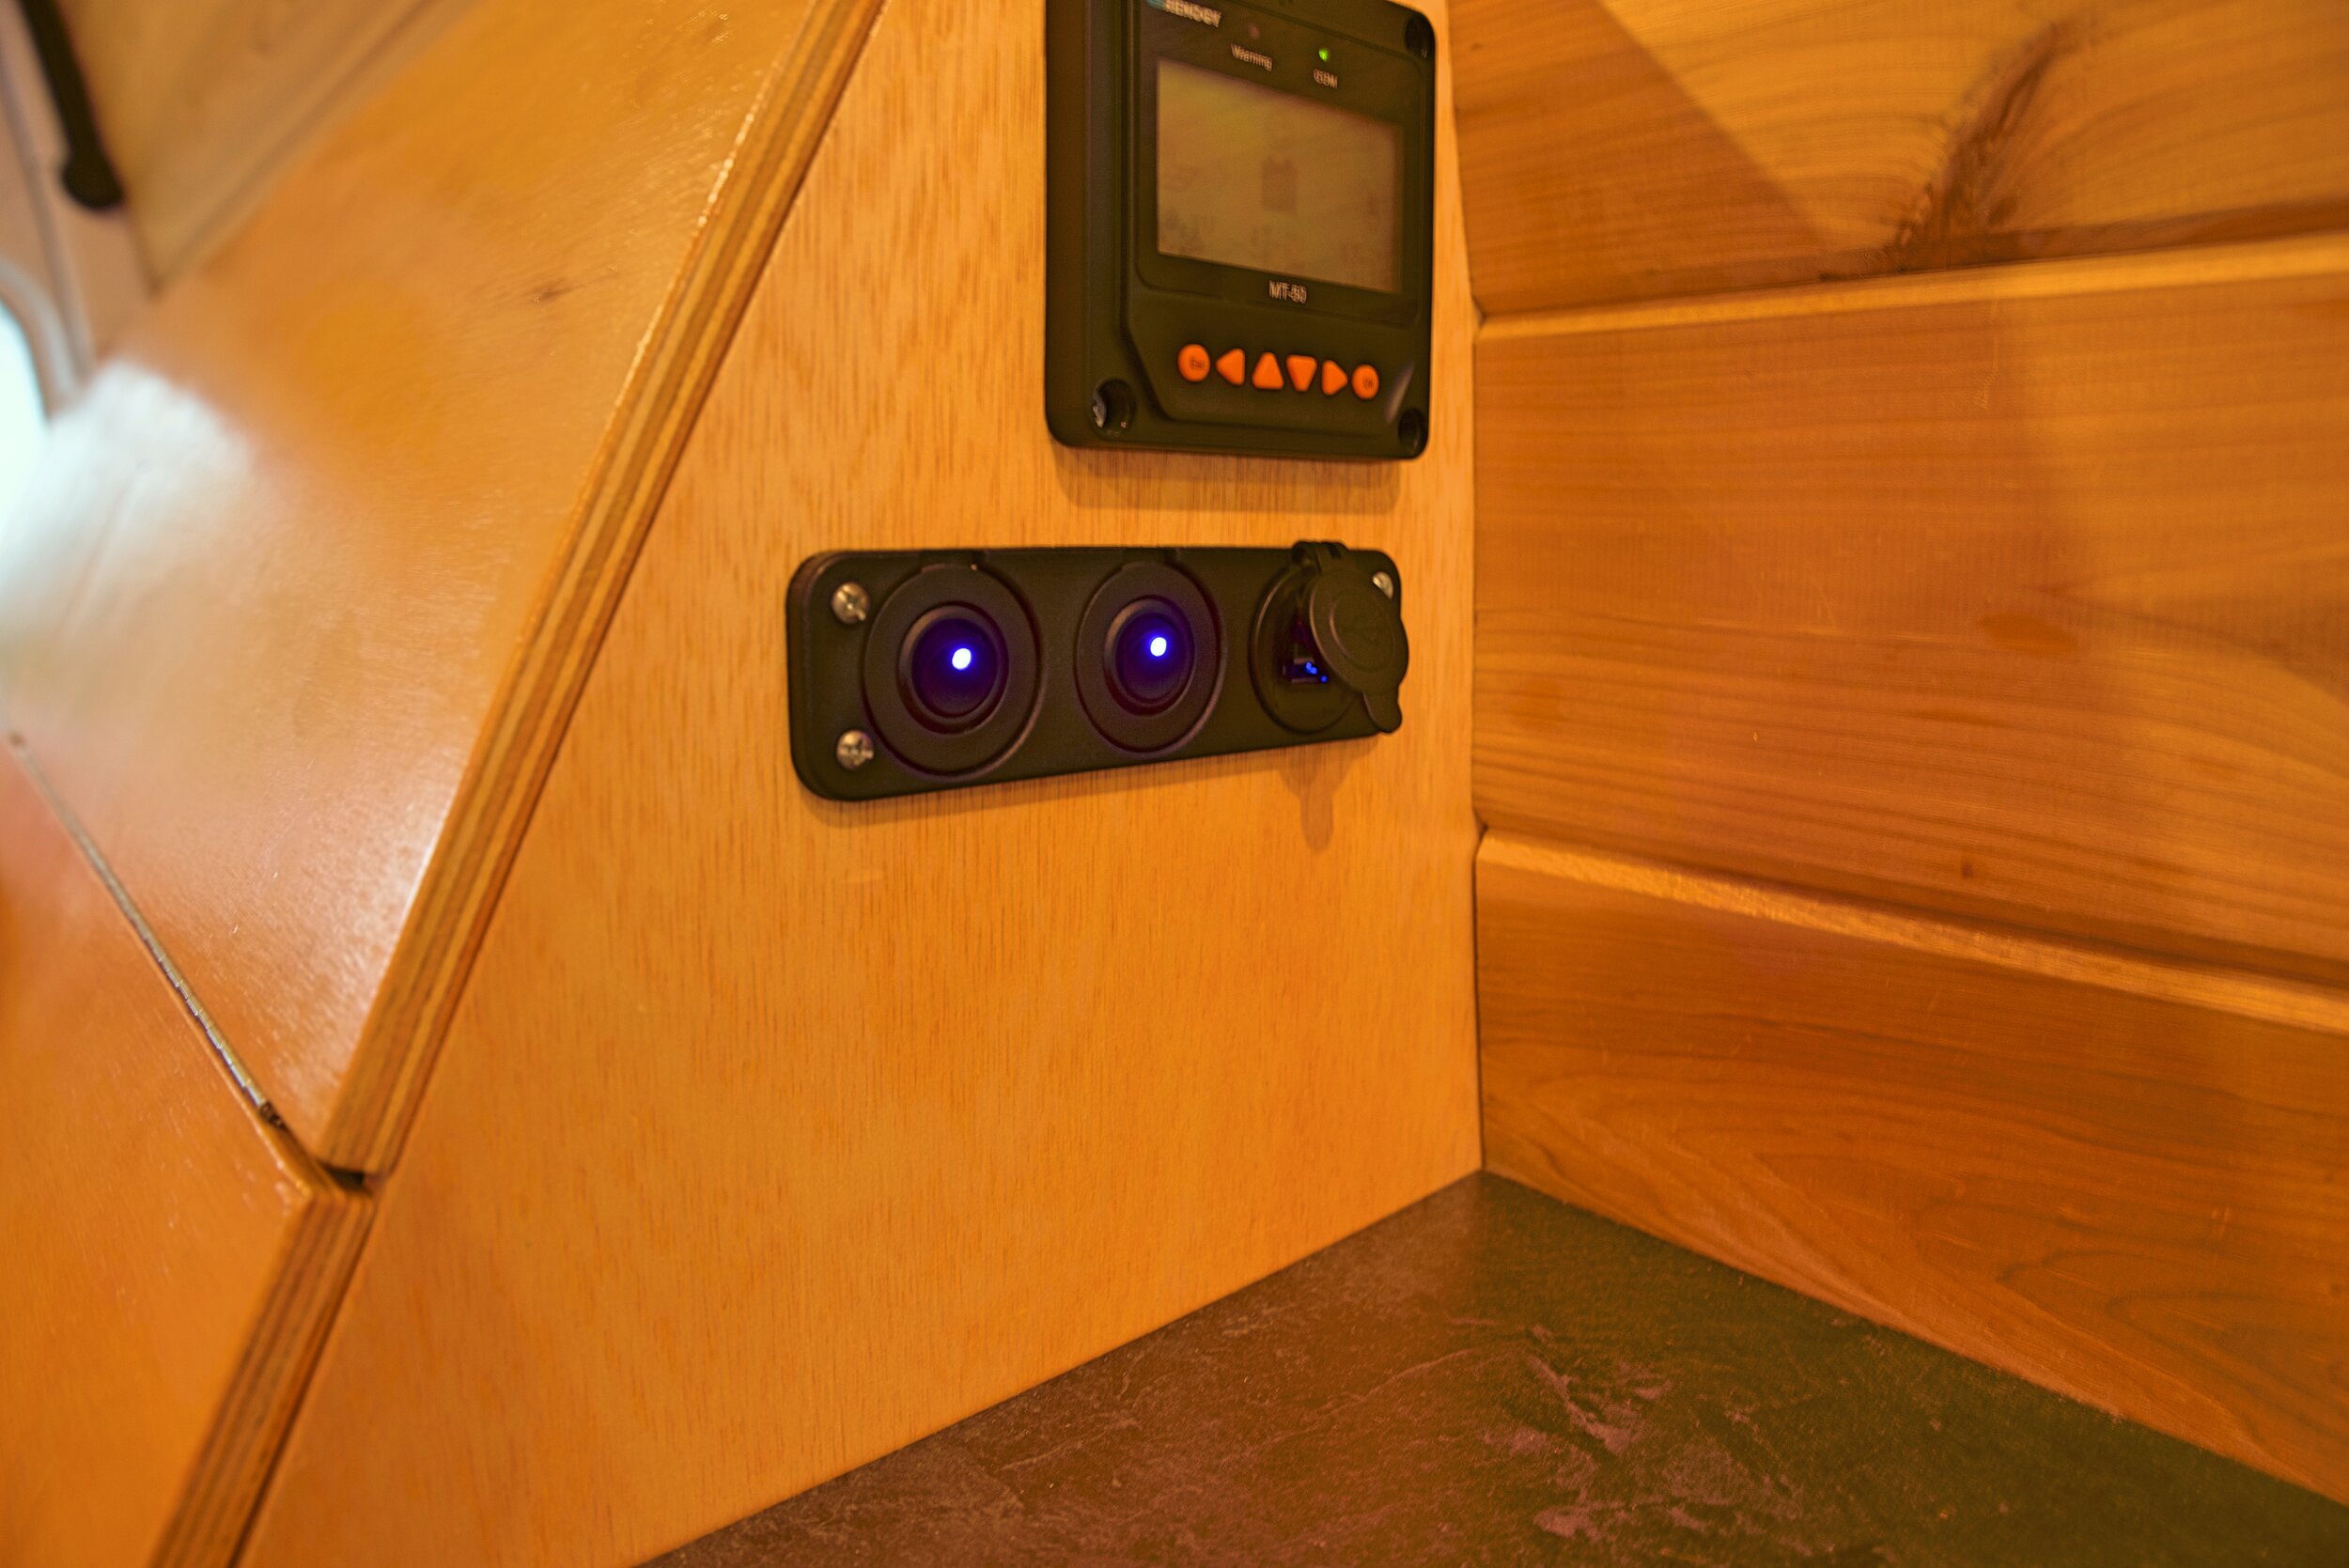
We chose a 40 amp Solar Charge Controller from Renogy. At the time we built our van, Renogy didn’t offer a 30-amp charge controller, which would have been our perfect size when we were building out our van (now they do!) It protects against overcharging, over-discharging, overload, and short circuit. It’s compatible with gel batteries (which is extremely important) if you have the MT-50 meter to calibrate the device. The MT-50 allows you to set the parameters of the charge controller to match your battery and system (follow the manual to do this). It’s also a monitor that allows us to easily check to see that our system is functioning correctly. It appears that the most recent generation of Renogy charge controllers have this functionality built into the module.

This MT-50 remote solar meter connects to our solar charge controller so that we can monitor our solar array and components.
You can also buy solar kits from Renogy, which make it easy to size all your components, fuses, etc. correctly if you do not want to make all these calculations. They even come with the wires for connecting the solar panels.
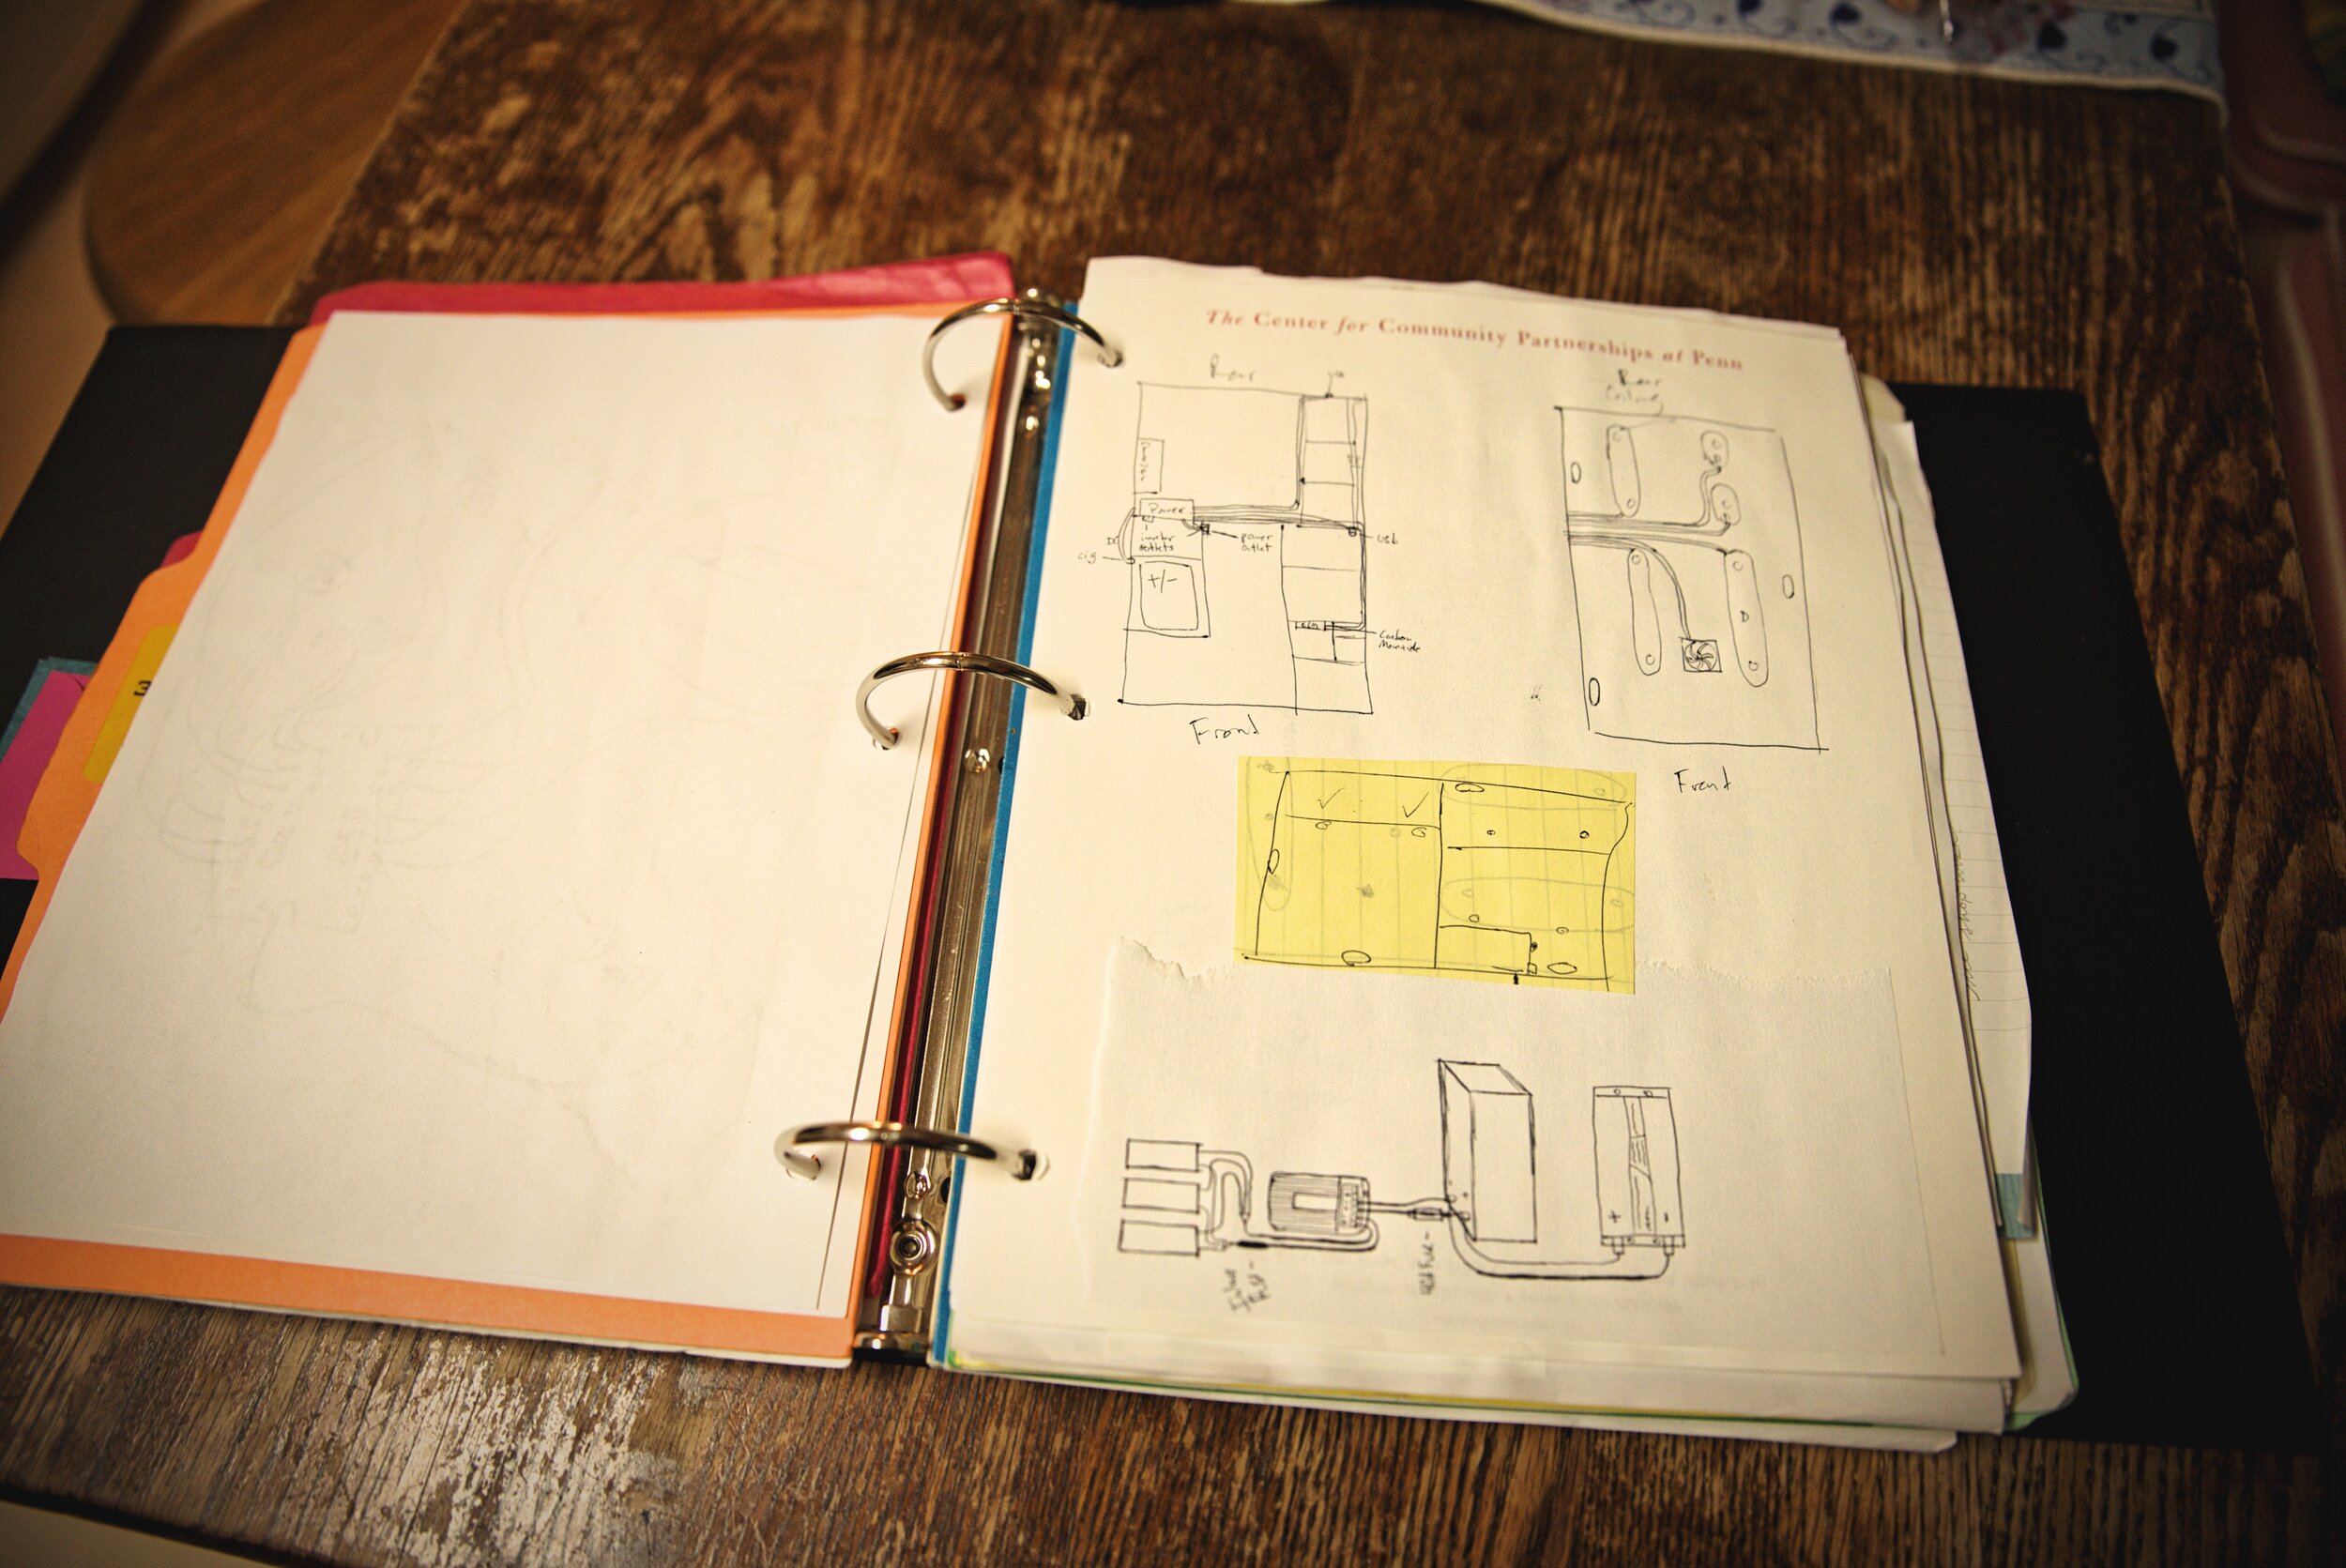
Connecting Our Battery, Solar Panels, and Charge Controller
After we had sized and selected our components, it was time to connect our system components together. We actually connected our system in a temporary test set up before mounting it in the van to make sure we had gotten everything put together correctly. It’s much easier to correct something before you have mounted your panels to the roof of your van.

It’s important to test your solar power set up prior to mounting everything on your camper van.
Parallel vs. Series for an Off-Grid Camper Van Solar Panel
We put our solar panels in parallel in our camper van solar system. Putting your panels in parallel will increase the amperage while keeping the voltage of your system the same. In our case we would add the amperage of all three of our panels together (max 6.24 amps x 3 = a total of 18.72 amps) but the voltage remains 12 volts. The downside of parallel arrays is that there is a loss of efficiency with high-amperage systems through wires over a long distance (which is more applicable in a long motorhome). However, our system isn’t that high amperage, and there isn’t that much distance in a camper van so this loss of efficiency wasn’t that big of a deal for us.

We opted to mount our solar panels in parallel for our camper van solar system.

Selecting parallel, series, or series-parallel will depend on your own needs for vanlife.
Solar panels in series will increase the voltage rather than the amperage. Two 12v solar panels in series become in essence one 24-volt panel while keeping the amperage the same. The benefit to doing this would be if you had a 24-volt battery set up (which could potentially be advantageous if you plan to have an inverter connected to high voltages devices.) A downside of panels in series is they they are dependent on each other. If one is shaded it will impact the others even if they are in full sun.
If you have a large number of solar panels, you could also connect your panels in series-parallel. In these systems, you might have 6 panels, with pairs of panels connected in series, and these three pairs then connected in series to create a 24-volt system.
We designed the solar panel system in our van as a 12-volt system with three 100-watt solar panels connected in parallel.
Check out this article from Renogy to understand more about the pros and cons of parallel and series for off-grid solar systems.
Wiring Your Camper Van’s Solar Panels
When you buy solar kits from Renogy, they come with wires to use for running to your charge controller. You can also purchase the solar panel to charge controller adapter kit from Renogy (10AWG wire), which is what we would recommend so that you do not have to worry about gauging or crimping the wire correctly. This kit is “plug and play” and is designed to withstand the elements so you don’t have to worry about a “DIY” connection being exposed to sun or water. (Never connect your solar panels to the charge controller without first connecting the battery.)
To run your solar panels in parallel, all your positive wires go together and all the negative wires go together. Use a Y-branch wiring connector to connect the wires together. This reduces the wiring from the roof of your van into two single positive and negative wires coming into the van.

We purchased this 20amp fuse and fuse holder from Renogy to protect this fuse which is installed underneath our solar panels on our van.
Next the positive wire is connected to an inline 20amp fuse, which prevents too much current from going down to the charge controller. The circuit would be broken if the fuse was ever overloaded, preventing damage to other components. (Technically for a 40amp charge controller, you only need a 40amp fuse, but our system really should never get above 20amps from our solar panels, so we went with a smaller fuse.) Our fuse is mounted in a fuse holder under the solar panels to keep it extra dry.

We have a 20a fuse mounted under the solar panels on top of our van.
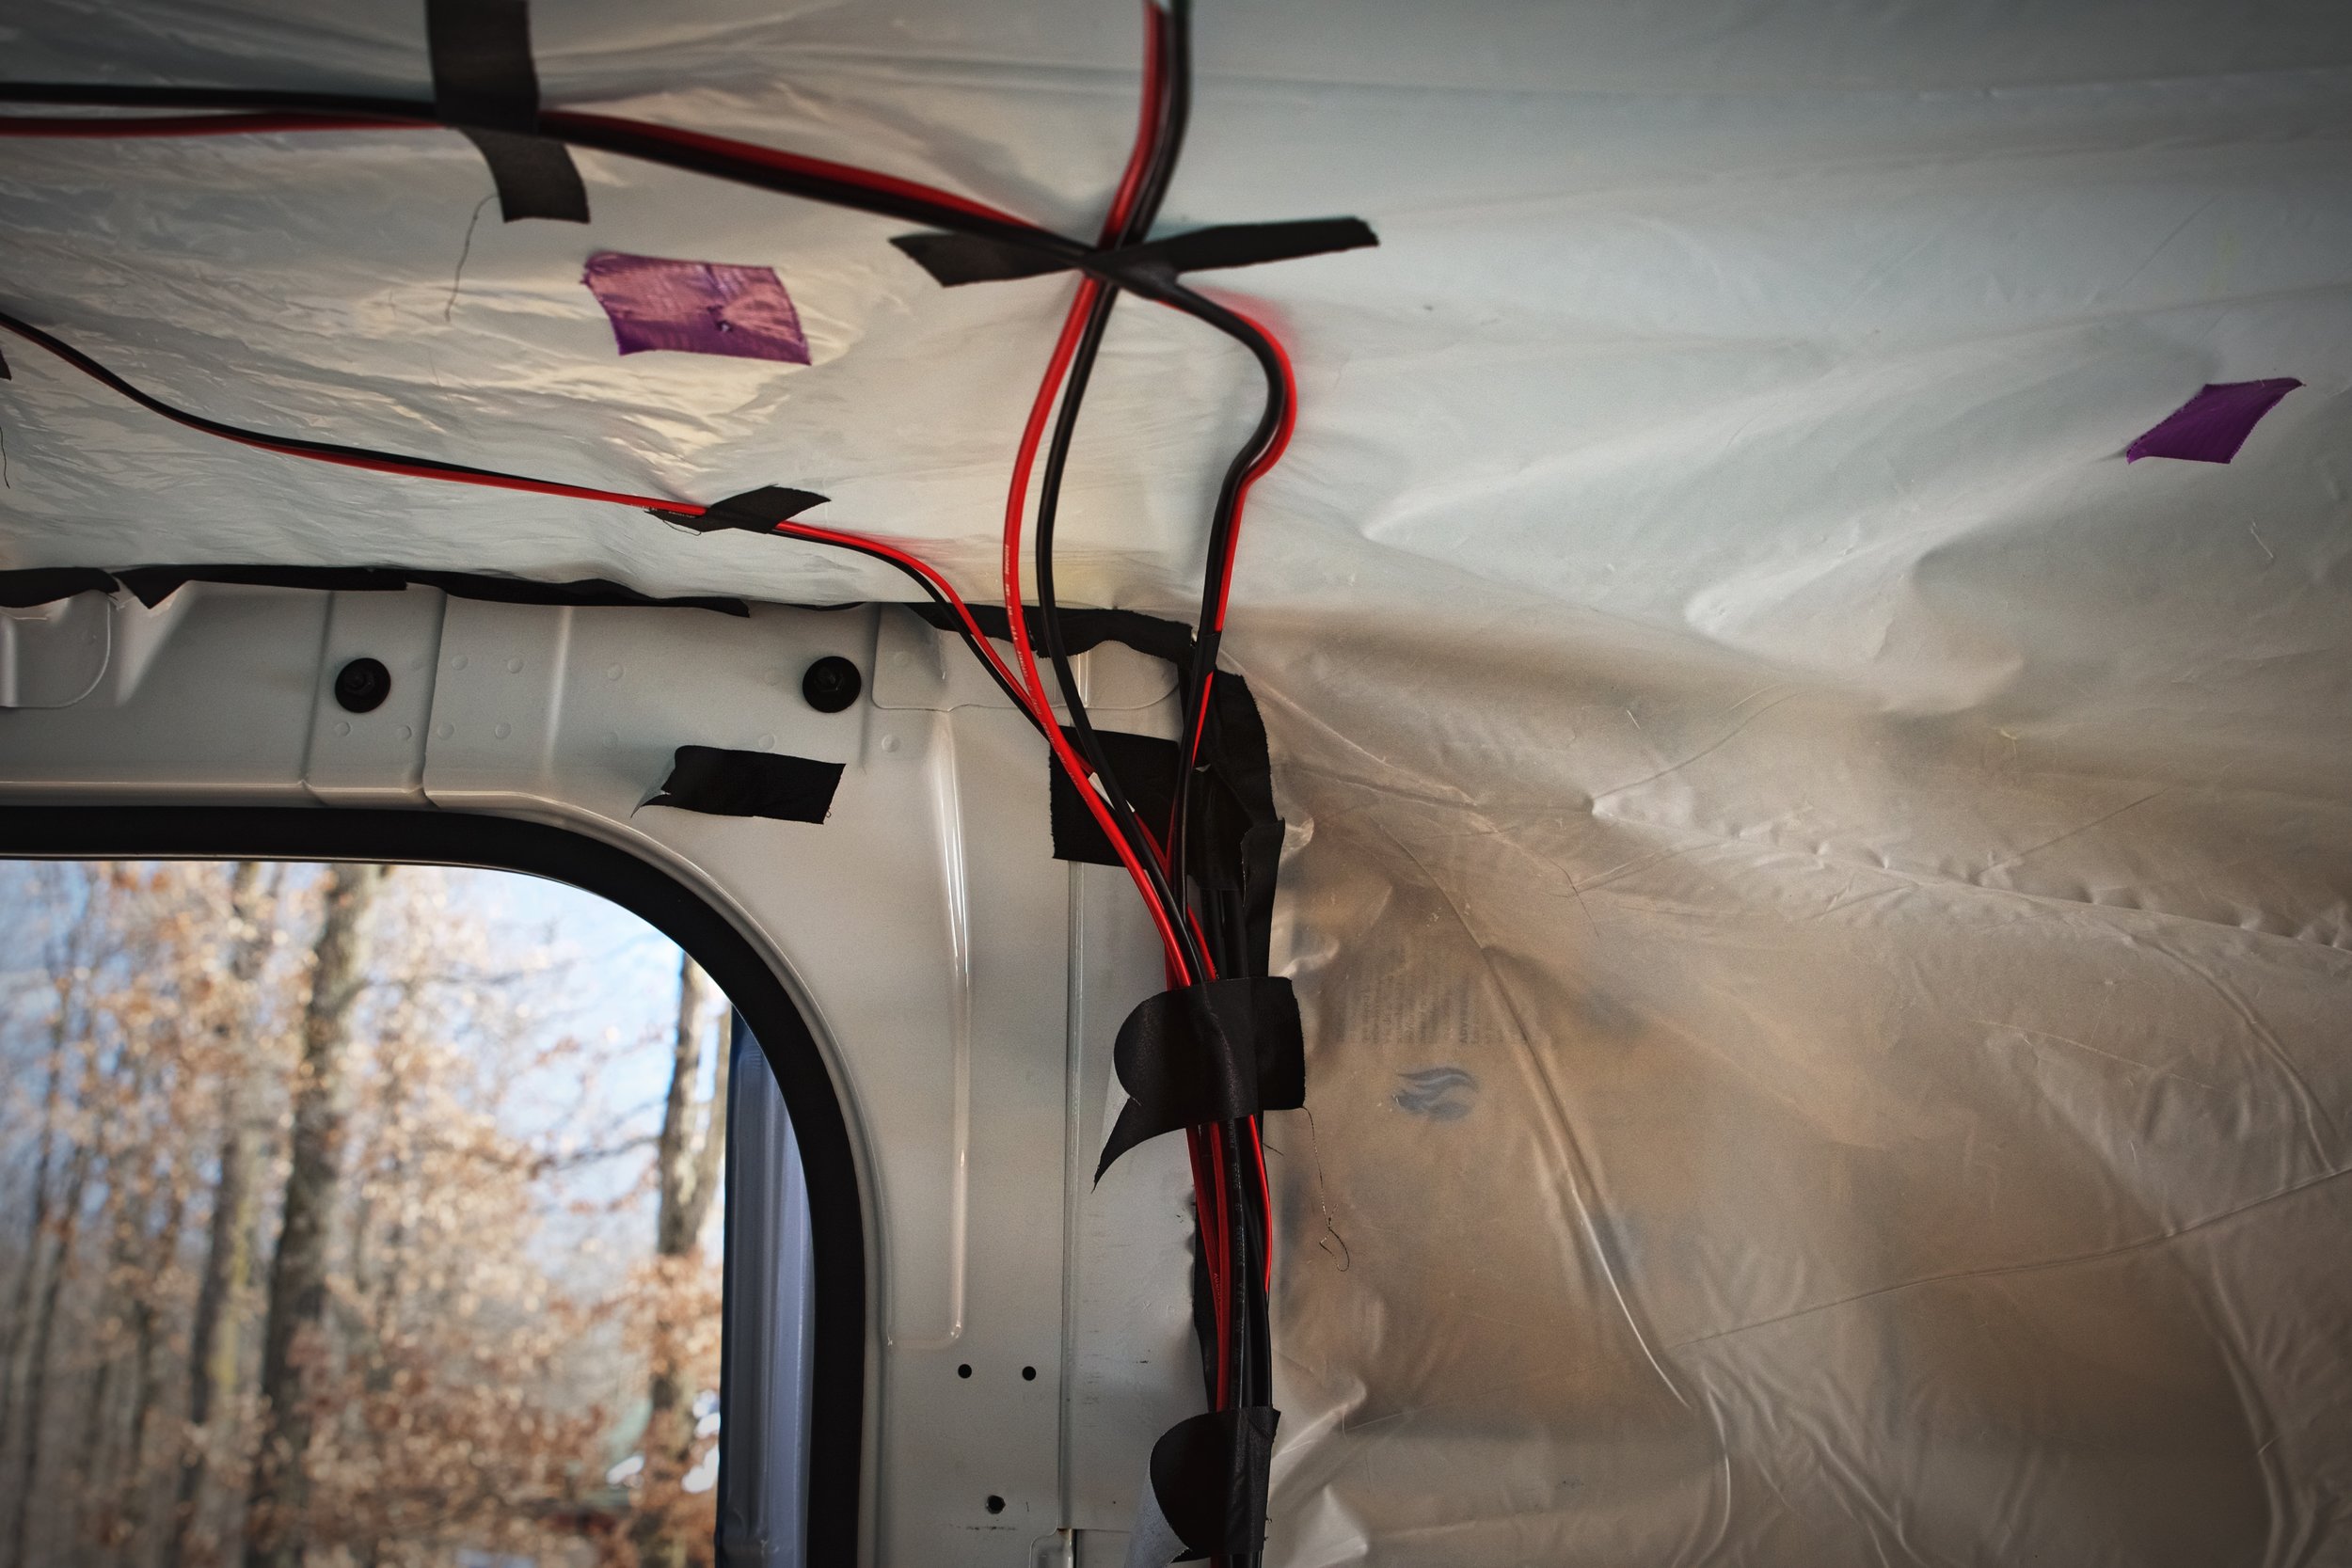
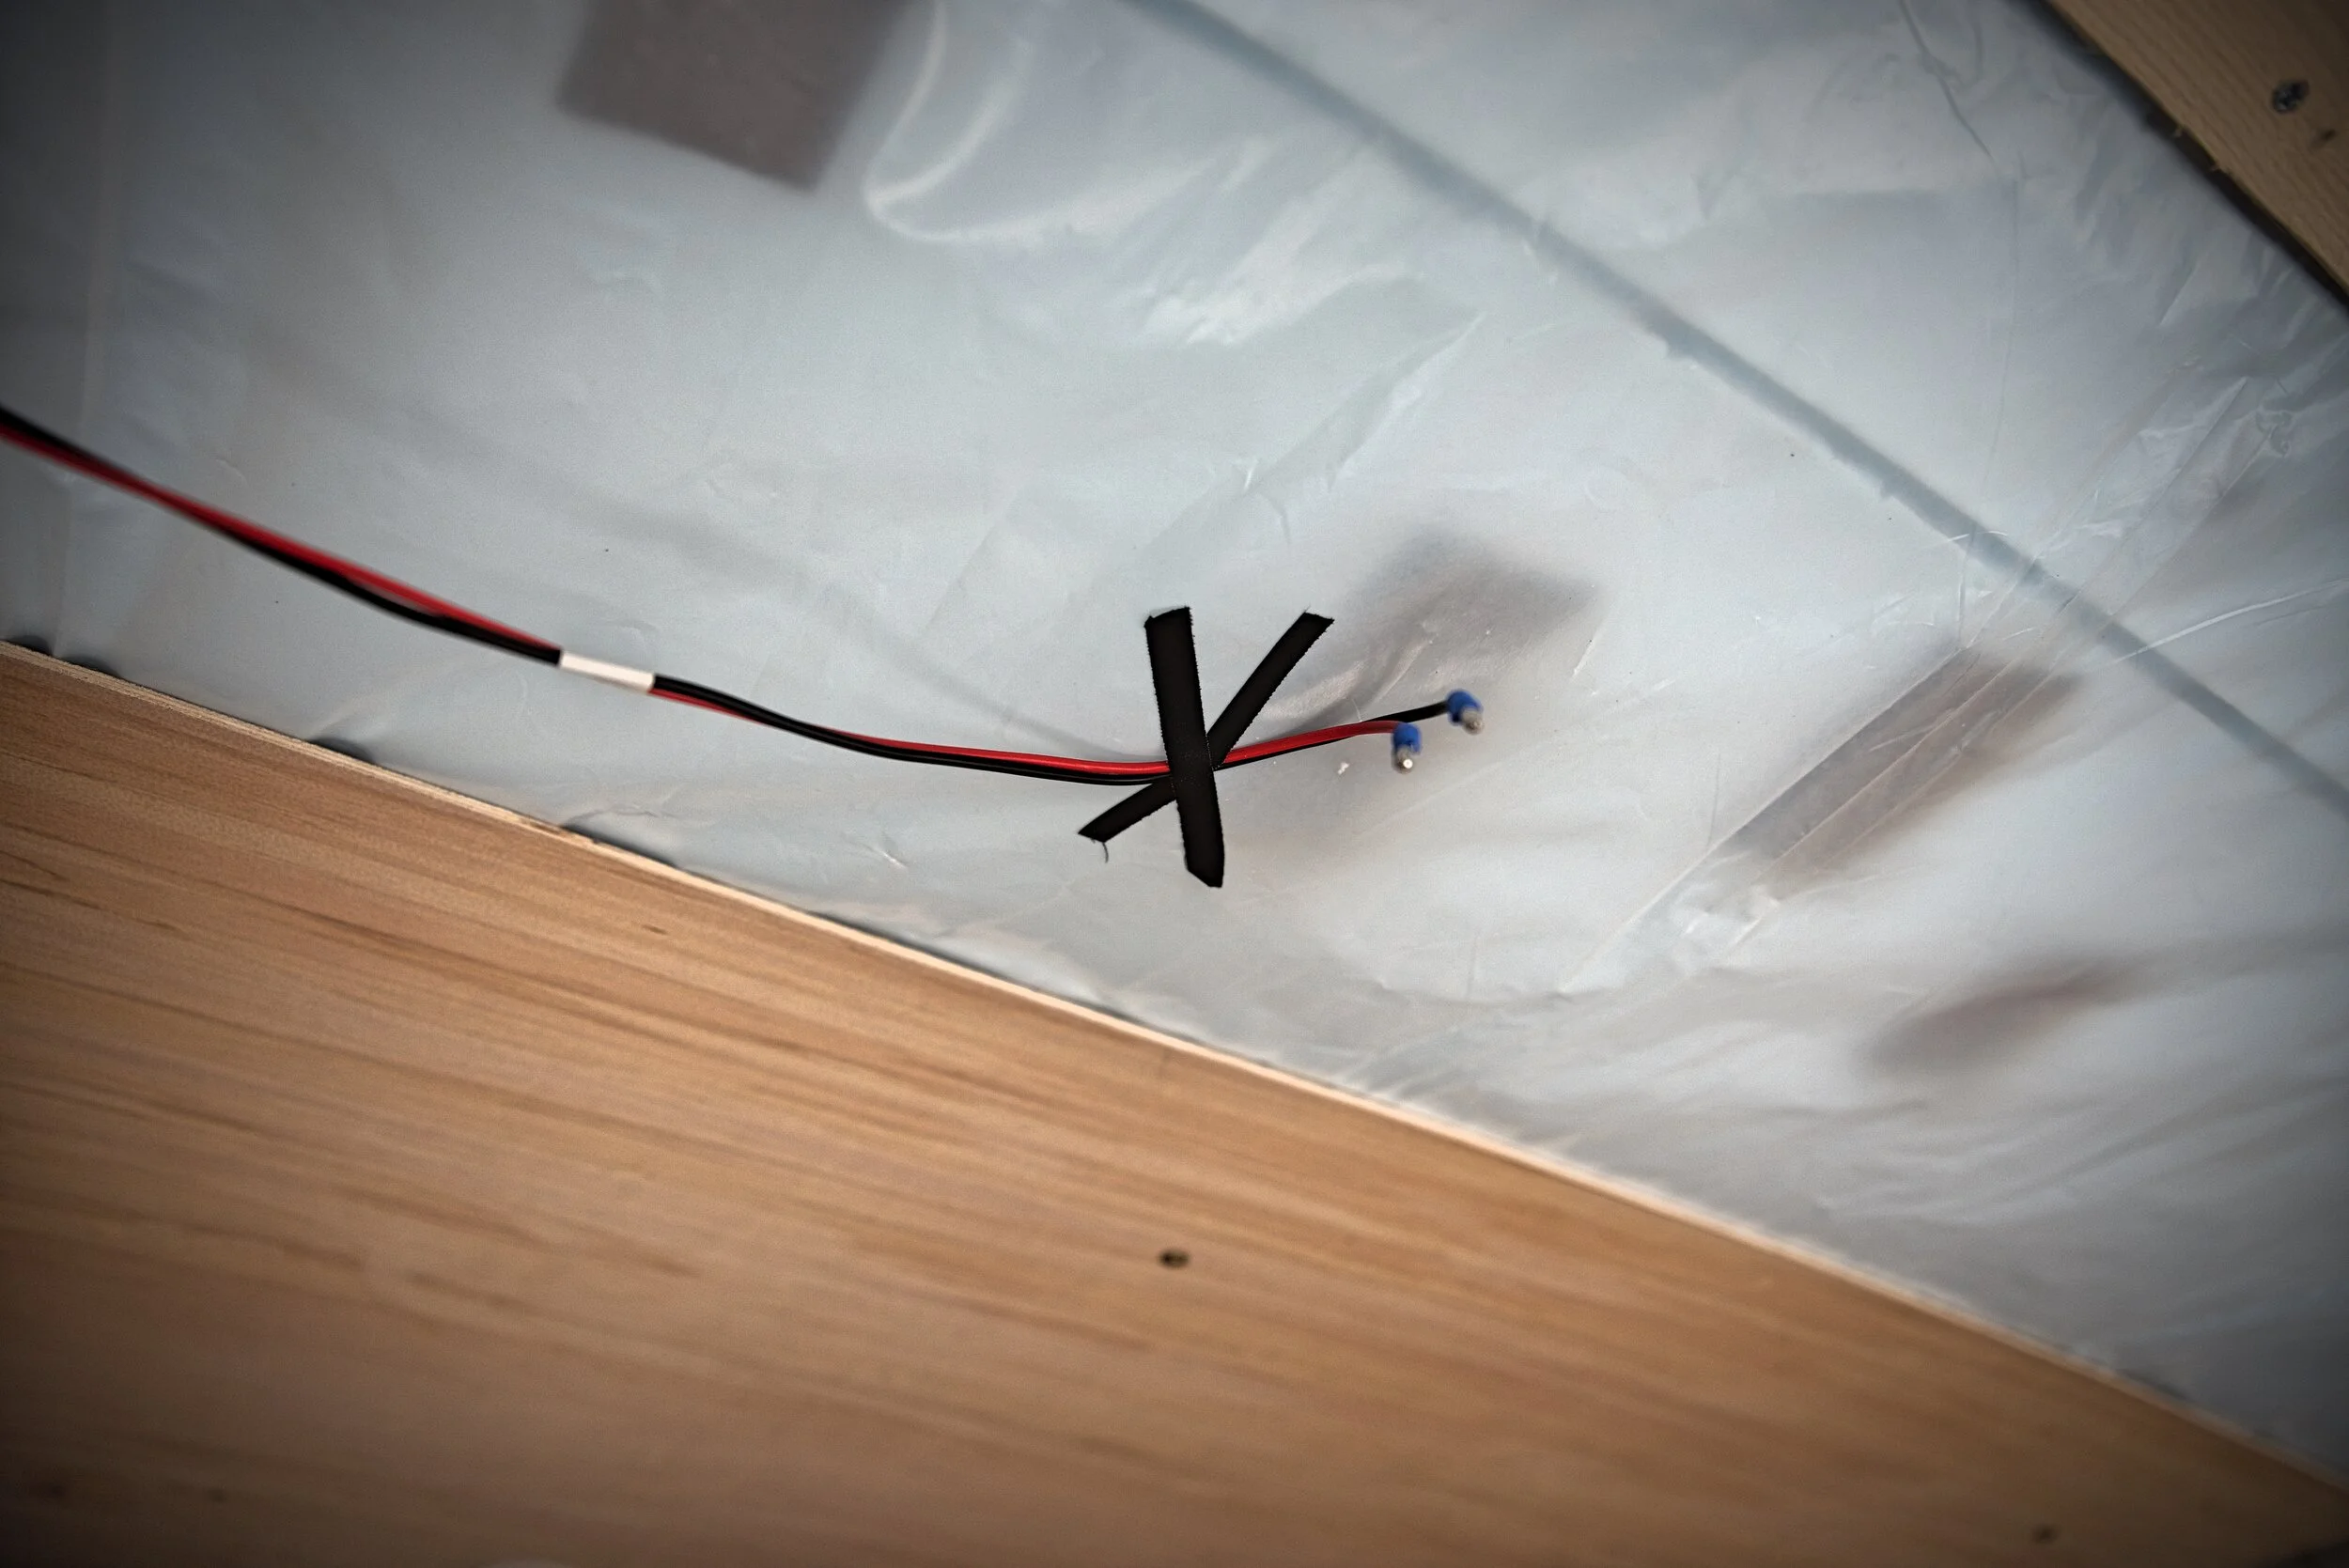
The wires from our solar panels run into our van near the sliding door frame.
Finally, these wires run into the van through a hole we drilled in the roof of the van through a cable entry housing attached to our roof. This solar port protects the cables and protects the roof of our van from water damage. This wire port is attached to the roof of our van with butyl tape and lap sealant (like our fan) to make it waterproof.

Self-leveling lap sealant should used to seal off the solar port where your solar wires go into your van.

We used butyl tape to adhere and seal the solar port to our camper van roof.
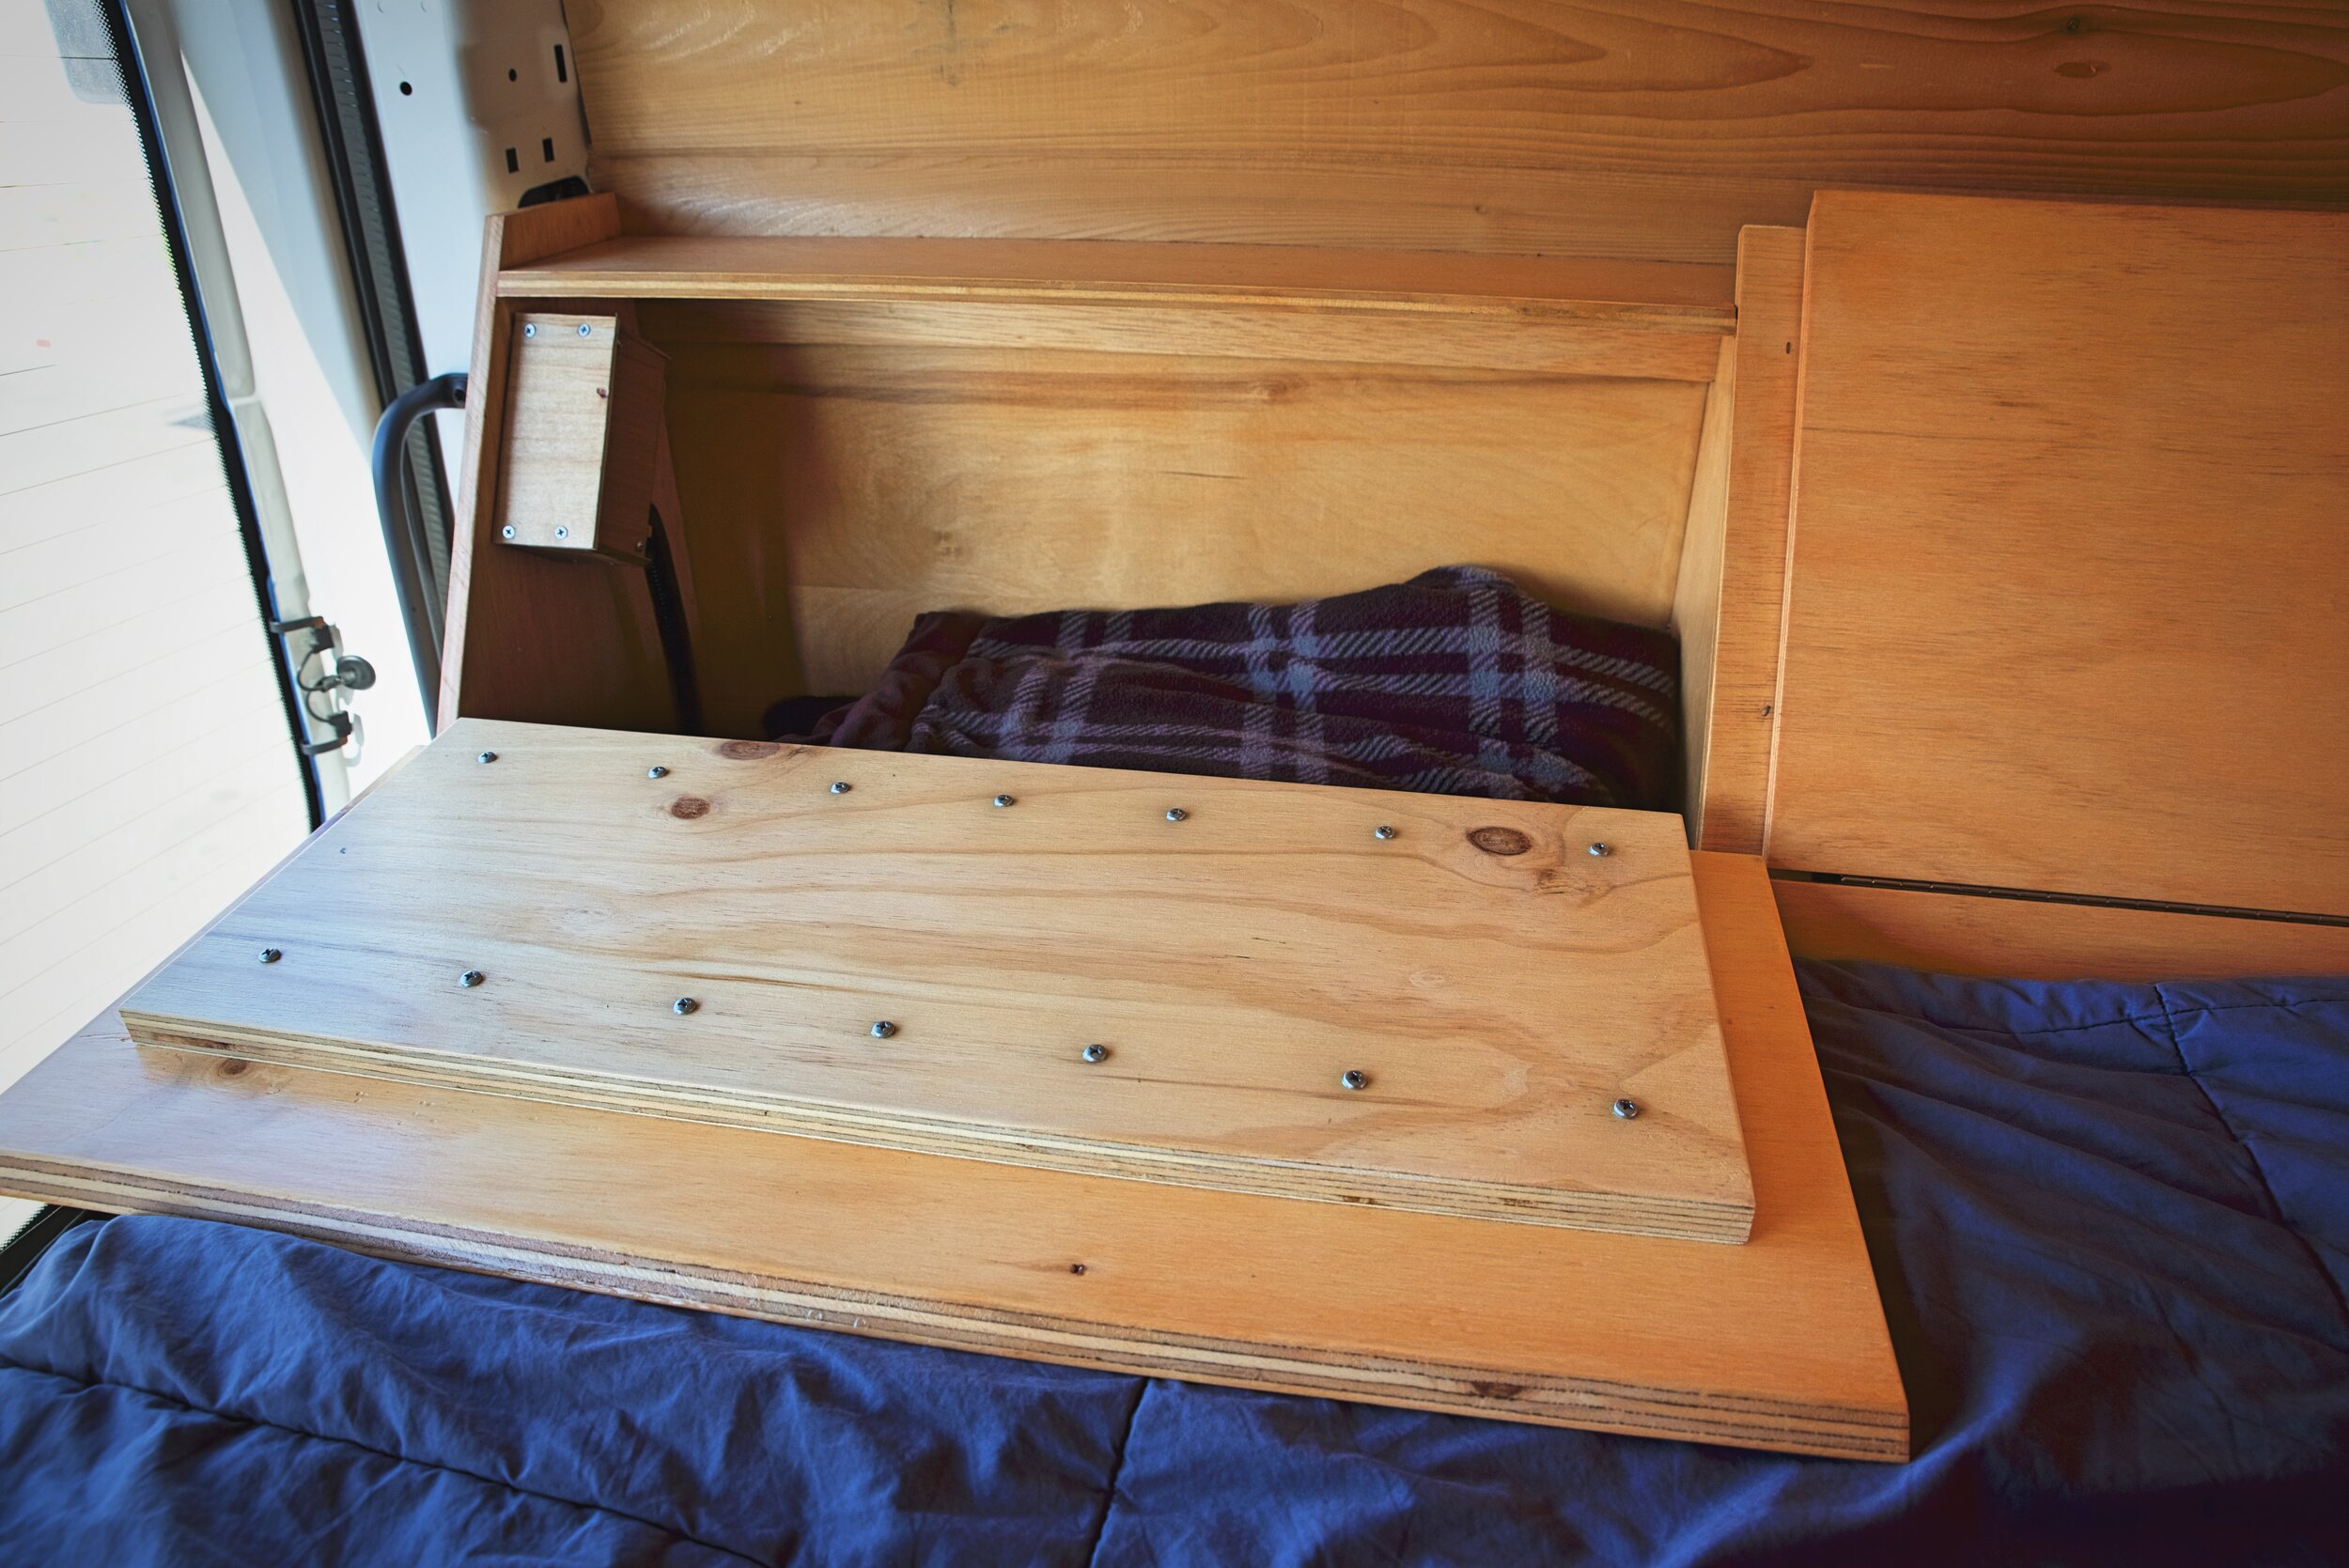
Inside the van, the wires from the solar panels are bundled inside some conduit. We chose to run the wire in near our door, so we were able to hide the wire alongside the doorframe behind an access panel that we designed so that we could easily access it.
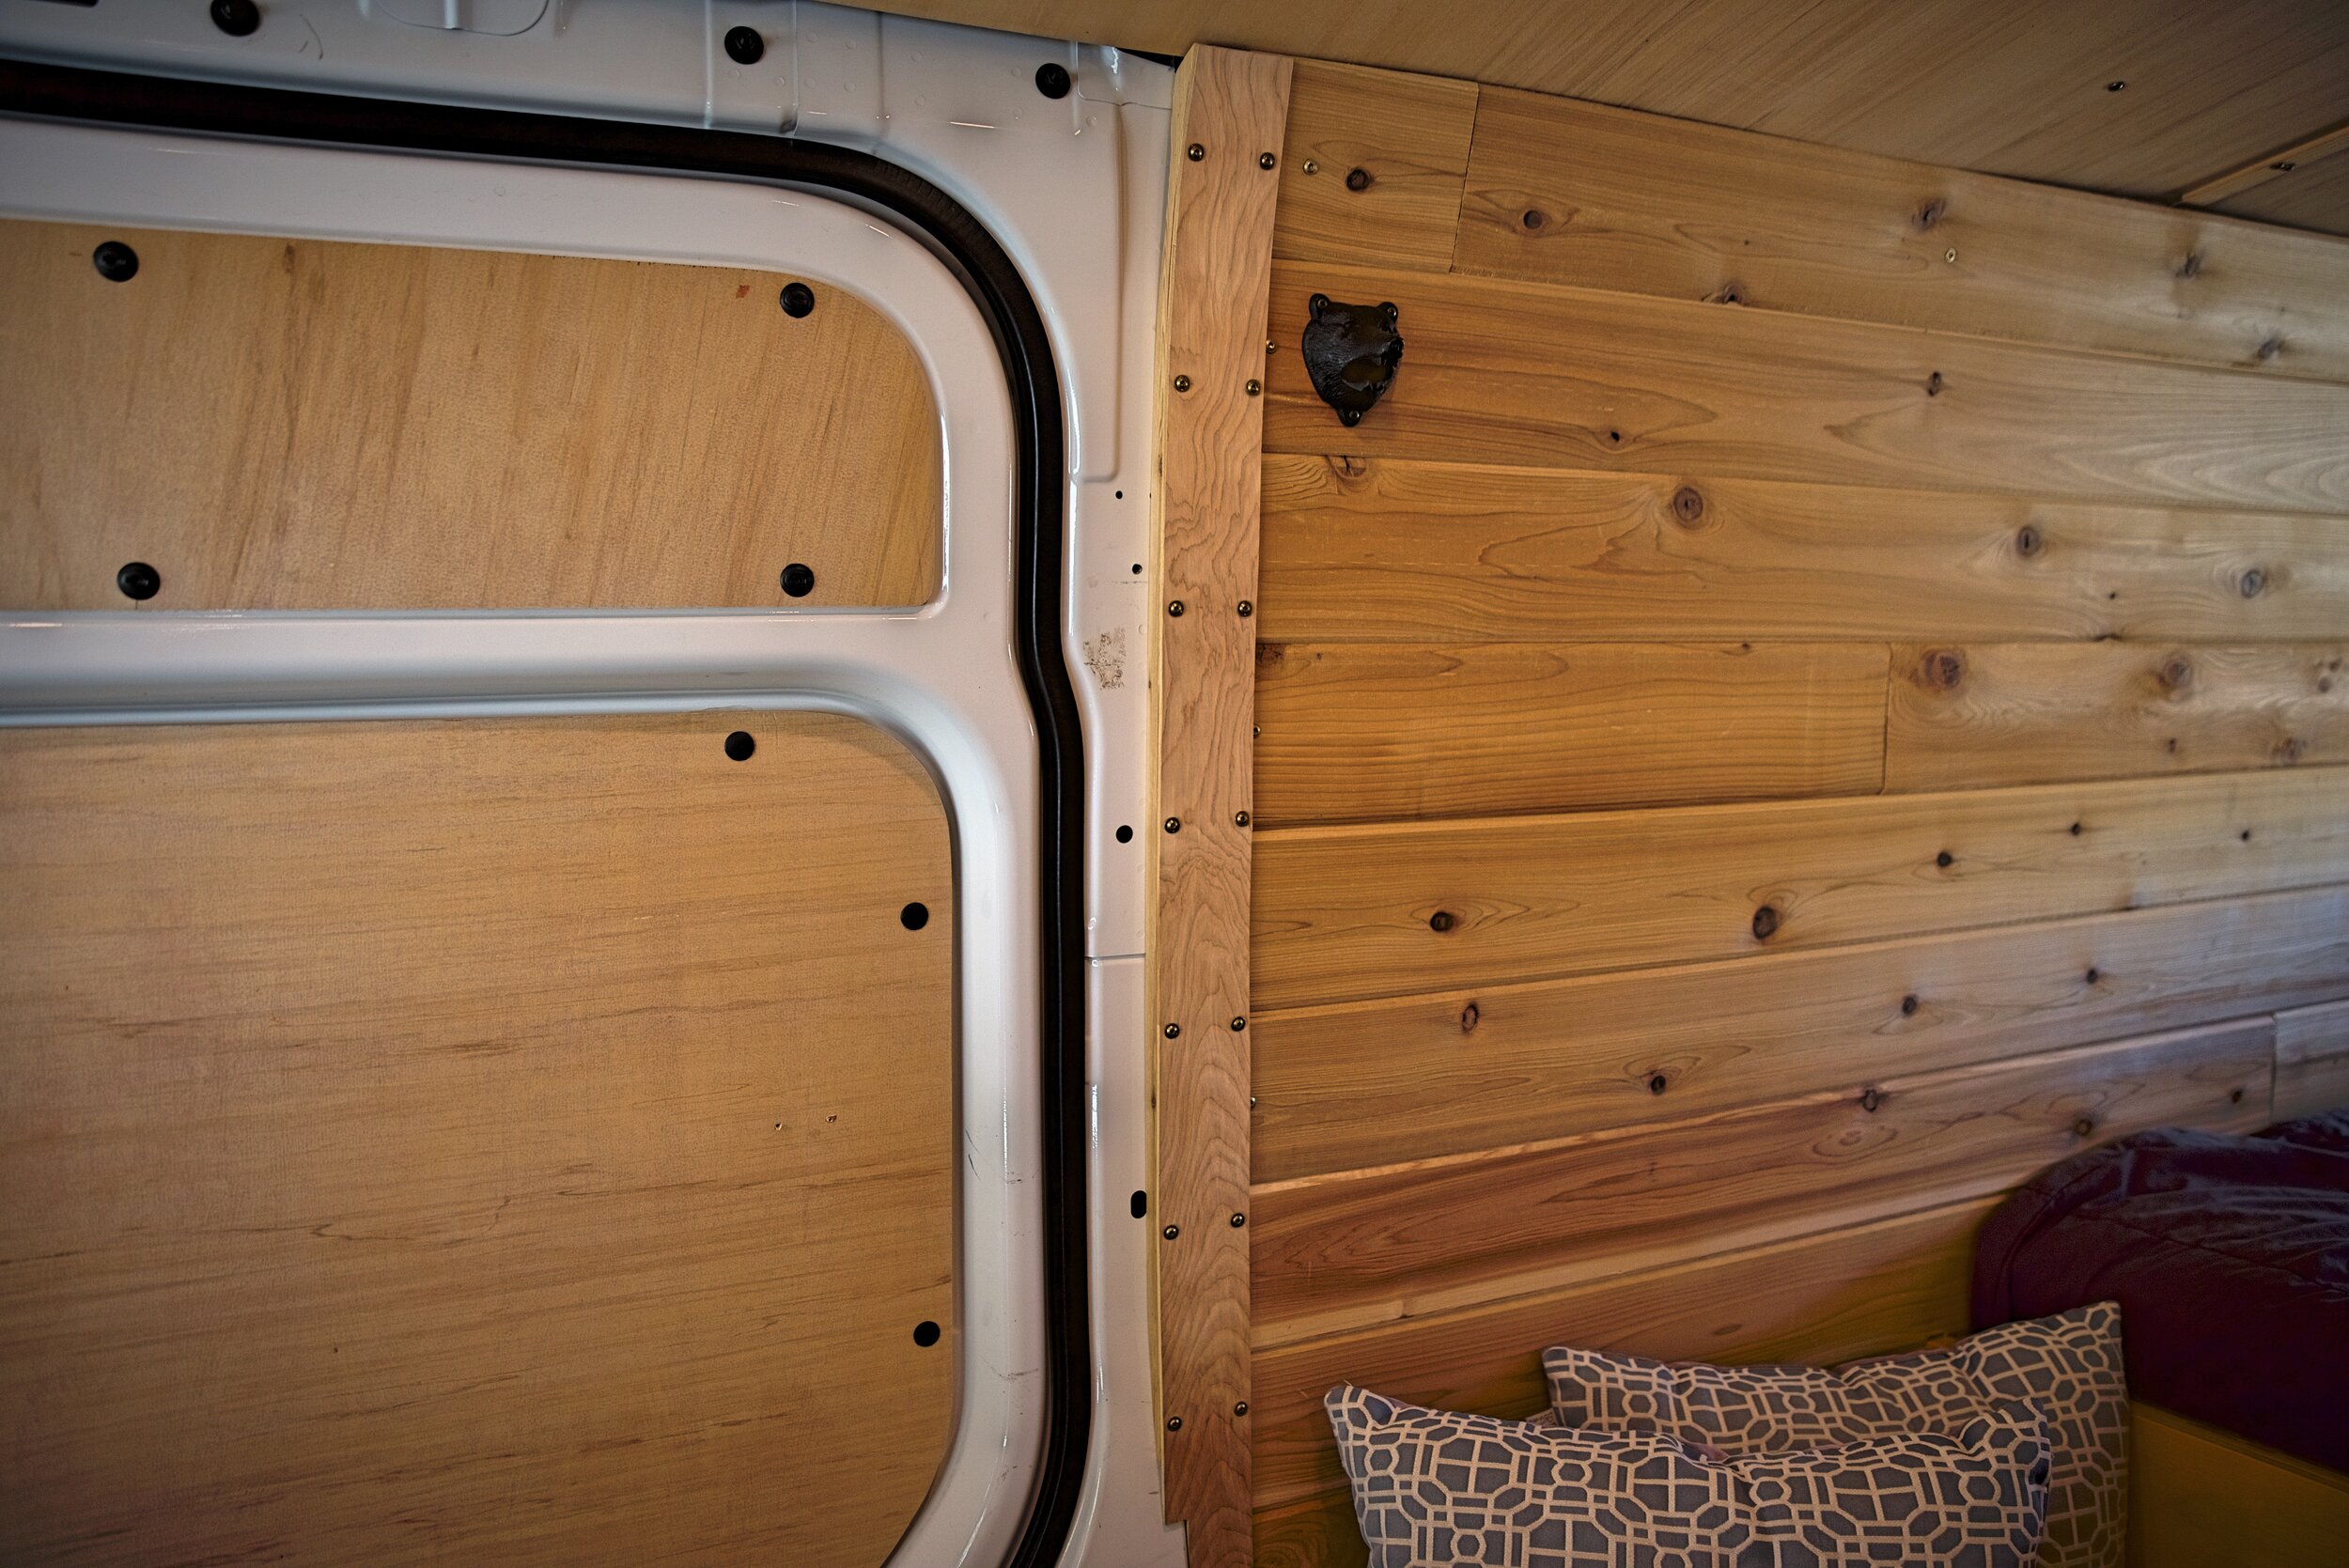
This panel made of flexible plywood conceals the bundle of wires coming down from our solar panel and the wires going back out to our lights.

The wires from our solar panels runs through this hole in our bed platform that we drilled with a whole saw.
Mounting and Connecting the Charge Controller
Our charge controller is mounted on the back of our bed platform with screws. It should be given a bit of space on all sides to allow for proper ventilation. Our battery, fuse box, and charge controller are mounted behind our bikes, ensuring that they are never crowded by loose groceries, sleeping bags, or backpacks.
On the Renogy 40 amp Solar Charge Controller, there are 6 terminals. They are conveniently labeled by what should be connected to them. There is a little solar panel icon, which indicates where the positive and negative wires from the solar panels should be connected. There is a battery icon for the battery wire terminals, and a light bulb icon, which indicates the outbound energy to your fuse box.

Only plug your solar panels into your charge controller after you have connected it to your battery.

Our battery is connected to our solar charge controller with 10AWG wires.
To connect the charge controller to the battery, we used a 10AWG wire (you should size this wire based on the specs of your system though). Again we have a 20amp fuse inline with the positive wire. After the fuse is connected, you can connect it to the battery’s positive and negative terminals. As soon as you connect it, your charge controller should turn on, which is very satisfying.

We mounted our charge controller under our bed platform in a place where it could still get plenty of ventilation.
After you connect the battery to the charge controller, then you can connect the charge controller to the solar panels using the terminals on the charge controller. Don’t forget to always disconnect your solar panels first before disconnecting your battery from the charge controller.
Do You Need to Ground Your Battery?
In an AC system the ground is a literal connection to the earth (hence “ground”). In mobile systems, people often ground to their chassis, which essentially makes the whole body of your vehicle the ground. Rather than having the black negative wire coming back to the battery to form the circuit, the body of your vehicle connects the device back to the battery. This cuts down on the cost of wire, because you basically cut the amount of wire you need in half.

In our van we have a positive wire going to each device and a negative wire that goes back to the battery. Red and black wires are traditionally used to show negative and positive terminals.
In a 12-volt system, you don’t necessarily need a ground as long as you complete the circuit with a negative wire coming back to your battery to complete the circuit. Our fuse box is a marine product designed for boats. Boats often have a fiberglass or wooden body or even if the body is metal, it will be touching the water causing another electrical issue, so using the boat hull, as the ground is not an option.
We stuck with this “marine” system of putting each device on its own circuit with a positive wire going from the fuse box to the device and a negative wire coming back to the fuse box. This gives us an easy way to trouble shoot any issues that might arise as well, because we can isolate each individual device and circuit. This system works for us because we have relatively few devices being powered by our system.

On our fuse box, we have a red positive wire that goes out to each device and a black negative wire that completes the circuit by returning to the fuse box.
Wiring the “Load” in a Camper Van
After your solar panels, charge controller, and battery are connected, you are now ready to connect your load. Your load is any device you want powered by the battery. The first step is to connect your charge controller to a fuse box. There is a positive and negative terminal on the fuse box. You can connect these terminals to the battery using the same thick wire used to connect the battery to the charge controller.

Ian works on wiring the load in our camper van conversion’s solar power system.
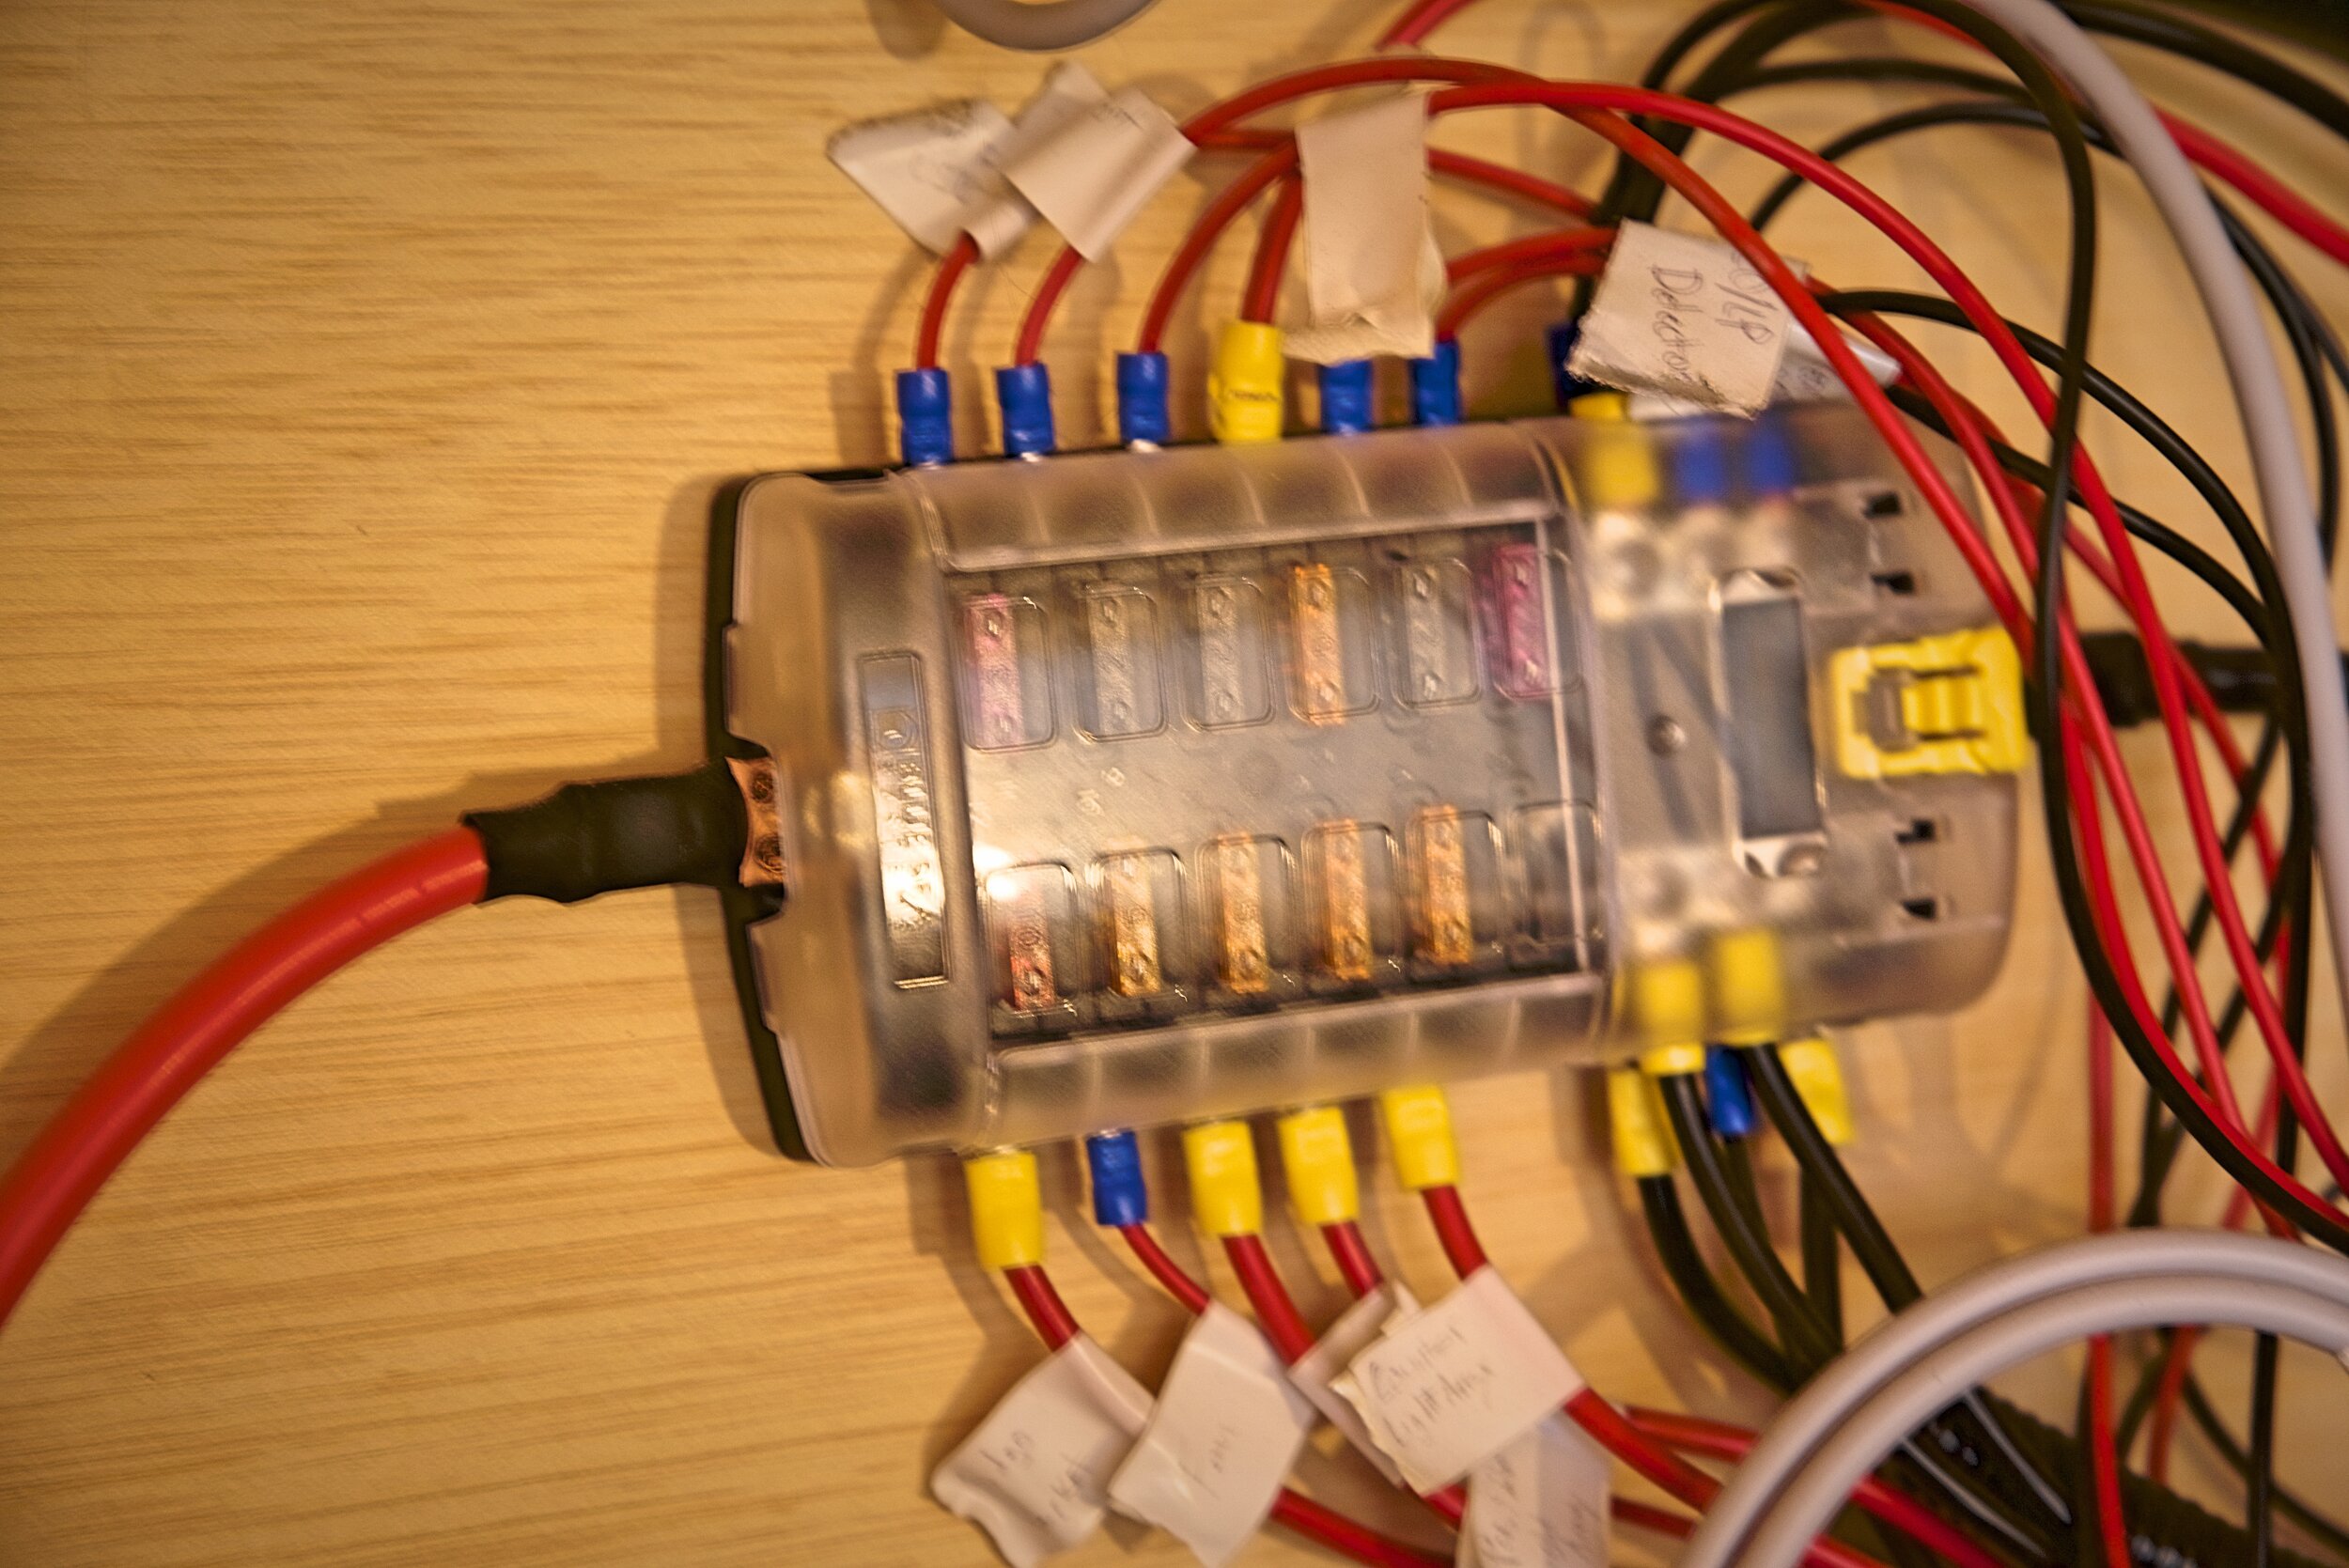
Fuse Box
A fuse box is basically just a way to split the energy from your battery out to different devices that need power. In the fuse box each circuit has a positive and negative terminal, which is connected with a simple ring connector. There is a slot for a blade fuse on each positive terminal that will blow in the case of a surge. The fuse should be sized for the max amperage of the circuit without going under. We suggest getting a full set of blade fuses rather than buying them individually. It’s cheaper and you’ll have the right size. Here’s a handy chart you can use for sizing fuses.
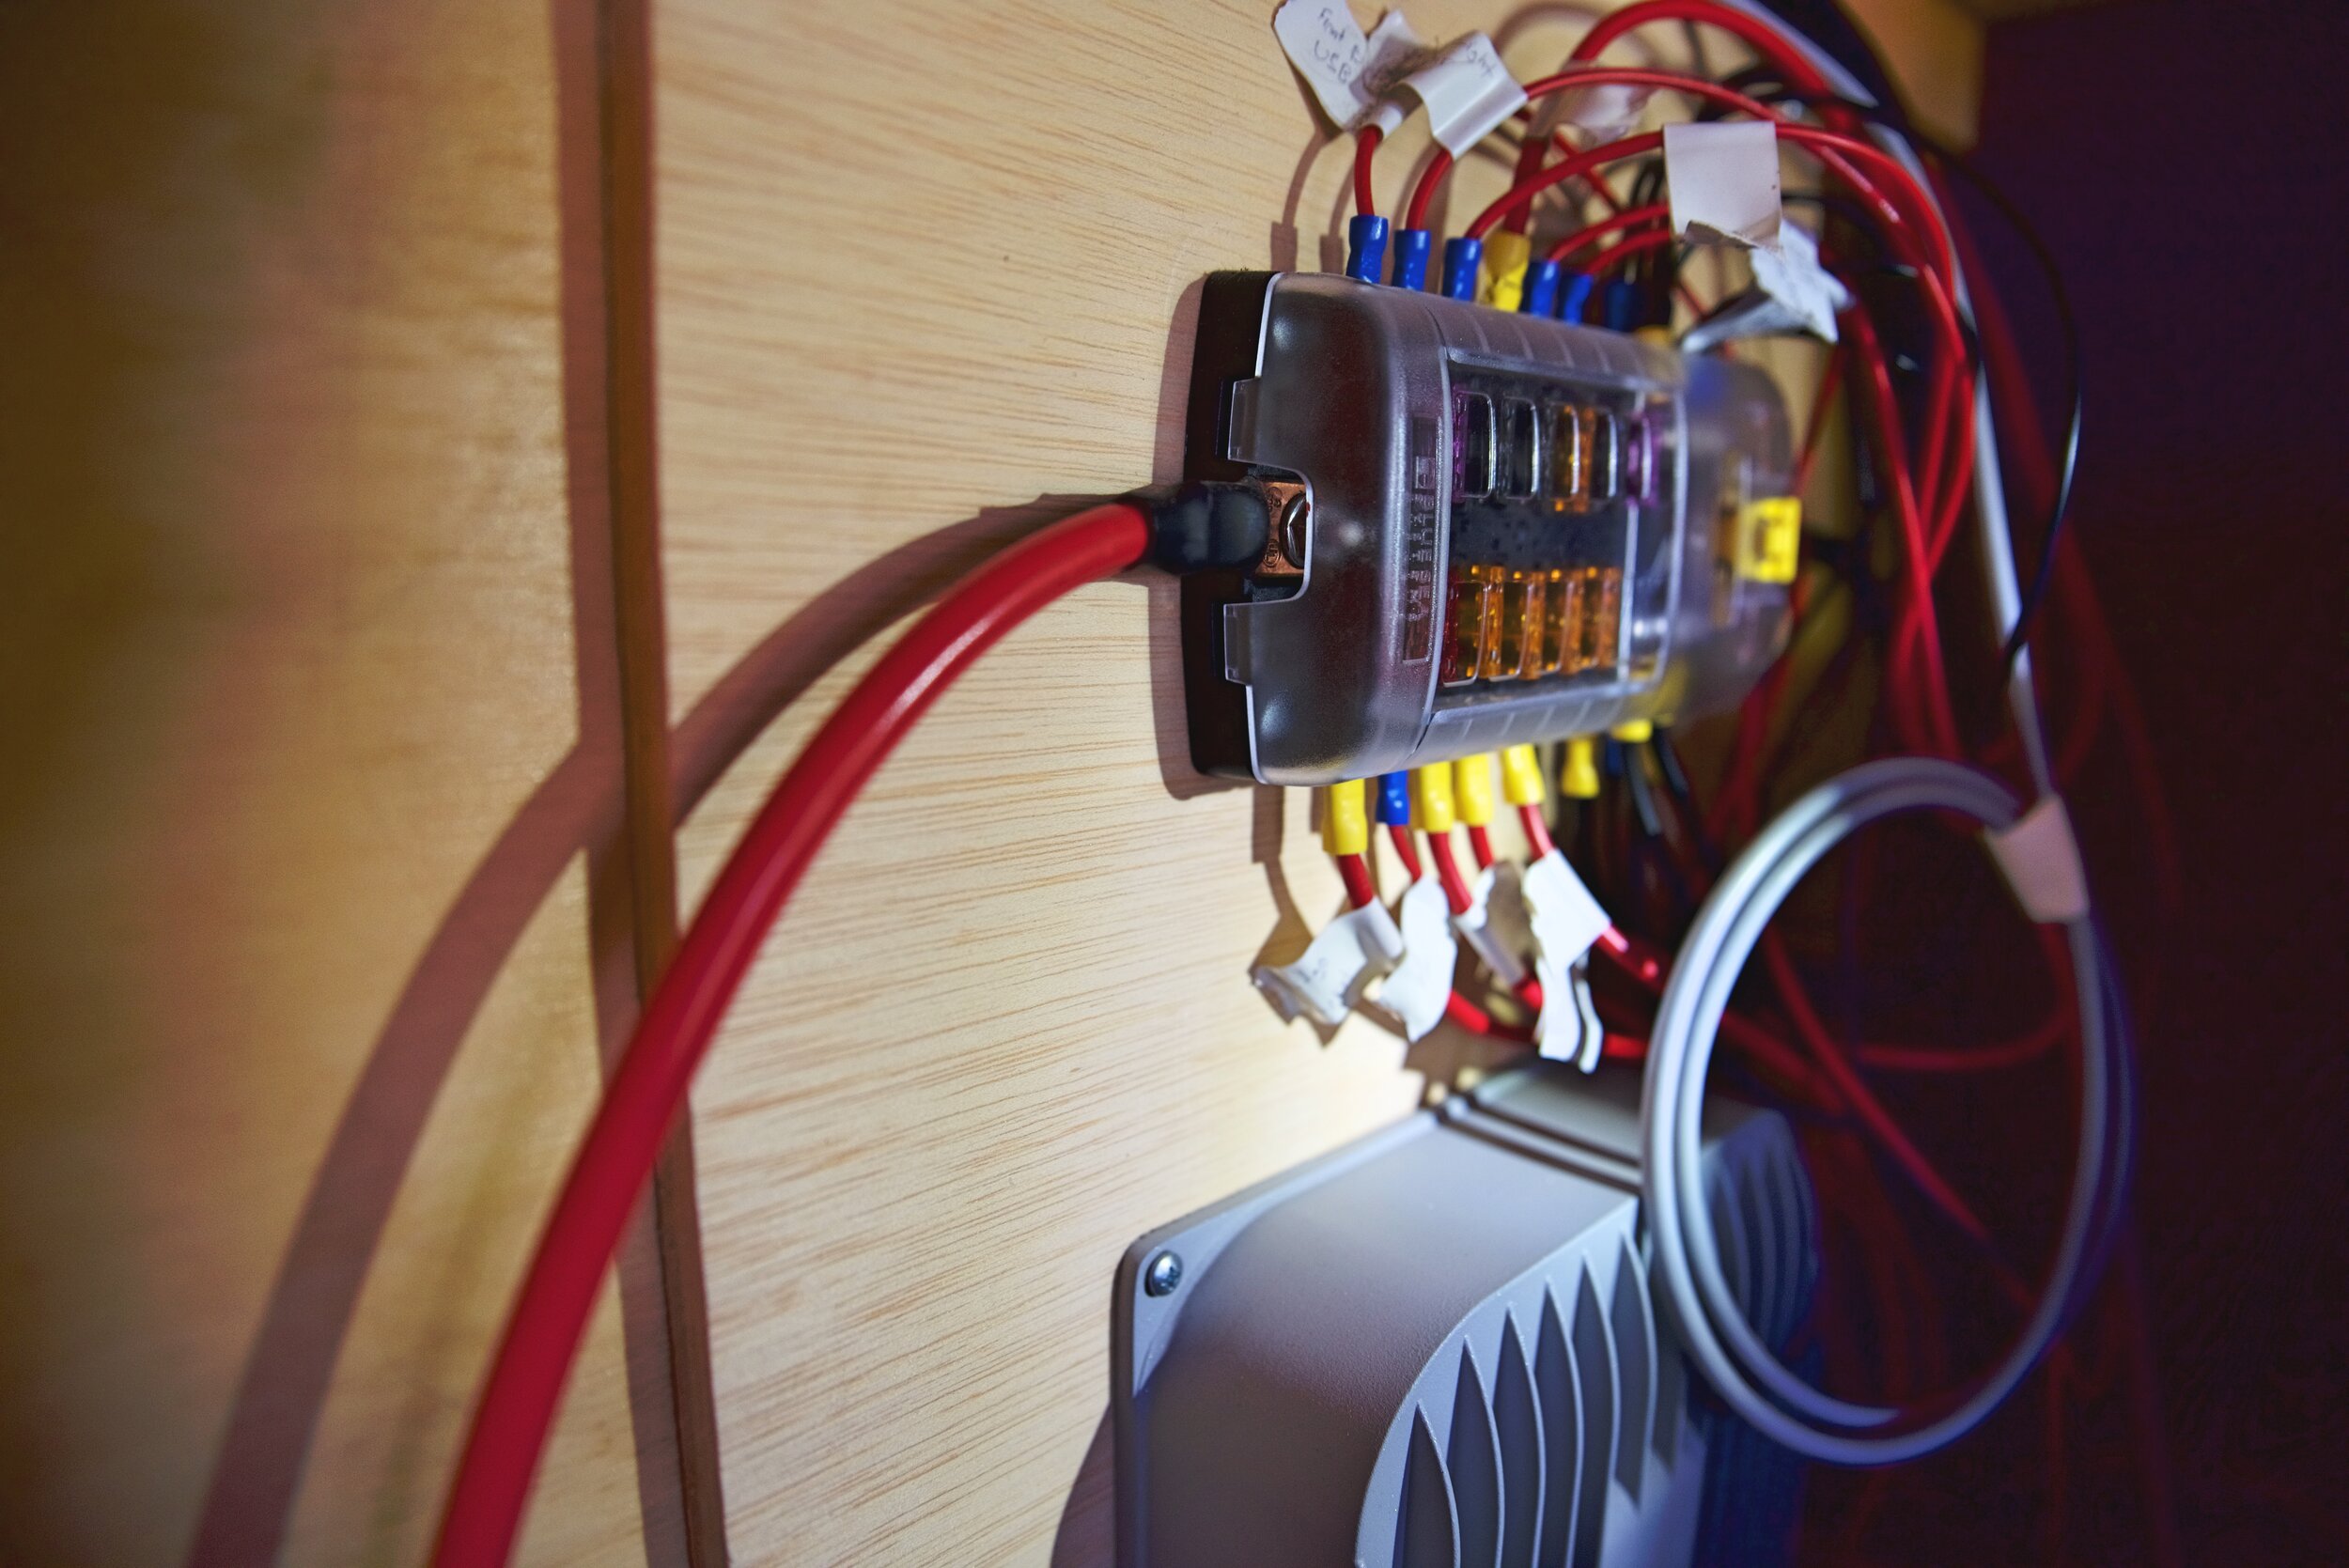
The fuse box splits out the power from the battery to all your devices.
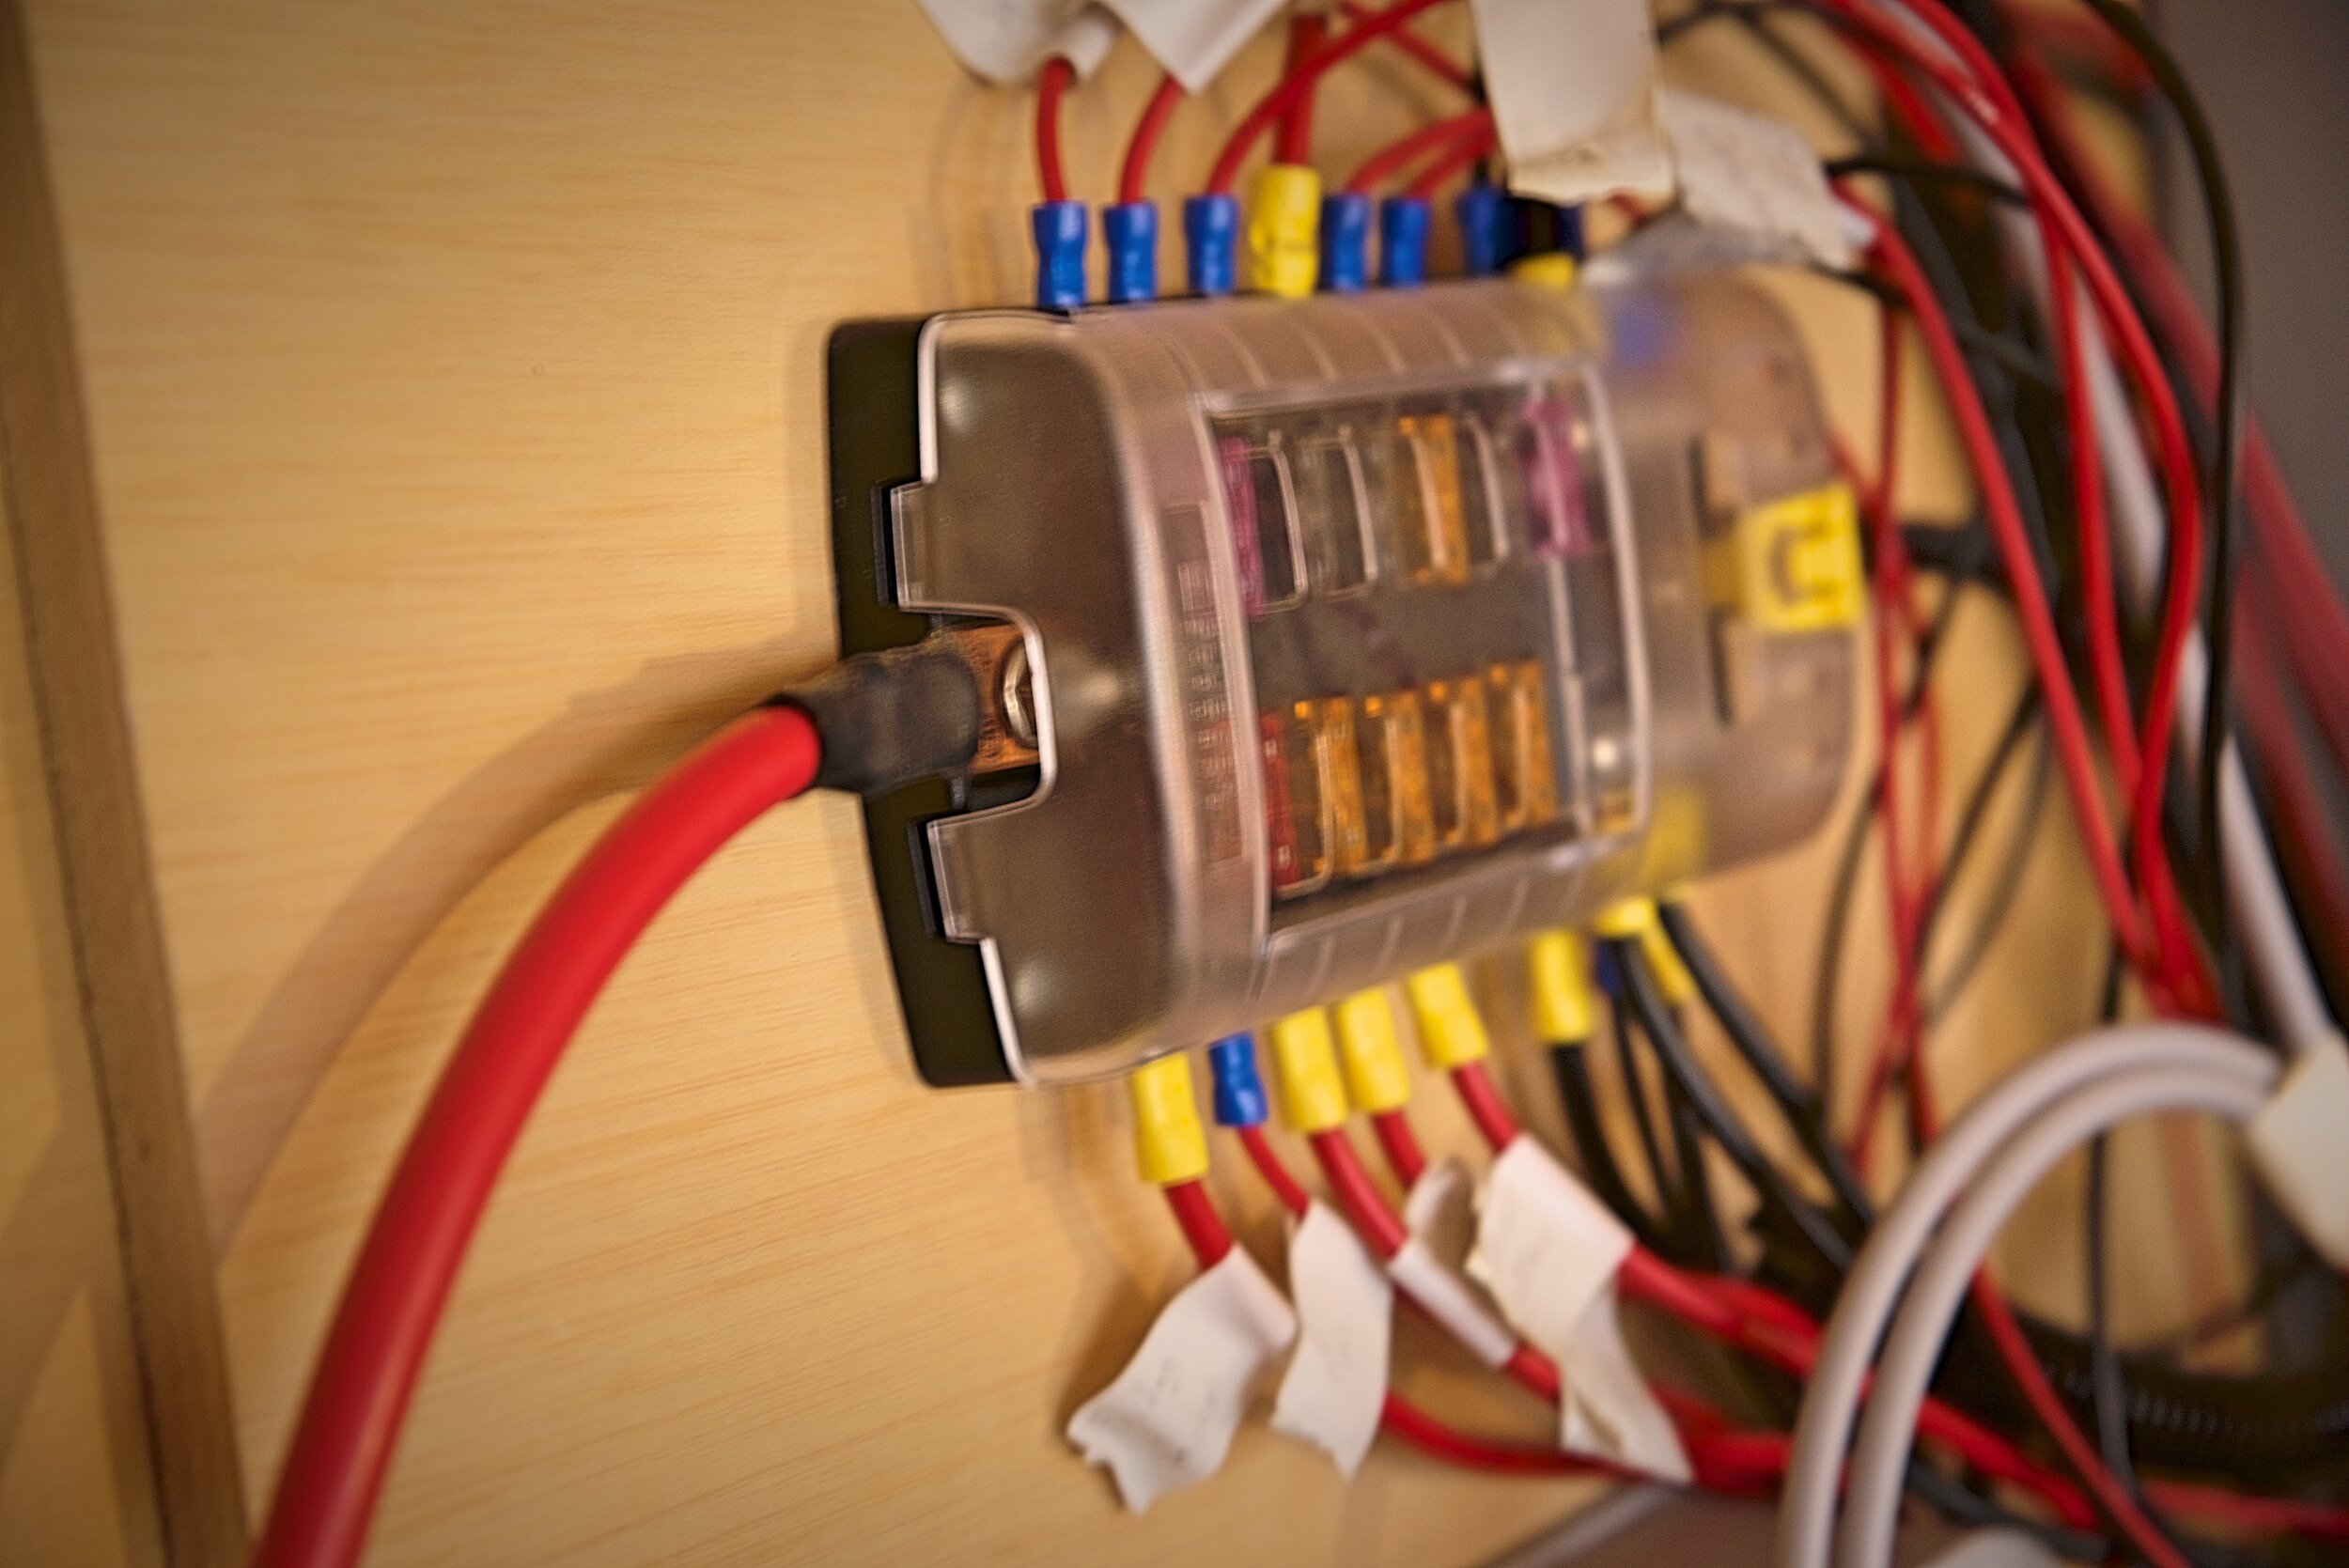
In the fuse box there is a slot for a blade fuse for each circuit connected to the fuse box.
We have a Blue Sea Systems ST Blade Fuse Box. It allows us to split the energy out to our load. We have individual circuits for our fan, fridge, propane detector, and outlets. The circuits for our lights have switches. We have eight lights on five circuits (with two lights on most circuits and with separate switches for each circuit.)

Each of the devices in our camper van has it’s own circuit.

Once you have run the wires through your van, you can connect them to the wires on your devices.
Sizing Wires in Your Camper Van
Sizing wires is sort of complicated. You need to use the amperage of the system and the length of wire needed to connect to calculate the correct gauge. Rather than trying to calculate it yourself, you should use a chart to help you find the correct gauge of wire to use for each circuit. Here’s a great chart you can use to size your wires for your solar system in your van.

To size wires correctly you much know how far you will be running the wire.

We used a chart in order to find the correct sized wires for our van’s solar system.
As you can see from the chart, the shorter your wires are, the less resistance you will have and the thinner (or higher gauge) wire you can use. The thicker wire gets, the more expensive it is. You can always use a lower gauge (thicker) wire in place of a high gauge (thinner) wire, but not vice versa. We suggest picking one or two gauges. It’s going to be more cost efficient to buy one spool of a lower gauge wire even though it costs more, than buy many spools of differently gauged wire.

We used two different gauge wires in our camper van’s solar system.
We used 16-gauge wire for our lights, outlets, and propane detector. We used 10-gauge wire for our fridge and fan. I’m only writing this to point out how we opted to use only two sizes of wire. You should always utilize a gauge chart to calculate the size that you need.
How to Run and Connect Wires in a Camper Van
After you have selected the correct size wires for your camper van’s load, it’s now time to run them through your van and connect them. As mentioned above, you should always select the shortest route possible for your wires to reduce resistance. It’s also important to reduce any friction or sharp corners where the wires could rub and break over time from the movement of the van.

It’s smart to consider running wires for your solar system in places where your van already has wires for lights or blinkers.

We used split loom to protect the wires for our van’s solar power system.
It’s ideal to place the wire in spots where you could still access them without tearing your entire van apart. As much as possible we ran wires through split loom in the backs of cabinets or our fridge bench. This split loom is held it in place in with wire clips. In some places we ran the wires through the metal walls of our van frame. We also designed an access panel going up our wall so that we could easily get to the wires coming from the solar panels as well as those going up to the ceilings for our lights and fan.

We left this small notch in the back of our bench to run wires protected by split loom.
You will want to protect the back of outlets with wood boxes to ensure your connections hold.

This access panel holds a huge bundle of wires. It’s good to put your solar wires in places where you could access them without tearing your entire van apart.
Once you have your wires run through out your van, you may want to wait to connect your appliances until you have your walls and ceilings, cabinets, etc. installed. Otherwise you will be disconnecting and reconnecting most of them again.
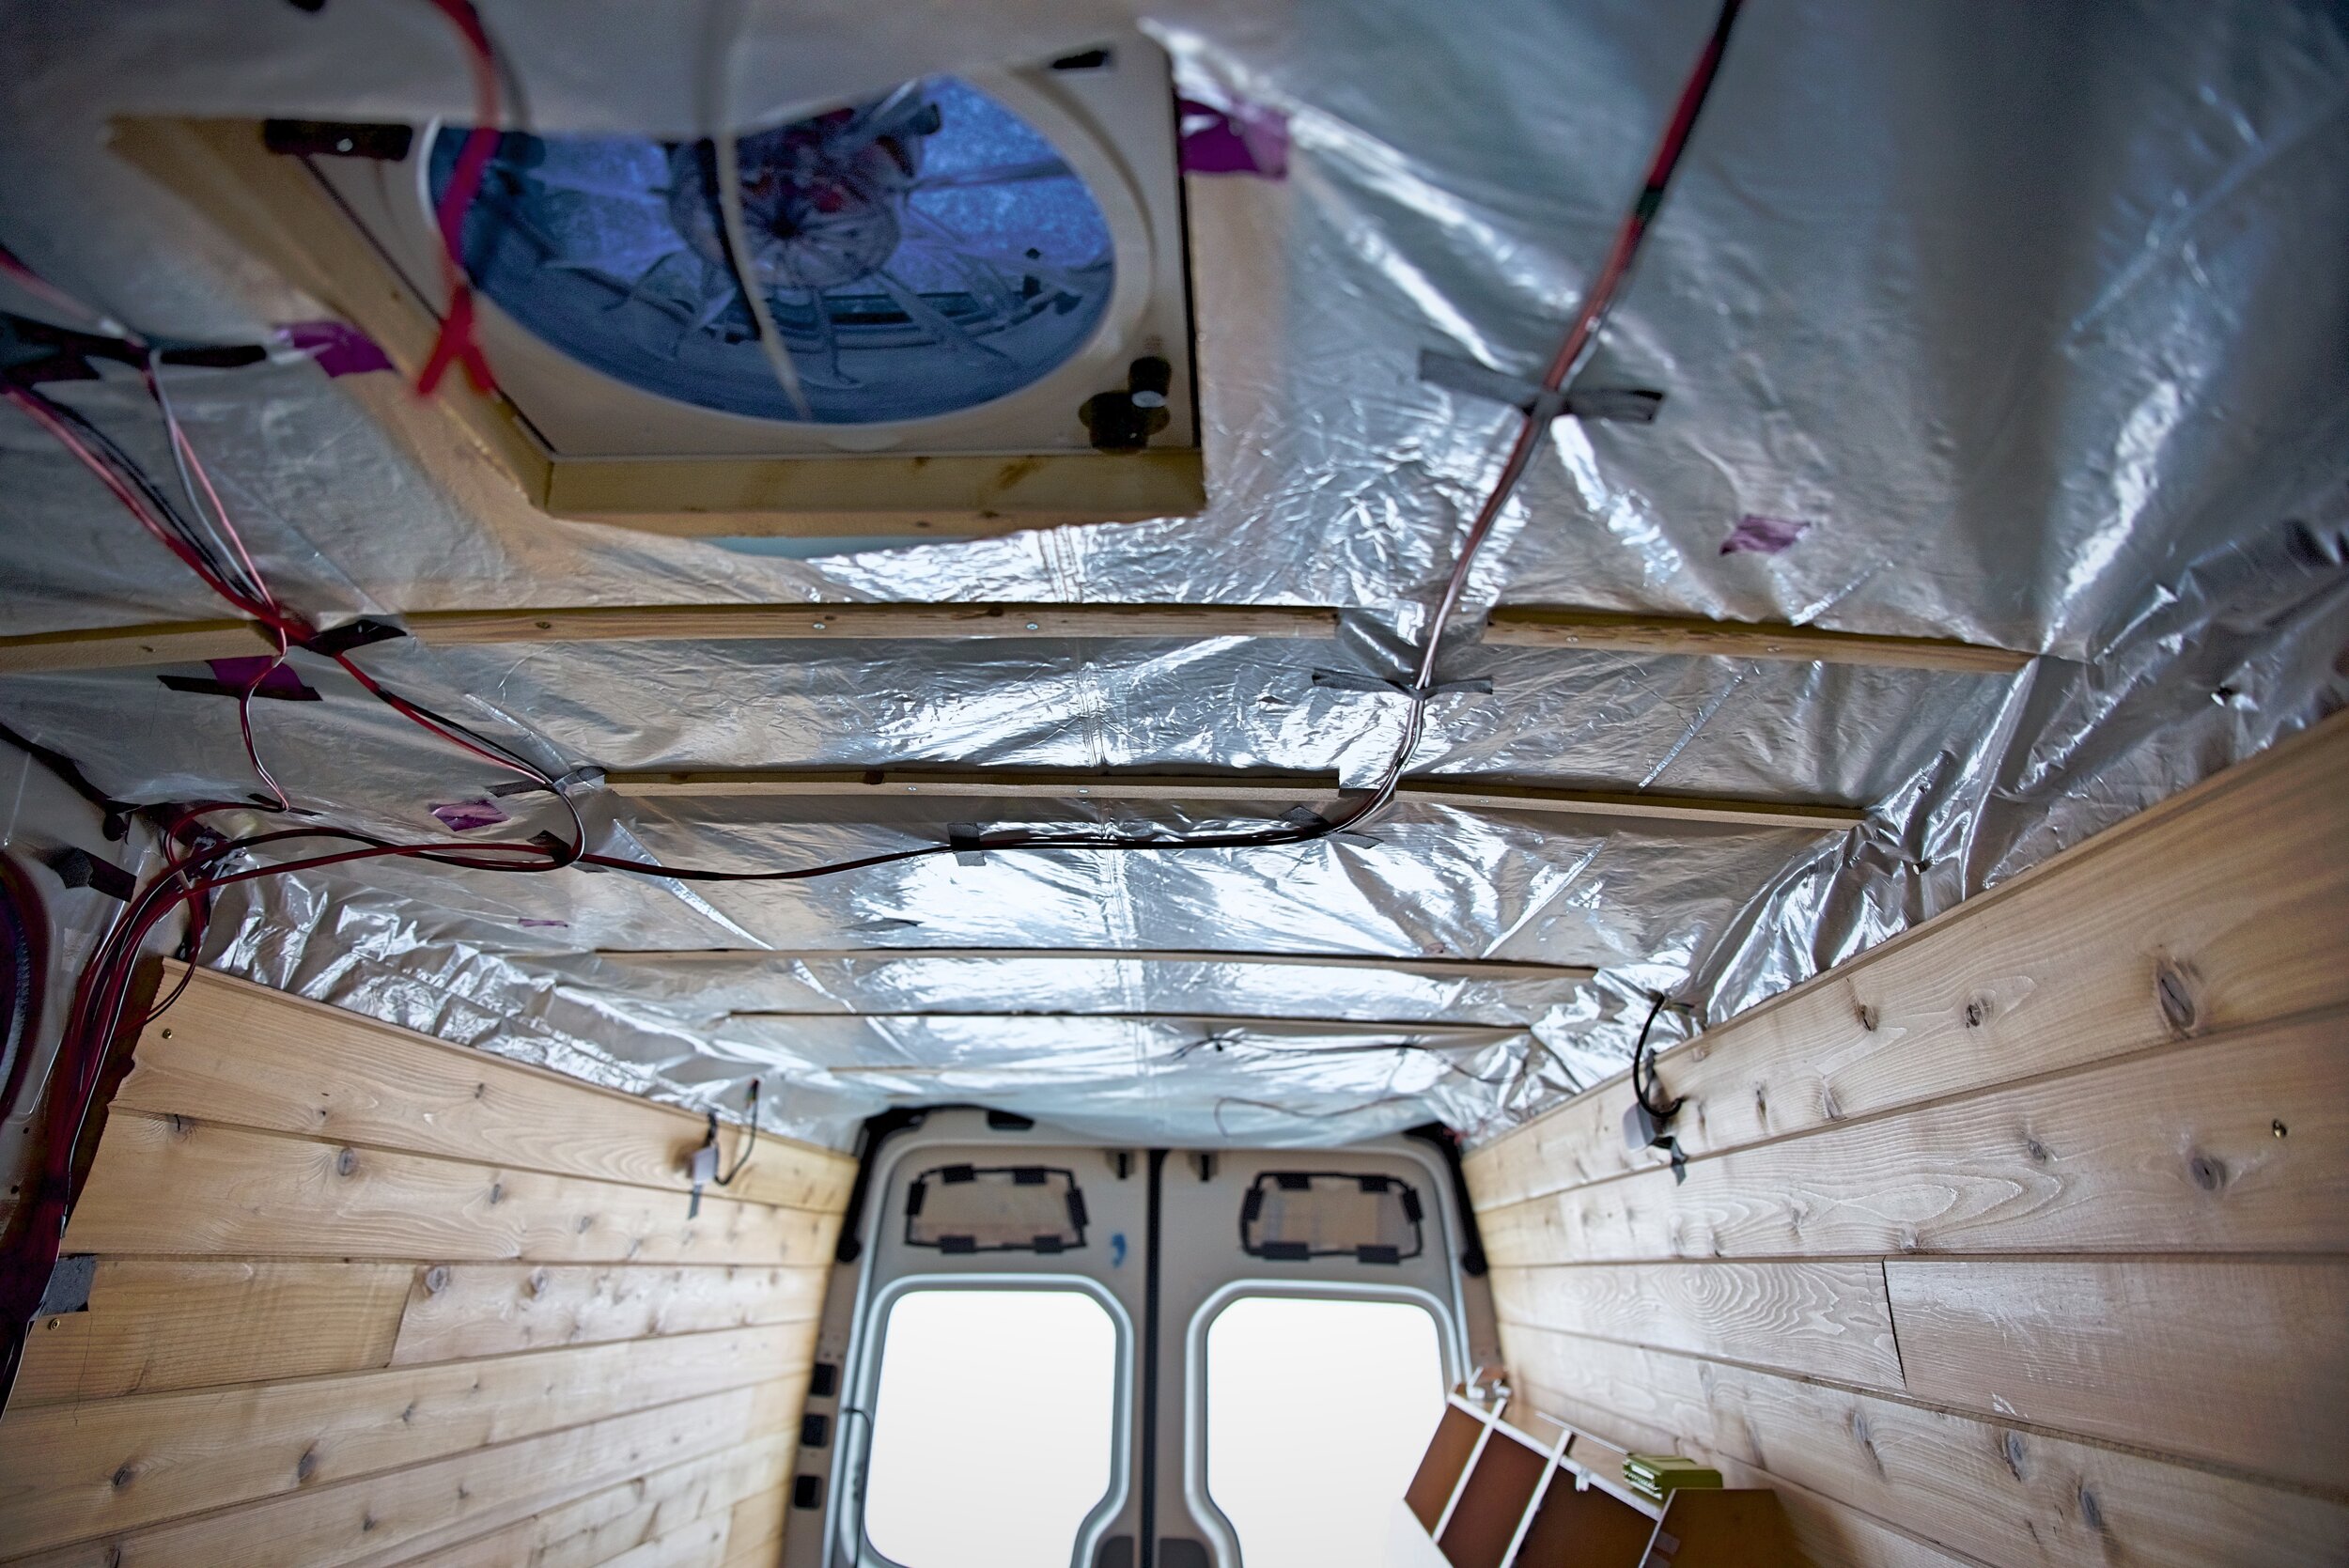
We ran our wires behind our ceiling paneling between the ribs that the panels are screwed into.
You should wait to attach your lights until you have your ceiling panels installed.
To connect the high gauge (thinner) wires to your devices, you can use quick crimp connectors. The quick connectors need to match the same gauge as the wire. For example, use a 16 gauge butt connector for a 16 gauge wire. The easiest thing to do is to buy a set of various sized crimp connectors. In our van we used some ring connectors, but mostly butt connectors.

Butt connectors for our 12v power system in our camper van.

Buying a set of multiple types of quick crimp connectors is the most economical ways to buy these connectors for building out a solar system.
To crimp a wire to a connector, you’ll need a wire stripper and cobra pliers for crimping. First you strip the plastic coating off the end of the wire. After selecting the correct connector, you can then crimp it on. Later you can easily connect it to your light switch, outlet, or fan.

To attach a crimp connector you first need to strip the plastic off the end of the wire.

Wires in our camper van with the copper interior exposed after stripping.
To connect lower gauge (larger) wires, you will need a lug hammer crimper. This tool will allow you to properly crimp a larger cable.

Using the crimping tool to attach a butt connector to a wire for our van’s solar power system.
After you have crimped a connection, you may want to protect it and hold it in place with a heat shrink tubing. Don’t forget that you need to slide this onto the wire before you connect it. You can simply use a lighter to lightly heat the tubing and it will shrink around the connection.

You can use heat shrink tubing to protect the connections that you crimp on your camper van’s wiring system.
Mounting Our Solar Panels on Our Van
Our three 100-watt solar panels are mounted on the roof of our van. The roof of the van is slightly curved, so the solar panels have to be slightly lifted off the roof by a rack. We have two panels mounted side-by-side and one mounted behind those.

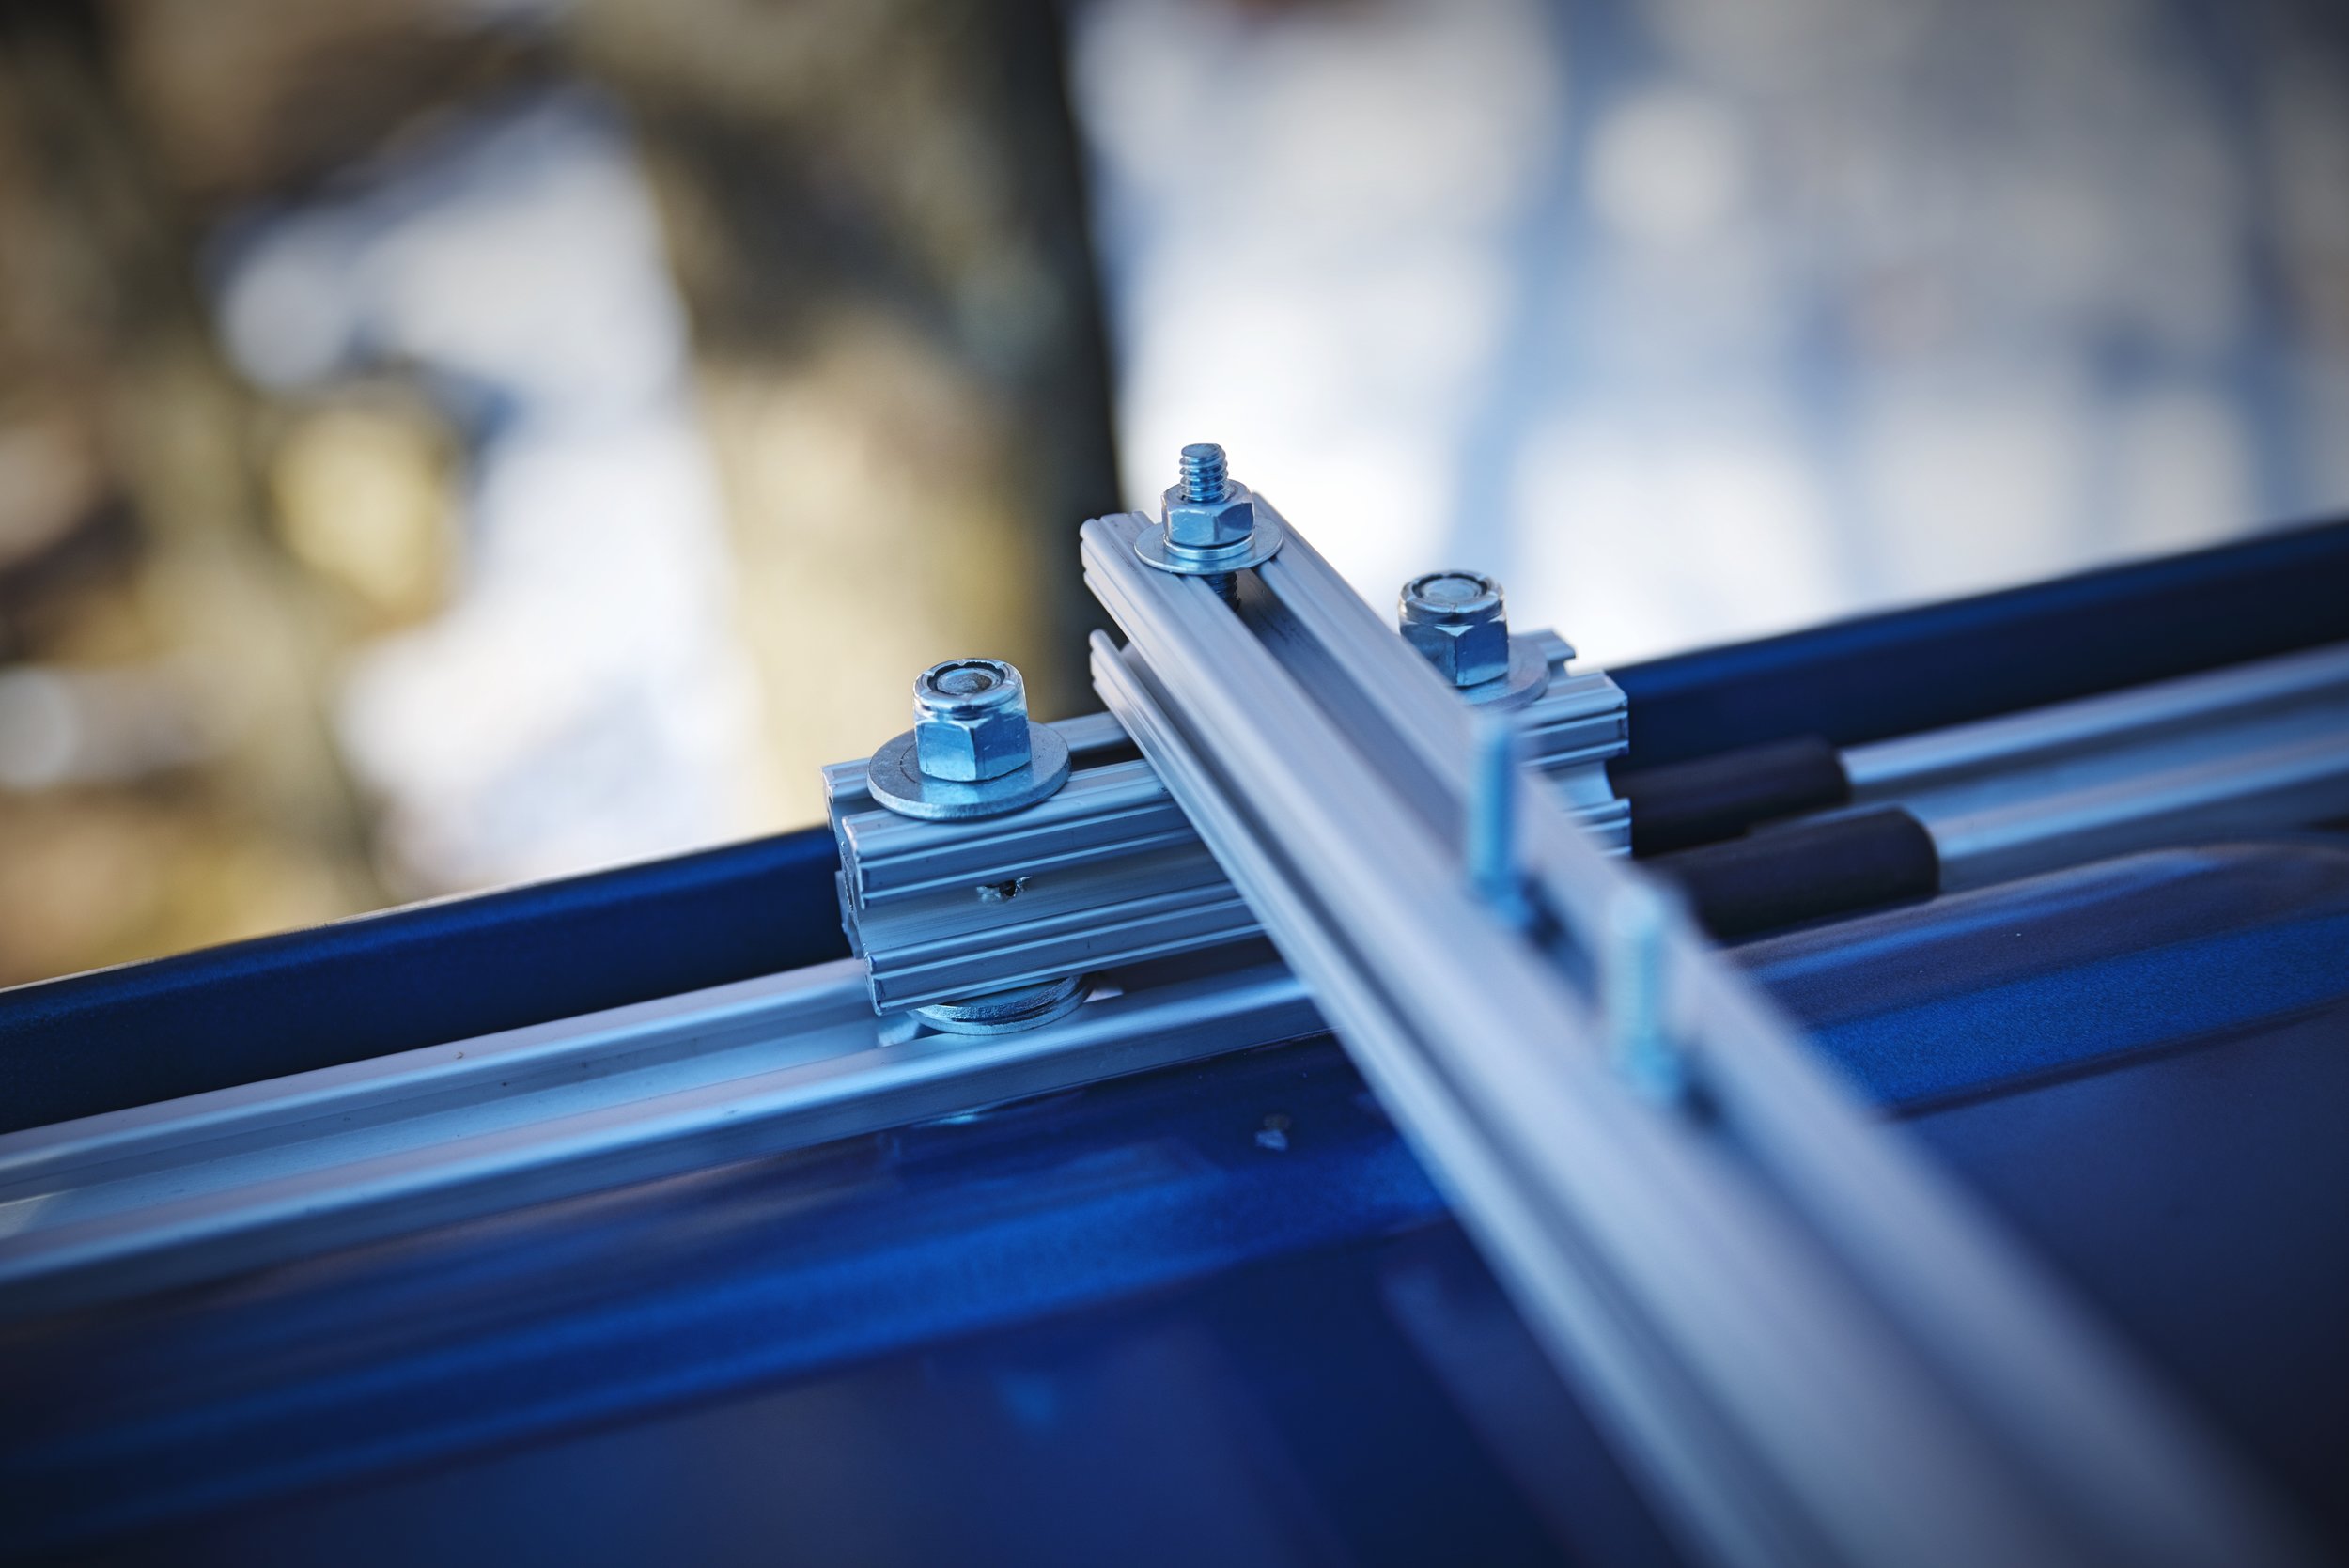
This aluminum rack attaches our solar panels to the roof of our camper van.
We used existing rails on the roof of our van in order to mount the solar panels.
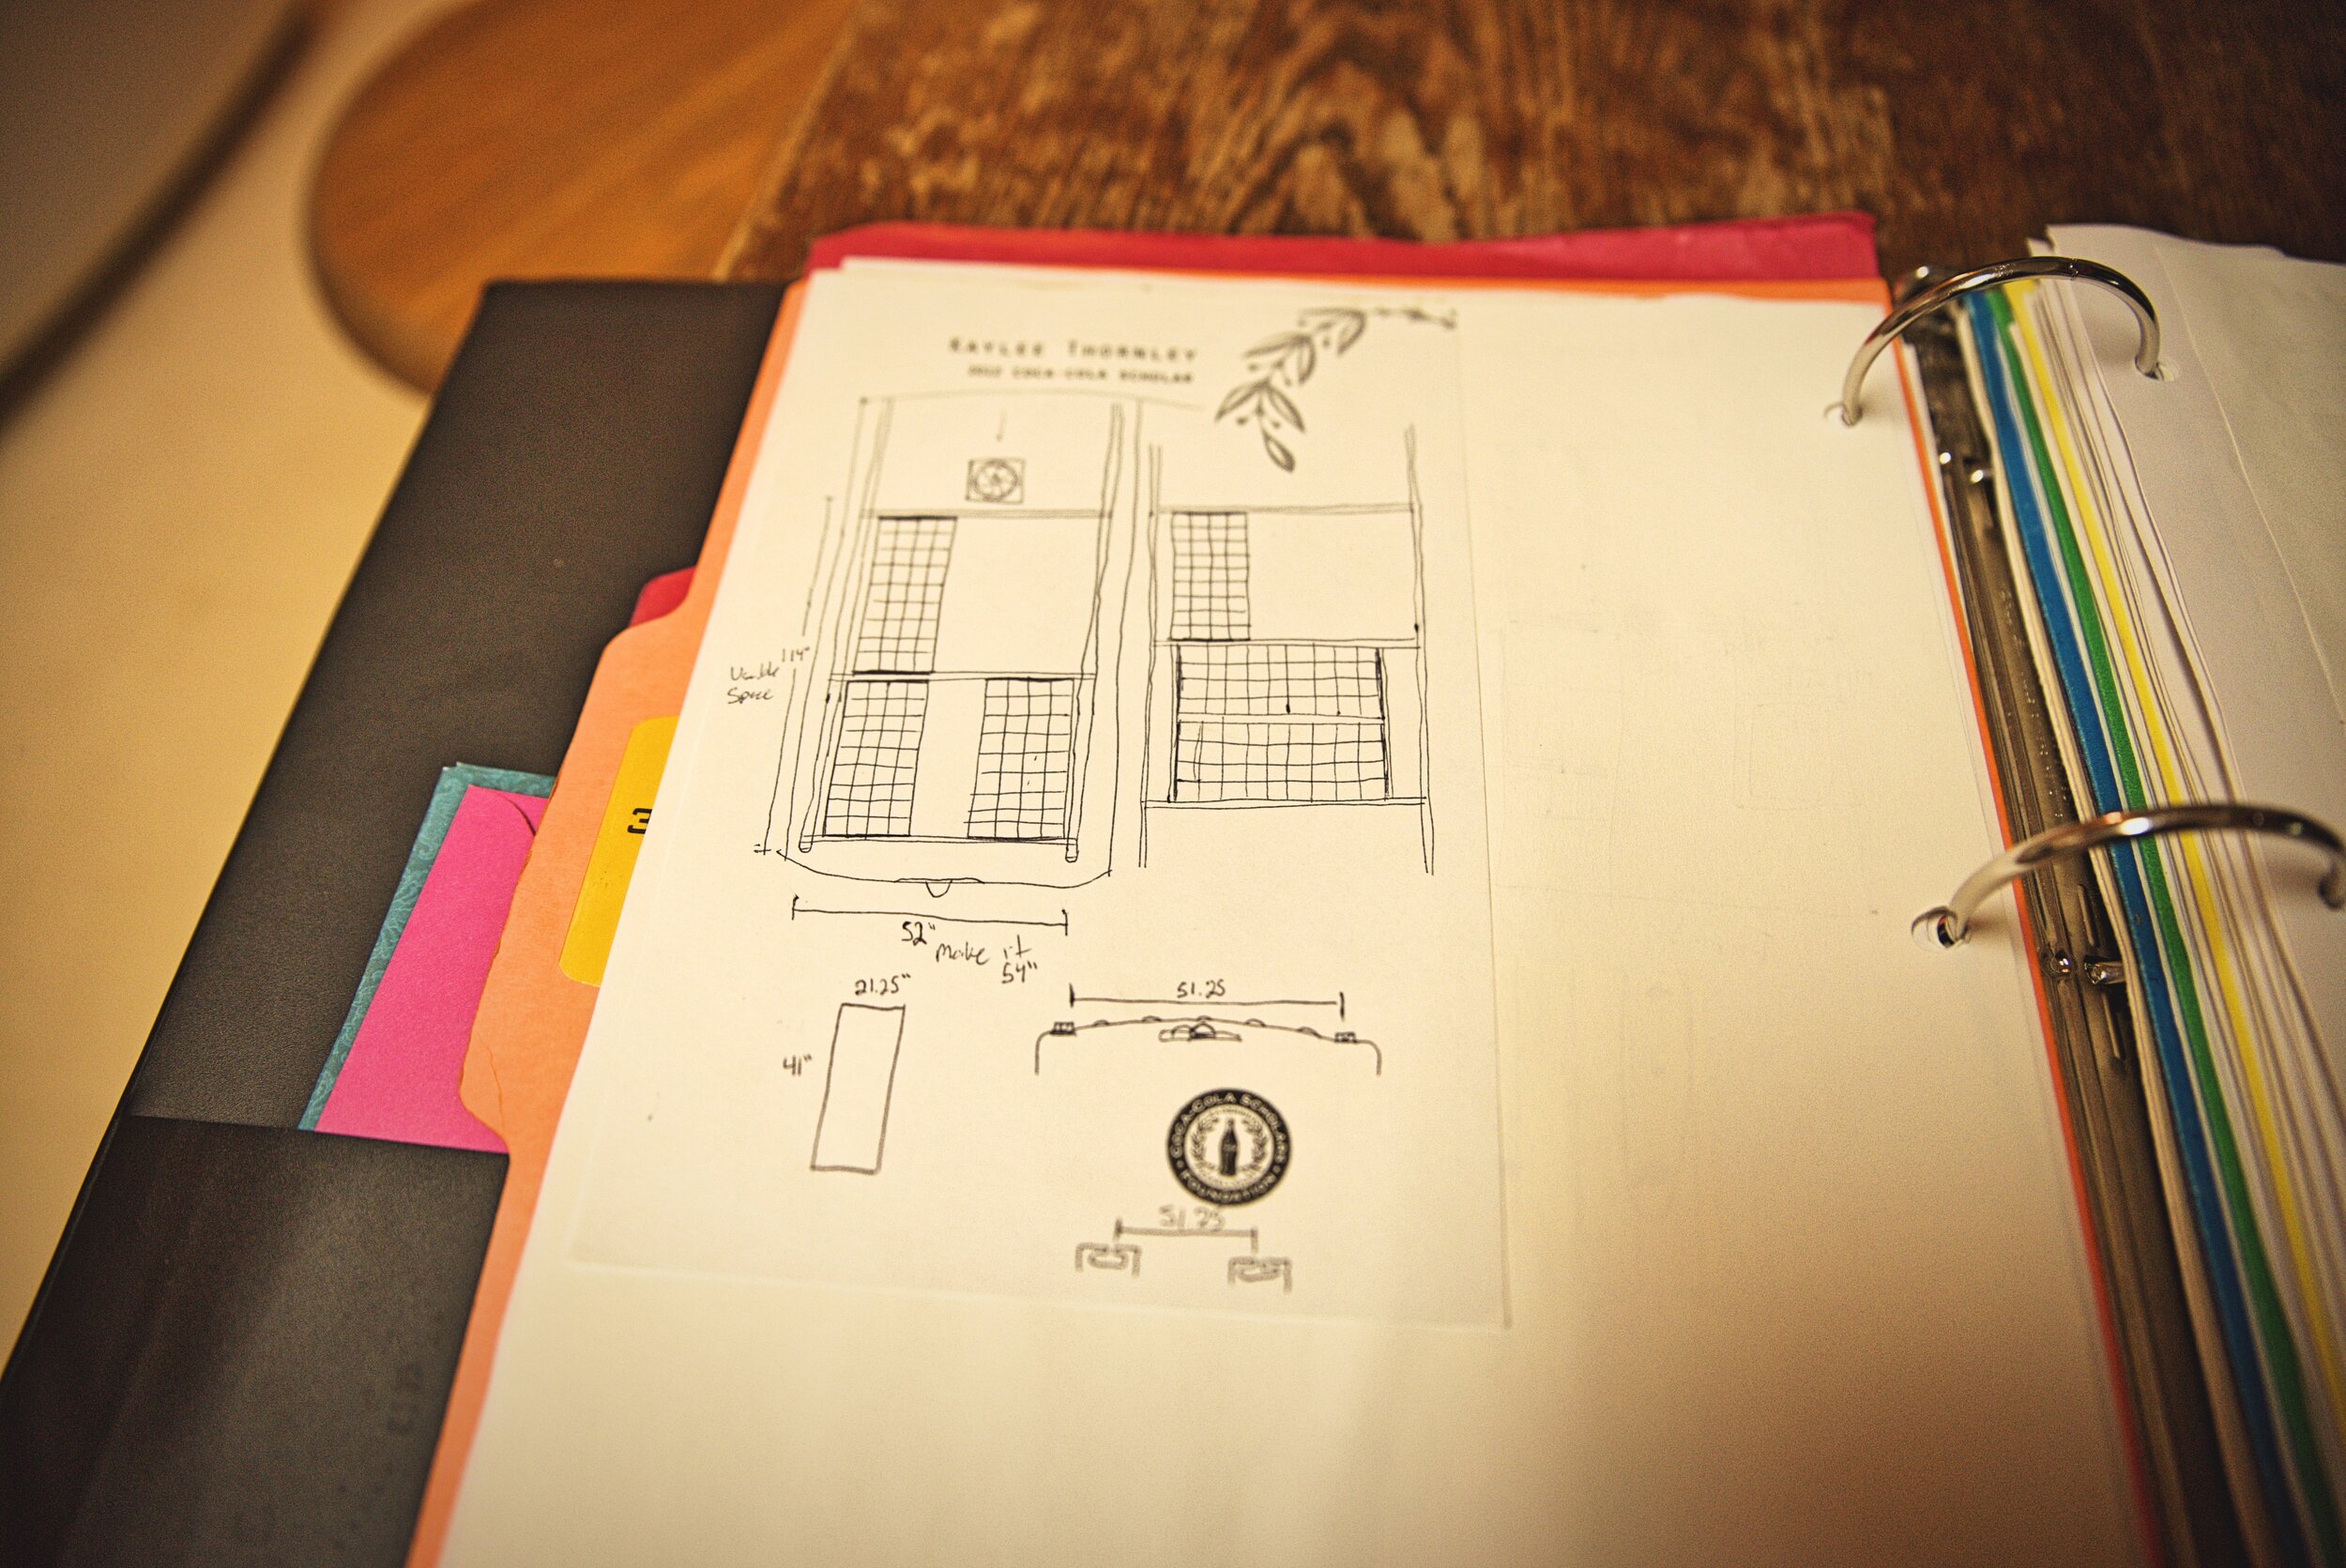
Building a Roof Rack for Our Stealth Solar Panels
We didn’t want the solar panels on our roof to be too obvious, since we planned to do a fair amount of stealth camping. We built a roof rack that was fairly low profile. You can barely see it if you’re standing on the ground. It’s definitely note noticeable if you’re just driving past.

We designed our solar roof rack to be very low profile.

The rack had to be just high enough to lift the panels above the curve of the van roof.
From the ground, it’s difficult to see the roof rack from ground.
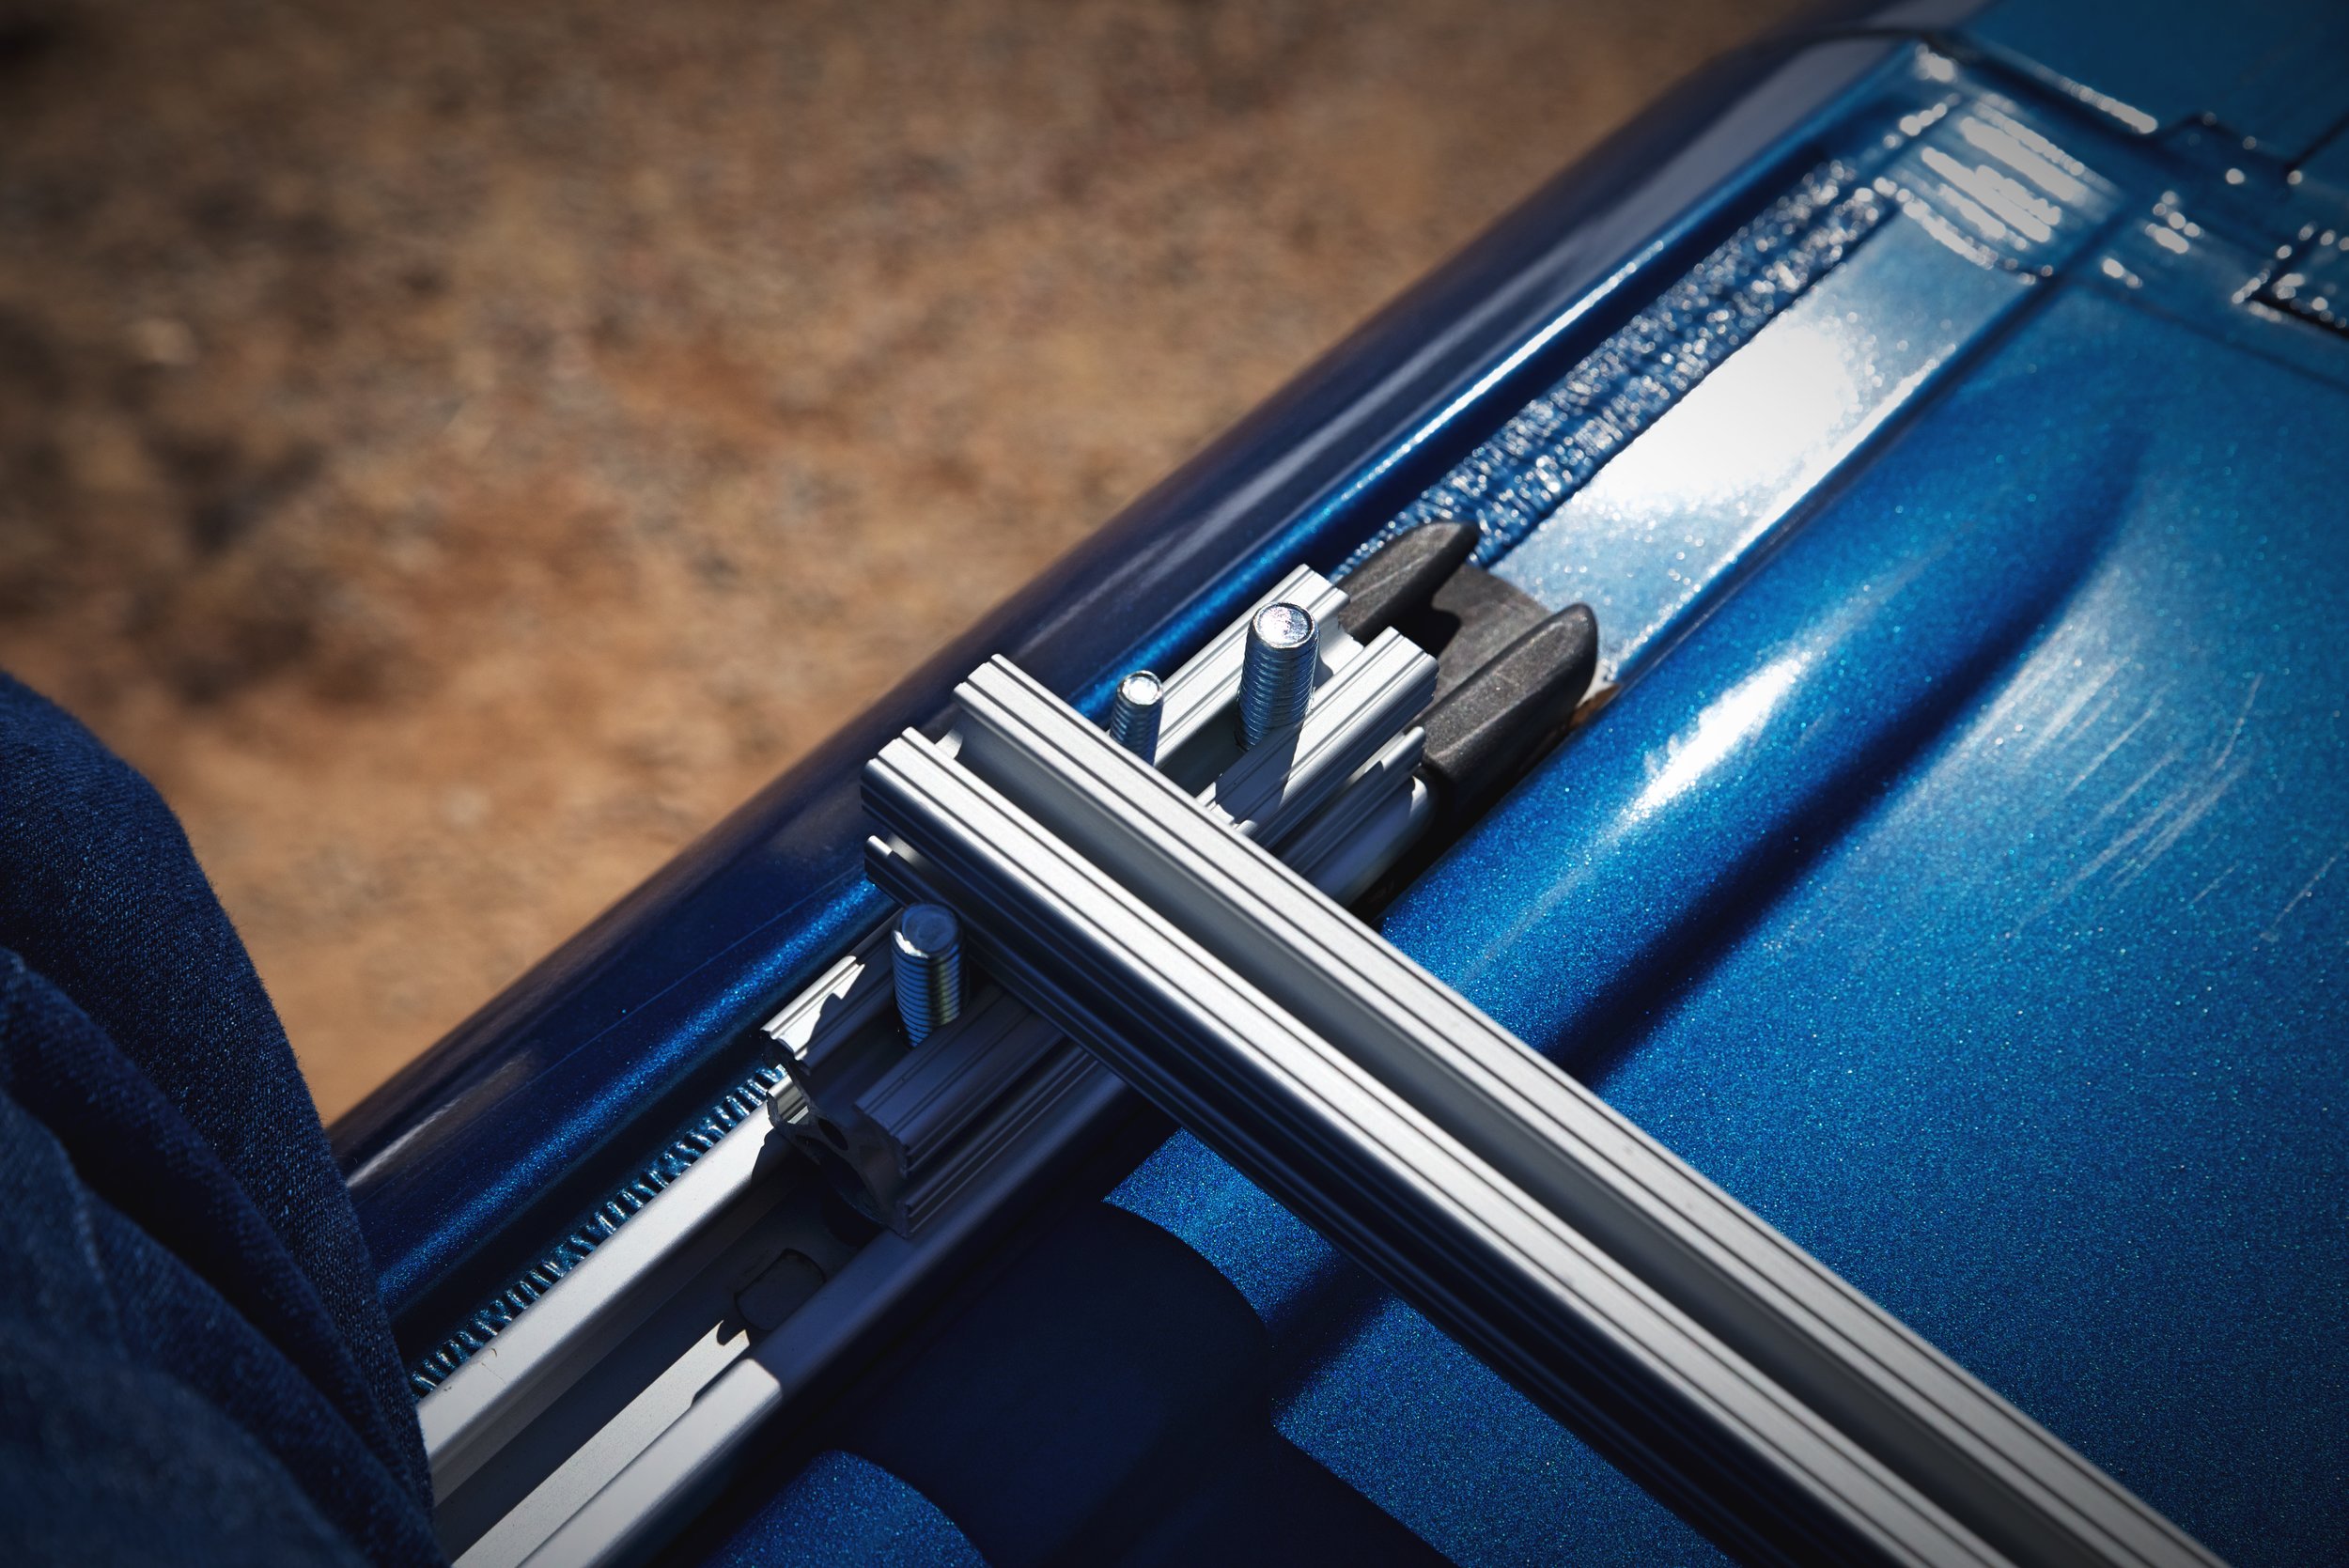
On the top of our Sprinter van are two inset rails that run vertically along the length of the van. We were able to slide the head of an elevator bolt down into the rail and from there we could bolt on the rack for the solar panels. Elevator bolts have a large flat head, and you can find them at your hardware store, they are easy to find online. This DIY rack would allow us to expand our rack to hold additional panels if we ever wanted to increase the capacity of our camper van’s solar system.

We built our rack from 80/20 aluminum rails.

These aluminum rails have slots where you can slide the head of a bolt.

Because they are aluminum, the rails are also easy to cut and drill through.
We built our rack for our solar panels from 80/20 T-slotted extruded aluminum rail. Because they are aluminum, they are lightweight and you can easily cut them with a hack saw or drill holes through them. If you use a center punch, it’s much easier to get your drill to bite into them.

It’s easier to drill through the metal rails if you use a auto center punch to make a dimple.

These rails are somewhat expensive, so you’ll definitely want to measure twice and cut once.
We used a short piece of 80/20 rail bolted into the elevator bolt along with a few washers as a spacer to lift the cross pieces high enough to raise the cross members above the curve in the van roof. The cross members are bolted to these spacers. We slid bolts into the aluminum rail to use for mounting the solar panels onto the rack.

Ian puts together our DIY solar roof rack.

Small pieces of rail are used as spacers to raise the cross pieces to the correct height.
An elevator bolt is slid into the rail on top of our van to attach the roof rack for our solar pane.s
The Renogy solar panels come with Z-shaped mounting brackets. Rather than mounting these brackets on top of the cross pieces, we mounted them inside the rails to keep the solar panels low profile.

Here’s all the hardware that we used to build the DIY solar roof racks for our van.

Renogy solar panels come with these mounting brackets that we used to attach it to our roof rack.
What We Power with Our Solar Panels
Here’s what we power with our 300-watt solar panels and 200-amp hour battery in our camper van.
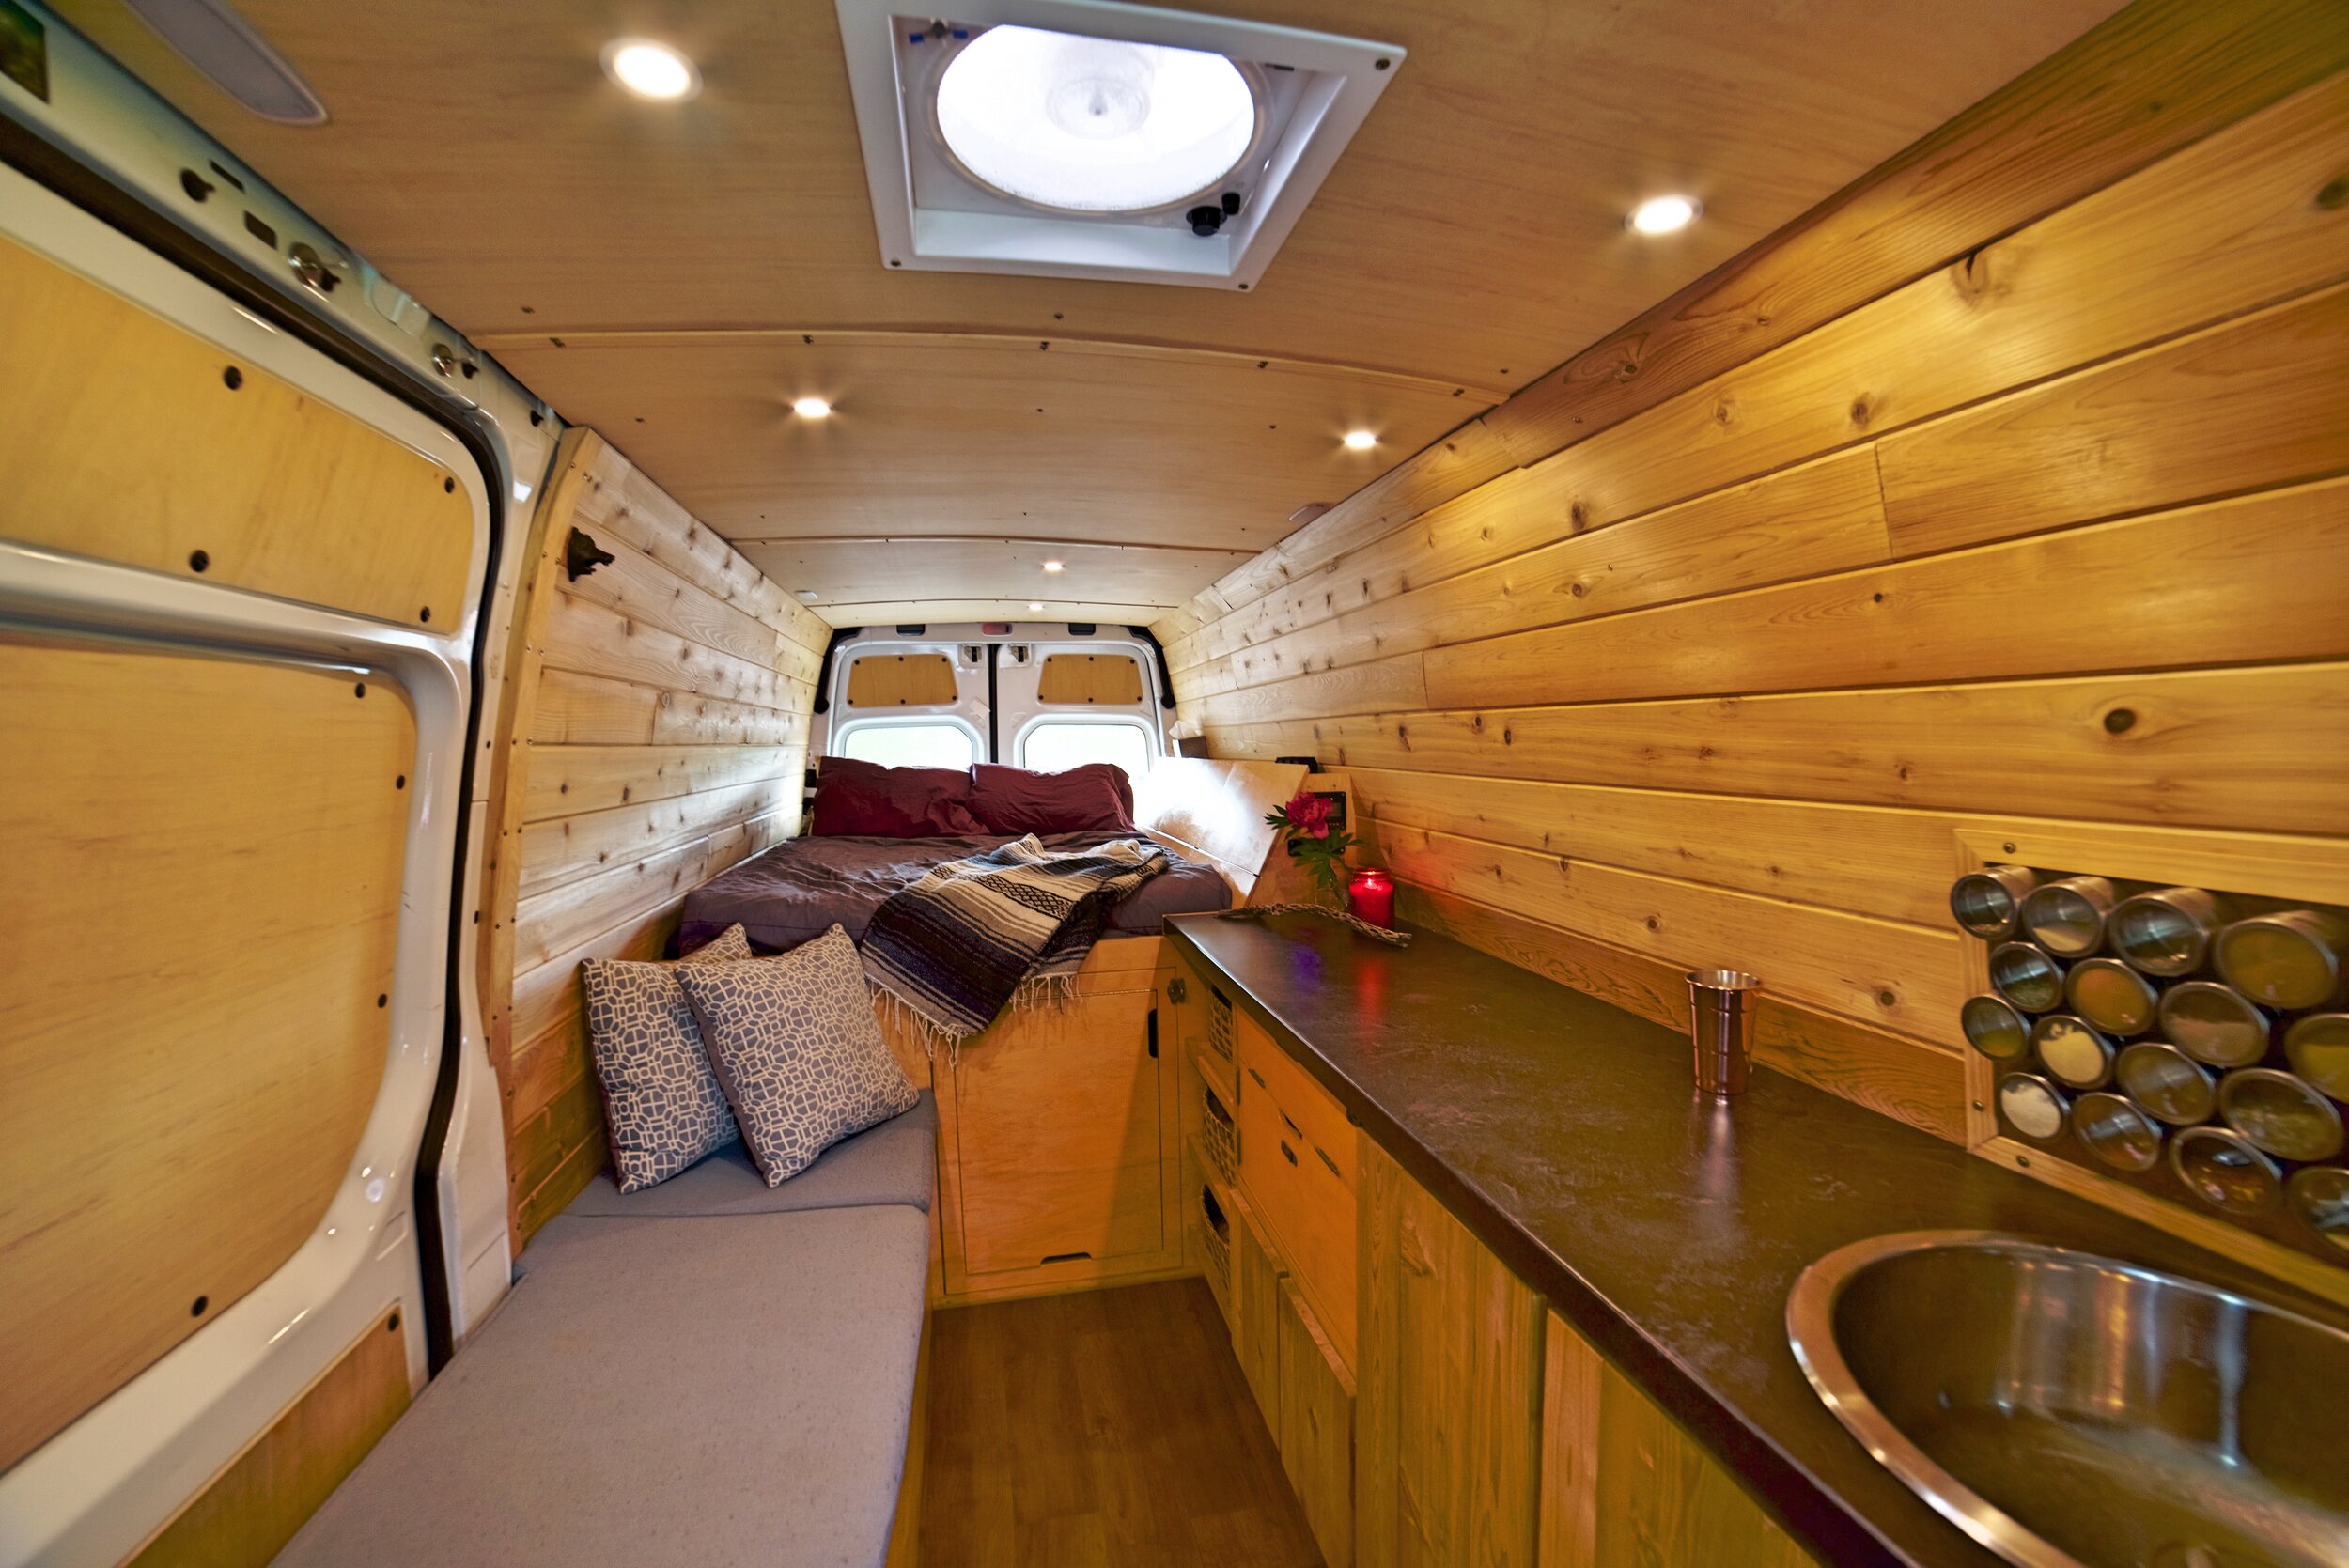
Lights with Switches
We have eight 12-volt lights on four separate circuits. We have two lights above our counter, two lights above our bench, two lights above our bed, and two lights below our bed so that we can see when we need to get something out of storage. Each of these sets of lights has their own circuit. We put the lights above our bed each on their own circuit in case one person wants to stay up reading.
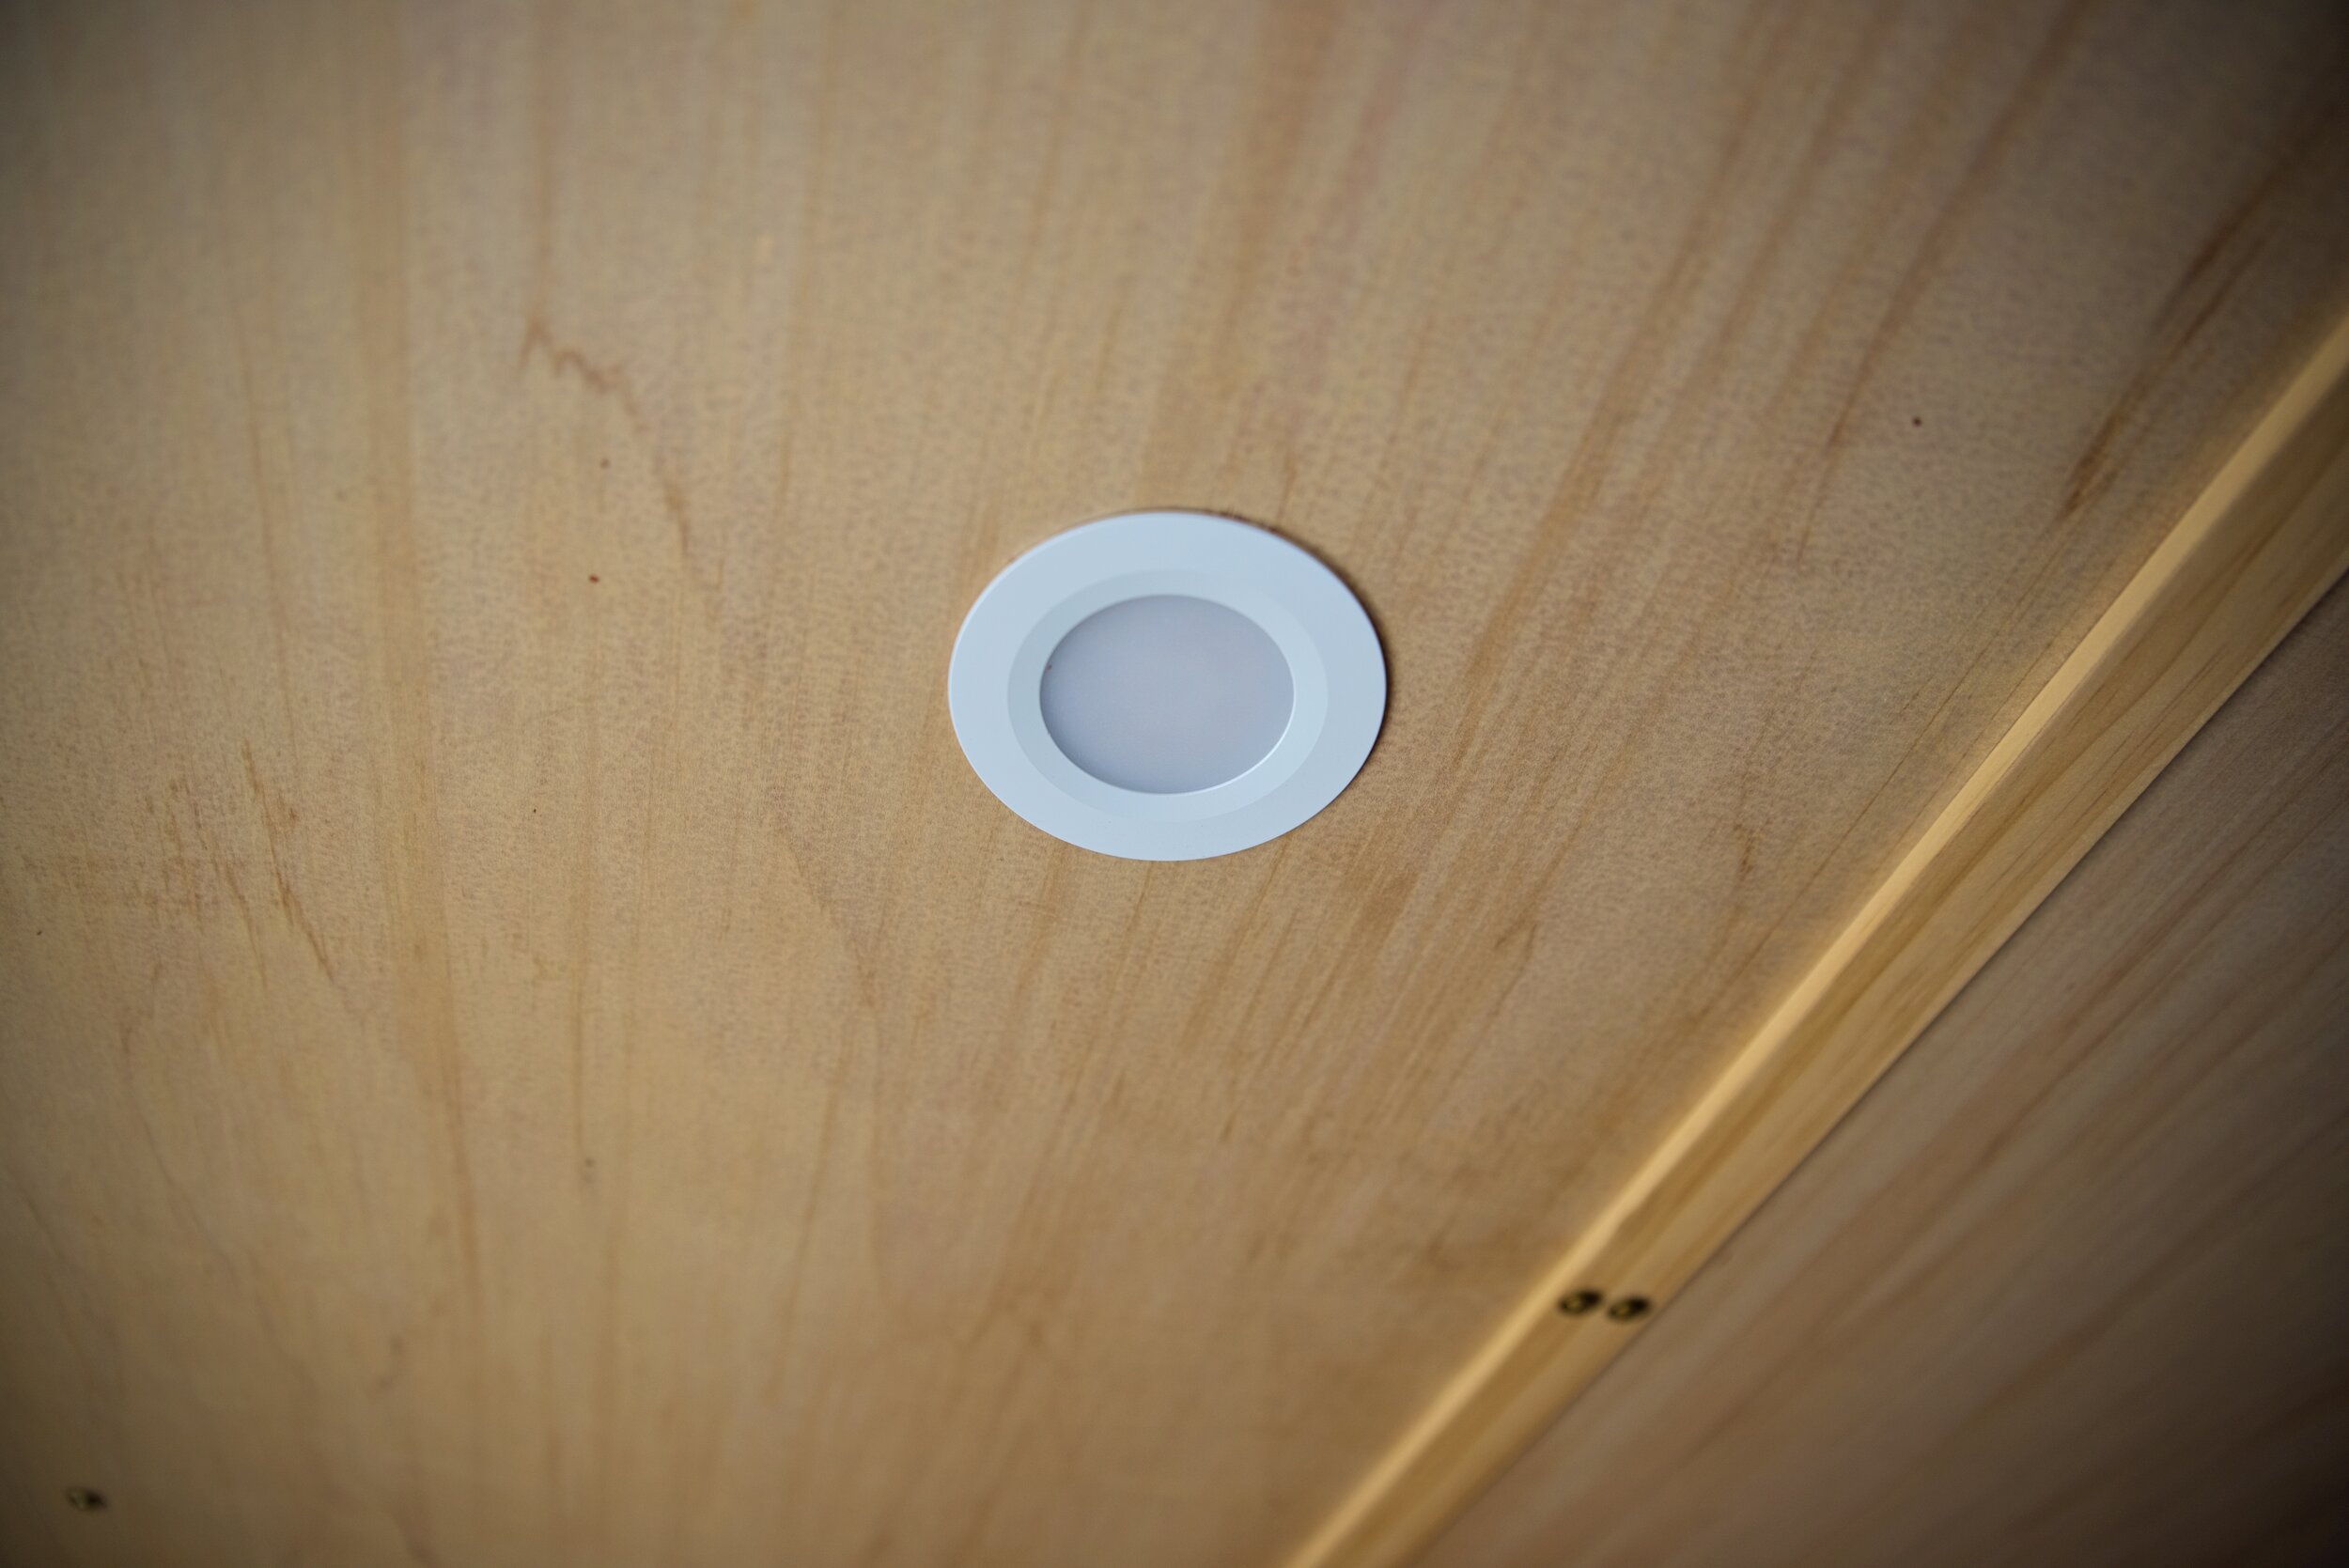
We have eight 12v lights in our van and it is bright!
These switches allow us to turn the lights above our bed on and off.
Each circuit has its own switch. Switches simply break the circuit when they are off so no electricity will reach the device. Switches should be matched to the amperage of the circuit.
The lights in our van have surprisingly low draw on our battery for how bright they are. We could have installed only 4 lights, and we still would have plenty of light. The warm-white lights are preferable for such a small space where you don’t need as much illumination.
All of the sets of lights in our van are on independent switches.

We even have lights under our bed so that we can see when we are getting things our of the storage area of our van.
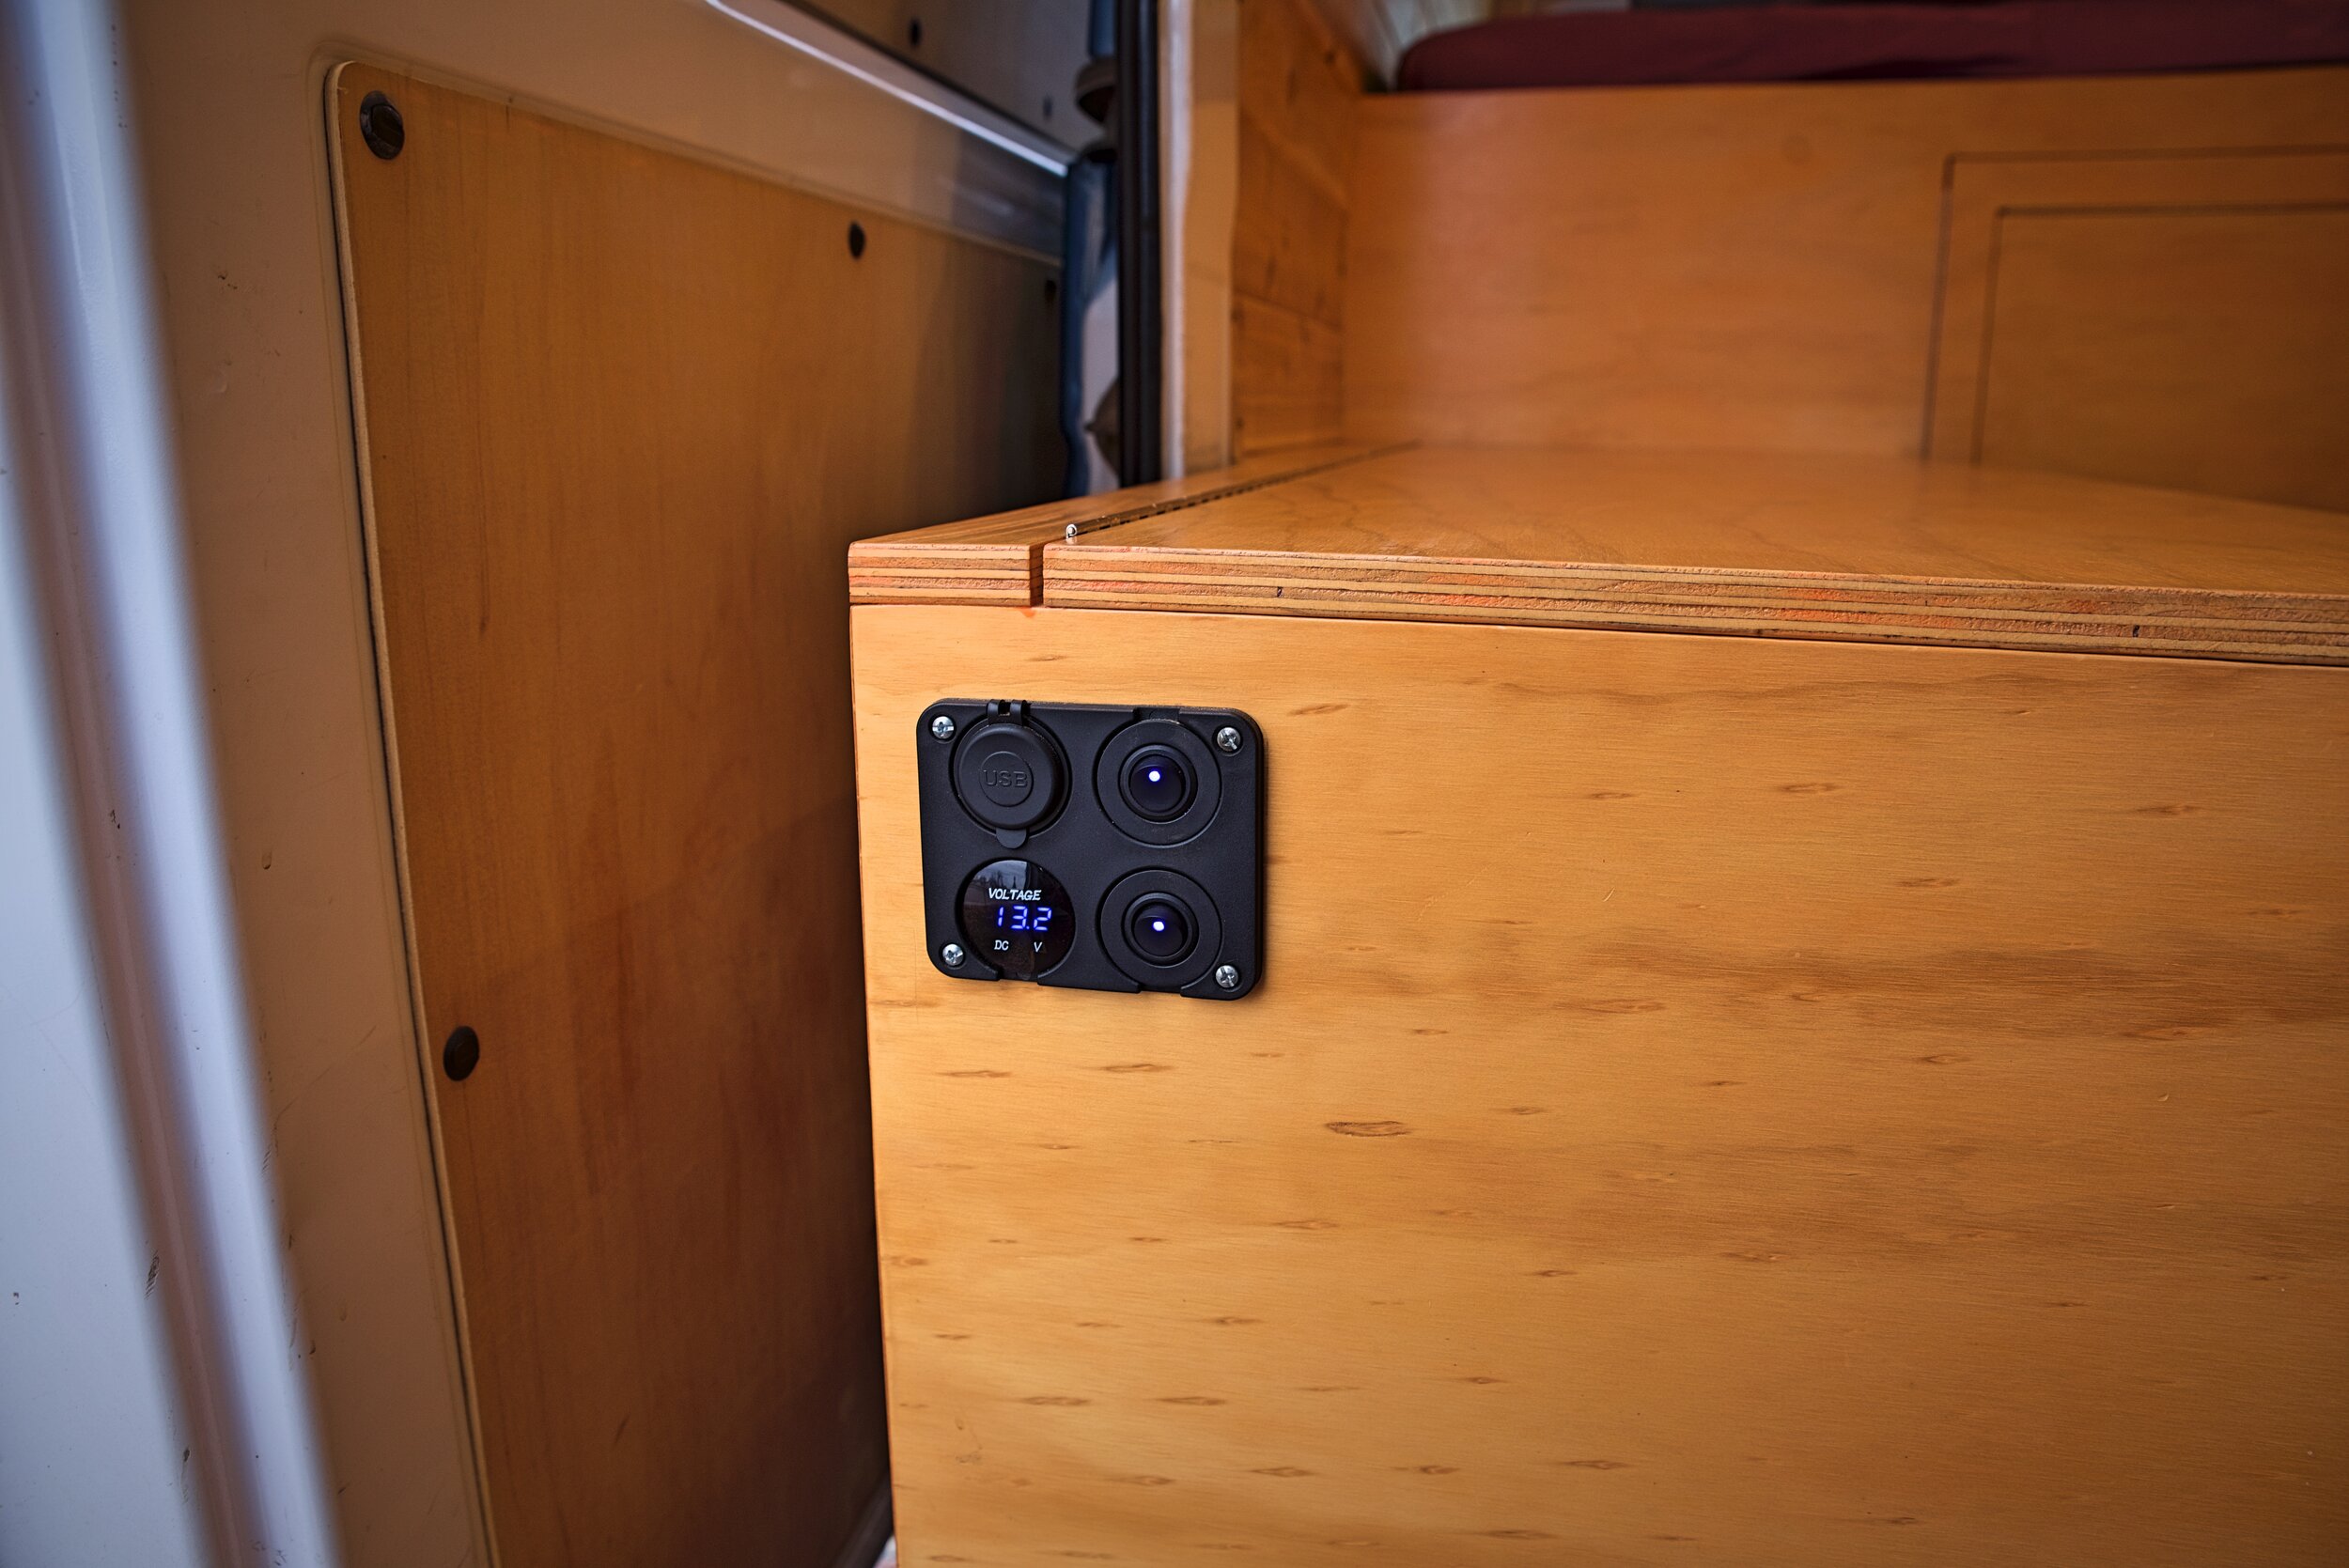
USB Outlets
We have three sets of USB outlets in our camper van. At the back of our bed we have a set of outlets so we can charge our phones in bed. There’s a set of outlets at the front of our bed cabinetry by our counter. We also have a set at the end of the fridge/storage bench. You can buy 12-volt switches and USB outlets that are round and can all fit into the same housing. To install these round outlets, we used a spade bit to drill the correct sized hole.
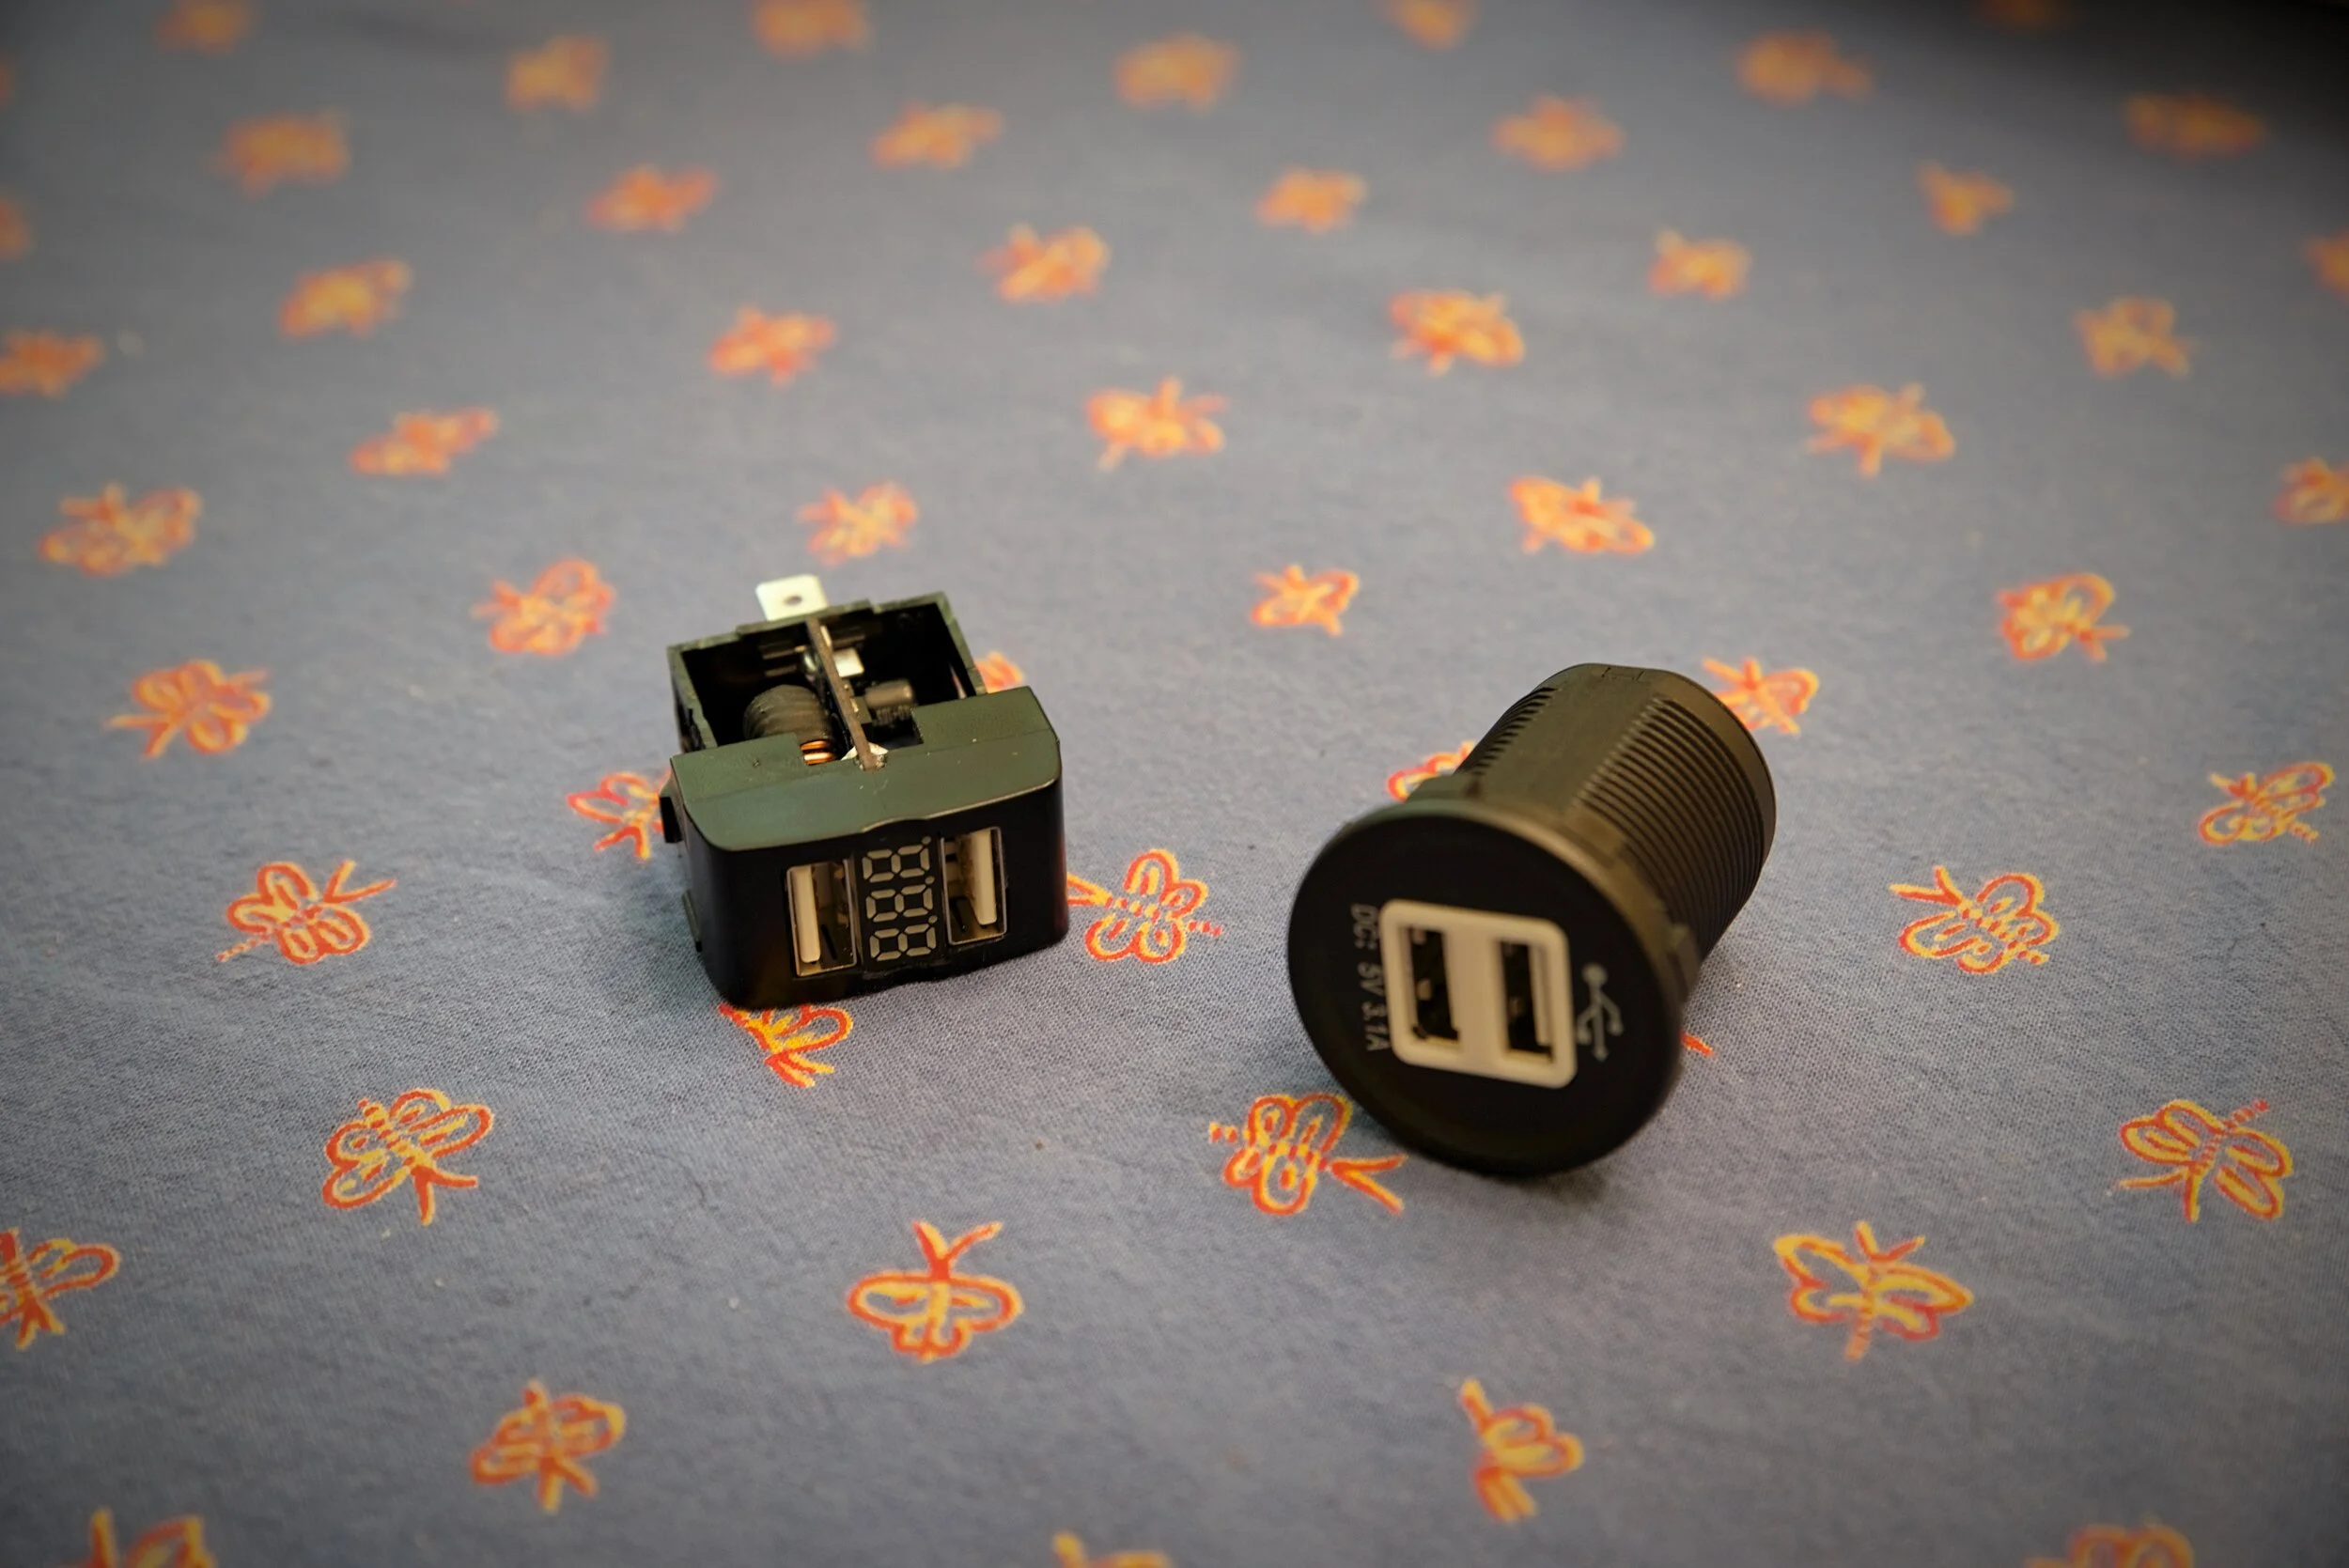
There are several types of 12v USB outlets you can choose from. We opted for the round ones that can use the same housing as our light switches.
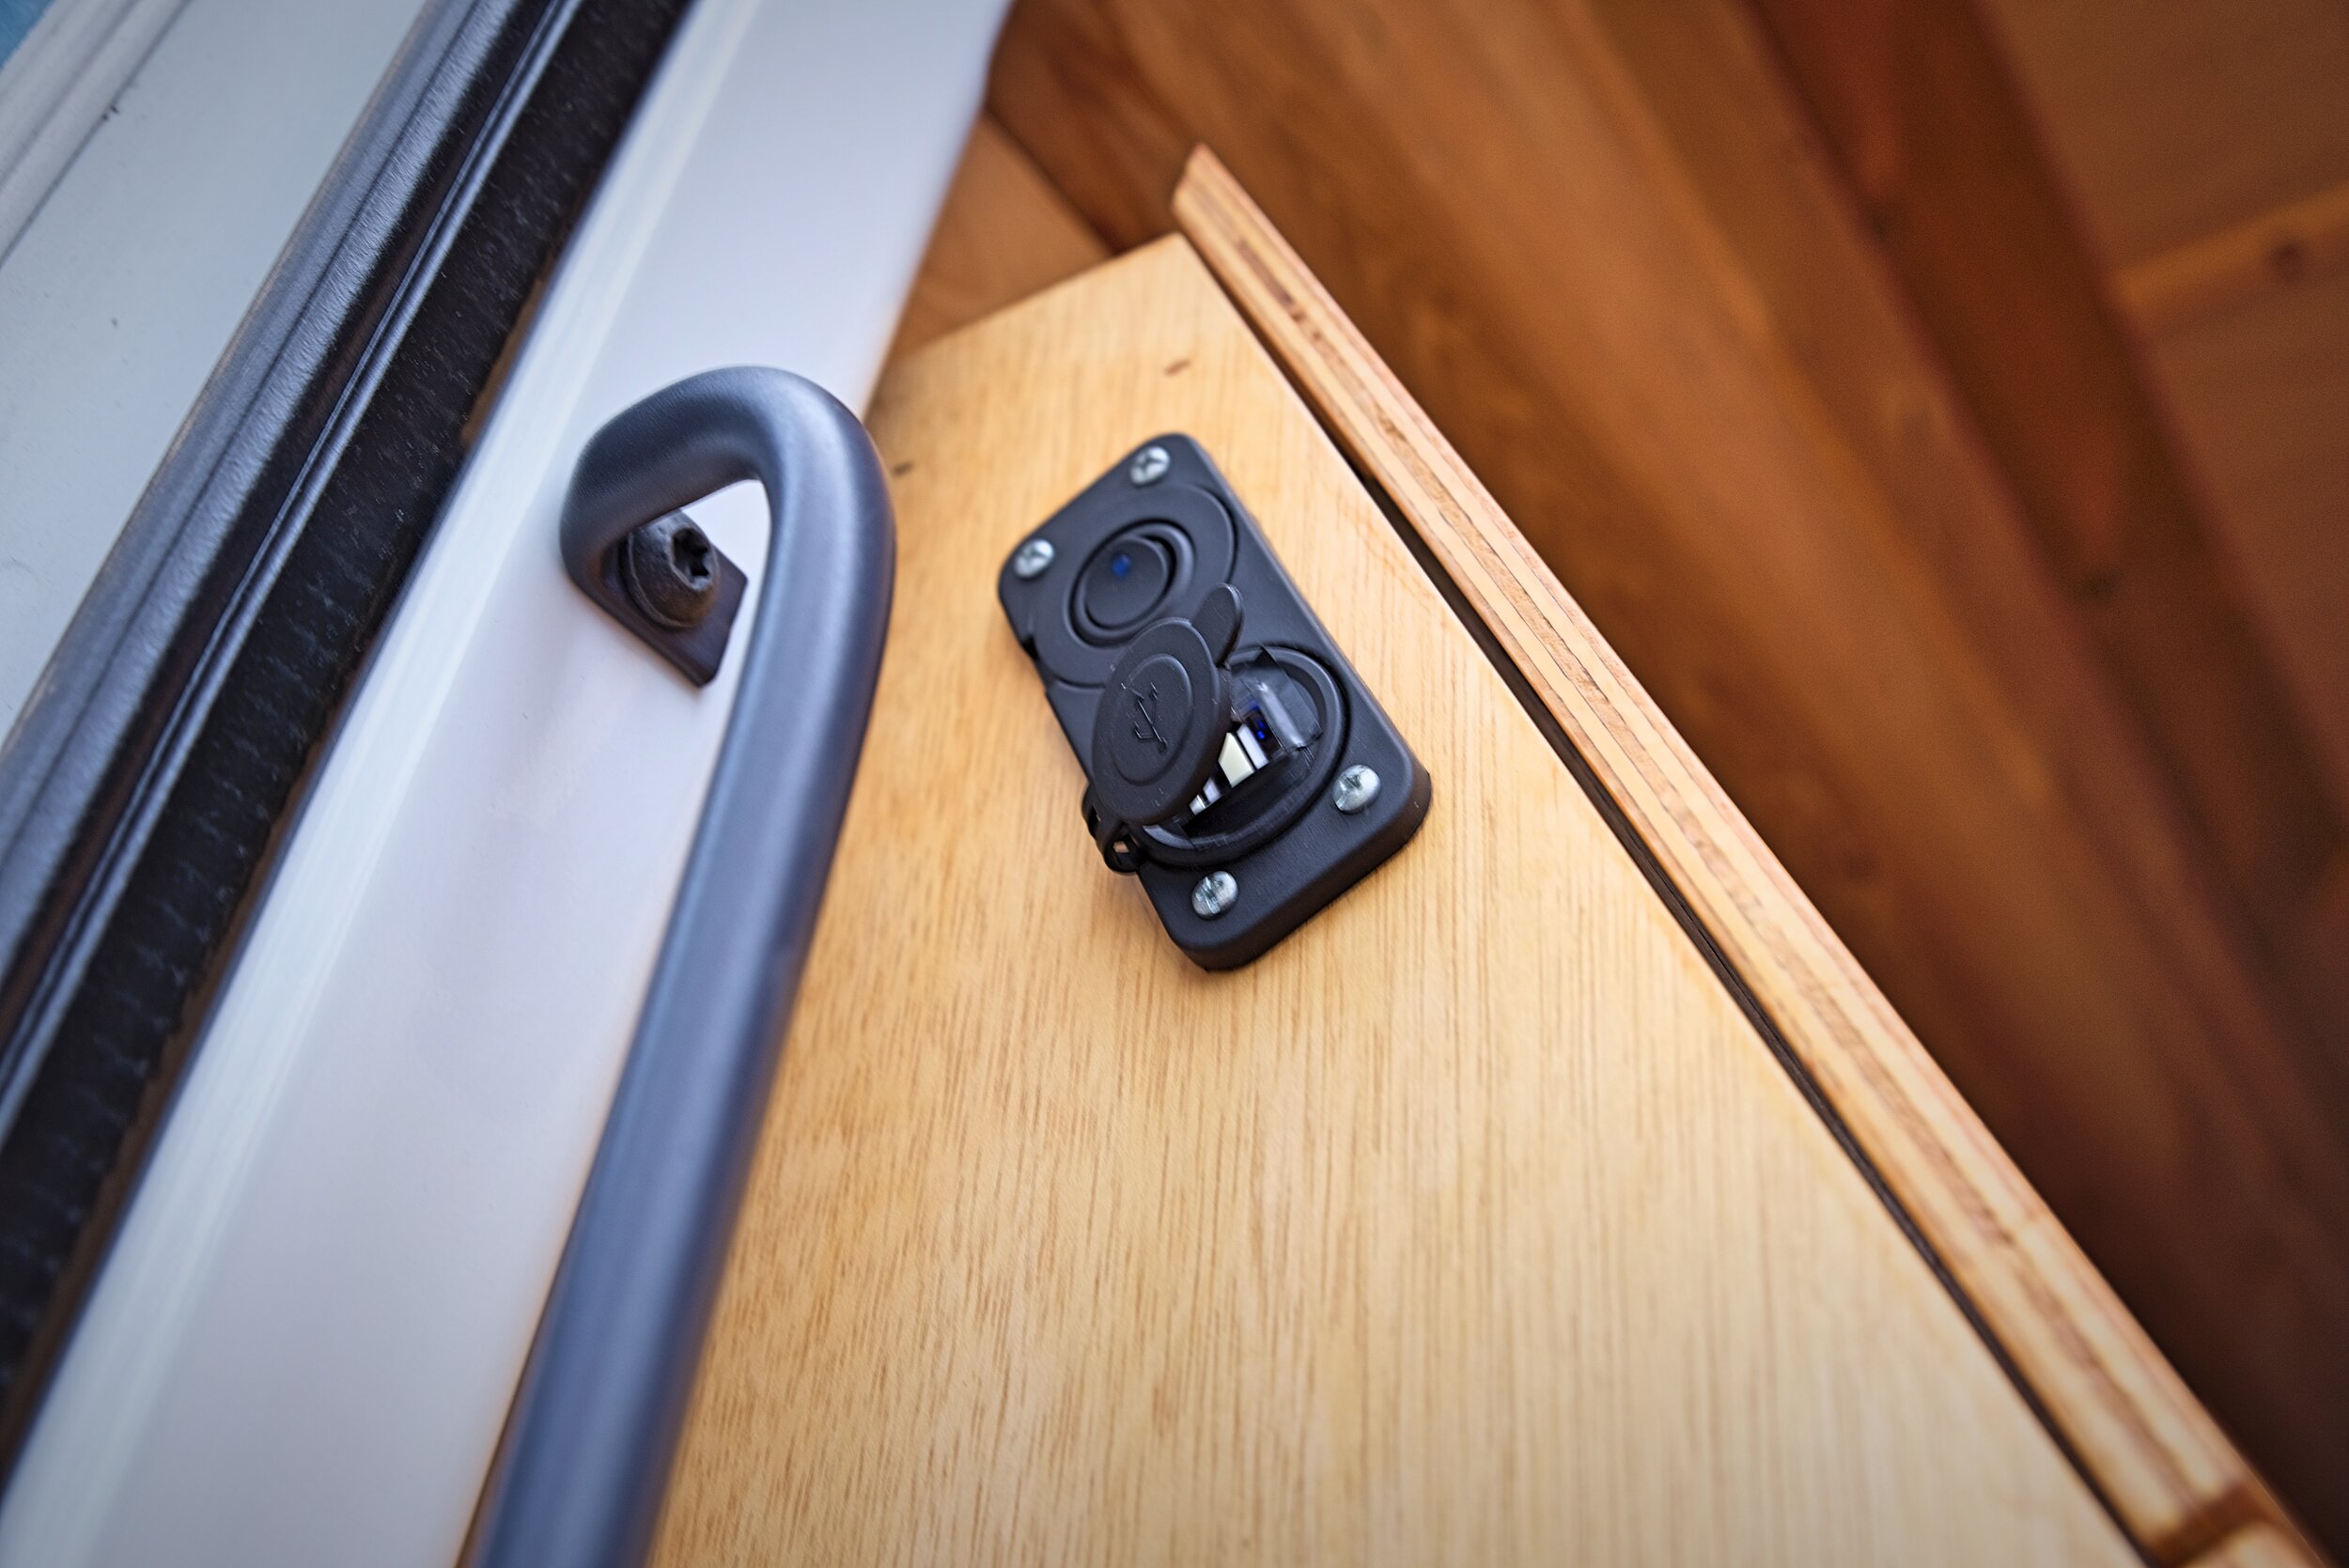
USB outlets are very handing for charging phones and other devices so we installed them through out our van.
Whenever possible we tried to charge our phones while driving to save our battery (not that we ever really needed to). You can also buy 12-volt adapters for many common devices like camera battery chargers or strings of lights. You can even small inverters that you can plug into your cigarette lighter to charge things like laptops. That’s another reason why we ultimately opted not to install an expensive solar-powered Renogy inverter.

Ian installing the 12v USB outlets in our camper van.

A spade bit is the perfect tool to use to install the round outlets and switches.
Voltmeter and Solar Meter
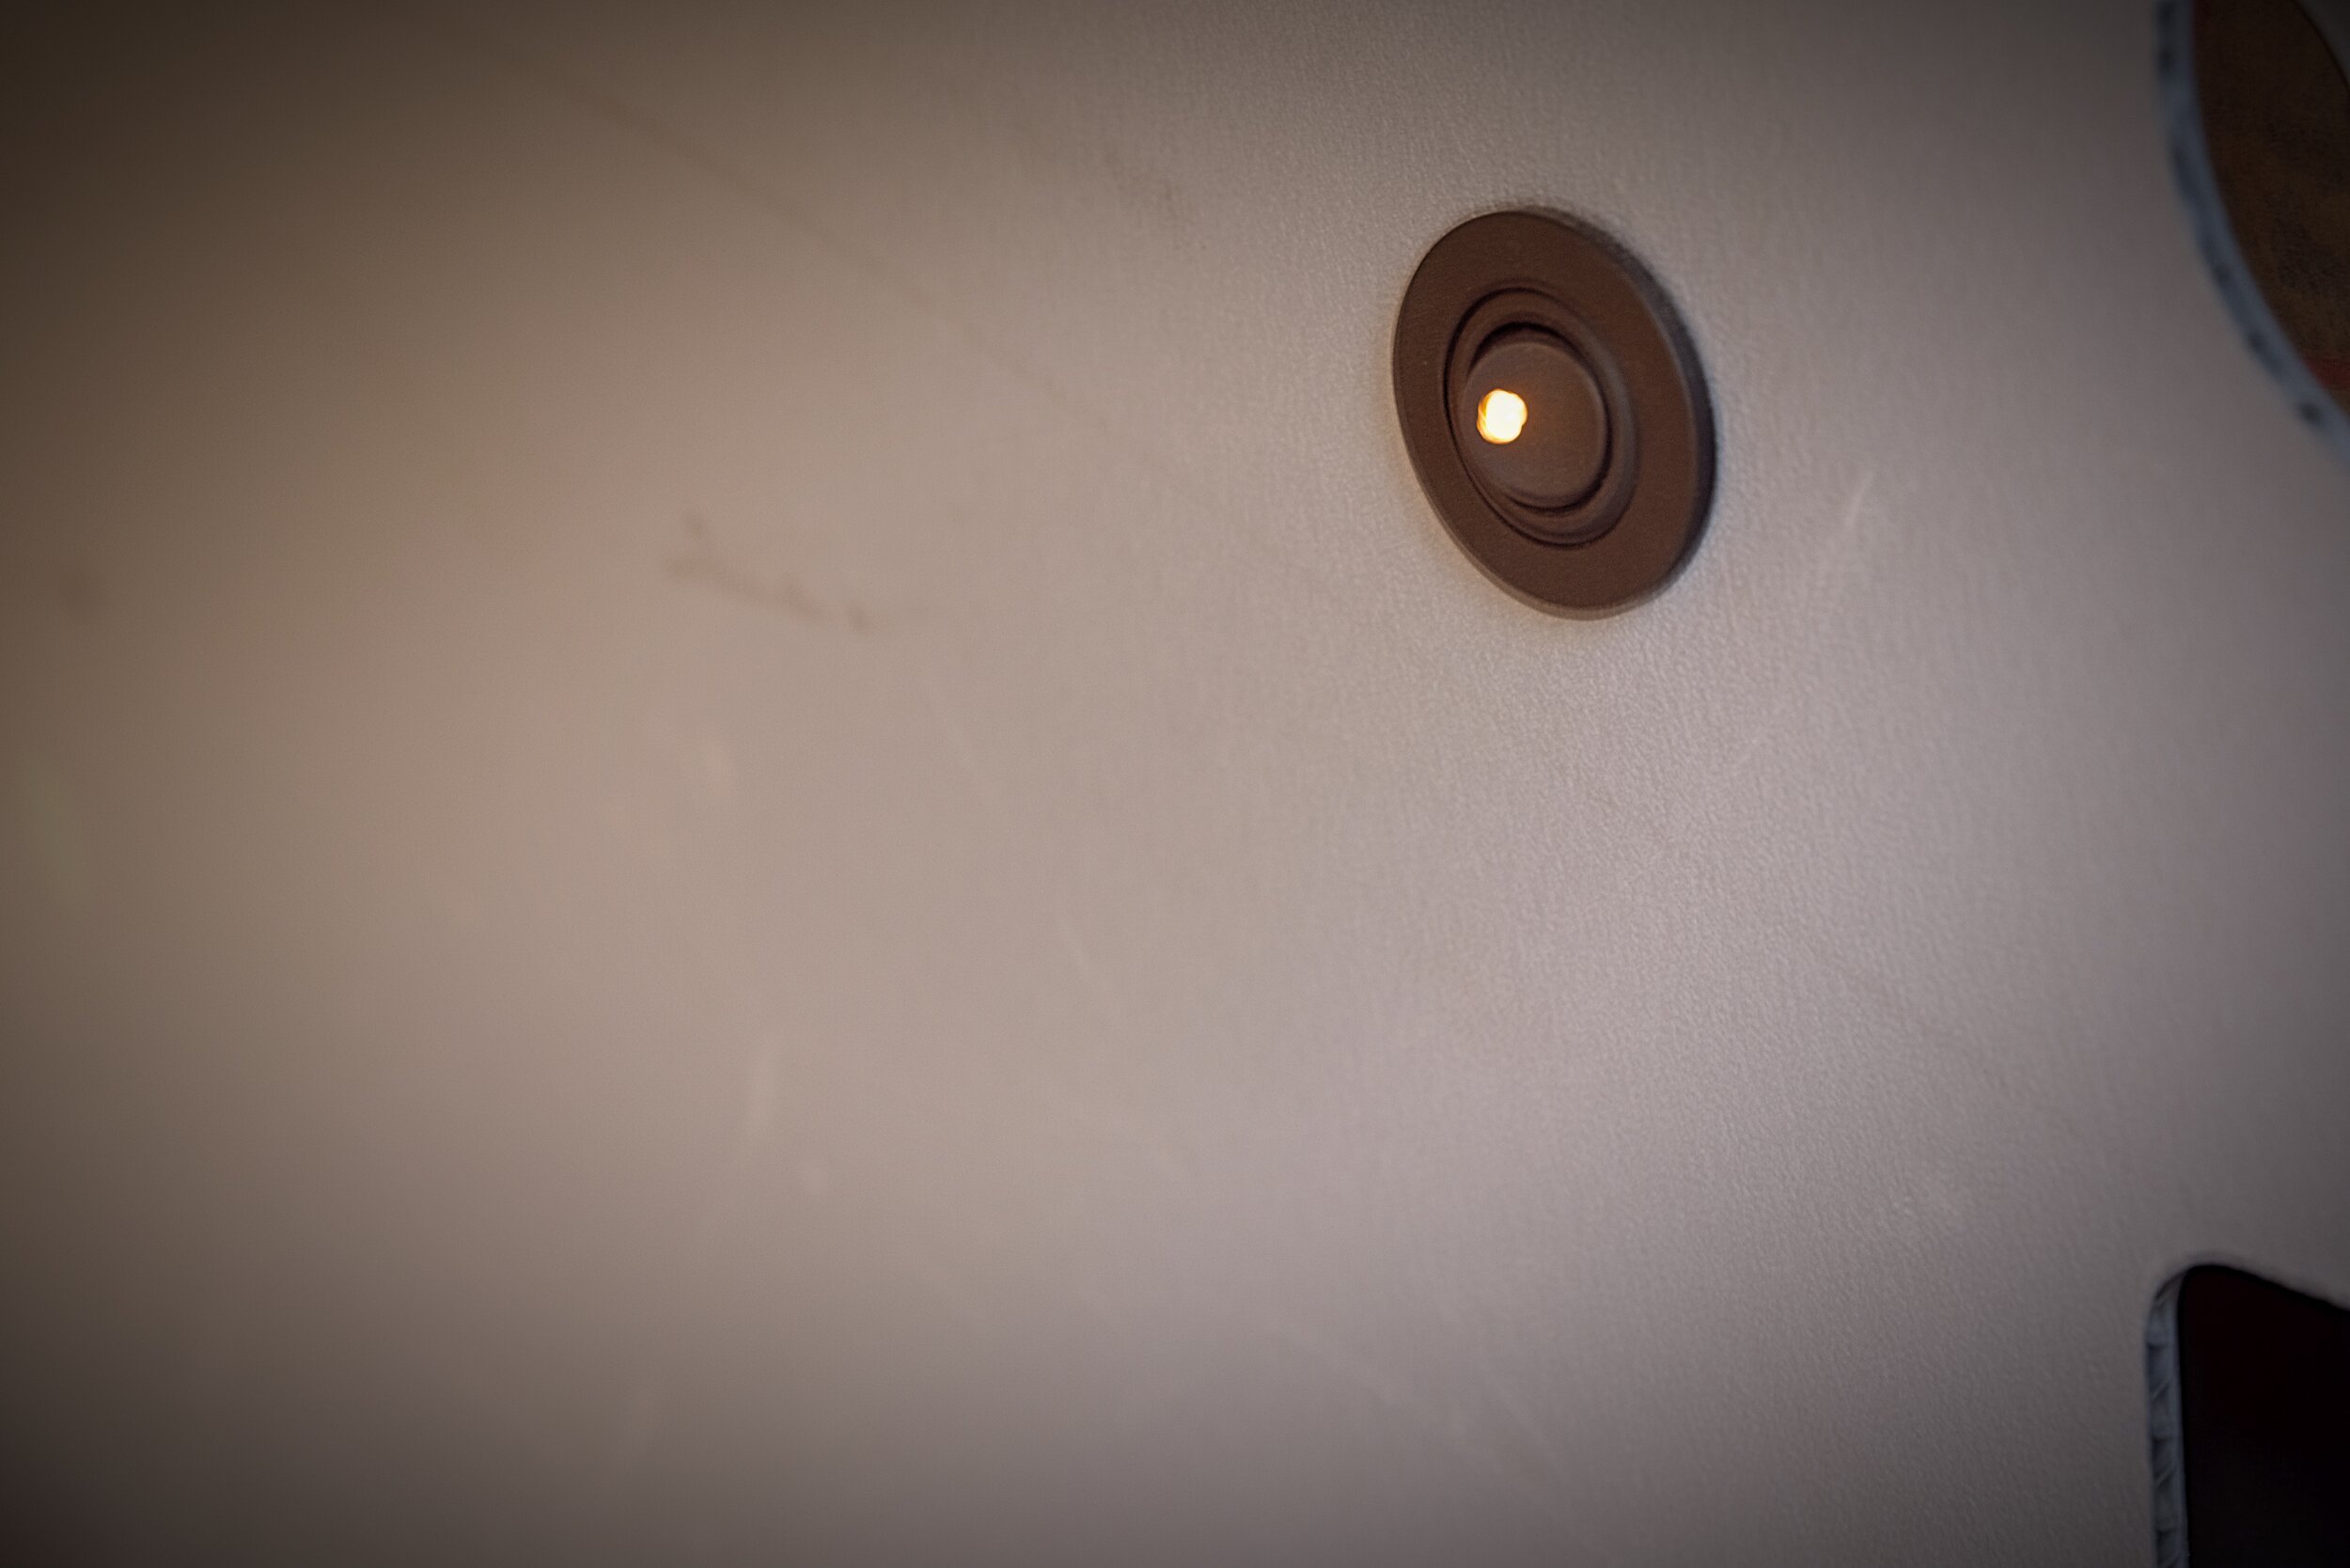
Along with the USB outlets in our bench, we also have a small voltmeter that we use to monitor the voltage of our battery to ensure that it’s running normally from a quick glance.

You can use this little solar voltmeter to quickly monitor how your solar array/battery is doing.
As previously mentioned, we also have a more detailed Renogy solar monitor that is connected to our solar charge controller. From this monitor we can tell how much voltage is coming in to the solar panels as well as how much we are drawing from the battery. There’s even a small smiley face that shows you the overall condition of the battery.

We installed this small solar meter in a place where we can easily see it.

The monitor shows you the voltage coming into your solar panels and going out from your battery to the load.
Fantastic Fan
We have a 1250-series Fantastic Fan in the kitchen area of our van. It has three speeds and is reversible so that you either pull air in or blow it out. We often left our fan running on low speed overnight for moisture or temperature control in our van. The fan fortunately does not draw too much power from our system (approximately 17Ah from our estimate).

Ian works on installing the fan in our camper van.

Our fan is essential for temperature and moisture control in our van.

Our Fantastic Fan has the second highest draw in our camper van solar system.
Although it is our second highest draw on our van’s battery, if we were to build our van again, we would have installed another fan above our bed so we could get some cross circulation without having to open the back doors. Read more about how we installed our fan.
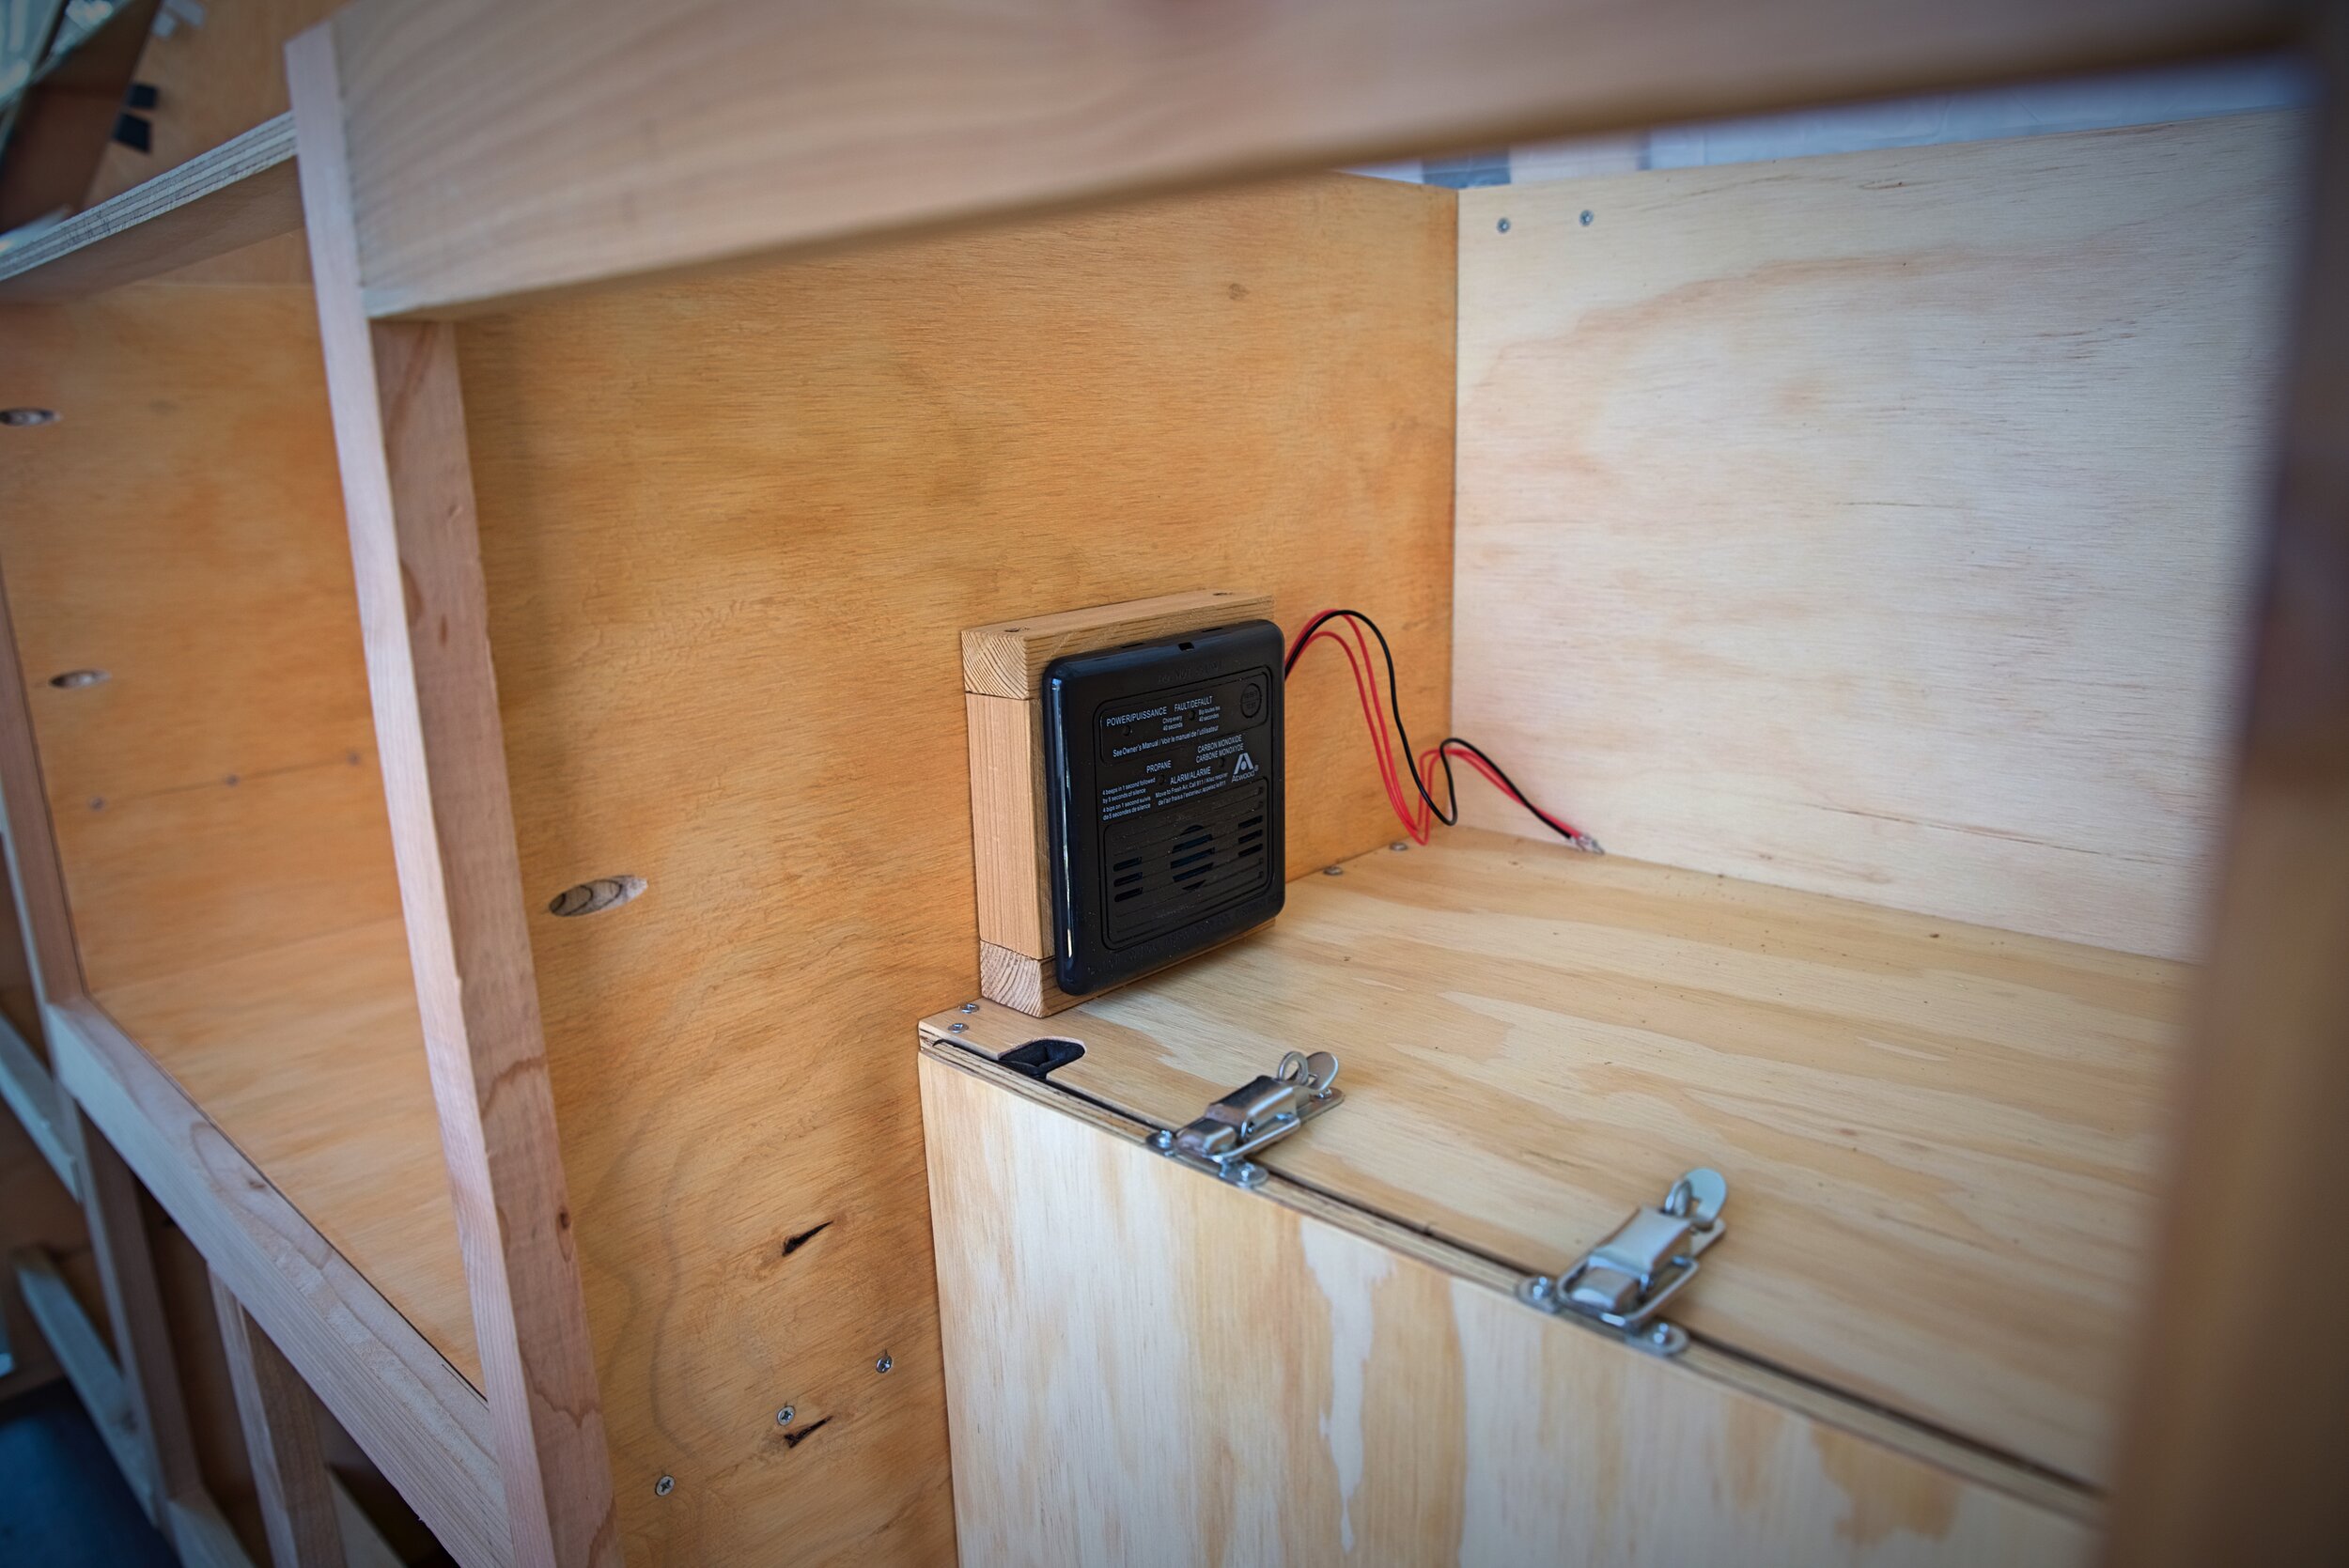
Propane Detector
We have a small 12-volt propane and CO detector in our propane locker. If you have a propane system, heaters, or a stove for cooking in your van, you should have a propane/CO detector. This detector runs 24 hours per day, but the draw is extremely low.

We have a small propane/CO detector above the locker that stores our 20-lb propane tank.

The propane detector has an extremely low draw even though it’s running 24/7.
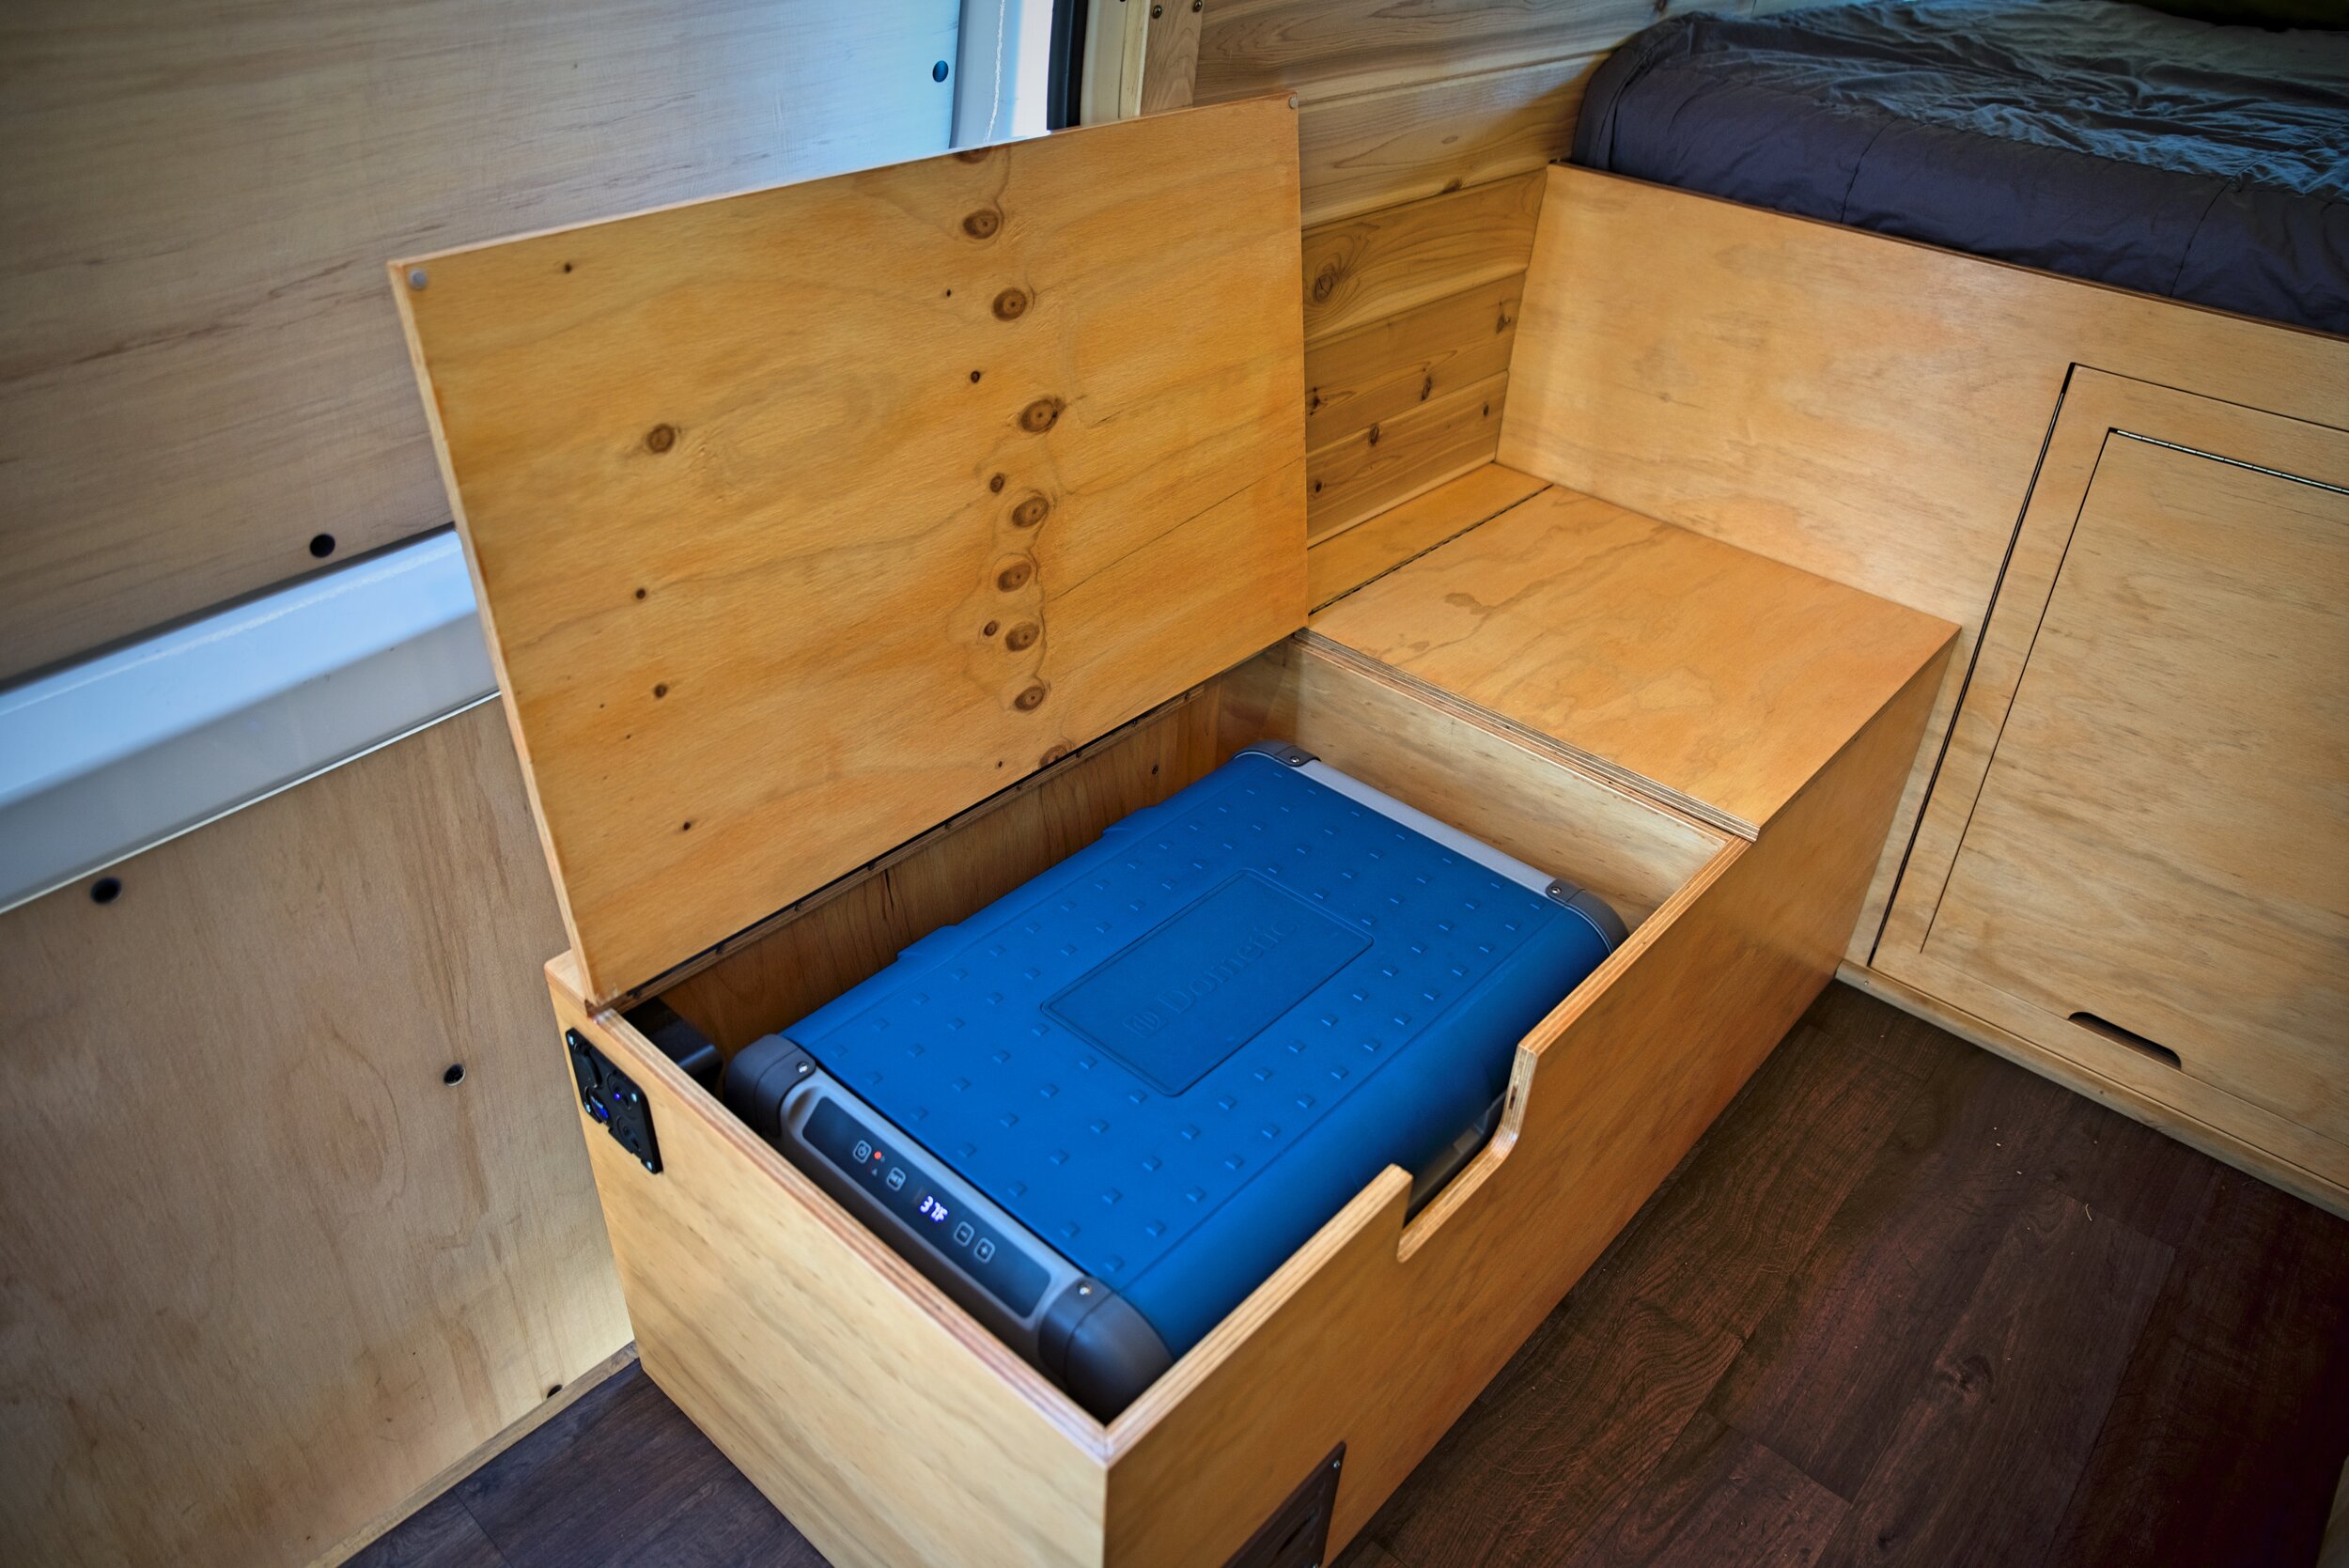
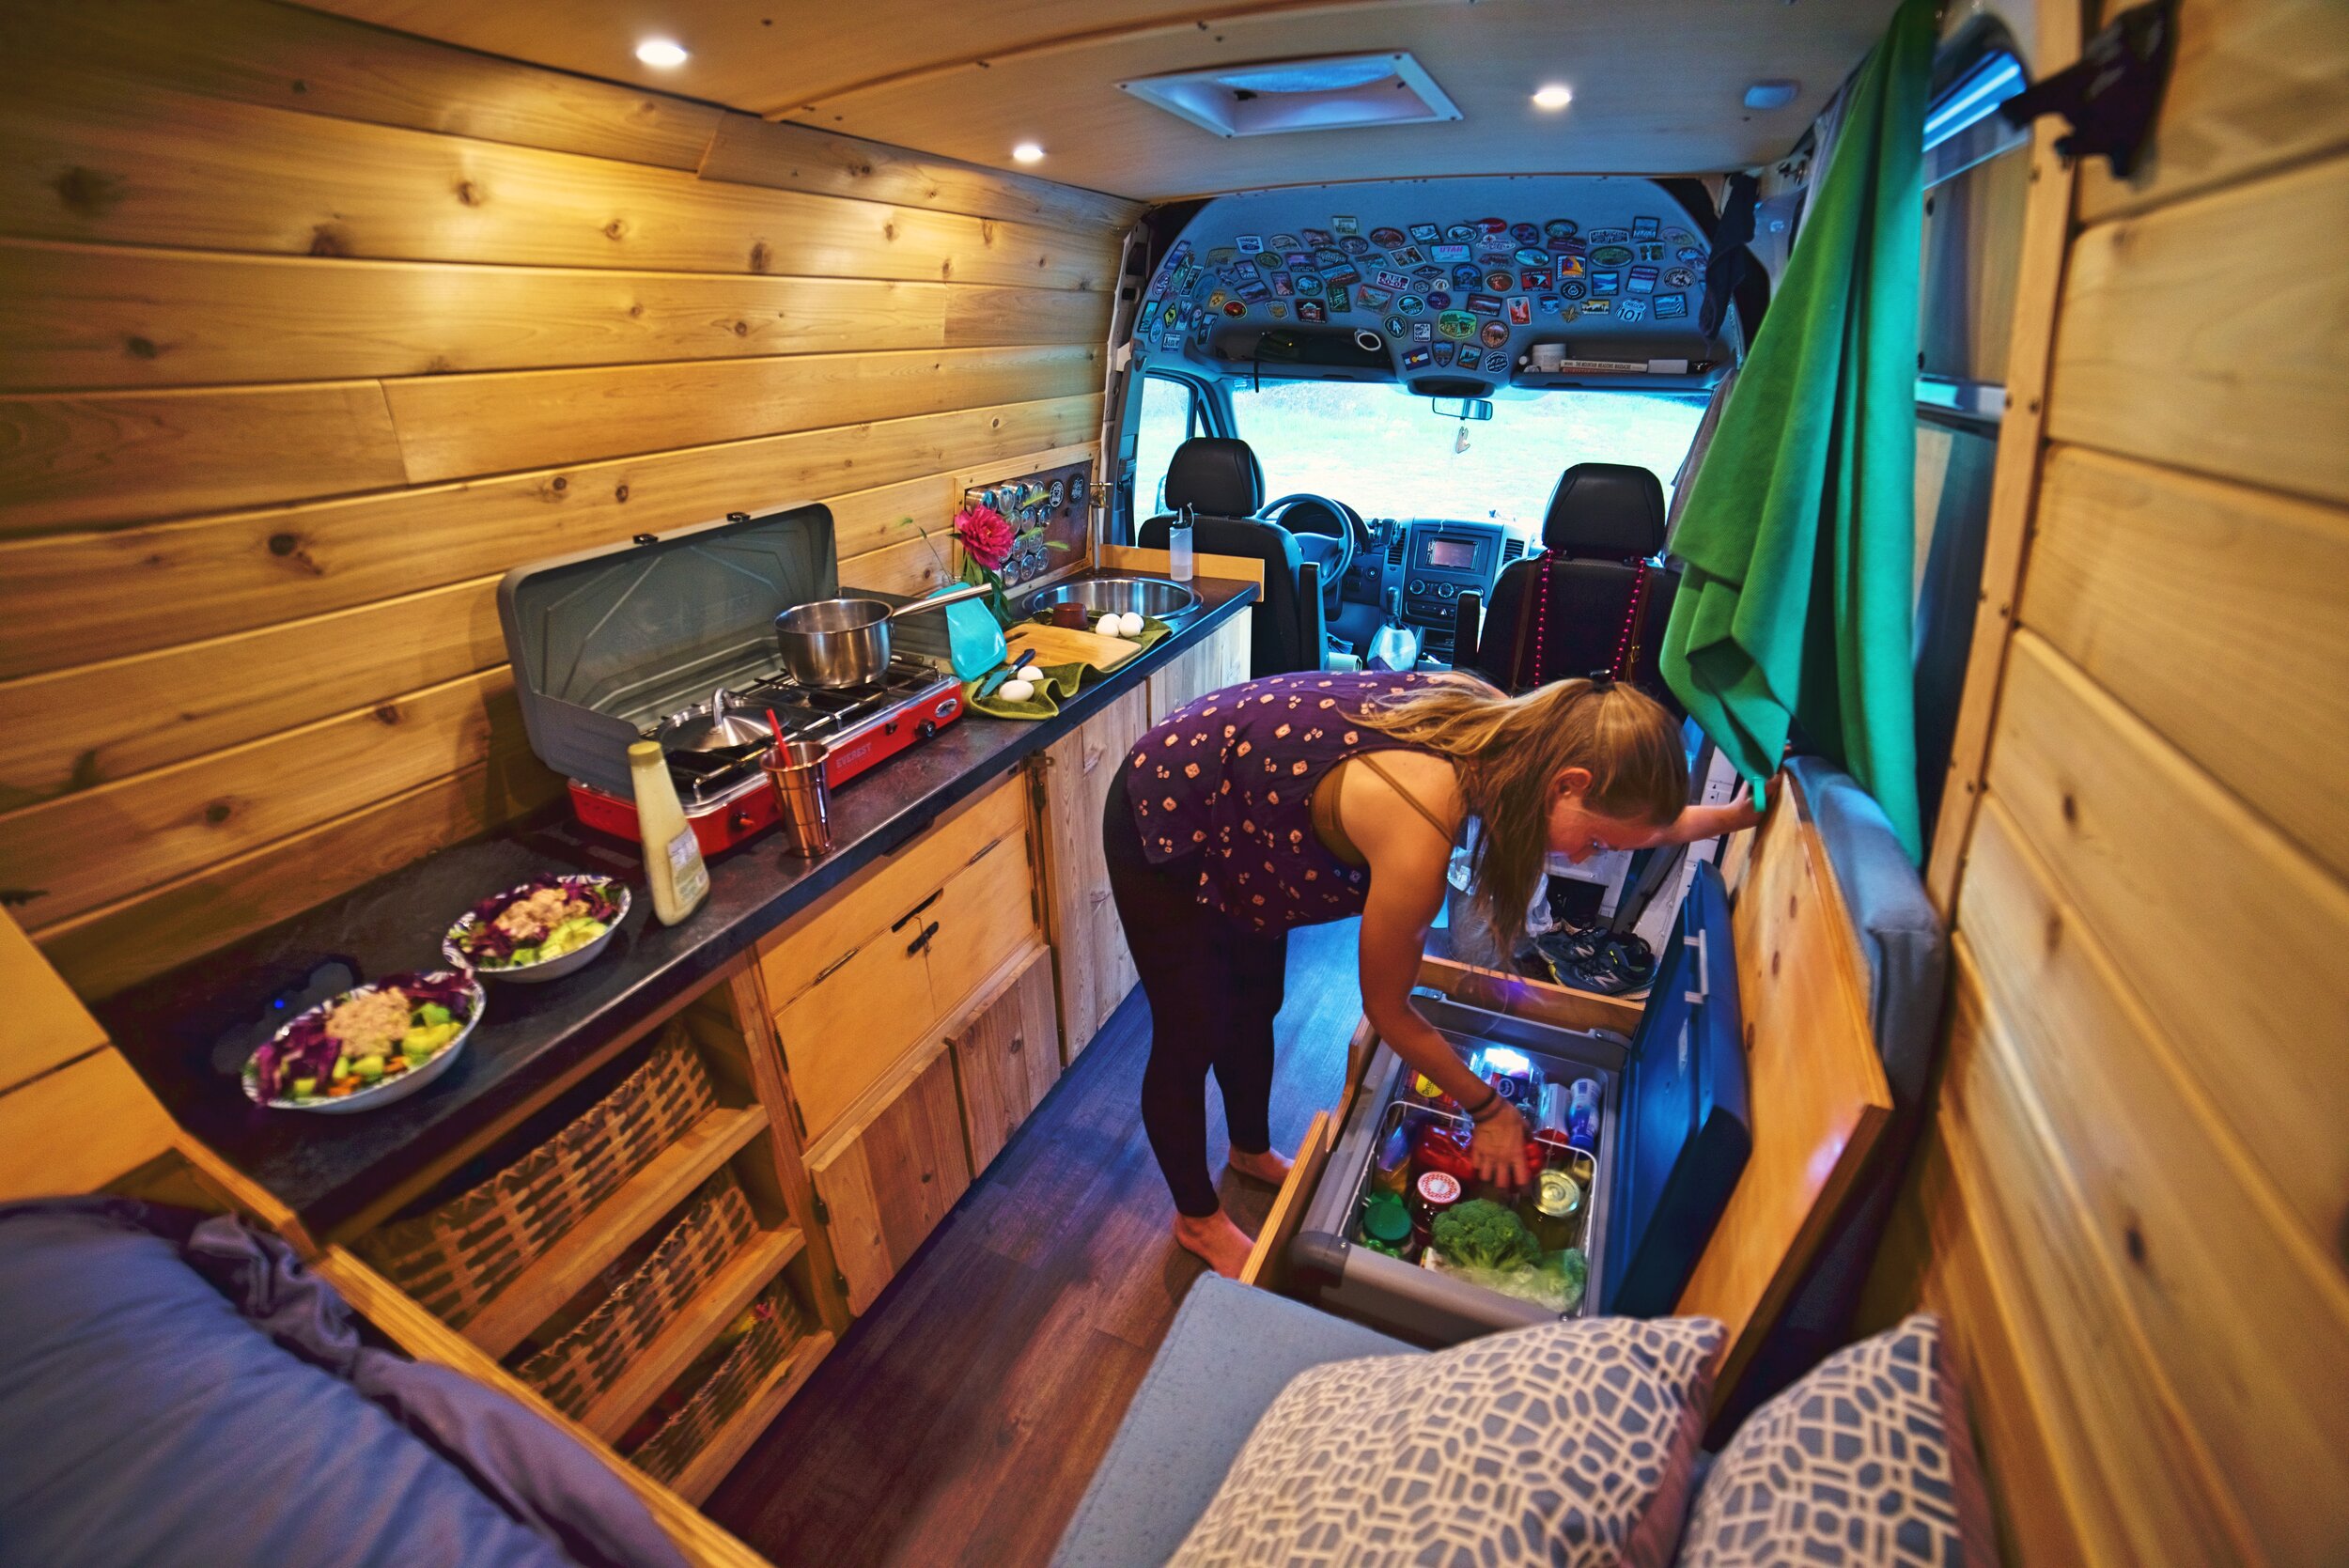
Dometic Fridge
Despite being impressively efficient, our fridge is our biggest draw on our solar power system. Having a fridge in your camper van is going to enable you to go off-grid for long periods of time without having to live off pasta and canned peas. If you want to power your van conversion exclusively with solar, you should get a high-efficiency fridge rather than just a typical mini-fridge like you’d find in your average RV. The extra cost you spend on your high-efficiency fridge will be saved in not having to buy a bunch of extra batteries and solar panels.
We have been highly satisfied with our Dometic fridge. It has 46 liters of capacity, which is bigger than you think. You can set the temperature anywhere from below freezing to into the 50s. There’s a low power setting in case your battery is running low. Plus it will not draw your battery below where it should be depleted. It also has adapters so you can plug it into your van’s cigarette lighter socket and even into a wall outlet. Dometic doesn’t make our exact model anymore, but the comparable model today is the CFX55.

Our high-efficiency fridge is essential to us being able to live off grid.

Spending more on a high-efficiency fridge will save you money on your solar system.
How Reliable is Solar Power?
We have found our solar power system to be extremely reliable for camping, boondocking and off-grid travel. We have never had any issues with our solar system, aside from having a fuse blow because it was the incorrect size.
Even on cloudy days, our battery will charge back up to full capacity. We actually really never noticed a difference on cloudy days. Winter is probably the time when we had to monitor our solar power most closely, because there are simply fewer hours of sunlight in the day, the sun is at a lower angle, and having snow or frost on your panels can block the sun’s rays.
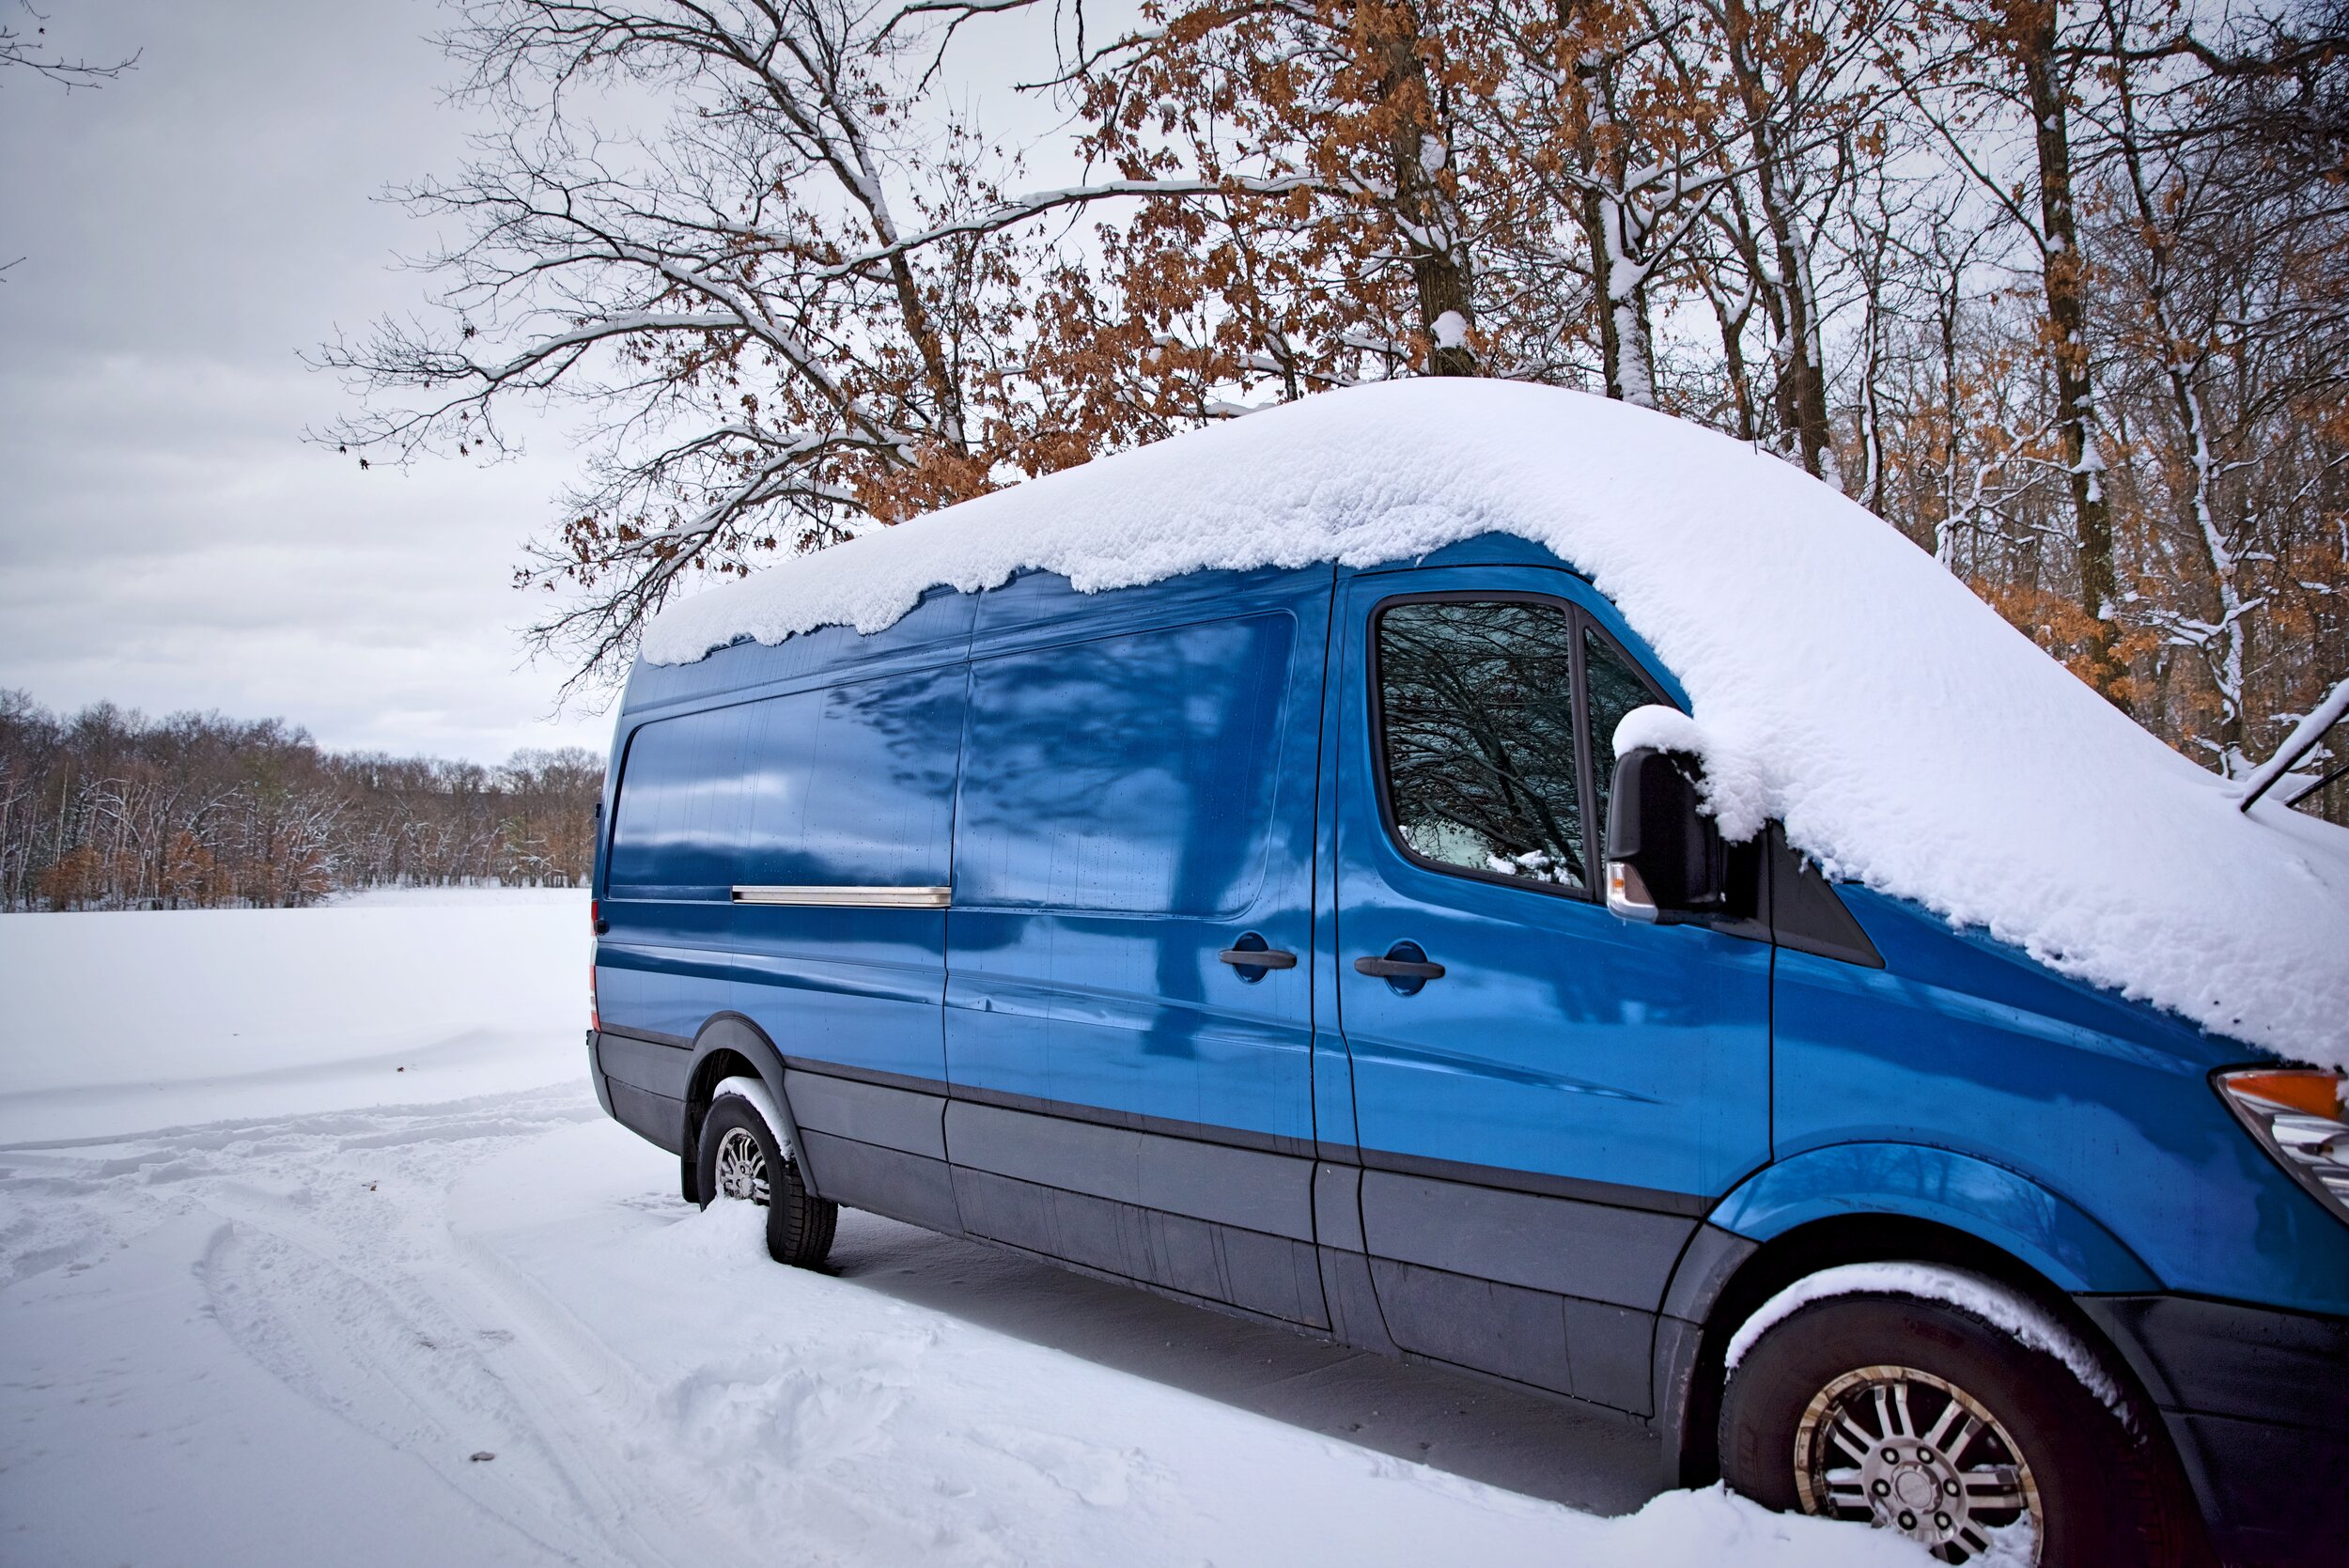
Snow and ice has actually been a greater detriment to our solar system than clouds.

Overall we have been extremely happy with how our solar panel has turned out.
Every now and again, you do need to clean off your solar panels with a soft microfiber cloth. It’s not nearly as often as a lot of people make it out to be. (You really do not need an expensive ladder screwed to the side of your van! But if you don’t have one, you won’t be a real vanlifer.) We clean ours maybe twice a year, or more often if we are in dusty conditions and it hasn’t rained. We just have a simple expandable ladder that we store under our bed and use to get up to the solar panels. Honestly we could probably get away without it. We could use our bed platform to allow us to boost ourselves up onto the roof.
Overall we have been very satisfied with the way we built the solar system for our van. Our solar system has been the right size and battery capacity for us.
If you have questions about building out your van or installing your solar system, get in touch with us here!
If you have questions about your own solar/electrical system for your camper van conversion, feel free to get in touch with us!