Fridge Storage Bench
Our fridge storage bench stores our food and other items, provides a comfortable place to sit, and works in tandem with our table.
When designing our van, we knew we needed a place to sit, a place to keep our fridge, and other storage space. Since our fridge is a Dometic, 12-volt, super efficient, chest fridge, it's the perfect size and shape to be stored inside a bench. We decided to build a bench in our van with a hinged lid that holds our fridge and gives us extra storage space as well.
Tools
Tape measure, yardstick, speed square, etc.
Materials
3/4", 7-ply, sanded plywood (about 1-1/2- 4’x8’ sheets)
3/4” continuous hinges (about 90 inches)
MDF board (two small pieces)
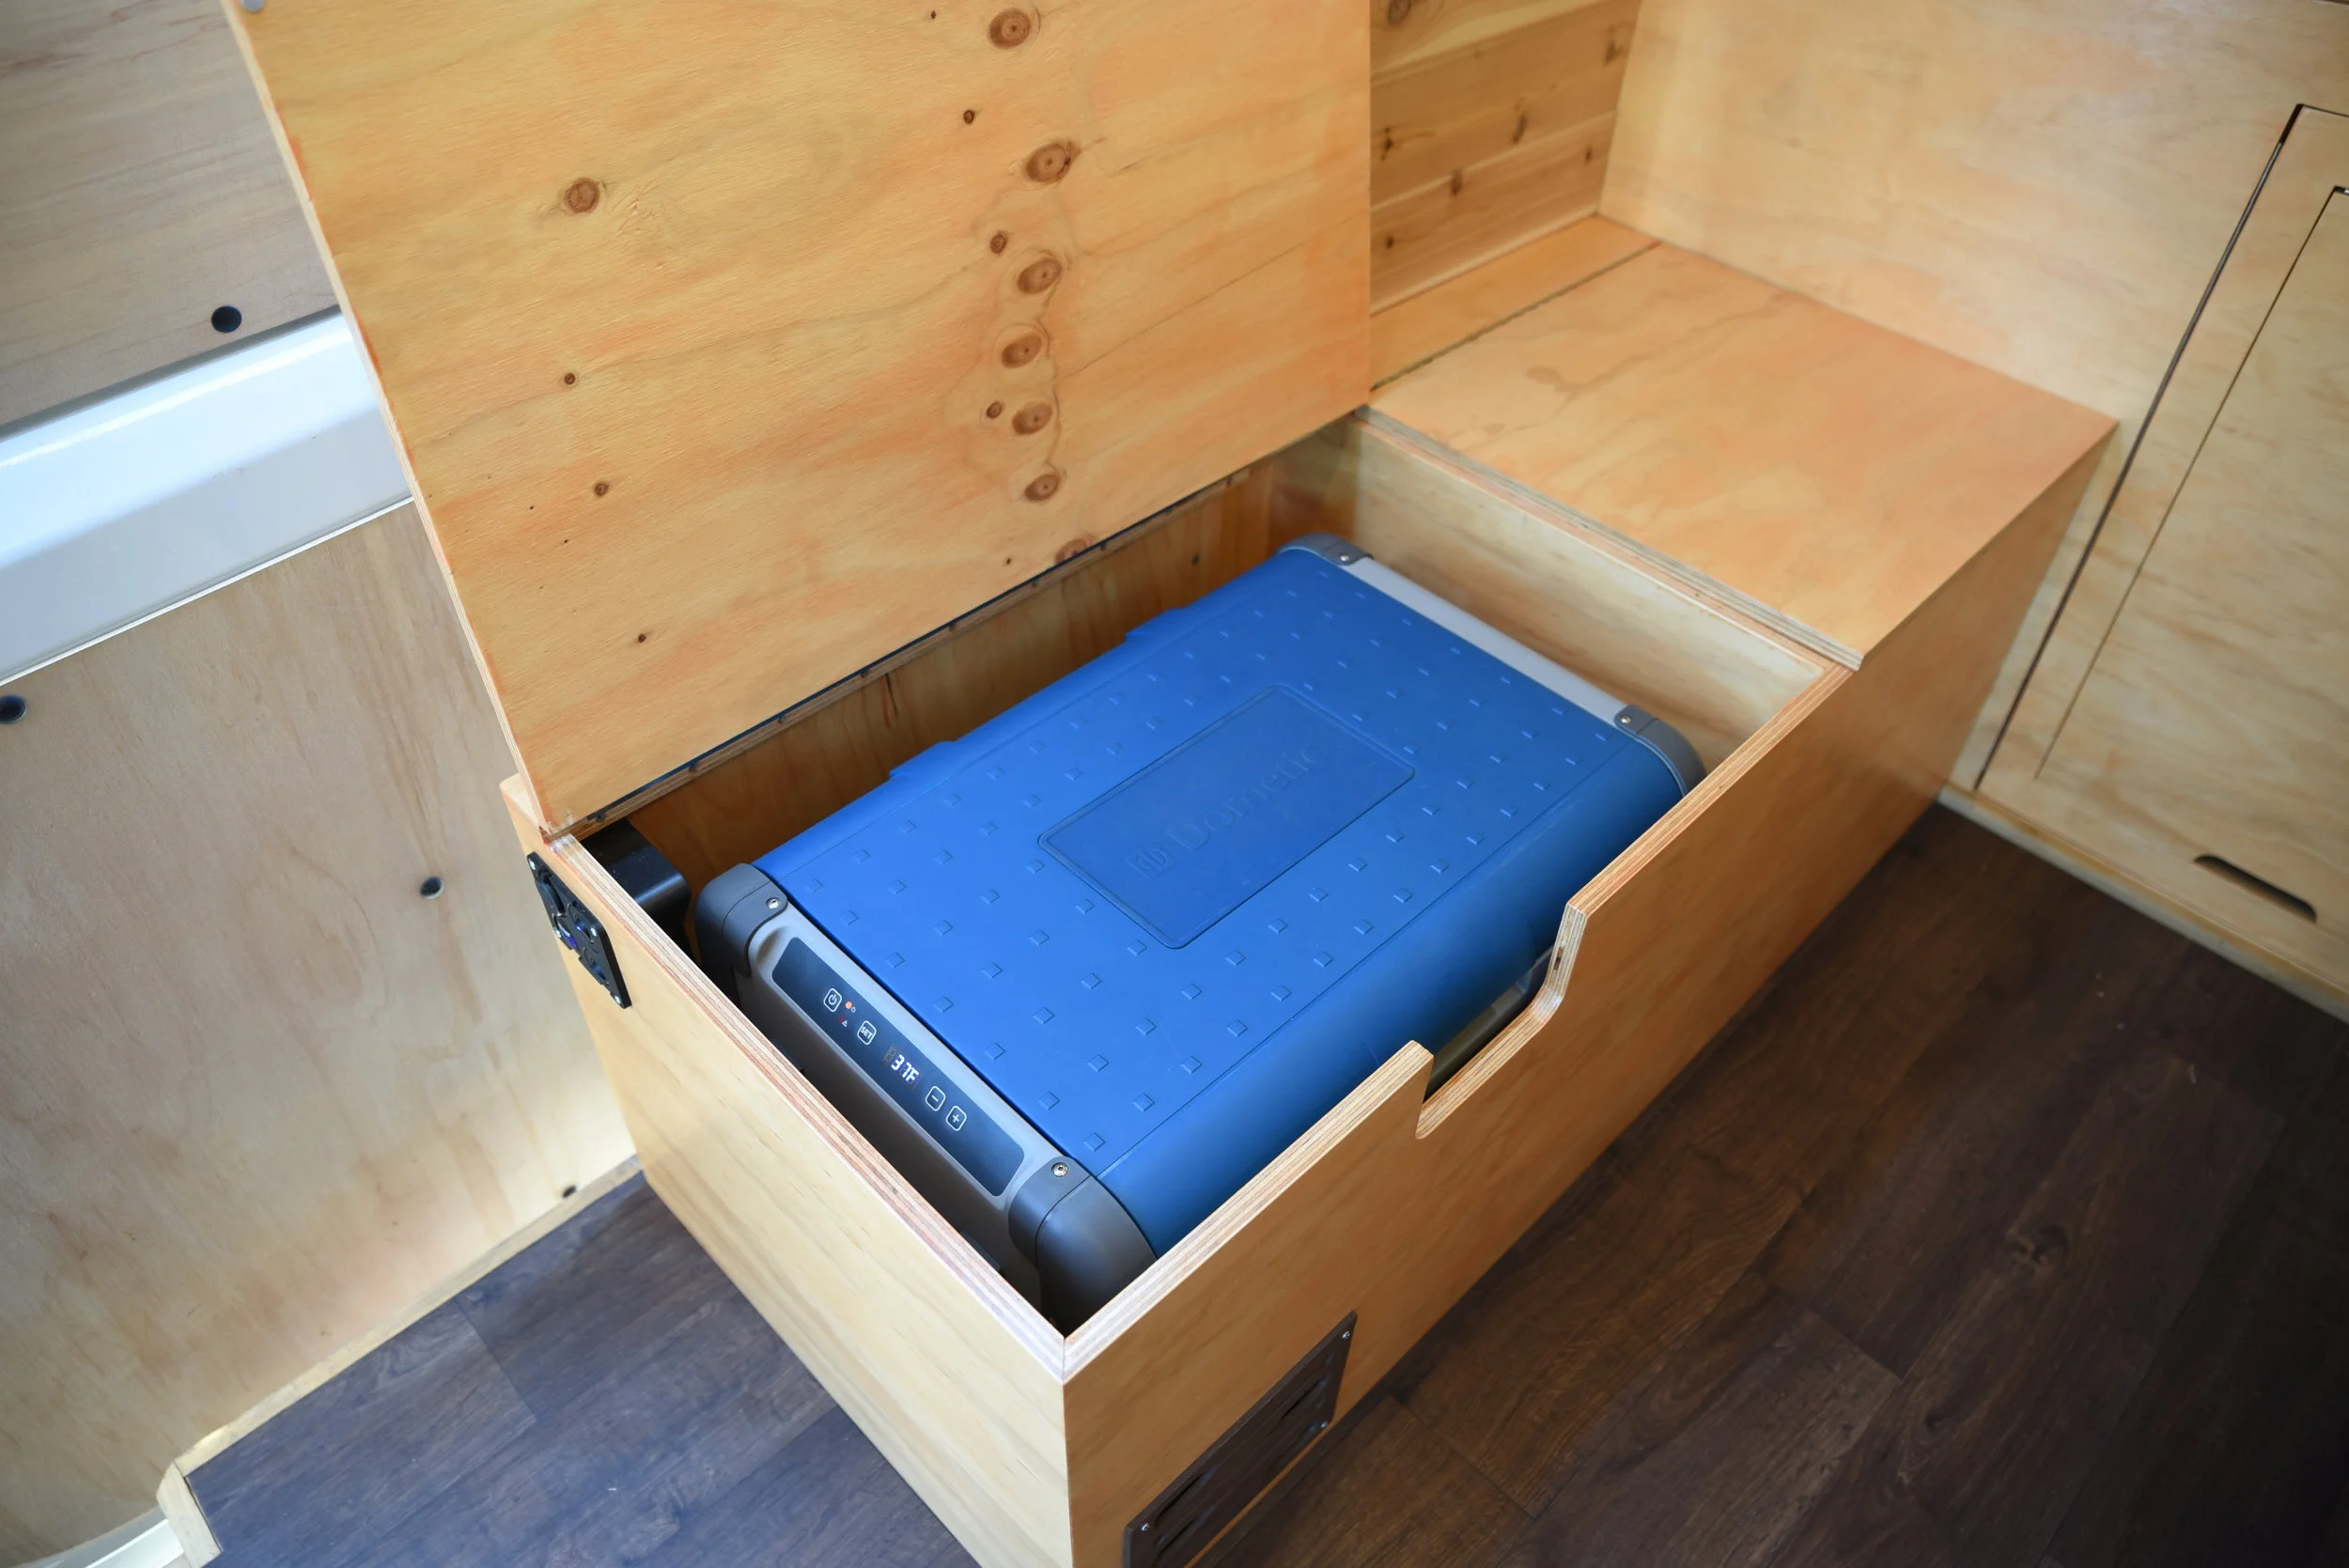
The bench in our van has two large compartments within it. The larger compartment holds our fridge and the smaller compartment is a large storage space that we use to store items like shoes, extra sheets, and our laundry basket, along with other miscellaneous items. The top of the bench hinges up in two separate lids so that we can access the fridge and the stuff in the other compartment.
The height and width of the bench were determined by the size of our Dometic fridge. The bench had to be wide enough to slide the fridge in with the lid of the bench open. The height of the bench had to be tall enough to fit the fridge without the lid resting on the top of the fridge. We didn't want any weight or pressure to be on the fridge when we were sitting on the bench, because over time that could break down the seals that make the fridge so efficient.
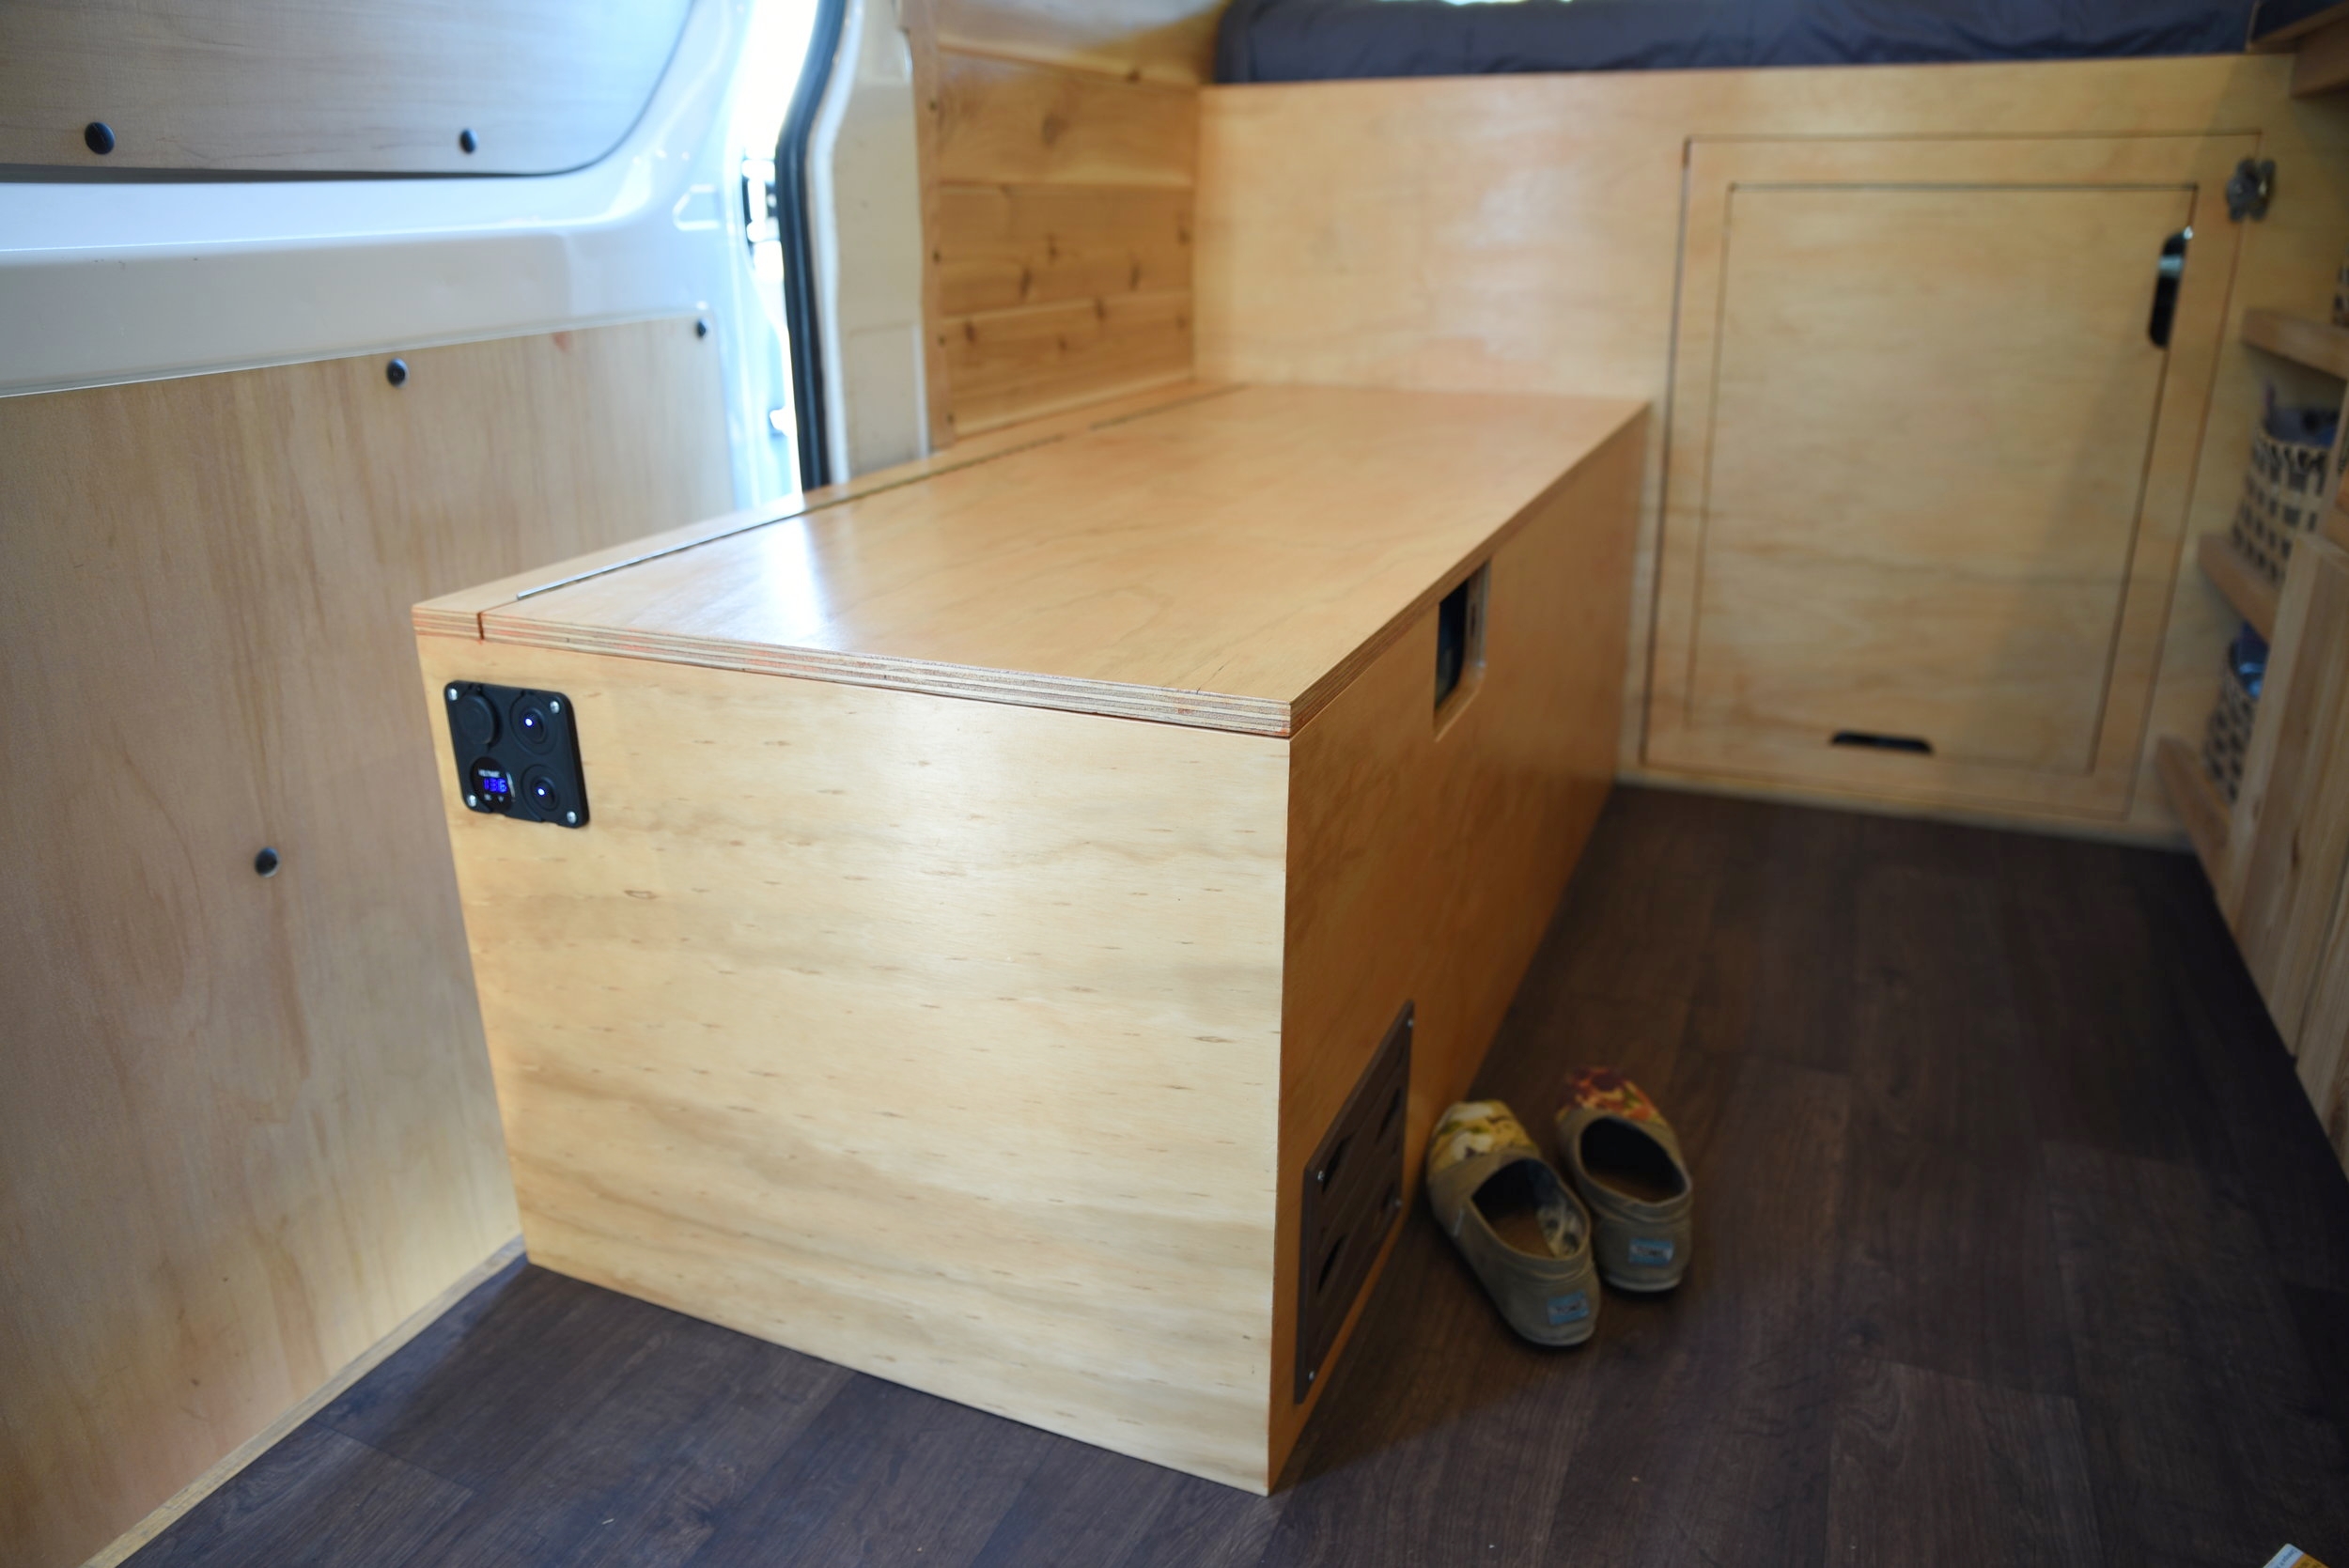
We decided that the fridge storage bench should stick out into the side door opening of the van a little bit so that you could sit on the bench and face out of the doorway if you wanted. By making the bench longer and allowing it to go into the sliding doorway, we were able to get some extra storage space inside the bench as well.

Ian carefully measures each piece of the fridge storage bench on a piece of 3/4-inch plywood.

Ian cuts the pieces of the fridge bench with his circular saw, using a fence made of another board in order to keep the cuts straight.
We made the fridge storage bench from a high quality 3/4-inch sanded plywood. We cut the pieces using a handheld circular saw and used a fence attachment to keep the cuts straight. We joined the corners of the bench at 45-degree angles (a miter joint), so it was especially important to keep these cuts straight. Any gaps or wavers become very visible in a long miter joint like we have on the bench.
Once we had all the side pieces of the bench cut, we test fit the bench inside the van to make sure the size worked and was to our liking. We put the fridge in as well to make sure that it would work out well within the bench. We also had to specifically test fit the back piece of the bench. The wall of the van on the door side, which the bench sits against, has a large notch in it, so we had to build the bench's back piece to match this notch. The back piece is actually made from two pieces of plywood, with a thin strip screwed in between as a spacer.

We test fit the bench within the van, and we also test fit the fridge within the bench.

We used corner clamps to keep the piece together while test fitting it.
After test fitting the fridge, we added an opening to the front of the bench where the fridge's handle is. This allows us to open the fridge and the lid of the bench together with one hand. We used a coping saw to cut this opening, and we smoothed it out with files and sandpaper.
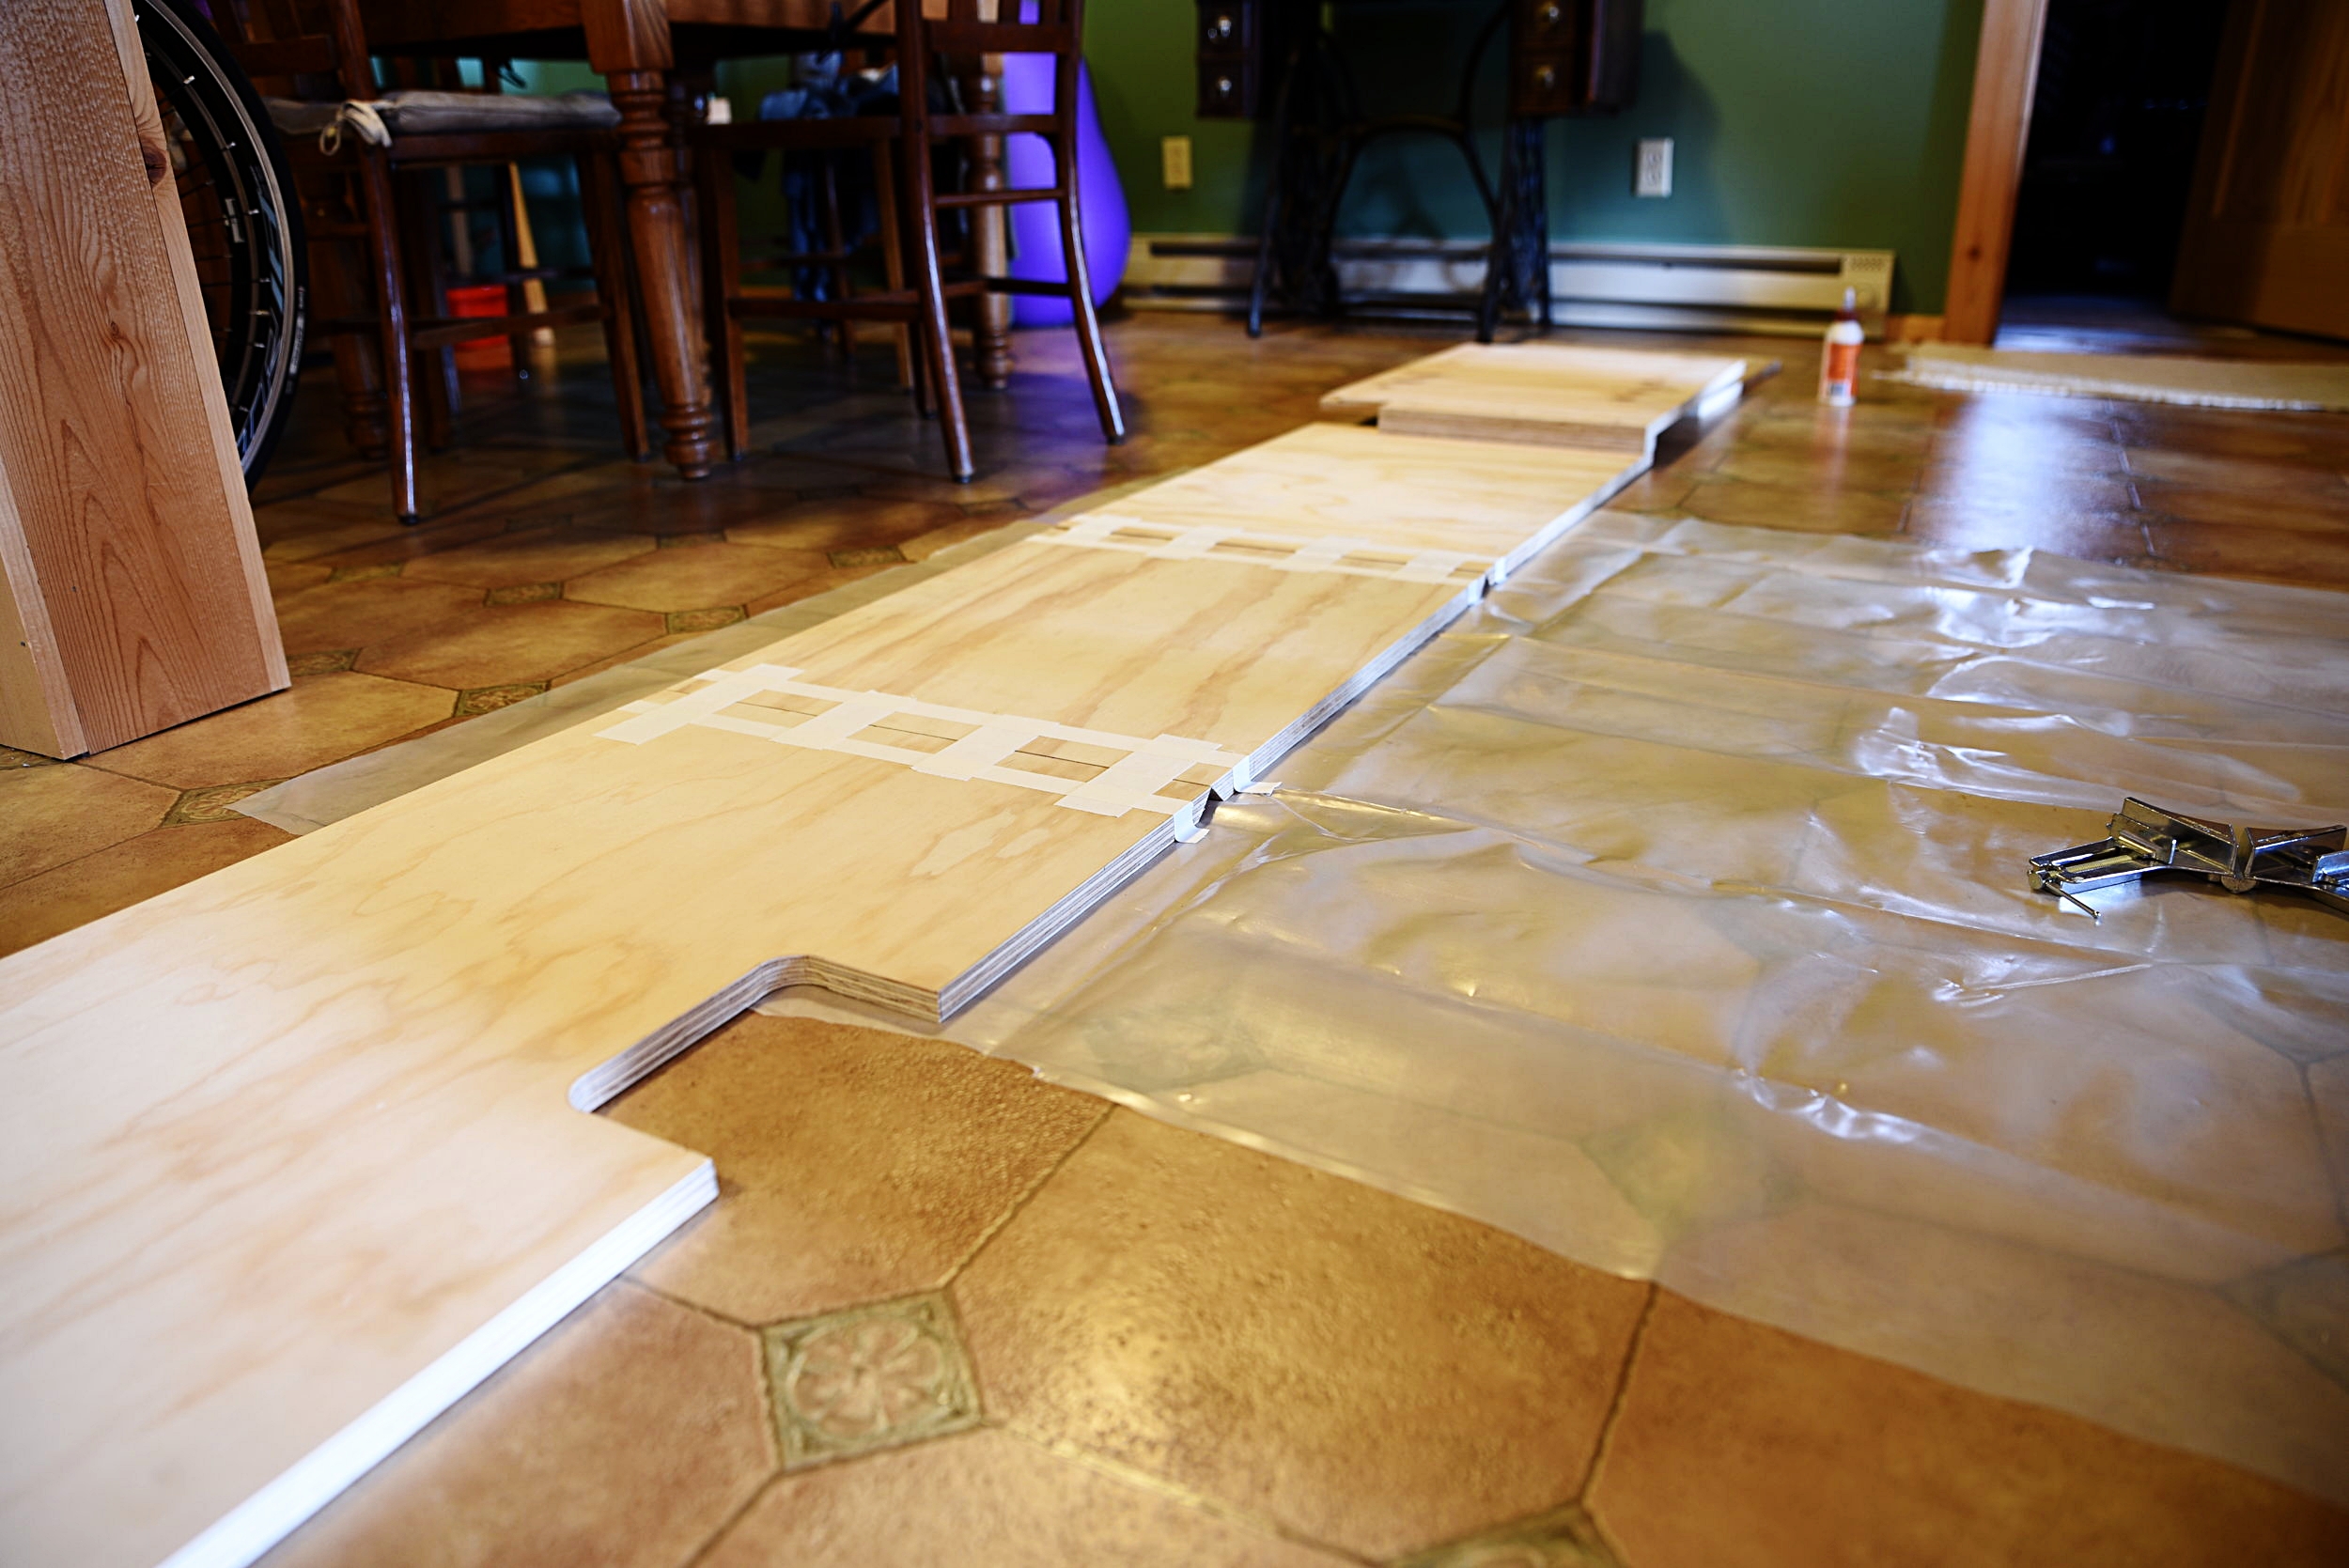
The bench taped and ready to be folded like a piece of origami.

Taping the corner prior to gluing helped prevent unsightly gaps from forming along the miter joint, especially since the joints were so long.
After successfully test fitting the side pieces of the bench and cutting the handle opening, we took them inside to put together. Since the corners were joined with 45 degree miter joints, we wanted to make sure they were joined neatly and aligned correctly. We used Gaffer Tape to tape each corner together, in the correct order. Then we flipped the taped together bench over, put wood glue in each corner, and folded it up like origami.
We set the bench upright, attached corner clamps to keep the corners square, and let the glue dry overnight.

Ian paints wood glue into the 45 degree corner joints. The 45 degree joints give the bench a really nice seamless look.

In this photo you can see the spacer in the back of the bench to make the back piece offset to match the notch in the wall of the van.
Finally we reinforced the corners further by adding angle brackets to the inside. Then we attached the center upright that divides the two compartments of the bench by screwing through the back wall and by using angle brackets in the front.

This handle cut into the bench, allows us to open the lid of the bench and the lid to the fridge all in one smooth movement.

The 45-degree corner joints are reinforced with aluminum angle brackets--strong on the inside and stylish on the outside!
Then we attached the lid pieces to the top of the bench with continuous hinges (also called piano hinges). We spaced the hinges away from the back edge of the bench with a strip of wood, so that when we open the lids them they can rest against the wall of the van and they don't fall closed.
This narrow strip of wood was reinforced with another strip of wood screwed underneath it. Then this strip of wood was used to connect the lids to the box with screws. By attaching the lid with these hidden strips inside the box, we were able to keep the screws hidden.

The lids of the bench, attached and hinged with continuous hinges, and ready for finishing.

These strips of wood are used to attach lids of the bench to the box structure of the bench while keeping the screws hidden inside of the bench.
After the bench was totally constructed, we finished it in the same way that we finished our bed platform and other aspects of our cabinetry. We chose a light but warm color called "Honey Pecan," that complements the unfinished cedar in our van.
We first had to sand the bench thoroughly with a medium grit sand paper. You will also want to sand lightly between each coat of finish. The first coat that we used was Varathane One Step Water-based Stain and Polyurethane. By using a stain and poly combo, we were able to cut the staining step out of our finishing process, saving us a ton of time. It was really an added convenience to us, since finishing and sealing was one of the more time consuming aspects of the build.
Polyurethane is most easily applied with a nylon-bristle brush. The next two coats we applied were a clear water-based polyurethane with a satin finish. When using polyurethane, you need to make sure your coats are either all water-based or all oil-based.
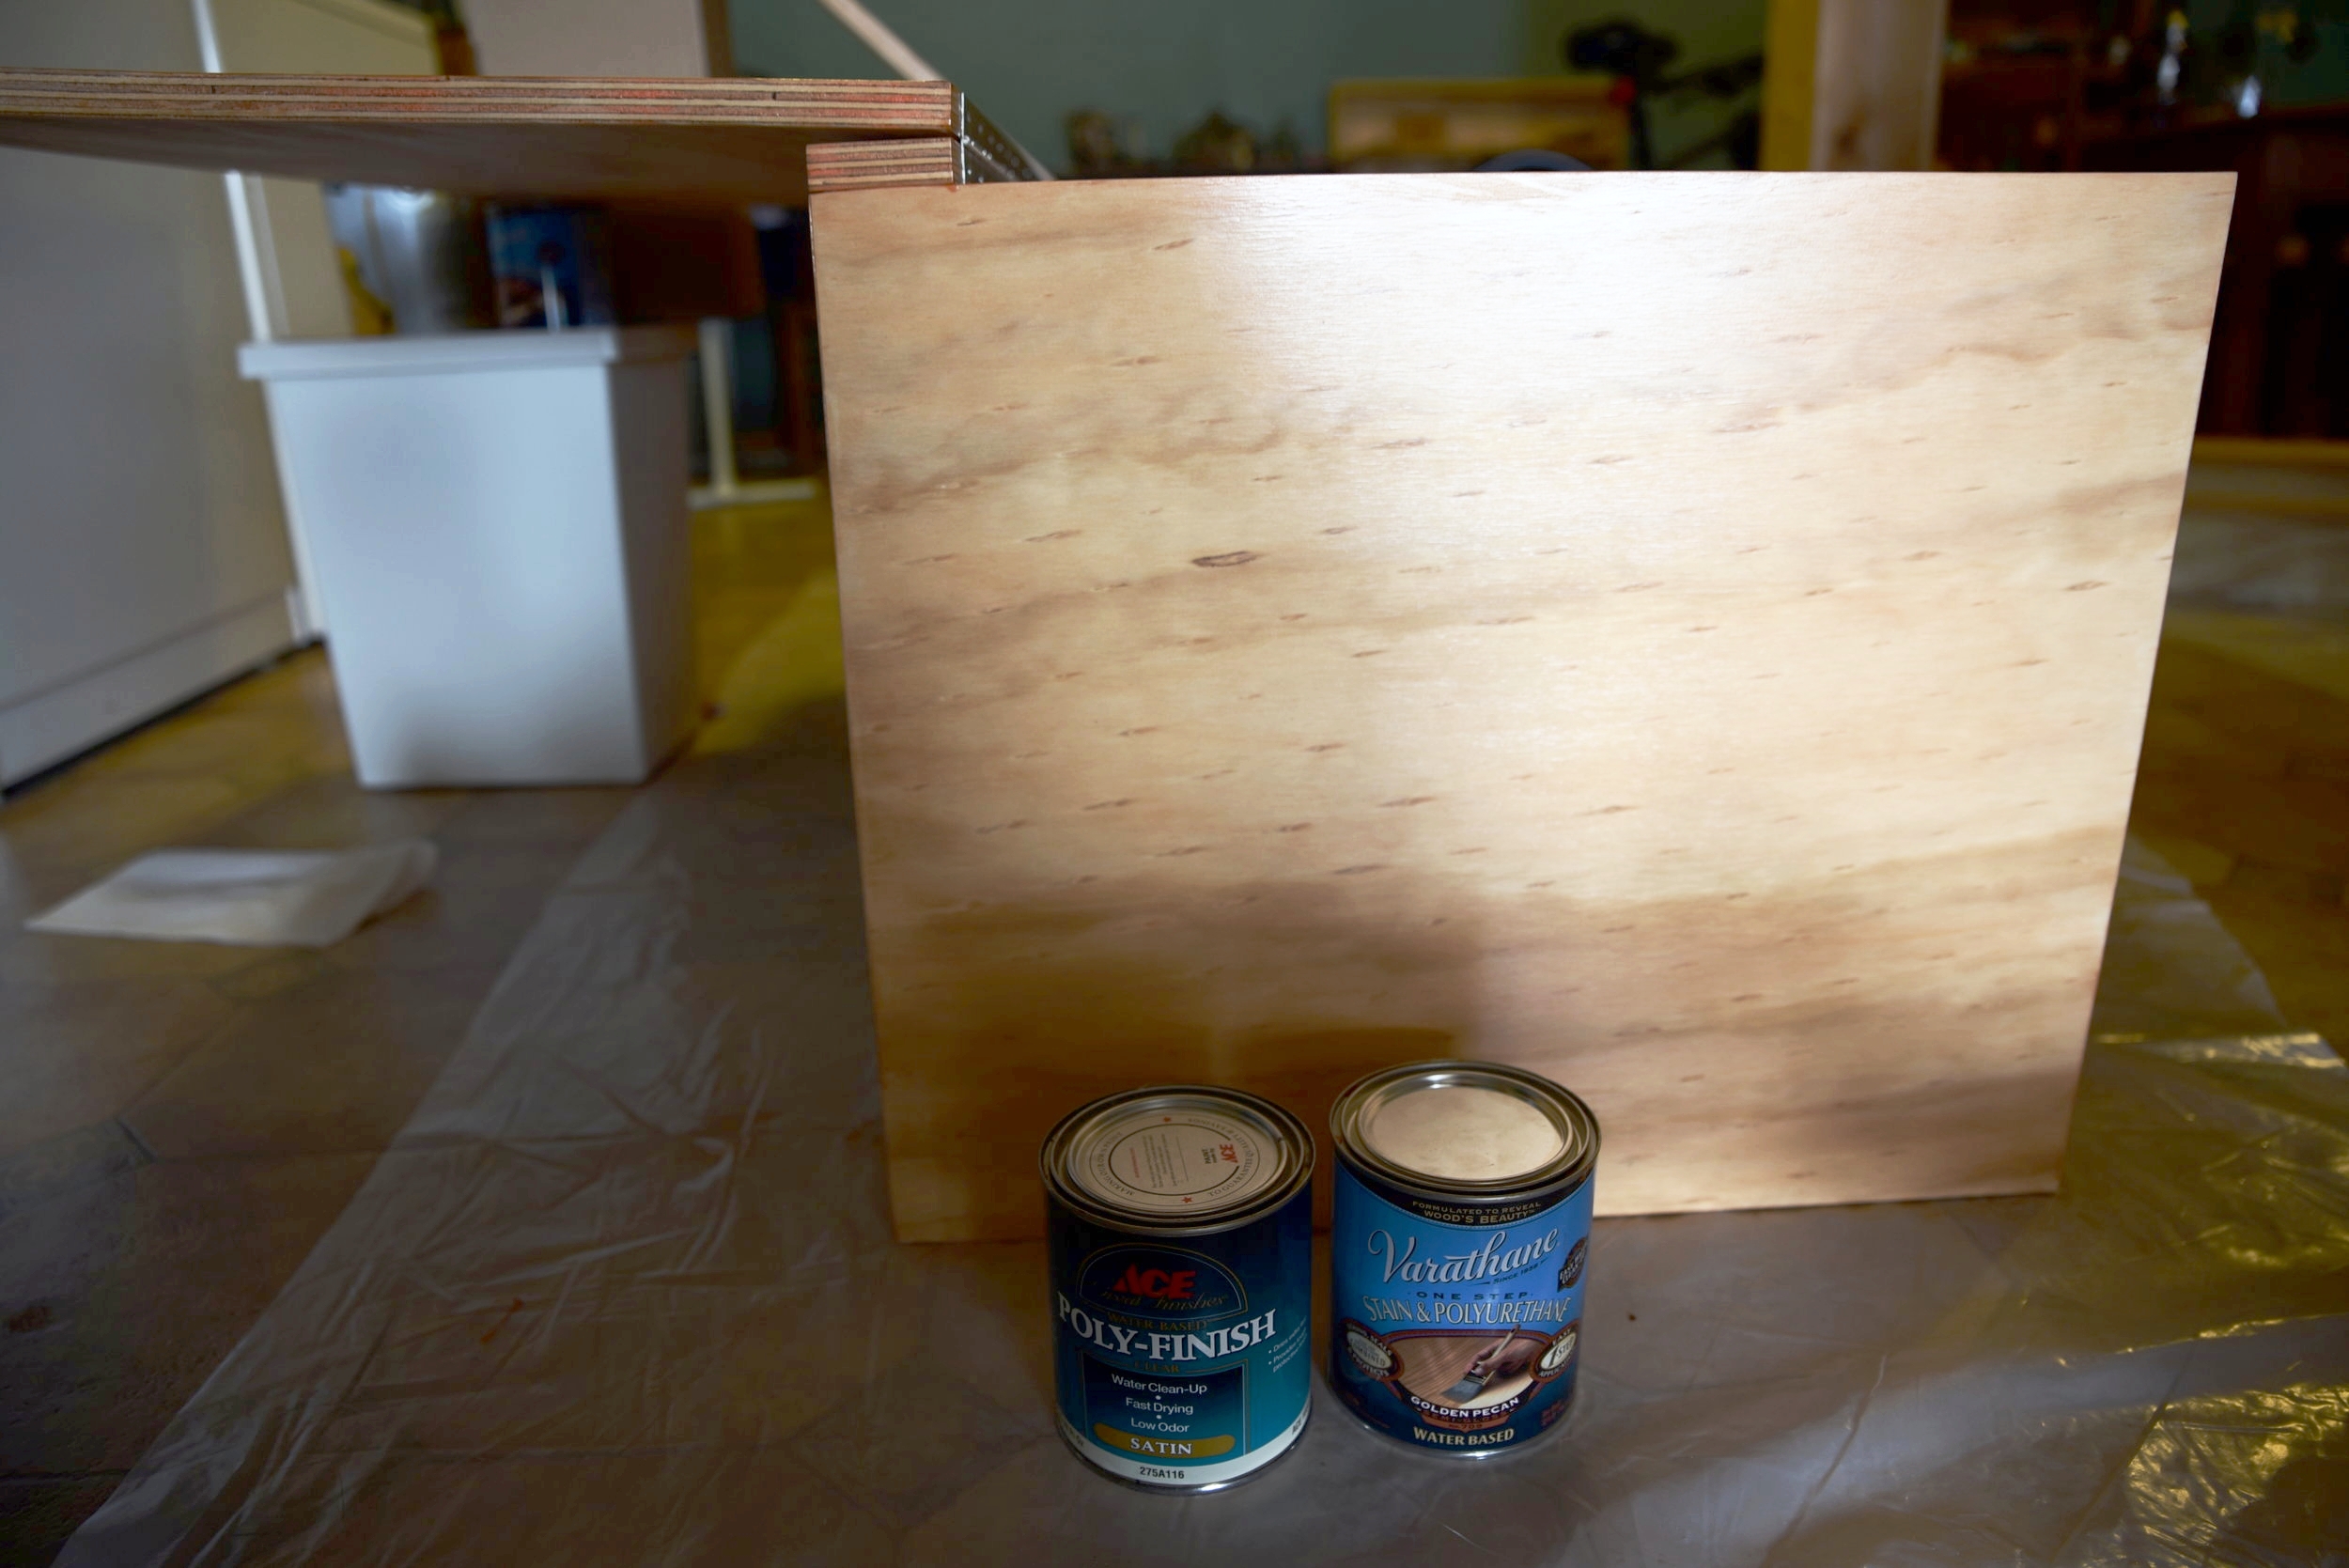
To finish the bench, we used a stain/polyurethane combo finish for the first coat, followed by two coats of clear poly.

High quality nylon bristle brushes work best for applying polyurethane.
A note on the best finishes for inside vans: Polyurethane is essentially a liquid plastic that can be applied as a finish to wood surfaces. It comes in oil- and water-based varieties, and it is just about the most durable wood finish around. Oil-based polyurethane penetrates the wood giving a bit richer finish, whereas water-based polyurethane just sits on the wood's surface.
Water-based polyurethane has very little odor in comparison to oil-based, and it provides a nearly as durable a finish. Water-based polyurethane also has fewer VOCs (Volatile Organic Compounds). It's definitely healthier for you and the environment than it's oil-based counter part, especially for a small space like a van where there isn't a great way to avoid inhaling it. Moreover, the water-based polyurethane dries much more quickly. Not only is this more convenient, your VOC exposure is also reduced based on the dry time, since the fewer chemicals are released after it has dried.
There are some more "natural" options such as linseed oil or tung oil. These finishes can take weeks to cure even in well ventilated spaces, and perpetually have a "wet" look to them. These oil finishes or a product like Shellac, which is made from beetle secretions, do not offer the same durability as polyurethane, and they can be easily scratched or stained. Often the modern versions of these age-old finishes are mixed with other high-VOC solvents anyway.
For these reasons, we believe that water-based polyurethane is the safest and best choice for woodwork inside van conversions.
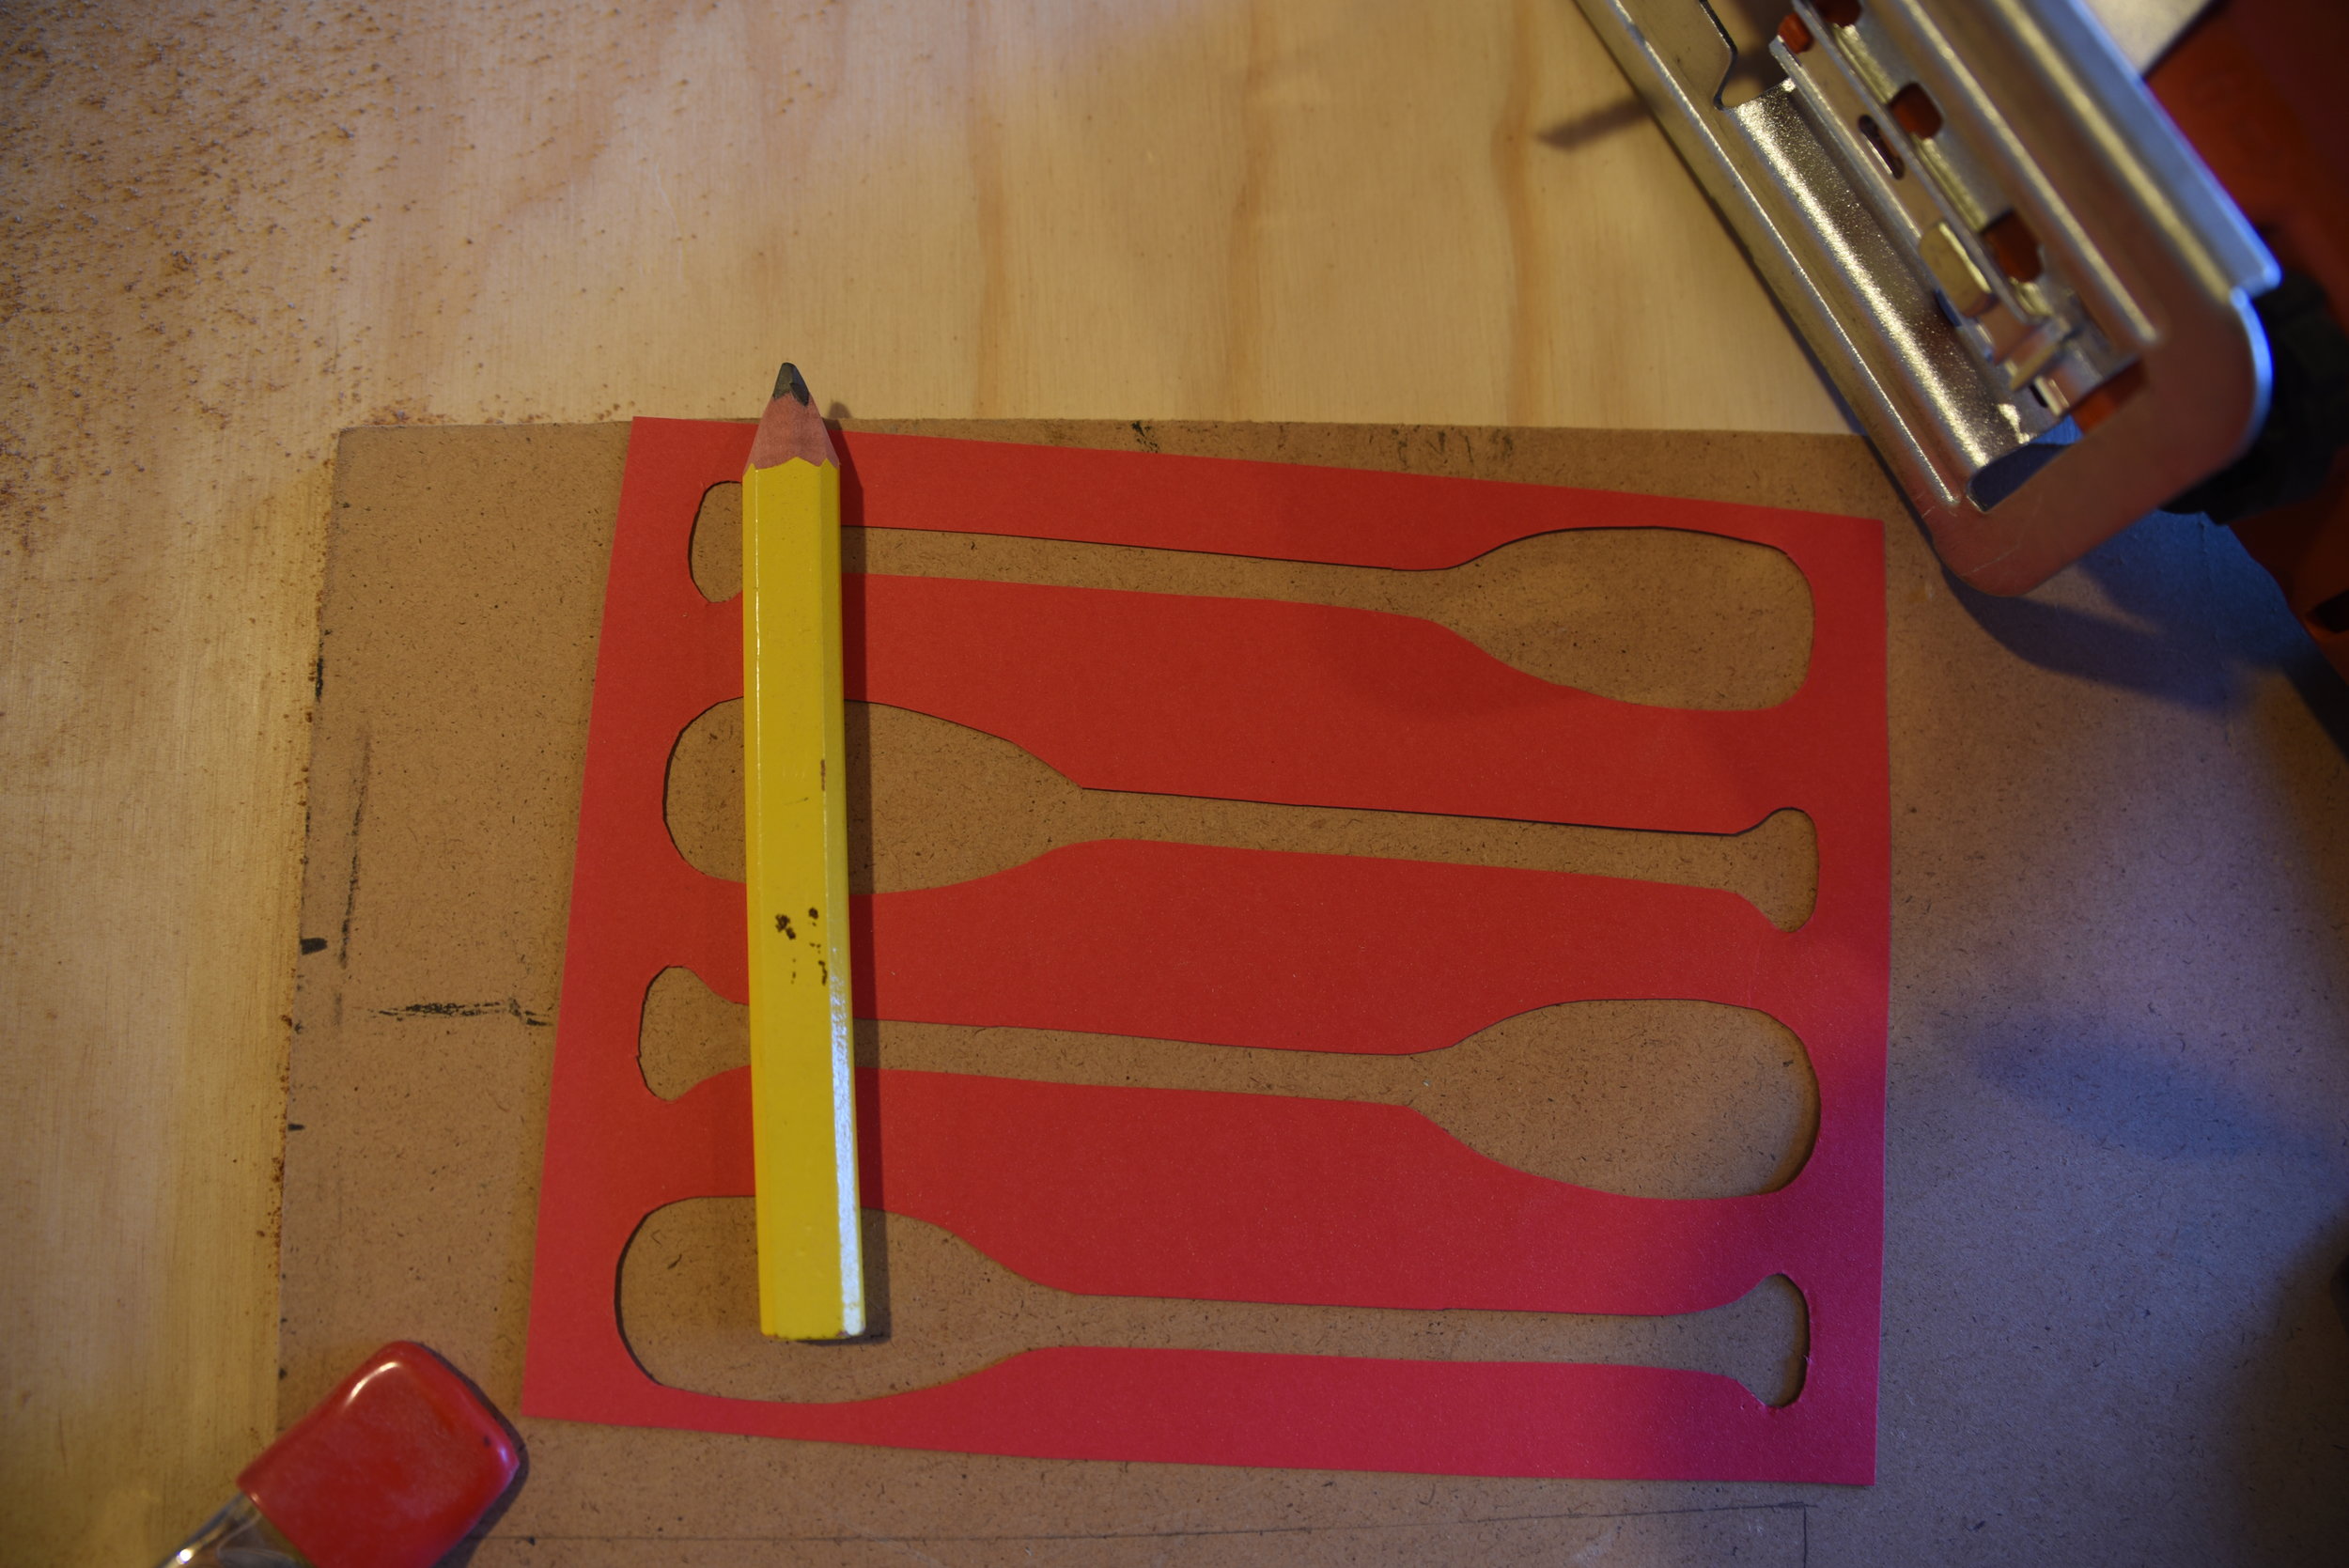
The stencil that we used for the vents for the intake and exhaust on the fridge.
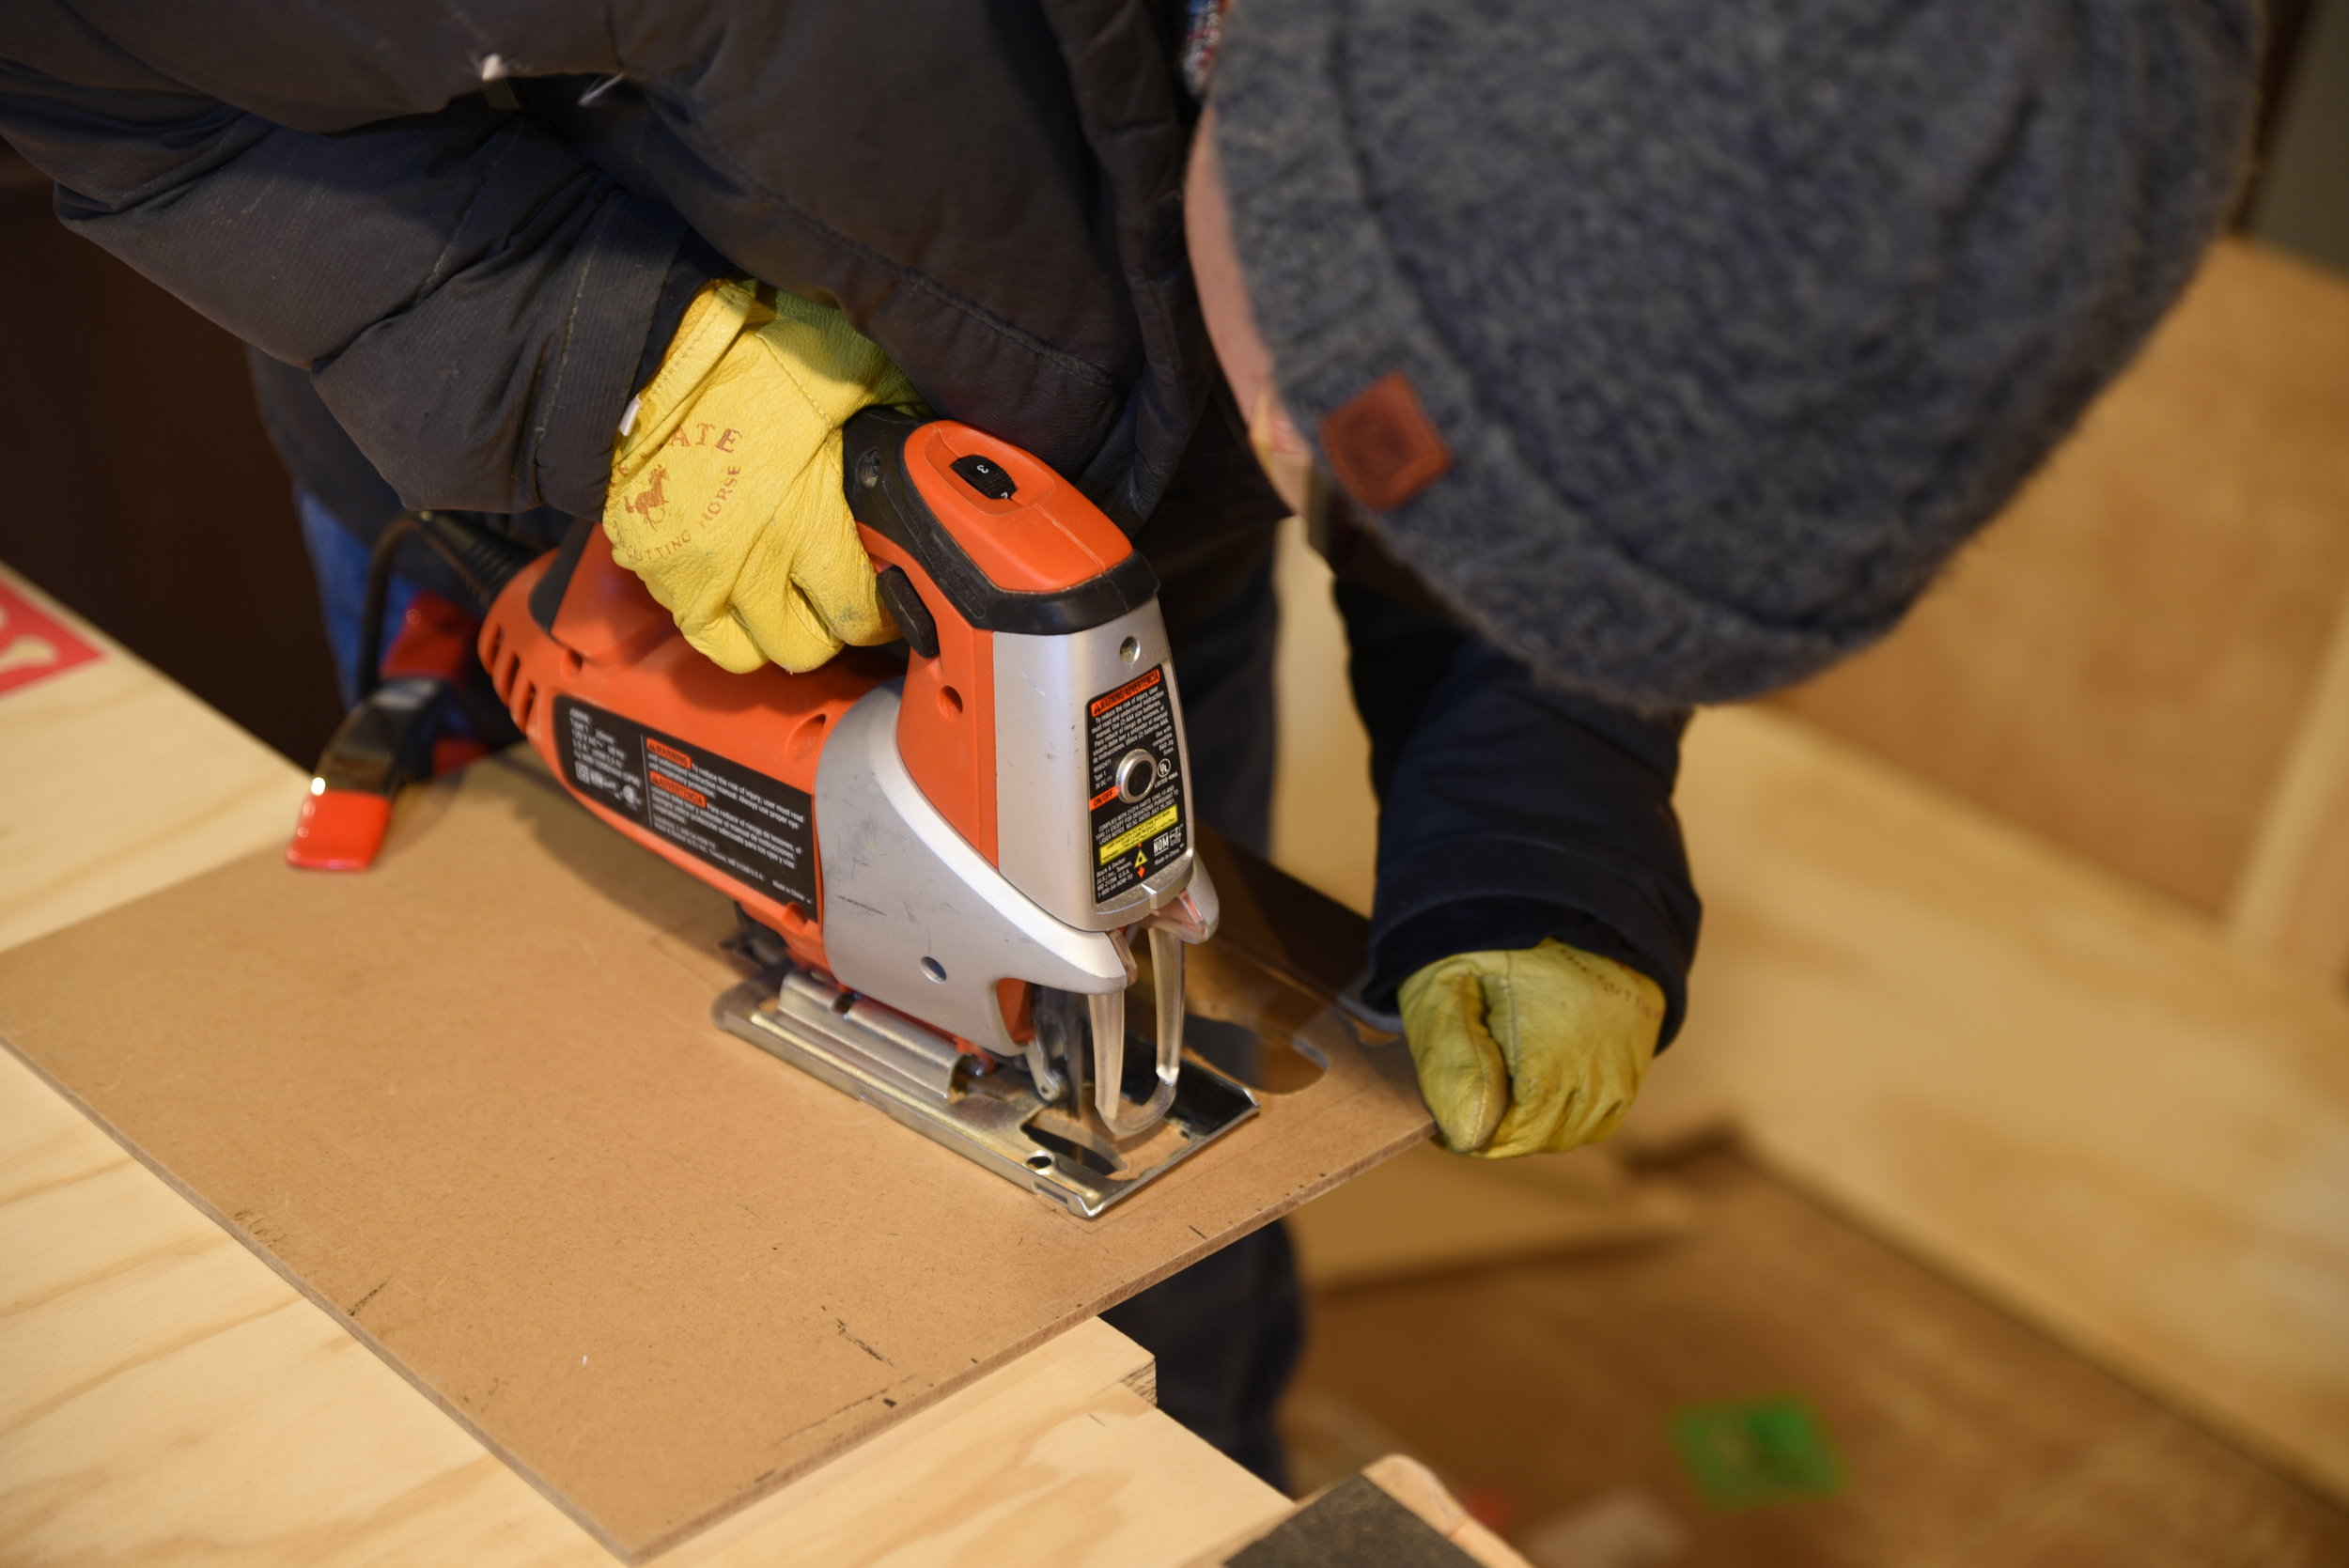
Kaylee cuts out the paddle slots in the vent with the jig saw.
The final step of building our fridge bench was to add a vent to each side of the fridge for both the intake and the exhaust of the fridge. The fridge has a vent on the front and back that bring fresh air in and let out the hot air. Without adding proper ventilation to the bench we could greatly diminish the efficiency of the fridge.
We looked at our options for using floor or wall vents that are commercially available, but they were all either too big, too thick, or just an ugly plastic piece. We needed something very simple that also had a very low profile. We decided to make our own vent for the bench.
We designed a pattern of four canoe paddles as the slots in the vent to add a decorative flourish to the bench. We created a stencil of the pattern, and then we traced it onto two pieces of high-density particle board (MDF) we had laying around. While we would have liked to use a thin piece of plywood or solid wood, we couldn't cut the slits of the vent without chipping the wood or veneer of the plywood too much. By using the MDF, we were able to cut the paddle design without any chips or nicks.

Kaylee founds the edges of the paddles using a sanding bit on a Dremel tool.

The finished vents ready to be cut down to size and painted.
We cut the basic shape from the MDF board with a jigsaw. We finished and rounded each of the edges with a sanding bit on a Dremel tool. We cut the MDF down to the correct size to match the fridge's vents. To finish the vents and hide the ugly cardboard color, we painted them with a brown latex paint that matches our vinyl floor.
We cut holes in the front and back walls of the bench that were slightly smaller than the vents. We screwed the vents over the top of these holes.

Sawdust paddles left behind by the Dremel tool.

The finished bench, with the vent, voltmeter, light switches, USB ports and cushions.
The finishing touches on our fridge storage bench were a pair of custom cushions sewed by Kaylee and a light switch, USB charging port, and voltmeter for our solar system installed by Ian.
The storage bench is a super functional piece of van "furniture." It hides our fridge in a way that doesn't reduce efficiency or make it difficult to access. It also gives us space for storing a lot of other items from clothes and shoes to foam rollers and beer growlers. We also have a lot of the wires hidden inside our bench that go from our lights and switches to our battery under the bed. Aside from that, it's also a comfy place to sit and it works well in tandem with our fold up table. (For more about our table, check out Fold-up Van Table for Two!)

The fridge bench showing our fridge and the storage area.